

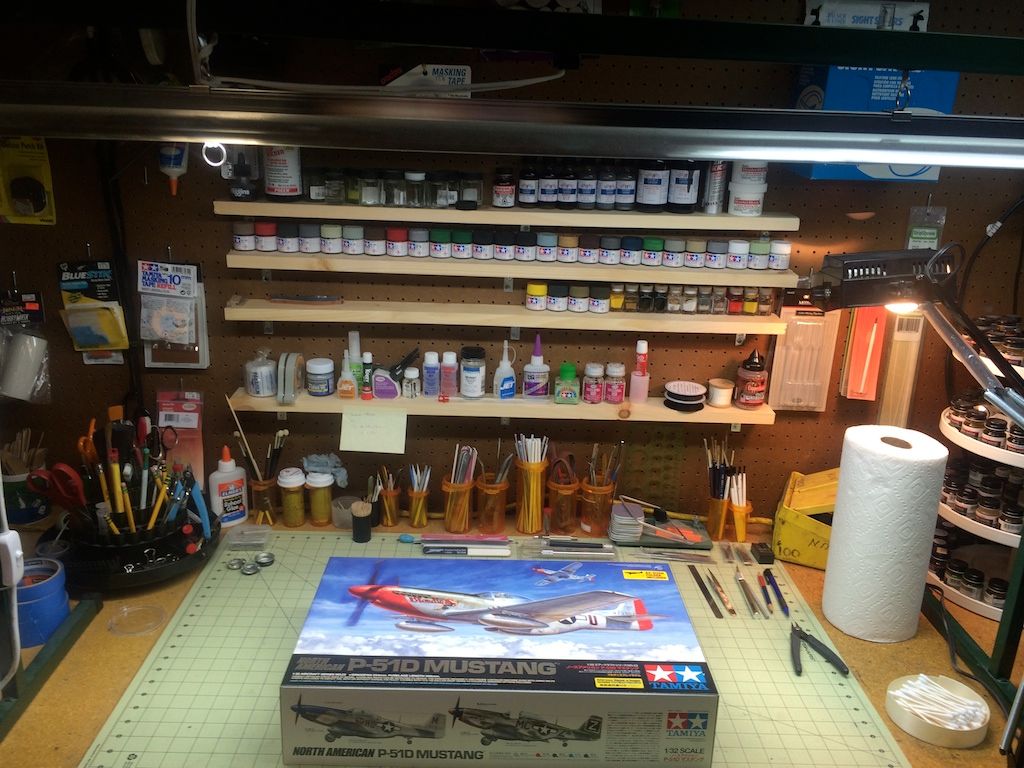
Well Father's Day was good to me and I can finally get a start on the D-Day GB!
Updates will follow and I hope I can do justice to the kit and the others doing the same kit.
Jon's 1:32 Tamiya P-51D Mustang LOU IV
Jon's 1:32 Tamiya P-51D Mustang LOU IV
- Attachments
-
- IMG_2751.JPG (218.87 KiB) Viewed 2839 times
Re: Jon's 1:32 Tamiya P-51D Mustang LOU IV
12-08-1944. 361FG, 375FS, 8th USAAF P-51D 44-13410, Col. Christian
Operation: Arras Marshalling Yards, France. (Dive Bombing)
Date: 12th August 1944 (Saturday)
Unit: 361st Fighter Group, 375th Fighter Squadron, 8th USAAF
Type: Mustang P-51D
Serial: 44-13410 (LOU IV) (4th aircraft named after Col. Christian’s baby daughter)
Code: E2-C
Location: Arras France
Pilot: Colonel Thomas Jonathan Jackson J.R. Christian
REASON FOR LOSS:
Report by 2nd Lt. Robert J. Bain, pilot in Colonel Christian’s flight.
"I was flying position number three of a three ship flight, lead by Colonel Christian. We approached the railway marshalling yard at Arras France, from the north east direction at an altitude of 11,000 feet. We circled the target receiving instructions from Colonel Christian to make the bomb run from south to north, pulling up to the left after bombing. We were then in string formation, my position number two trailing our leader. Colonel Christian executed a half roll and split S, from an altitude of 11,000 feet. I watched his descent to at least 6,000 feet and then made my dive. Pulling out of my dive at 3,000 feet. I banked left and climbed to 6,000 feet and looked for the leader. Number three ship pulled up near to me, but neither he or I could find Colonel Christian. I observed a very good hit in the centre of the railway yard, not caused by number three man or myself and assumed it was the Colonel’s bombs. I repeatedly called our leader over the radio but never received an answer. The attack took place 15.05 hrs. 12th August 1944."
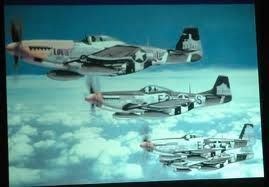
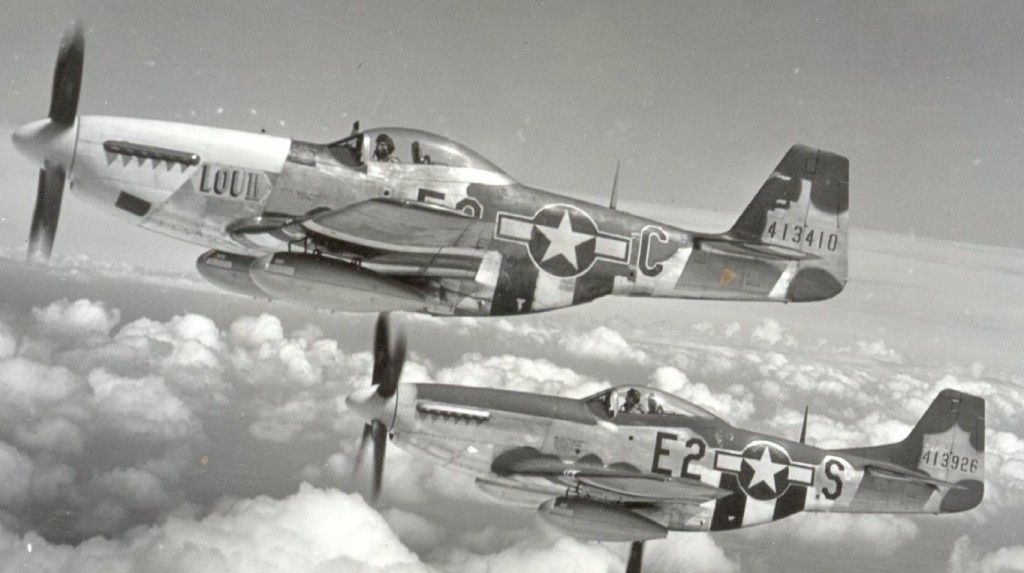
Shortly before his death Col Christian was photographed in his P-51D Mustang 44-13410 leading a group of four P-51s from the 361st Fighter Group. At the beginning of August 1944 the squadron increased the size of it’s yellow nose band identification colour, to include the whole of the engine cowling, it is therefore believed that these photos were taken just a few days before he was tragically killed in action on the 12th.
A graduate of the West Point Class of 12 June 1939 and great grandson of the Confederate General Thomas J 'Stonewall' Jackson, Col Christian was lost on operations on 12 Aug 1944, whilst attacking the railway marshalling yard at Boisleux au Mont, a few miles south of Arras. He was 28 years old and had commanded the 361st FG since its activation with the P-47 at Richmond Army Air Base, Virginia, on 10 Feb 43. The 361st FG sailed to the UK onboard the Queen Mary on 23 Nov 43, arriving on the Clyde 6 days later. The unit operated from Bottisham in Cambridgeshire from 30 Nov 43 till 26 Sep 44, from where Christian flew his last sortie. The unit acquired its P-51s from May 44 onwards. Colonel Christian took his last steps on a free and unbeaten nation's land on 12 Aug 44, took to the air and fought in order to bring freedom to a country under the heel of Nazi tyranny. Given Christian's Confederate lineage, it might appear incongruous that his death was so eerily in keeping with the pledge contained in this line of the Battle Hymn of the Republic: 'As He died to make men holy, let us die to make men free'. Given that Generals Jackson and Lee are framed in stained glass either side of the text of the song in Washington National Cathedral, perhaps it is not surprising at all.
As a B-17 pilot flying from Guadalcanal, Christian had been shot down earlier in the war and posted as 'M.I.A.' over the South Pacific, but managed to make it back to friendly lines after surviving a period in the jungle with the help of natives. After returning to the United States, he married Marjorie Lou Ashcroft on 2 January 1943. His P-51D depicted in the accompanying photograph, Lou IV, was named after his daughter, Lou Ellen, who was born in January 1944 and whom he never saw. Lou IV had another name, 'Athelene', emblazoned on the starboard cowling. It is believed to be the name of the wife or partner of the aircraft's crew chief, S/Sgt D Jameson. Christian was piloting 'LouIV/Athelene' when he perished. Although Christian did not achieve any air-to-air victories, 'Lou IV' did in fact account for 2 German aircraft in the hands of other pilots. In Europe, Christian flew more than 70 combat missions and was awarded the Distinguished Service Cross with Oak Leaf Clusters, the Air Medal with three Oak Leaf Clusters and the Purple Heart.
On 12 Aug 44, the day on which Col Christian was lost, the US 8th Air Force launched 1330 aircraft (B-17, B-24, P-38, P-47 and P-51s) against targets in central, east and north-east France (8th Air Force Mission 545). 18 aircraft failed to return (including four P-51s from the 361st FG, including Lou IV). 6 enemy aircraft were claimed as destroyed in the air (1 by an escort P-47 and 5 by P-38s); 13 further enemy aircraft were claimed as destroyed on the ground by P-47s. Colonel Christian went missing during an attack on the railway marshalling yard at Boisleux au Mont, a few miles south of Arras. Approaching the marshalling yards from the North-East, he had briefed his formation to attack from the South. After performing a half-roll and split-S from 11,000 feet to acquire the target, Christian led his formation's attack at 15.05hrs and was not seen again, although his No 2 believed he had made good hits with his bombs. Eyewitnesses claim to have seen a wing come away from Christian's aircraft before it crashed, but the precise cause of Lou IV's destruction is not known.
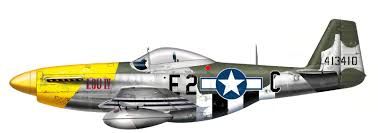
LOU IV Profile - yellow cowling is incorrect for June 44, it came out Aug 44.
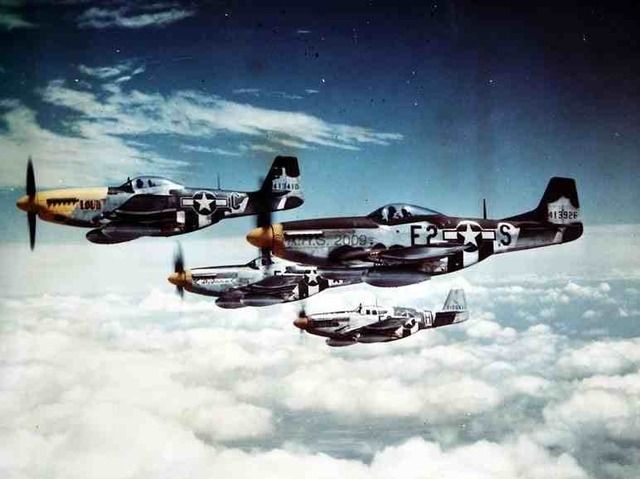
The Bottisham Four", a famous photo showing four U.S. Army Air Force North American P-51 Mustang fighters from the 375th Fighter Squadron, 361st Fighter Group, from RAF Bottisham, Cambridgeshire (UK), in flight on 26 July 1944. The nearest aircraft is P-51D-5-NA s/n 44-13410 ("Lou IV" on the left side, the 4th aircraft named after his daughter, "Athelene" on the right side, probably the crew chief's lady friend or wife), flown by the 361st CO, Col. Thomas J.J. Christian Jr., who was killed in this plane while dive-bombing the Arras marshalling yards on 12 August 1944. The 2nd aircraft is P-51D-5-NA s/n 44-13926, already equipped with the fin-fillet, was flown by Lt. Urban L. "Ben" Drew. This aircraft crashed during a training flight near Stalham, Norfolk, on 9 August 1944, the pilot, 2Lt. Donald D. Dellinger, was killed. The 3rd aircraft is P-51D-5-NA s/n 44-13568 ("Sky Bouncer" later "Alice Marie") flown by Capt. Bruce W. "Red" Rowlett, 375th FS operations officer. This aircraft suffered an engine failure on take-off and crashed on 3 April 1945. The furthest P-51 is P-51B-15-NA s/n 42-106811 flown by Capt. Francis T. Glankler (named "Suzy-G", after his wife), 375th FS "D" Flight commander. This plane was written off after a crash landing at Bottisham following a combat mission on 11 September 1944. photographed for a series of U.S. 8th Air Force publicity pictures for widespread distribution (photos were taken from B-17G bombers of the 91st Bomb Group) 26 July 1944
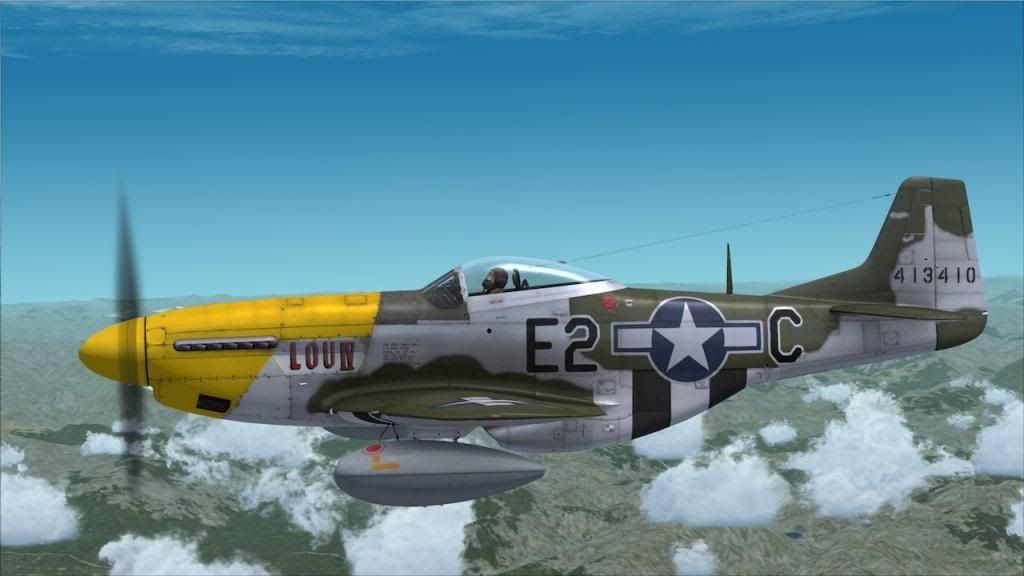
CGI representation
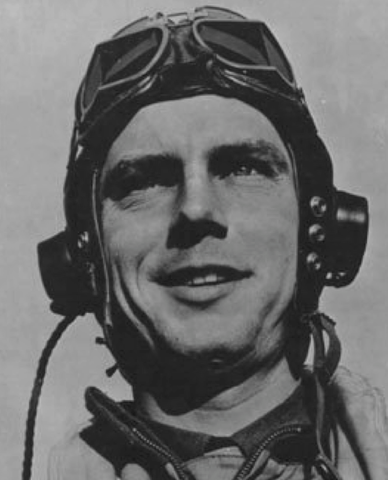
361st CO Lt Col Thomas JJ Christian Jr.
Operation: Arras Marshalling Yards, France. (Dive Bombing)
Date: 12th August 1944 (Saturday)
Unit: 361st Fighter Group, 375th Fighter Squadron, 8th USAAF
Type: Mustang P-51D
Serial: 44-13410 (LOU IV) (4th aircraft named after Col. Christian’s baby daughter)
Code: E2-C
Location: Arras France
Pilot: Colonel Thomas Jonathan Jackson J.R. Christian
REASON FOR LOSS:
Report by 2nd Lt. Robert J. Bain, pilot in Colonel Christian’s flight.
"I was flying position number three of a three ship flight, lead by Colonel Christian. We approached the railway marshalling yard at Arras France, from the north east direction at an altitude of 11,000 feet. We circled the target receiving instructions from Colonel Christian to make the bomb run from south to north, pulling up to the left after bombing. We were then in string formation, my position number two trailing our leader. Colonel Christian executed a half roll and split S, from an altitude of 11,000 feet. I watched his descent to at least 6,000 feet and then made my dive. Pulling out of my dive at 3,000 feet. I banked left and climbed to 6,000 feet and looked for the leader. Number three ship pulled up near to me, but neither he or I could find Colonel Christian. I observed a very good hit in the centre of the railway yard, not caused by number three man or myself and assumed it was the Colonel’s bombs. I repeatedly called our leader over the radio but never received an answer. The attack took place 15.05 hrs. 12th August 1944."
Shortly before his death Col Christian was photographed in his P-51D Mustang 44-13410 leading a group of four P-51s from the 361st Fighter Group. At the beginning of August 1944 the squadron increased the size of it’s yellow nose band identification colour, to include the whole of the engine cowling, it is therefore believed that these photos were taken just a few days before he was tragically killed in action on the 12th.
A graduate of the West Point Class of 12 June 1939 and great grandson of the Confederate General Thomas J 'Stonewall' Jackson, Col Christian was lost on operations on 12 Aug 1944, whilst attacking the railway marshalling yard at Boisleux au Mont, a few miles south of Arras. He was 28 years old and had commanded the 361st FG since its activation with the P-47 at Richmond Army Air Base, Virginia, on 10 Feb 43. The 361st FG sailed to the UK onboard the Queen Mary on 23 Nov 43, arriving on the Clyde 6 days later. The unit operated from Bottisham in Cambridgeshire from 30 Nov 43 till 26 Sep 44, from where Christian flew his last sortie. The unit acquired its P-51s from May 44 onwards. Colonel Christian took his last steps on a free and unbeaten nation's land on 12 Aug 44, took to the air and fought in order to bring freedom to a country under the heel of Nazi tyranny. Given Christian's Confederate lineage, it might appear incongruous that his death was so eerily in keeping with the pledge contained in this line of the Battle Hymn of the Republic: 'As He died to make men holy, let us die to make men free'. Given that Generals Jackson and Lee are framed in stained glass either side of the text of the song in Washington National Cathedral, perhaps it is not surprising at all.
As a B-17 pilot flying from Guadalcanal, Christian had been shot down earlier in the war and posted as 'M.I.A.' over the South Pacific, but managed to make it back to friendly lines after surviving a period in the jungle with the help of natives. After returning to the United States, he married Marjorie Lou Ashcroft on 2 January 1943. His P-51D depicted in the accompanying photograph, Lou IV, was named after his daughter, Lou Ellen, who was born in January 1944 and whom he never saw. Lou IV had another name, 'Athelene', emblazoned on the starboard cowling. It is believed to be the name of the wife or partner of the aircraft's crew chief, S/Sgt D Jameson. Christian was piloting 'LouIV/Athelene' when he perished. Although Christian did not achieve any air-to-air victories, 'Lou IV' did in fact account for 2 German aircraft in the hands of other pilots. In Europe, Christian flew more than 70 combat missions and was awarded the Distinguished Service Cross with Oak Leaf Clusters, the Air Medal with three Oak Leaf Clusters and the Purple Heart.
On 12 Aug 44, the day on which Col Christian was lost, the US 8th Air Force launched 1330 aircraft (B-17, B-24, P-38, P-47 and P-51s) against targets in central, east and north-east France (8th Air Force Mission 545). 18 aircraft failed to return (including four P-51s from the 361st FG, including Lou IV). 6 enemy aircraft were claimed as destroyed in the air (1 by an escort P-47 and 5 by P-38s); 13 further enemy aircraft were claimed as destroyed on the ground by P-47s. Colonel Christian went missing during an attack on the railway marshalling yard at Boisleux au Mont, a few miles south of Arras. Approaching the marshalling yards from the North-East, he had briefed his formation to attack from the South. After performing a half-roll and split-S from 11,000 feet to acquire the target, Christian led his formation's attack at 15.05hrs and was not seen again, although his No 2 believed he had made good hits with his bombs. Eyewitnesses claim to have seen a wing come away from Christian's aircraft before it crashed, but the precise cause of Lou IV's destruction is not known.

LOU IV Profile - yellow cowling is incorrect for June 44, it came out Aug 44.

The Bottisham Four", a famous photo showing four U.S. Army Air Force North American P-51 Mustang fighters from the 375th Fighter Squadron, 361st Fighter Group, from RAF Bottisham, Cambridgeshire (UK), in flight on 26 July 1944. The nearest aircraft is P-51D-5-NA s/n 44-13410 ("Lou IV" on the left side, the 4th aircraft named after his daughter, "Athelene" on the right side, probably the crew chief's lady friend or wife), flown by the 361st CO, Col. Thomas J.J. Christian Jr., who was killed in this plane while dive-bombing the Arras marshalling yards on 12 August 1944. The 2nd aircraft is P-51D-5-NA s/n 44-13926, already equipped with the fin-fillet, was flown by Lt. Urban L. "Ben" Drew. This aircraft crashed during a training flight near Stalham, Norfolk, on 9 August 1944, the pilot, 2Lt. Donald D. Dellinger, was killed. The 3rd aircraft is P-51D-5-NA s/n 44-13568 ("Sky Bouncer" later "Alice Marie") flown by Capt. Bruce W. "Red" Rowlett, 375th FS operations officer. This aircraft suffered an engine failure on take-off and crashed on 3 April 1945. The furthest P-51 is P-51B-15-NA s/n 42-106811 flown by Capt. Francis T. Glankler (named "Suzy-G", after his wife), 375th FS "D" Flight commander. This plane was written off after a crash landing at Bottisham following a combat mission on 11 September 1944. photographed for a series of U.S. 8th Air Force publicity pictures for widespread distribution (photos were taken from B-17G bombers of the 91st Bomb Group) 26 July 1944


CGI representation


361st CO Lt Col Thomas JJ Christian Jr.


Re: Jon's 1:32 Tamiya P-51D Mustang LOU IV
Great bit of History Jon.
Best of luck with your build.

Best of luck with your build.
Will
"A thing of orchestrated hell- a terrible symphony of light and flame."
Edward R Murrow
"A thing of orchestrated hell- a terrible symphony of light and flame."
Edward R Murrow


Re: Jon's 1:32 Tamiya P-51D Mustang LOU IV
Looking forward to see you progress with this build
I was going to build Lou VI, before I found out about Nooky Booky II
Glad to see someone is building her
I was going to build Lou VI, before I found out about Nooky Booky II
Glad to see someone is building her

IPMS USA 46957
Re: Jon's 1:32 Tamiya P-51D Mustang LOU IV
Bit of an update -
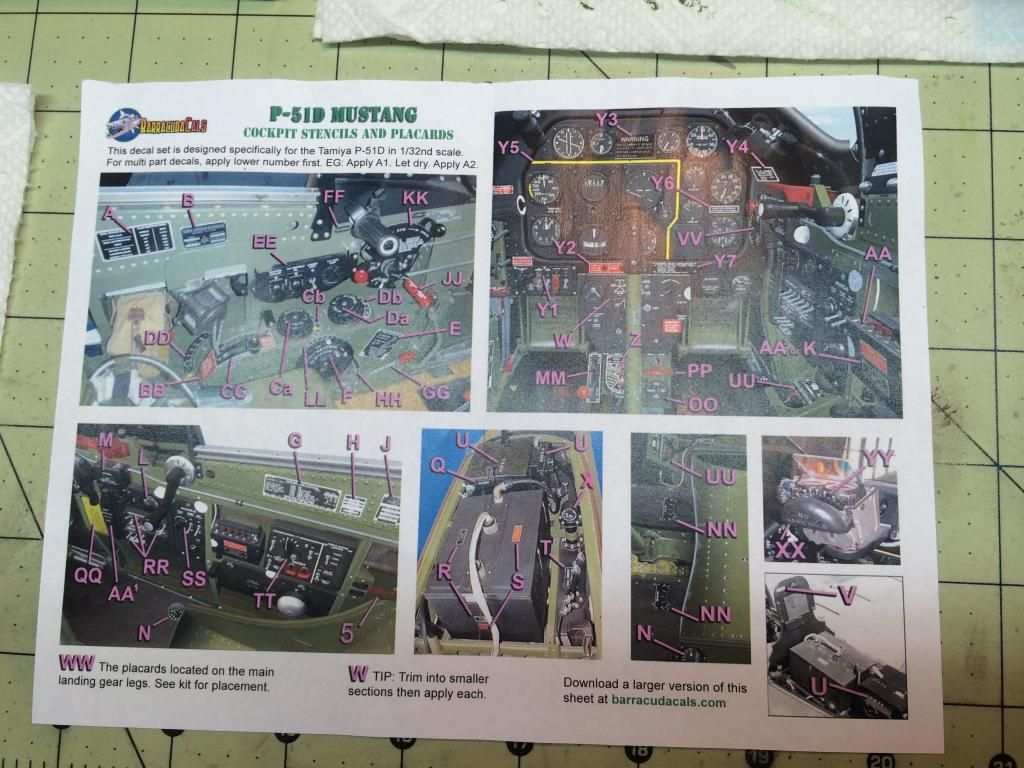
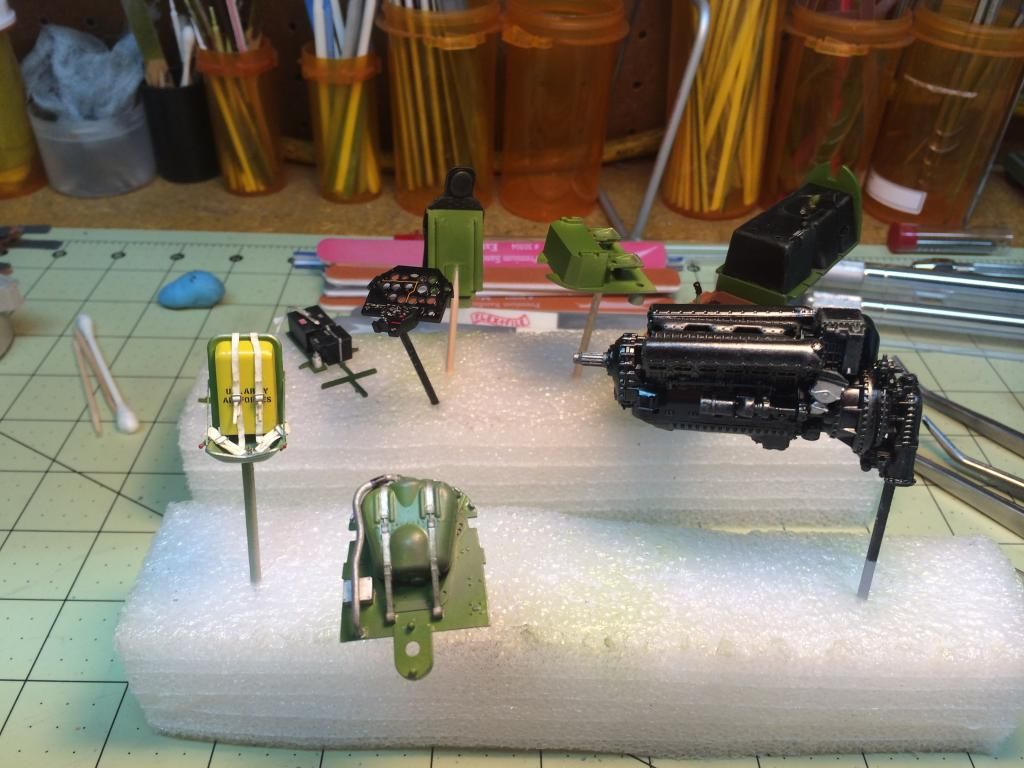
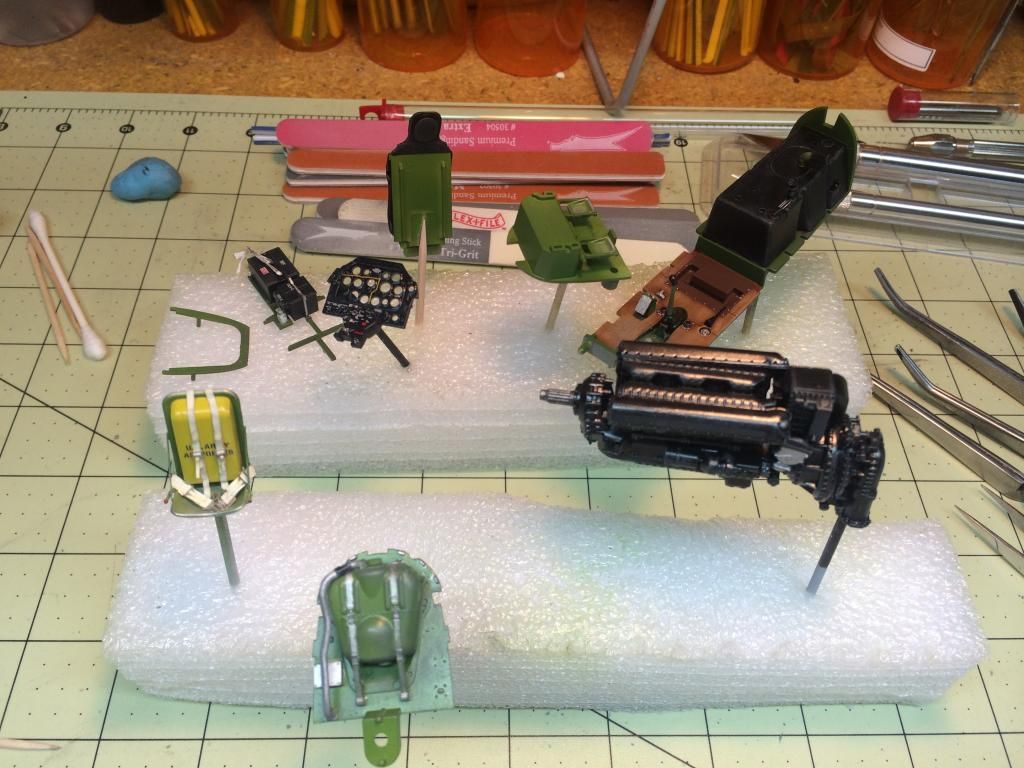
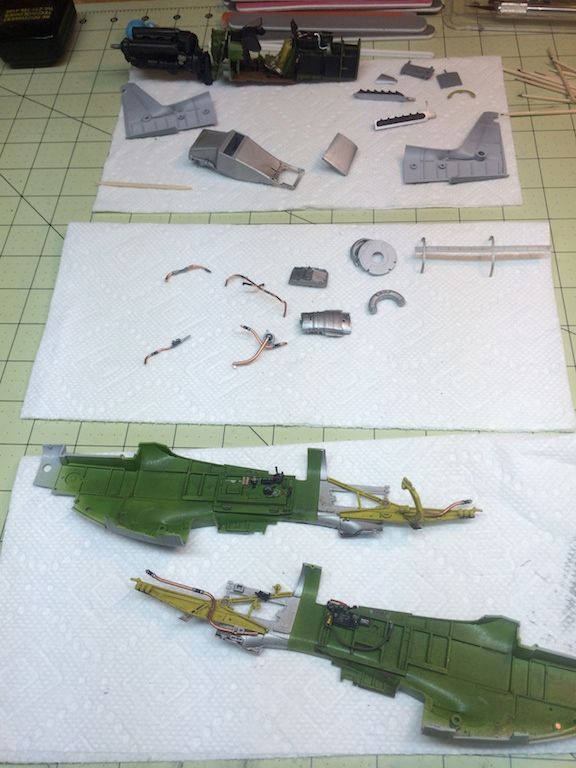
Since there is a lot of parts to the engine/cockpit assembly, I'm cutting, cleaning, gluing what I can prior to prime, paint, and then add placarding decals - a lot of paint and decals from the Barracuda set.
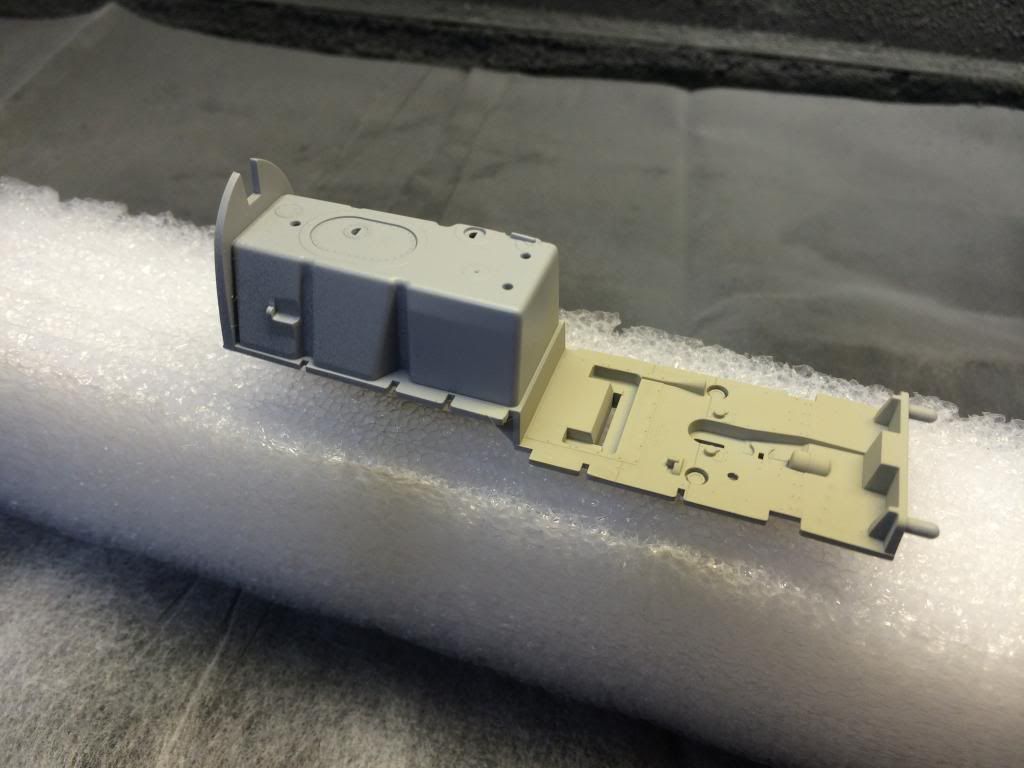
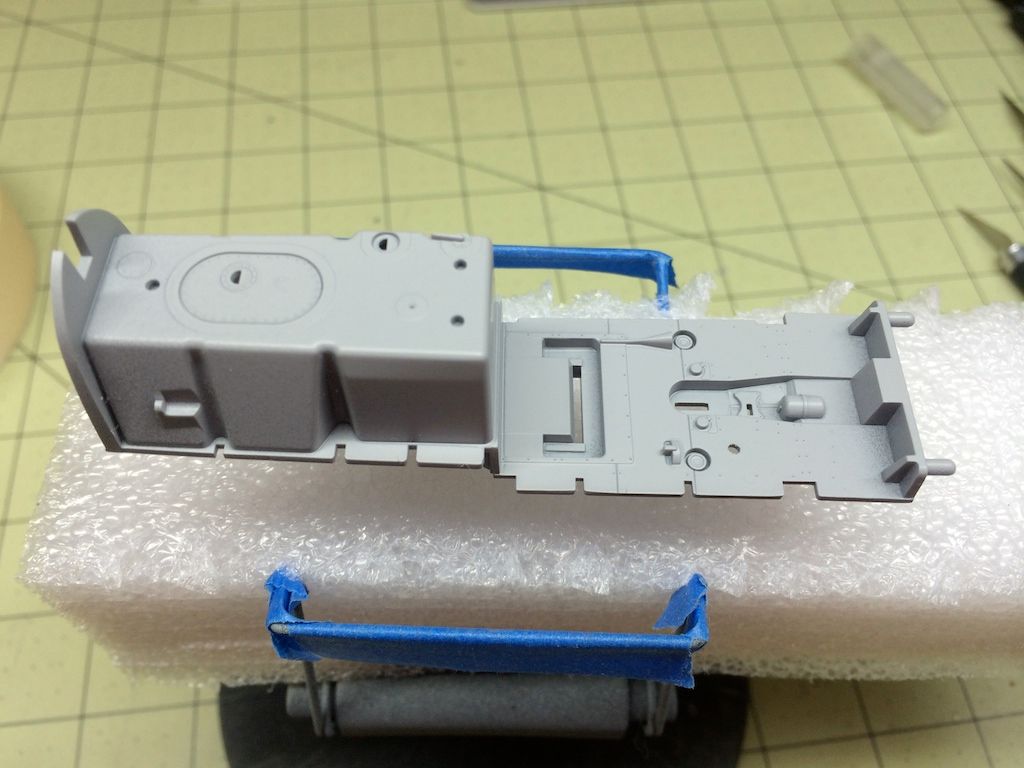
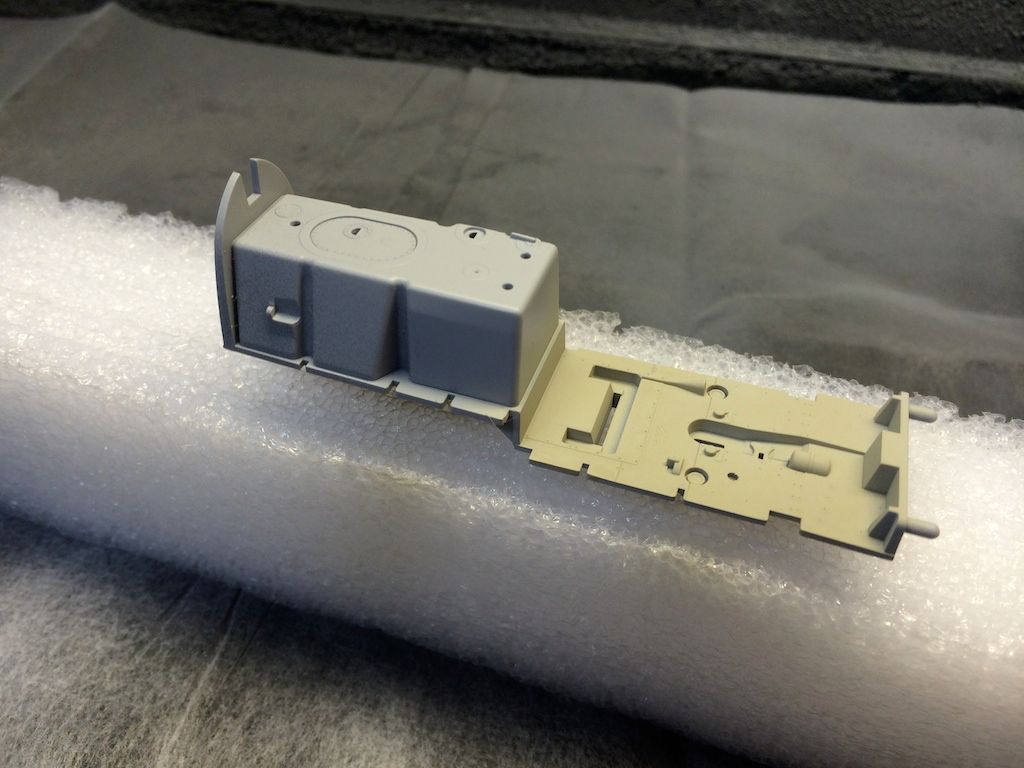
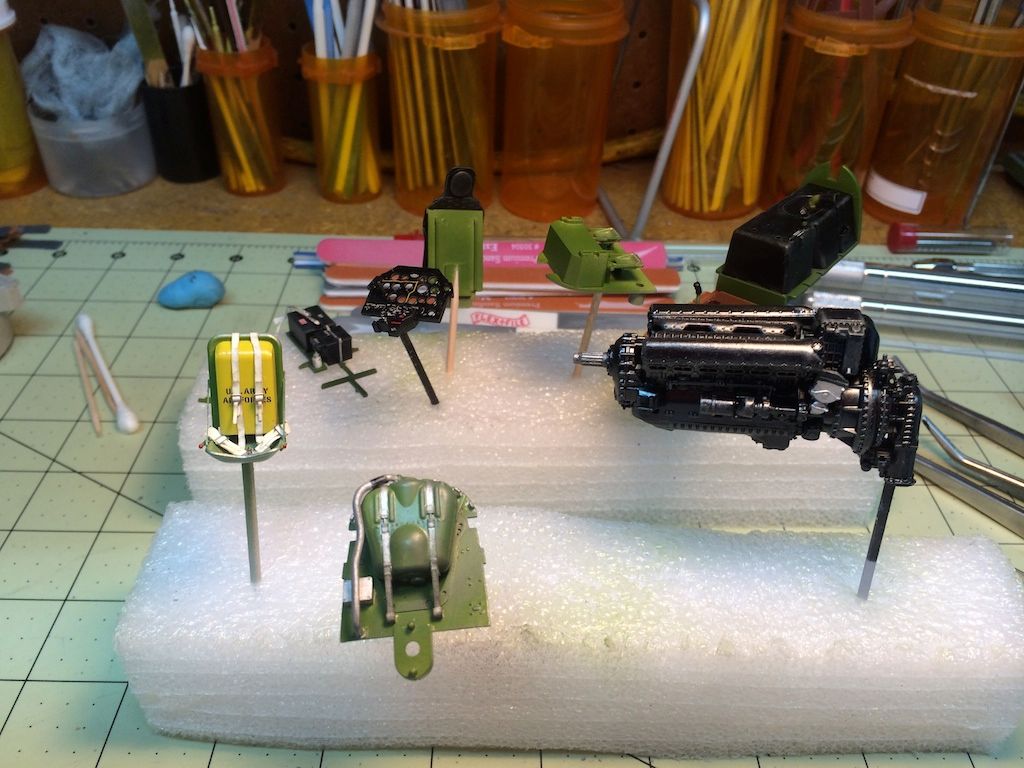
So, here are the assemblies for the engine, oil tank and instrument panel - pre-paint
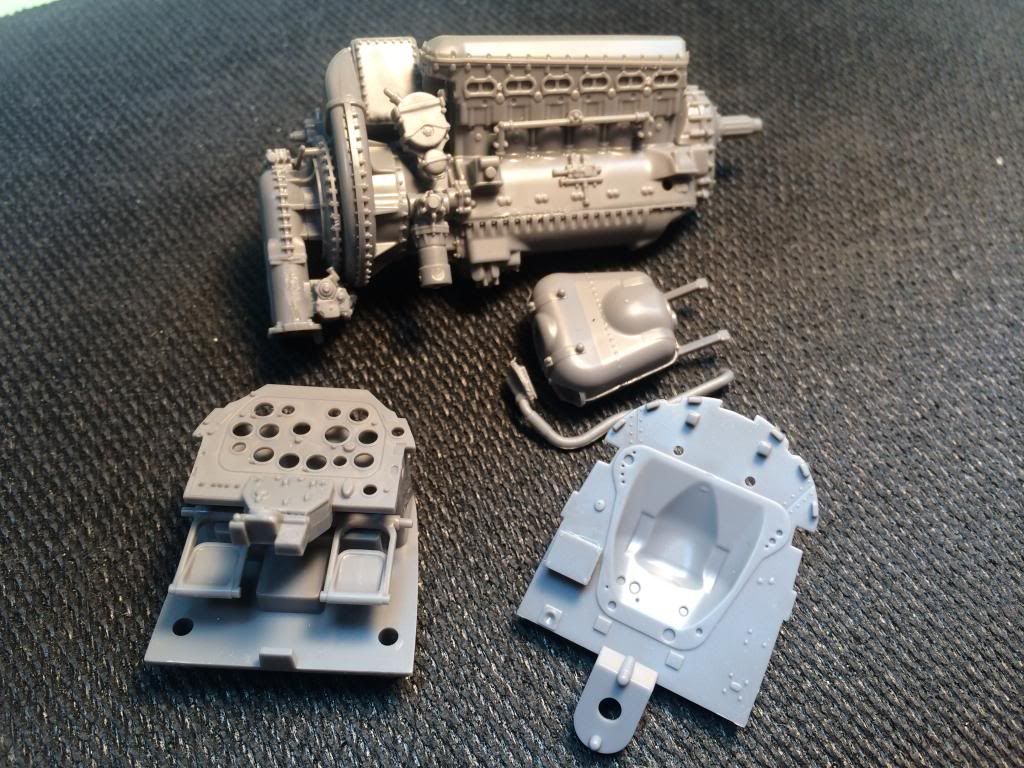
Then I put them in the booth for priming. I used Tamiya Fine Primer Light Gray in a spray can, which worked beautifully.
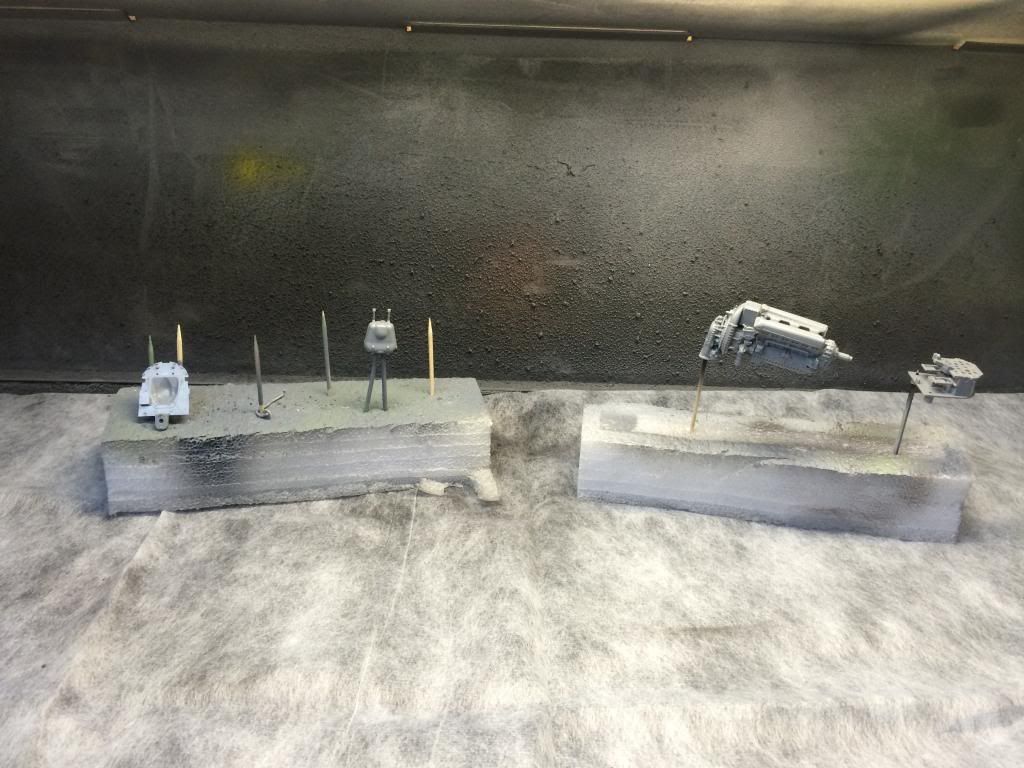
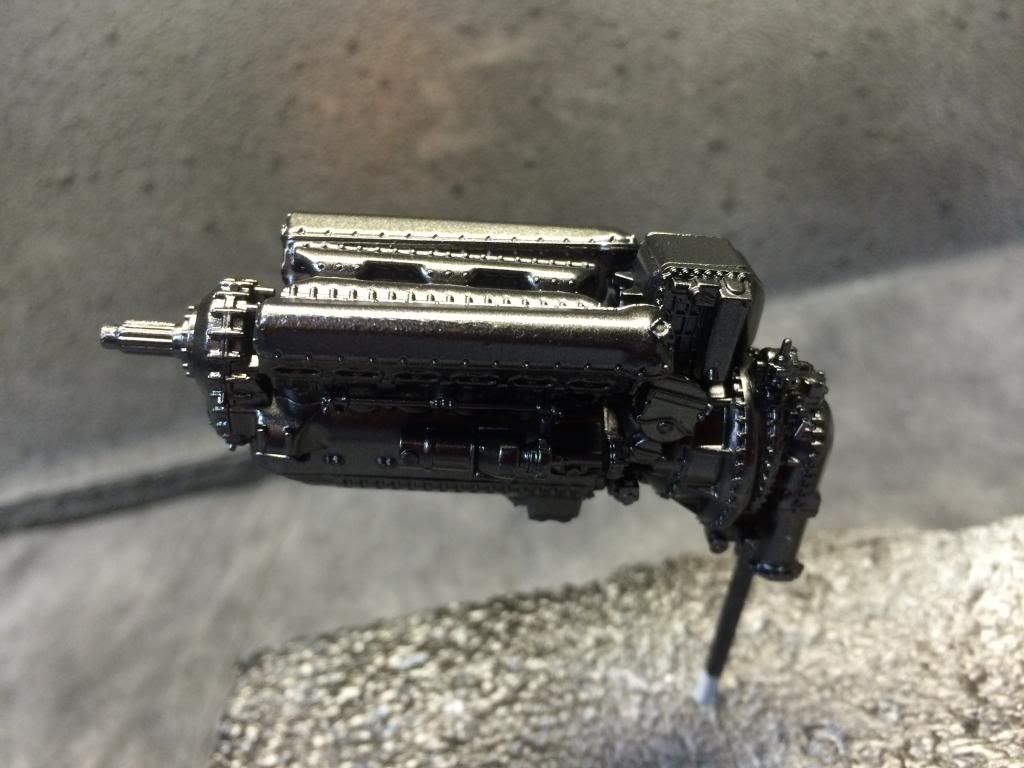
Finished off the engine base coat with Tamiya Semi-Gloss Black TS29 lacquer in a can. Let it just set up as a base coat and lightly applied Tamiya Metallic Black TS40 - another lacquer in a can. I think it looks great in its pristine condition, prior to adding any weathering or other detailing effects.
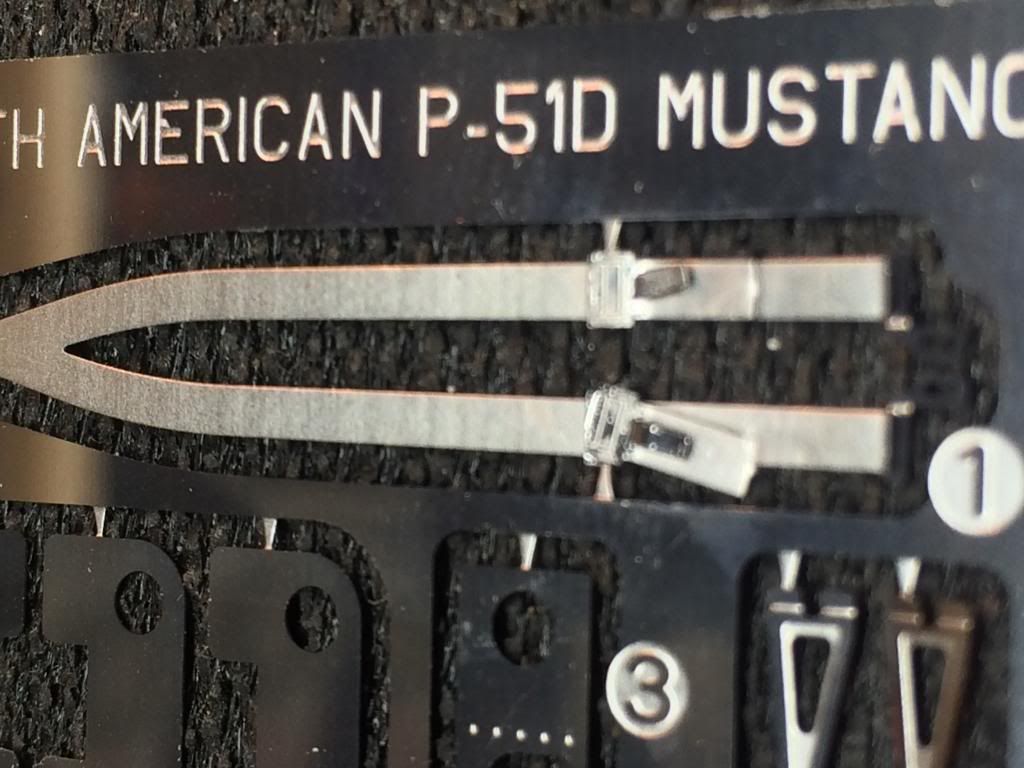
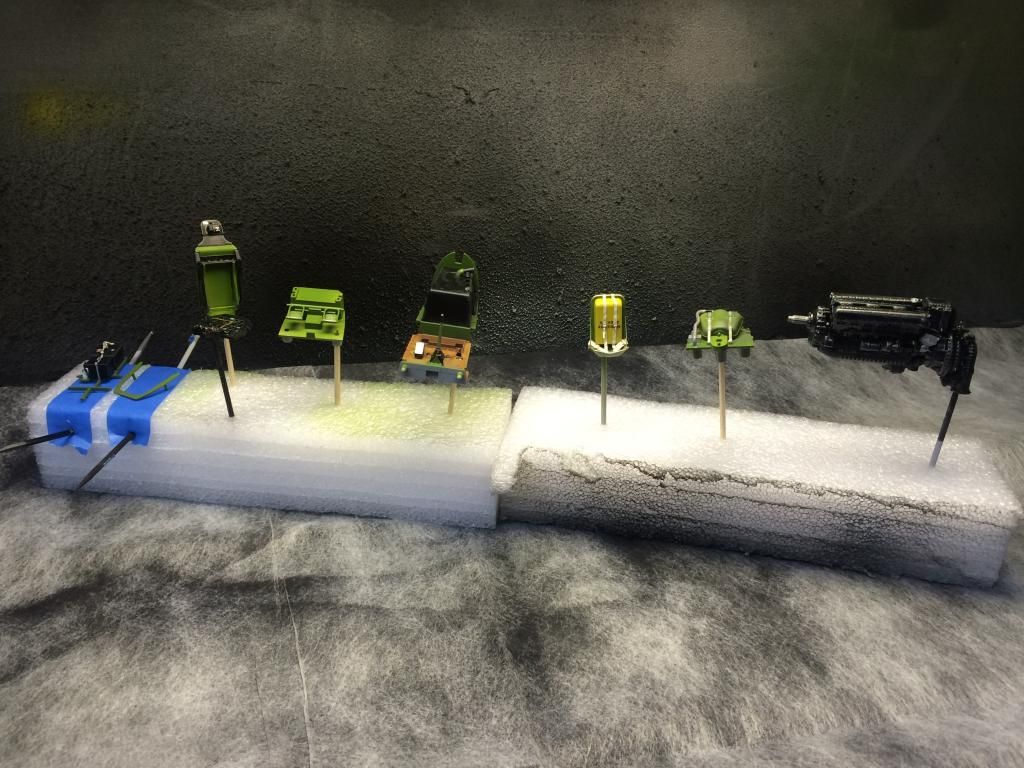
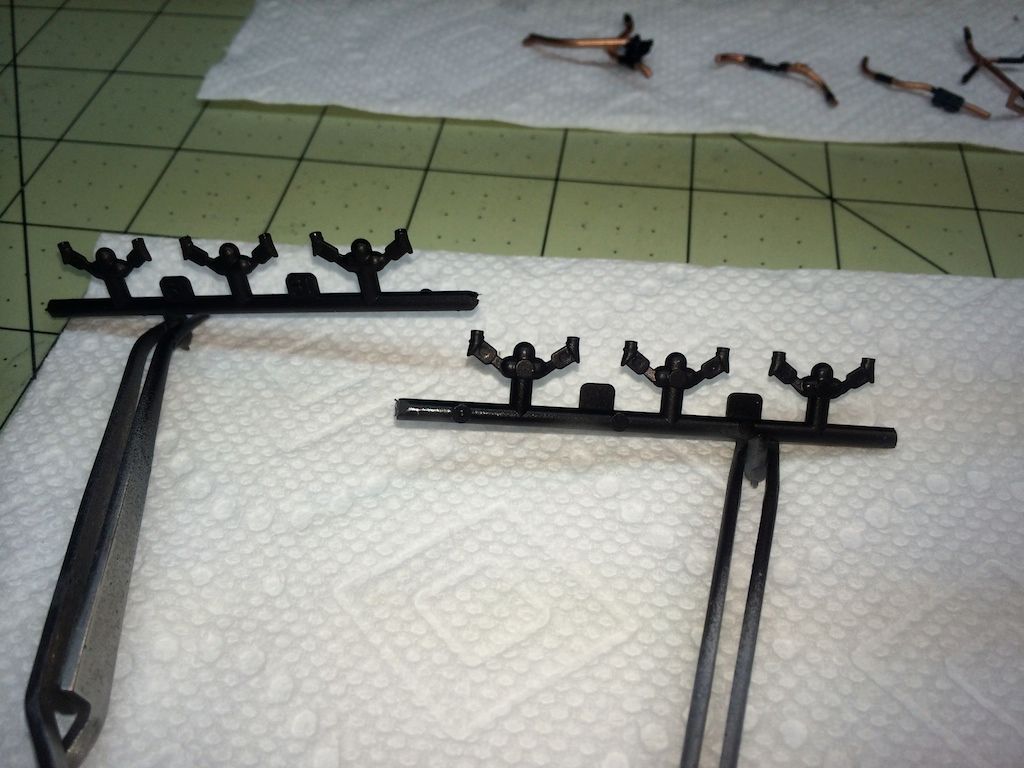
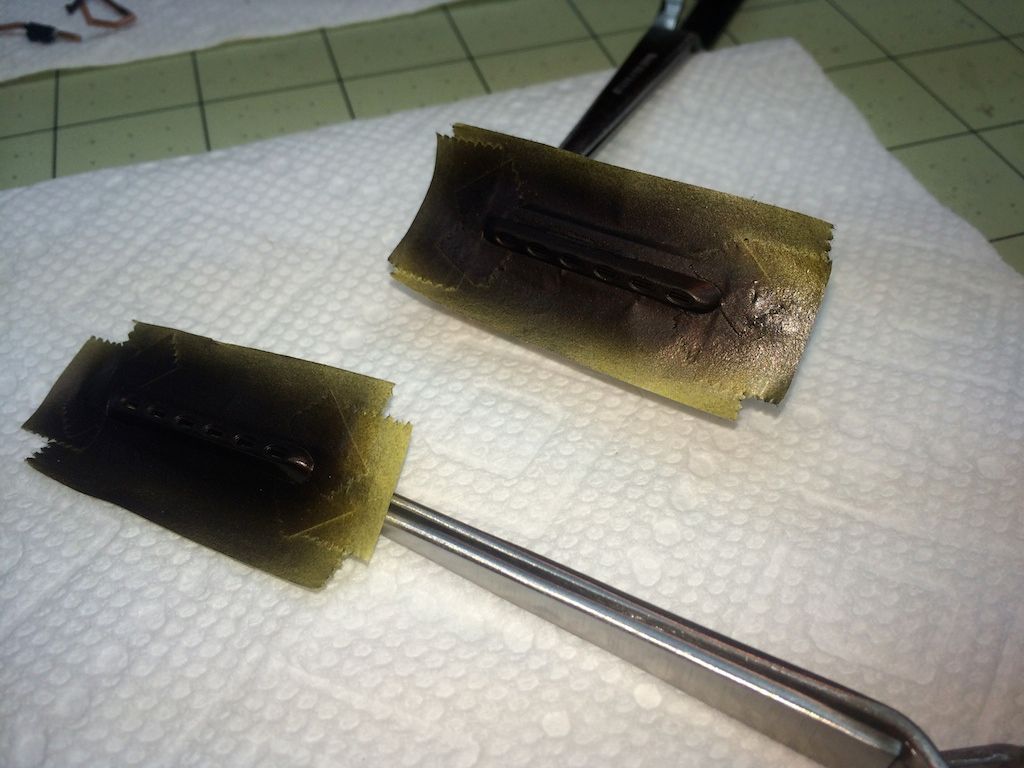
So, while paint and glue are setting up and curing, I went on to the "fiddly bits" as you chaps in the UK say. Namely the PE seat belts.
One thing about this kit - you have to complete the engine and cockpit prior to moving forward with anything else and there is a lot to do to button up the fuselage and I ain't even close right now. This is my concentration - cut, clean, glue where possible, prime, paint, assemble, detail. I am quite enjoying the build so far when I can squeeze in a half an hour or sometimes luckily a bit more time. I am amazed at the incredible detail of the engine assembly. I literally repeated to myself while building it up..."amazing" "incredible", things as such and beaming ear to ear and giggling like a little kid.
Since there is a lot of parts to the engine/cockpit assembly, I'm cutting, cleaning, gluing what I can prior to prime, paint, and then add placarding decals - a lot of paint and decals from the Barracuda set.
So, here are the assemblies for the engine, oil tank and instrument panel - pre-paint

Then I put them in the booth for priming. I used Tamiya Fine Primer Light Gray in a spray can, which worked beautifully.

Finished off the engine base coat with Tamiya Semi-Gloss Black TS29 lacquer in a can. Let it just set up as a base coat and lightly applied Tamiya Metallic Black TS40 - another lacquer in a can. I think it looks great in its pristine condition, prior to adding any weathering or other detailing effects.

So, while paint and glue are setting up and curing, I went on to the "fiddly bits" as you chaps in the UK say. Namely the PE seat belts.

One thing about this kit - you have to complete the engine and cockpit prior to moving forward with anything else and there is a lot to do to button up the fuselage and I ain't even close right now. This is my concentration - cut, clean, glue where possible, prime, paint, assemble, detail. I am quite enjoying the build so far when I can squeeze in a half an hour or sometimes luckily a bit more time. I am amazed at the incredible detail of the engine assembly. I literally repeated to myself while building it up..."amazing" "incredible", things as such and beaming ear to ear and giggling like a little kid.
Re: Jon's 1:32 Tamiya P-51D Mustang LOU IV
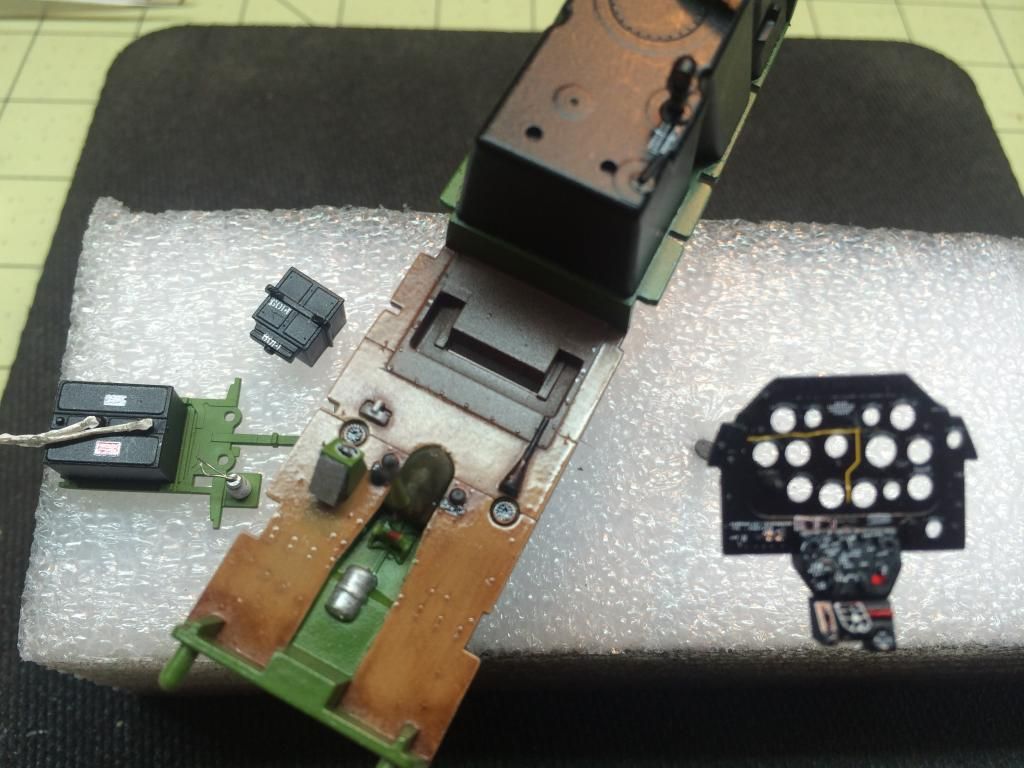
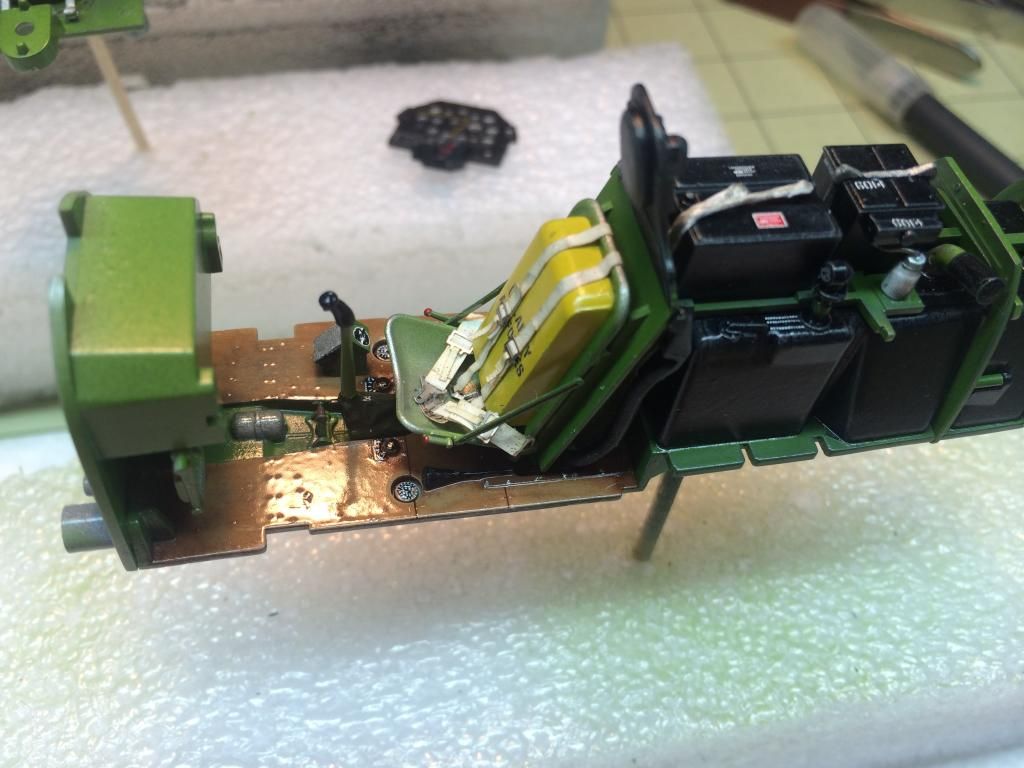
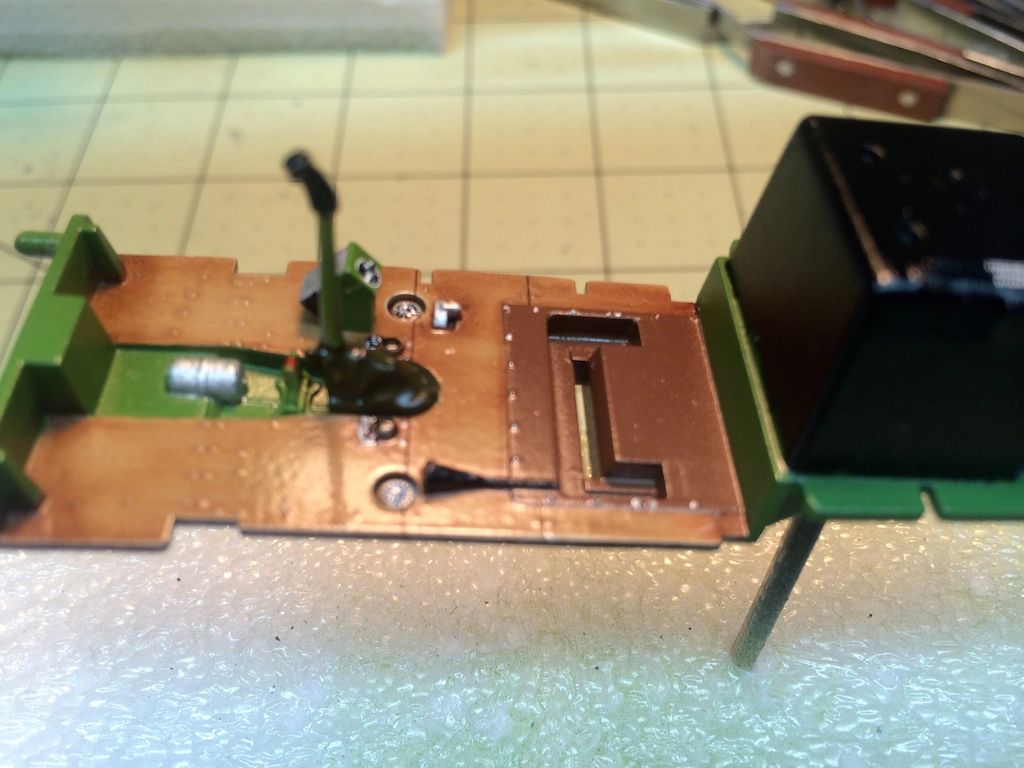
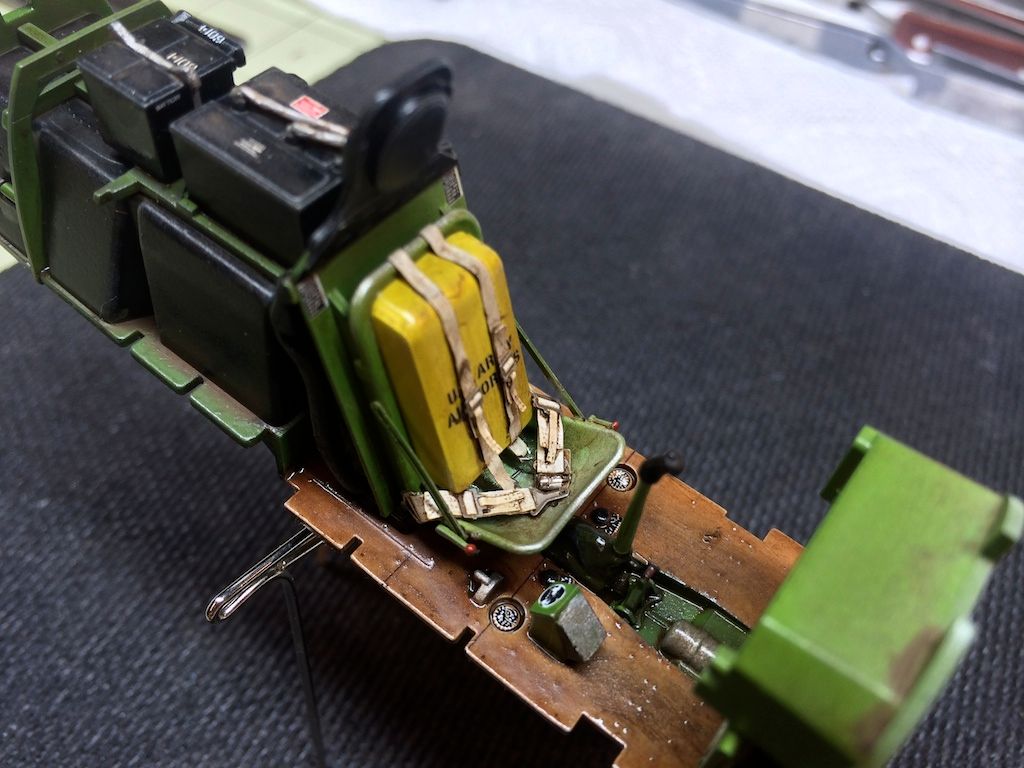
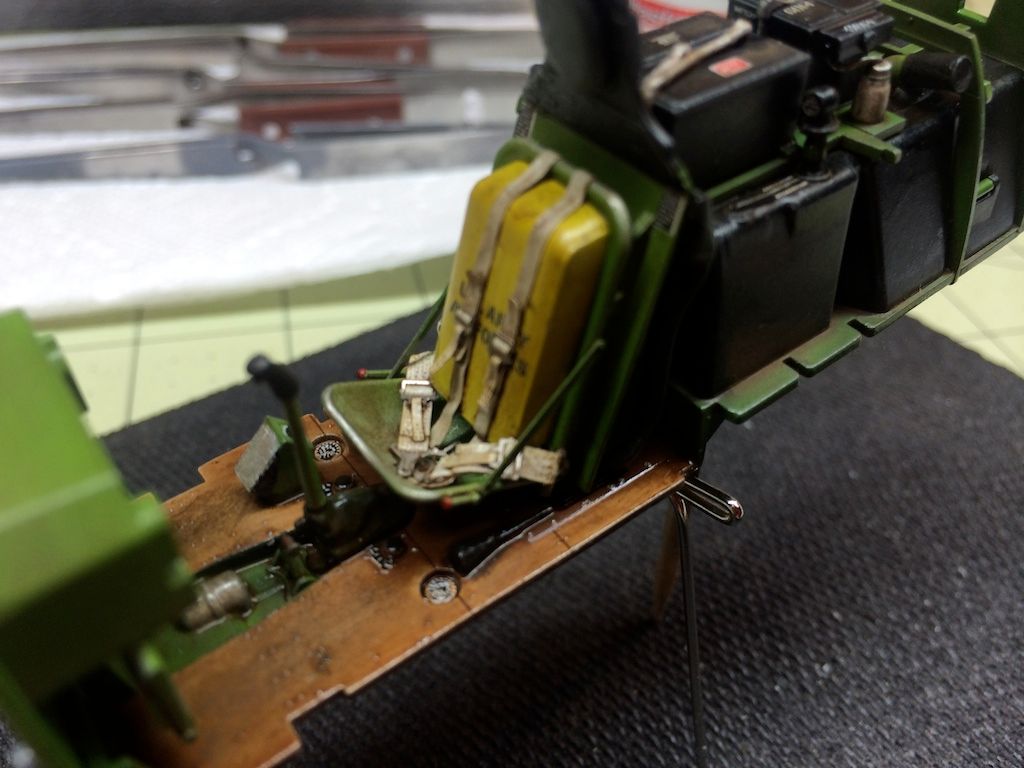
Bit of an update...I had some quality time to spend with the cockpit...paint, details, stencils.
I started with the cockpit floor.
Base coat of light tan
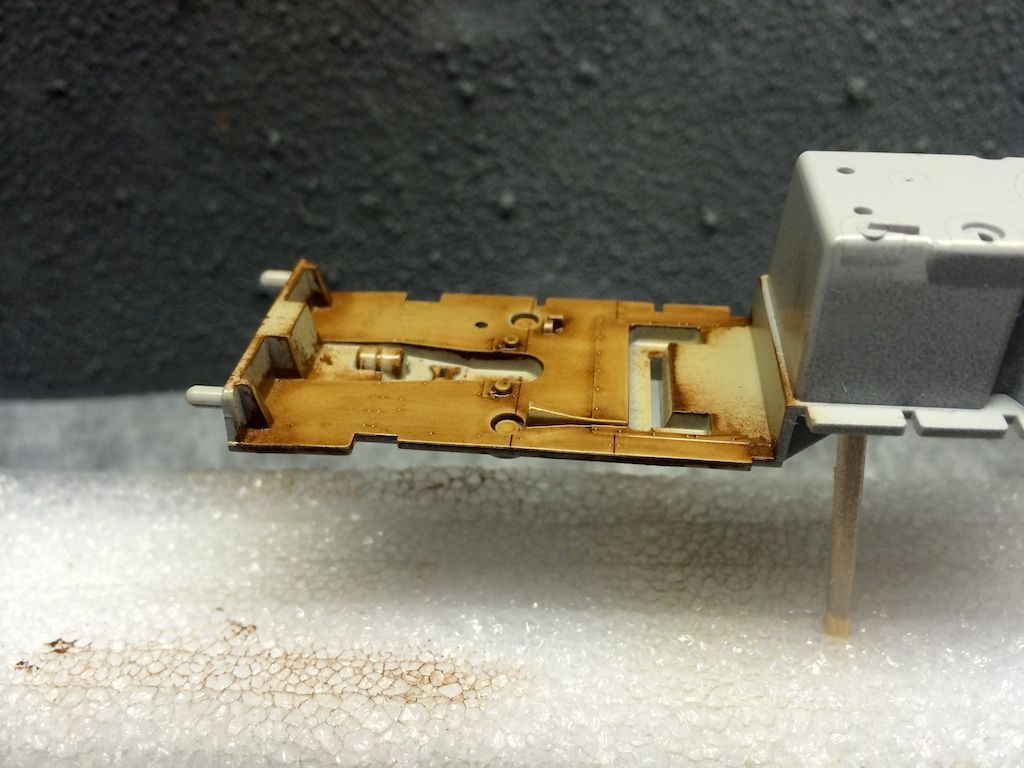
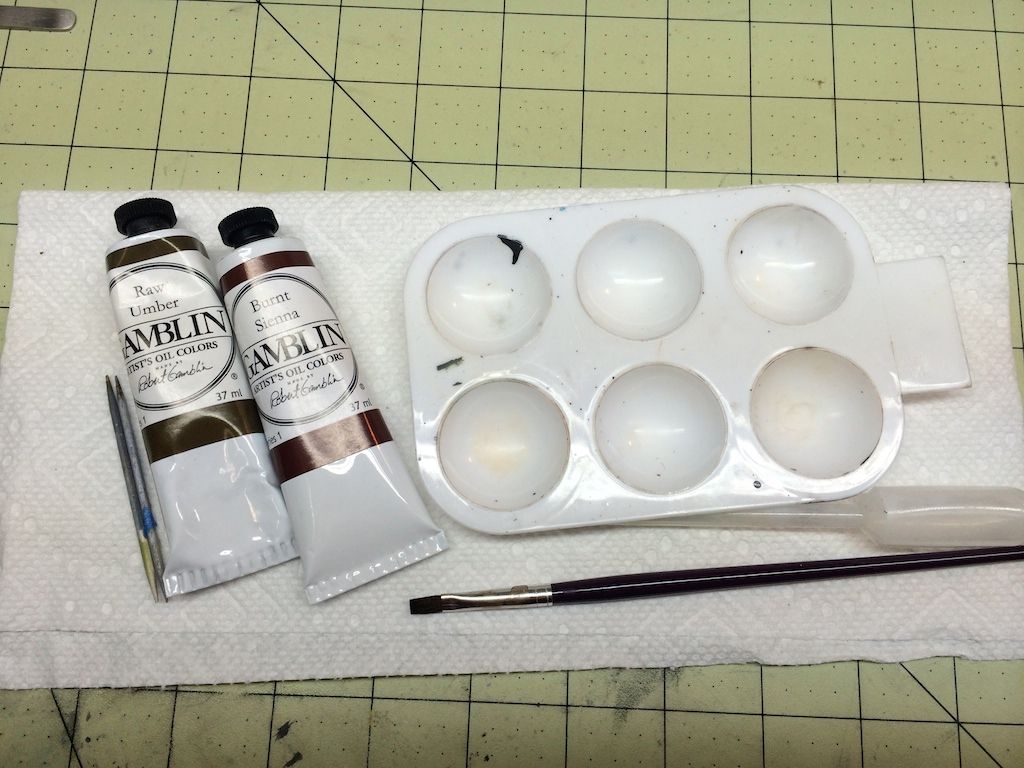
Then the oils were used to simulate plywood.
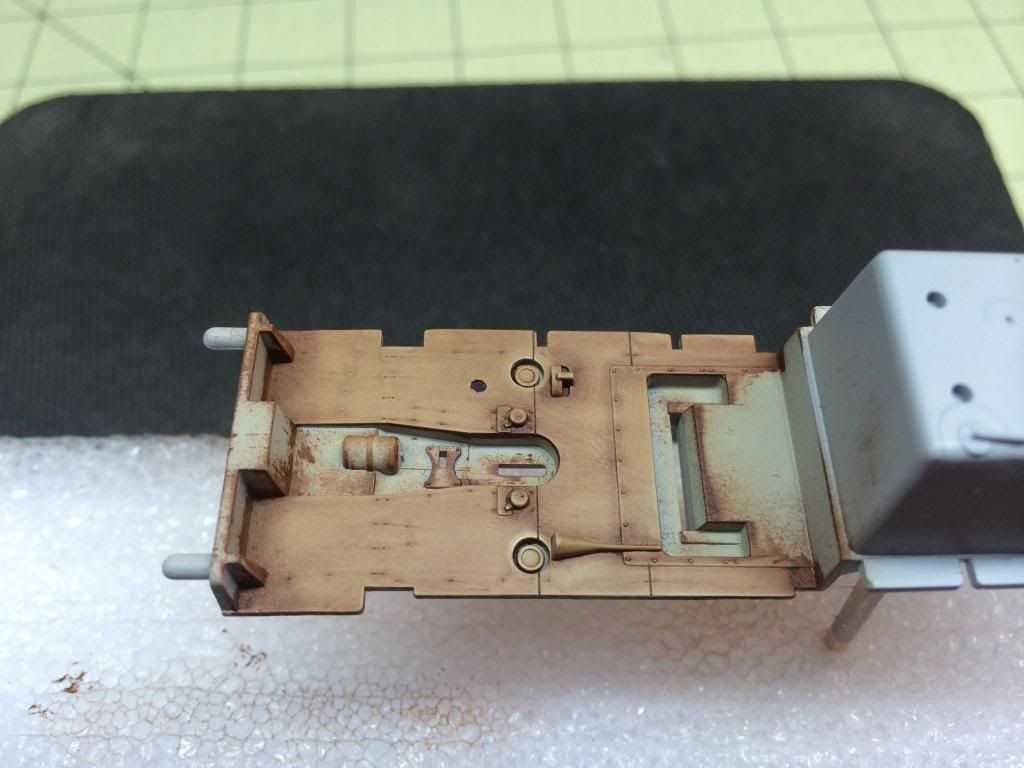
Once I got the look I wanted, gloss coated to protect it from subsequent detailing.
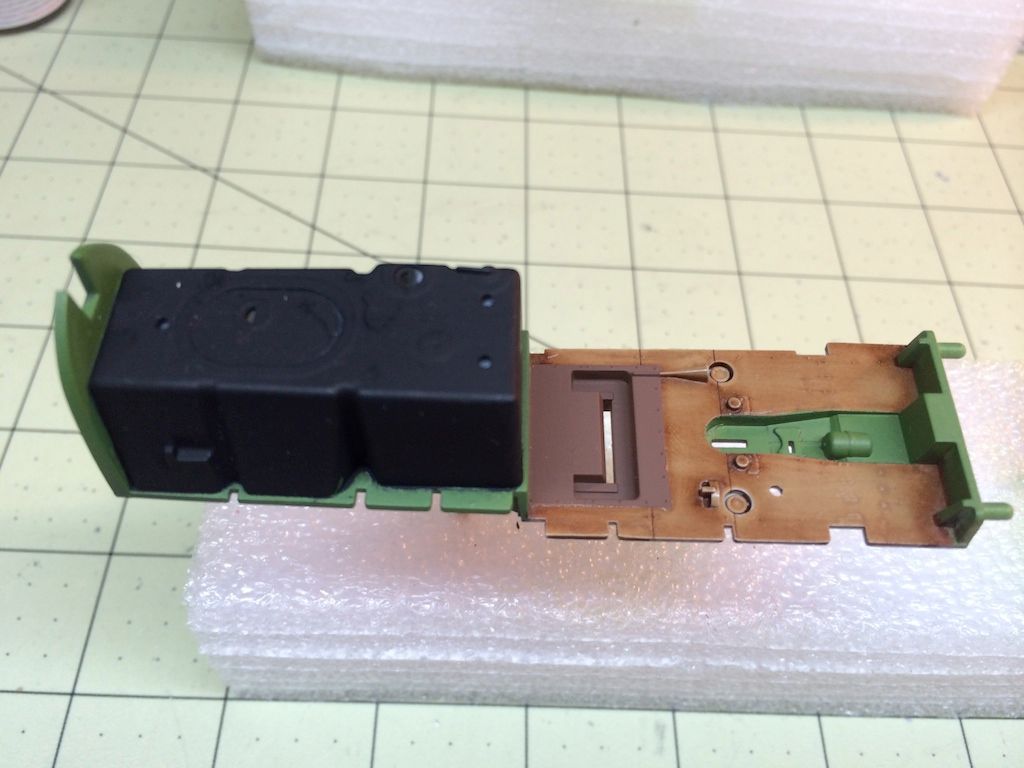
Then careful masking to paint the other colors - black, interior green, and the brown.
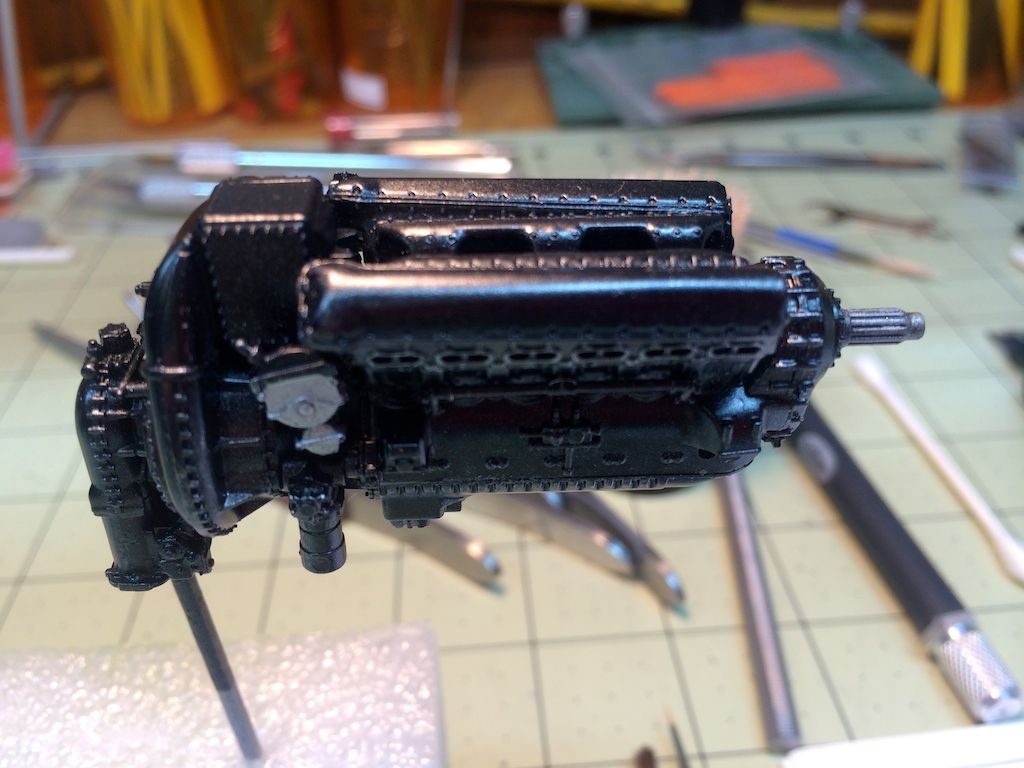
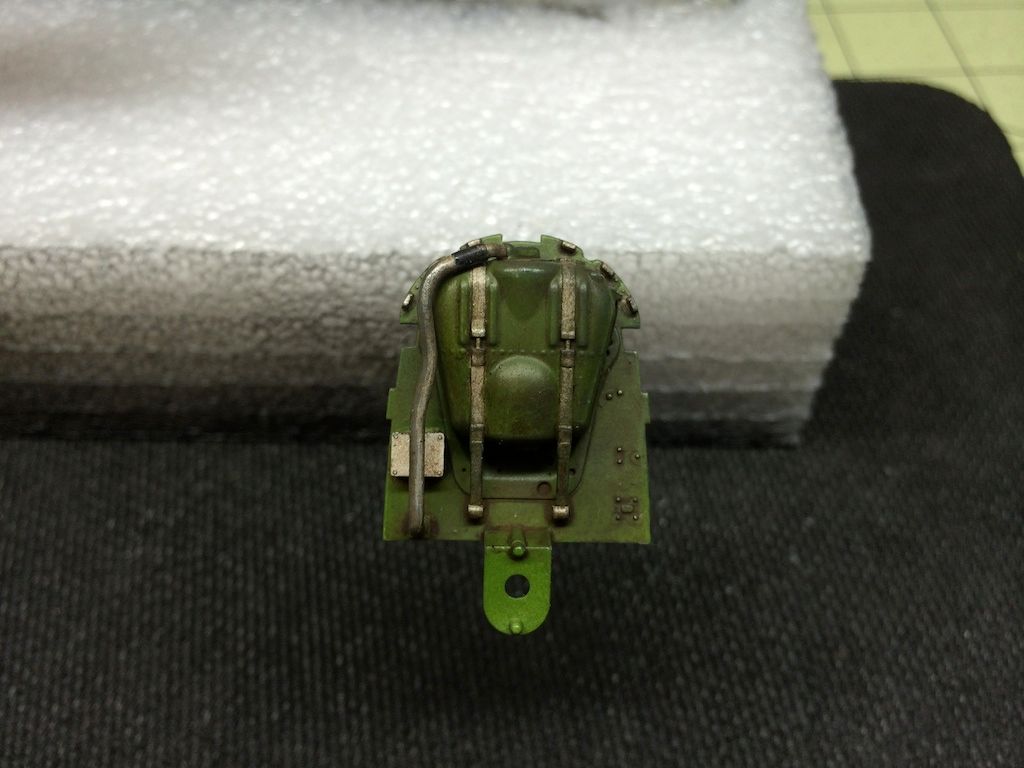
The Mighty Merlin was detailed a little.
What!? Flash on a Tamiya kit? No freaking way! Yes way!
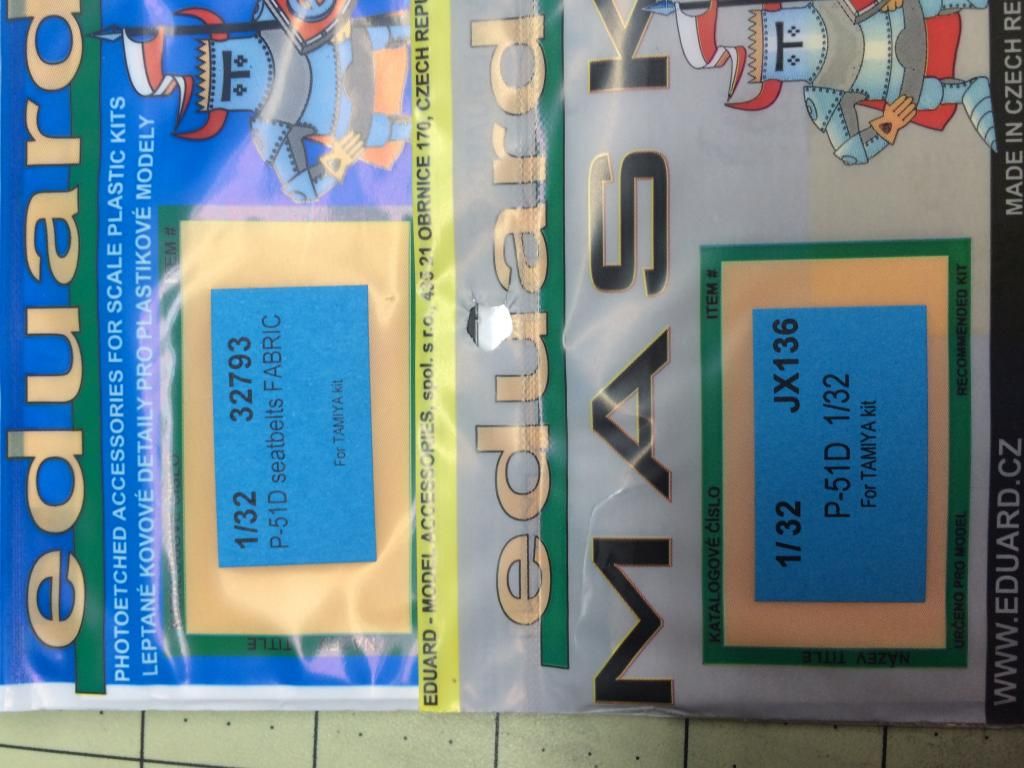
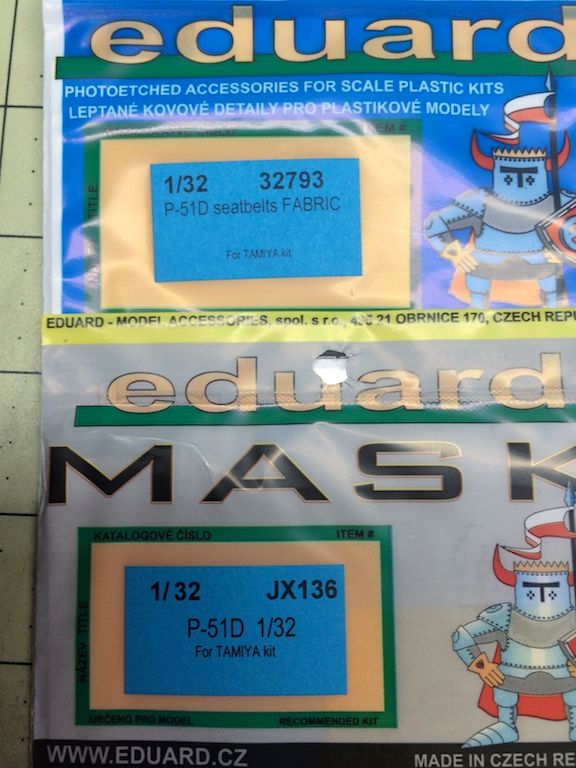
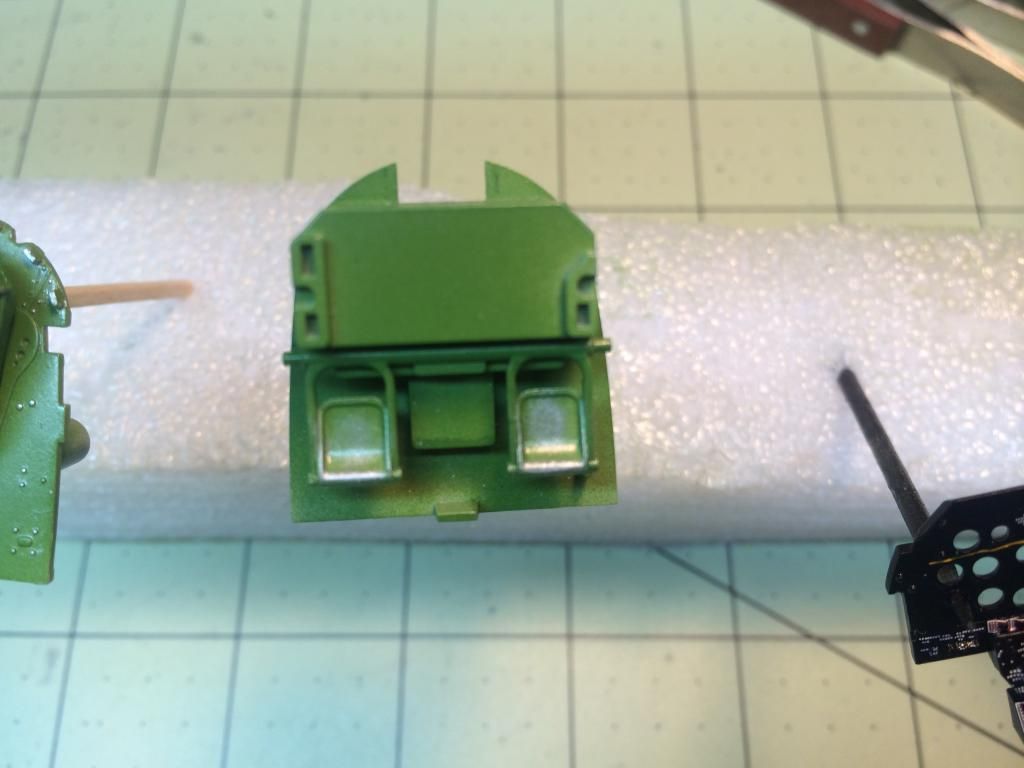
A couple additions to the arsenal...canopy masks and fabric seat belts!
With all the various components painted up they were ready for some stencils...but was I? Hours and hours were spent on the stencils just for the fuel tanks, radio, battery, cockpit floor, and the instrument panel. I think it turned out great and I am really pleased withe the outcome!
Ready for another clear coat...
Assembled, except for the instrument panel. I'll leave it off until I finish the weathering - I use oils for this and do not want them on the panel.
Once the weathering is finished, the whole thing will be ready to be put together and I can move forward. All in all a productive weekend. I am enjoying this build tremendously. The fits and details are phenomenal.
Hope you all like the work so far ?
?
Jon
I started with the cockpit floor.
Base coat of light tan

Then the oils were used to simulate plywood.

Once I got the look I wanted, gloss coated to protect it from subsequent detailing.

Then careful masking to paint the other colors - black, interior green, and the brown.

The Mighty Merlin was detailed a little.

What!? Flash on a Tamiya kit? No freaking way! Yes way!

A couple additions to the arsenal...canopy masks and fabric seat belts!

With all the various components painted up they were ready for some stencils...but was I? Hours and hours were spent on the stencils just for the fuel tanks, radio, battery, cockpit floor, and the instrument panel. I think it turned out great and I am really pleased withe the outcome!


Ready for another clear coat...

Assembled, except for the instrument panel. I'll leave it off until I finish the weathering - I use oils for this and do not want them on the panel.

Once the weathering is finished, the whole thing will be ready to be put together and I can move forward. All in all a productive weekend. I am enjoying this build tremendously. The fits and details are phenomenal.
Hope you all like the work so far
Jon
Re: Jon's 1:32 Tamiya P-51D Mustang LOU IV
Beautiful detailing mate. More!
Will
"A thing of orchestrated hell- a terrible symphony of light and flame."
Edward R Murrow
"A thing of orchestrated hell- a terrible symphony of light and flame."
Edward R Murrow
-
Nige201980

- Captain

- Posts: 4095
- Joined: Wed Jun 05, 2013 9:30 am
- Location: Doncaster South Yorkshire UK
- Contact:
Re: Jon's 1:32 Tamiya P-51D Mustang LOU IV
Looks lovely mate keep up the good work.
http://www.youtube.com/channel/UCy-TGcs5u_ZXSZ9kObNfsPg
On the go at the Mo
Quite a few
On the go at the Mo
Quite a few


Re: Jon's 1:32 Tamiya P-51D Mustang LOU IV
That is a wonderful cockpit! :O Loved the wood effect with the oils!  Gotta try it sometime!
-
Paul

- Site Admin

- Posts: 12622
- Joined: Thu May 23, 2013 4:47 pm
- Location: Merseyside, England, UK
- Contact:

Re: Jon's 1:32 Tamiya P-51D Mustang LOU IV
Excellent work Jon, looking great buddy
Products I use in my builds viewtopic.php?f=192&t=27234
My Paul-Ism page https://www.facebook.com/thebenchwithpaul/
Friday Live show here https://www.facebook.com/groups/120548821977514/

My Paul-Ism page https://www.facebook.com/thebenchwithpaul/
Friday Live show here https://www.facebook.com/groups/120548821977514/

-
FishBowlMan

- Sergeant First Class

- Posts: 317
- Joined: Wed Jan 29, 2014 9:42 pm
- Location: Kidderminster, England
Re: Jon's 1:32 Tamiya P-51D Mustang LOU IV
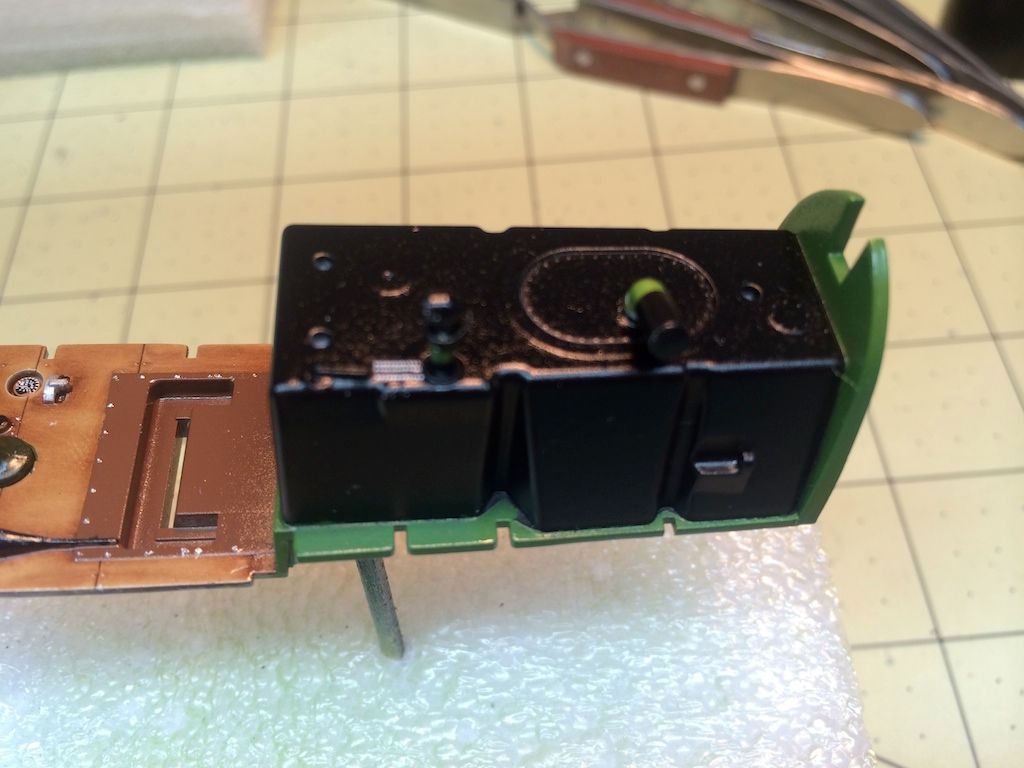
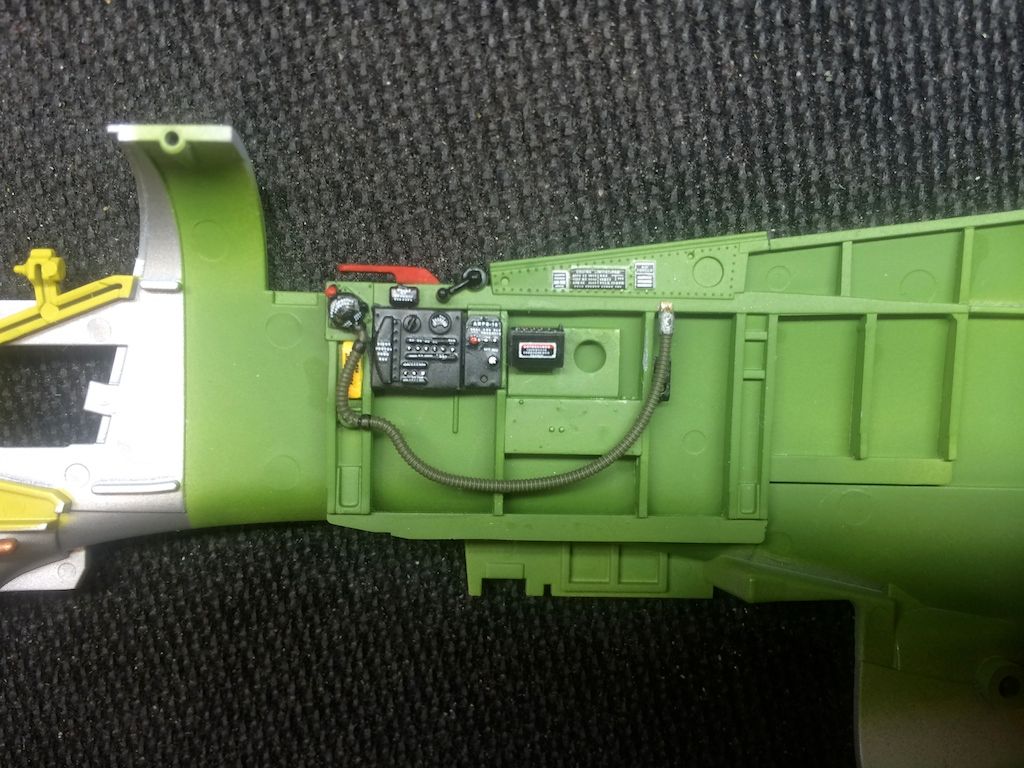
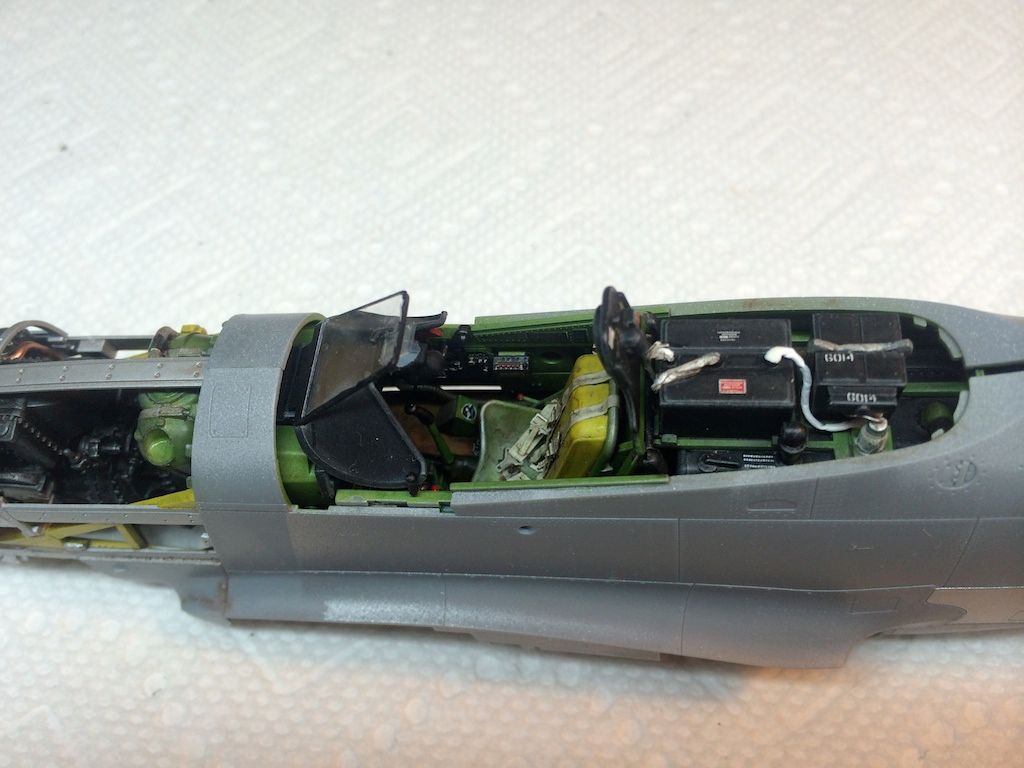
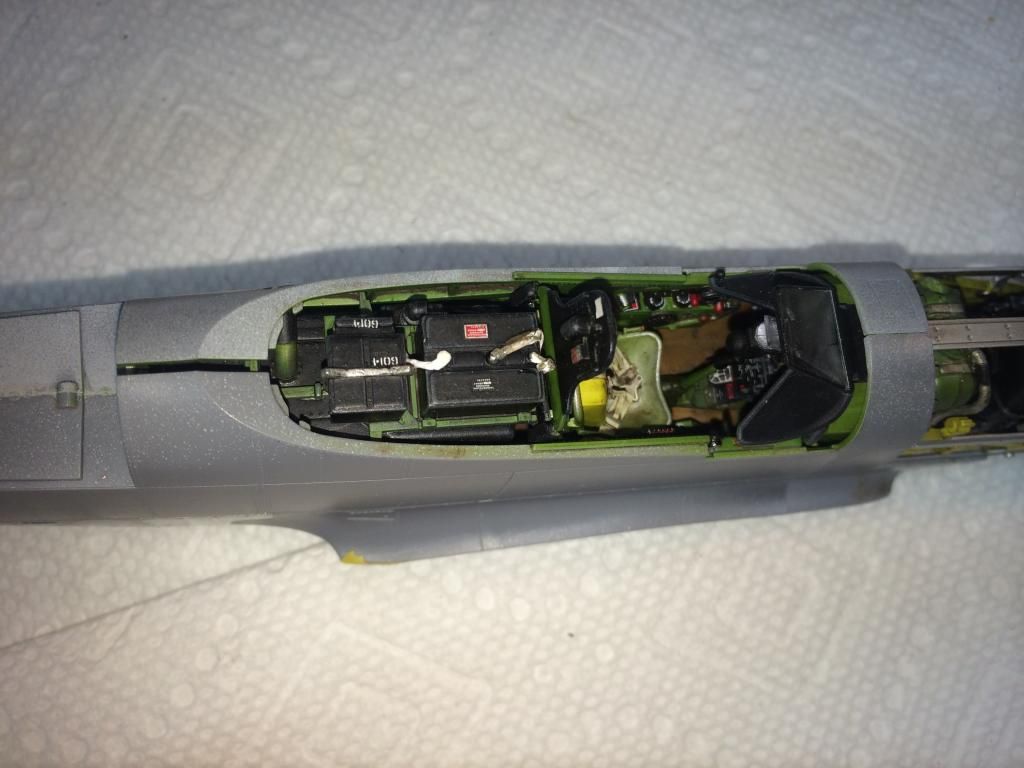
Lovely detailing work, Jon. Especially the radio and battery behind the seat. 
The cables from the battery terminals remind me of those in my first car.
The cables from the battery terminals remind me of those in my first car.
John
On the bench:
Tamiya 1/35 SAS Jeep, 1/35 BMW R75, 1/35 Pzkpfw III Ausf M/N
MiniArt 1/35 Bantam 40 BRC British Staff Car
Hasegawa 1/48 P-51D, originally for D-Day GB
Hobbyboss 1/35 Pzkpfw I ausf F
There is no room inside a box!
On the bench:
Tamiya 1/35 SAS Jeep, 1/35 BMW R75, 1/35 Pzkpfw III Ausf M/N
MiniArt 1/35 Bantam 40 BRC British Staff Car
Hasegawa 1/48 P-51D, originally for D-Day GB
Hobbyboss 1/35 Pzkpfw I ausf F
There is no room inside a box!

Re: Jon's 1:32 Tamiya P-51D Mustang LOU IV
Nice start Jon. What a great gift to get!
My Youtube Channel: http://m.youtube.com/user/MrBobsBuilds


Re: Jon's 1:32 Tamiya P-51D Mustang LOU IV
Fantastic detail. The extra cockpit decals ad a lot here. I like how your seat belts turned out so life like as well. If I ever build another one, I will probably do it without the pilot and go this route. Can't wait to see how this will turn out. It's such an amazing kit.
-
UKguyInUSA
- Second Lieutenant

- Posts: 3429
- Joined: Sun Mar 30, 2014 10:19 pm
- Location: New Hampshire, USA formerly Palm Beach, Florida, USA and Leicestershire, UK (until 1999)
- Contact:
Re: Jon's 1:32 Tamiya P-51D Mustang LOU IV
Wow! How did I miss this one until now?! Awesome work so far....will be looking out for more updates with this one! 
WIP:: Tamiya 1/48 F4U-1A Corsair
Non-WIP::Eduard 1/48 Fokker DVII, Revell 1/32 Arado AR196 and 1/32 BF109G10 Erla,
Non-WIP::Eduard 1/48 Fokker DVII, Revell 1/32 Arado AR196 and 1/32 BF109G10 Erla,
Re: Jon's 1:32 Tamiya P-51D Mustang LOU IV
Nice work so far Jon
got to agree about the decals for the cockpit, took me about a week to do my ones
got to agree about the decals for the cockpit, took me about a week to do my ones
IPMS USA 46957
Re: Jon's 1:32 Tamiya P-51D Mustang LOU IV
UPDATE #1
First let me say this kit is complicated...very complicated, with almost every section a kit in itself. I am enjoying building this, but...man-o-man is it taxing my mojo.
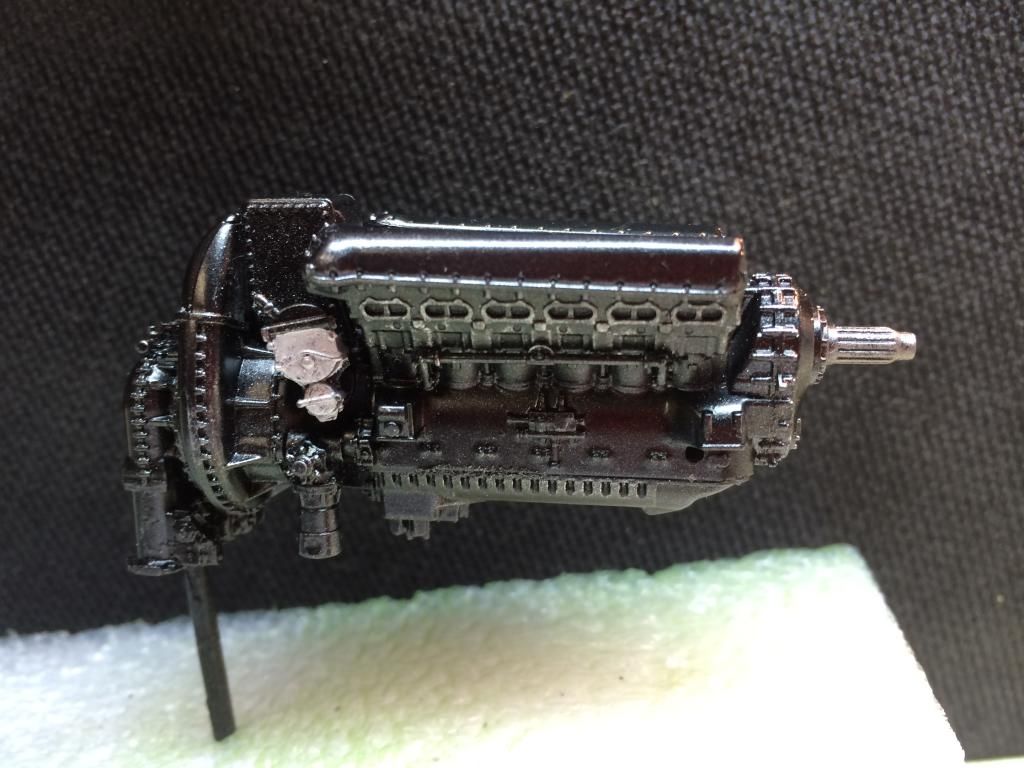
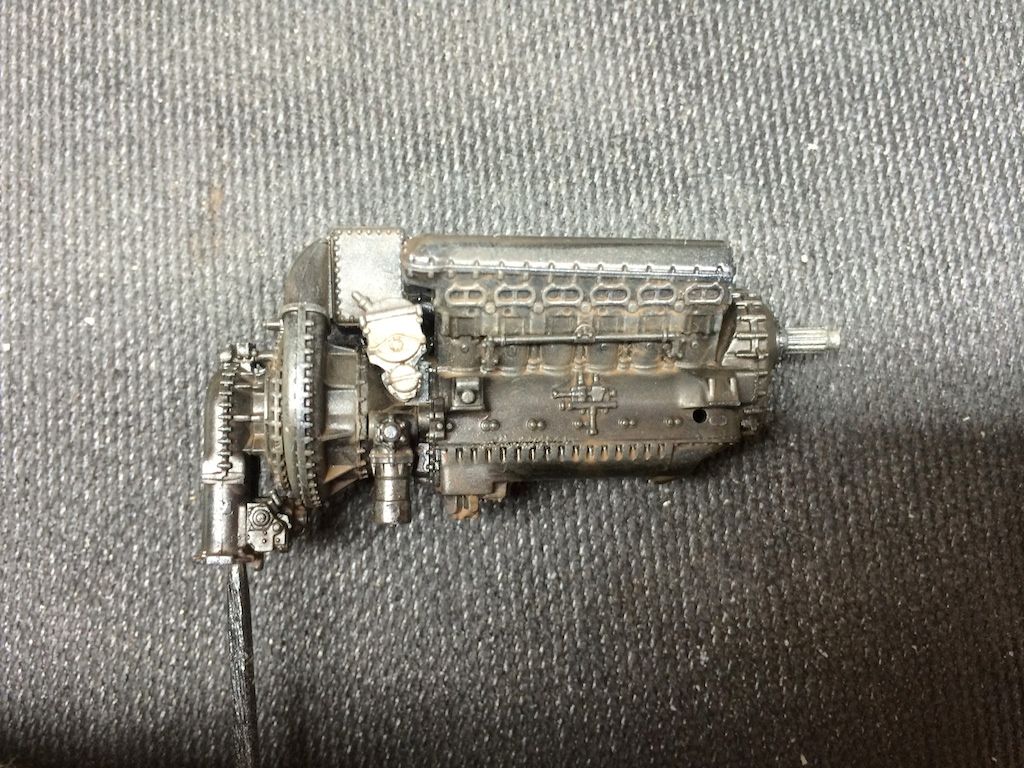
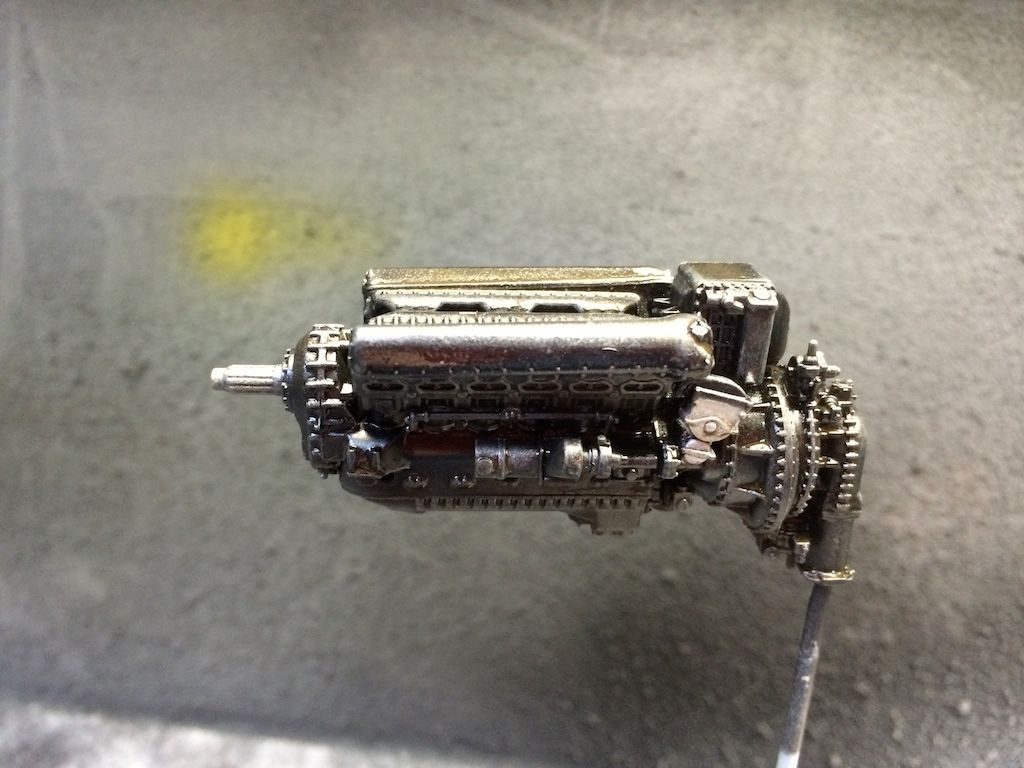
Started at the beginning of course, the engine. The depiction is so detailed I was amazed as I was assembling it, and kept repeating wow...wow...wow. I assembled the engine, oil tank, and instrument console.
Ready for a bit of primer - Tamiya gray rattle can...
Then the engine received Model Master Metallic Black gloss....I think it turned out great!
Then some details...
Then it was time to turn to the cockpit...what a project in itself!
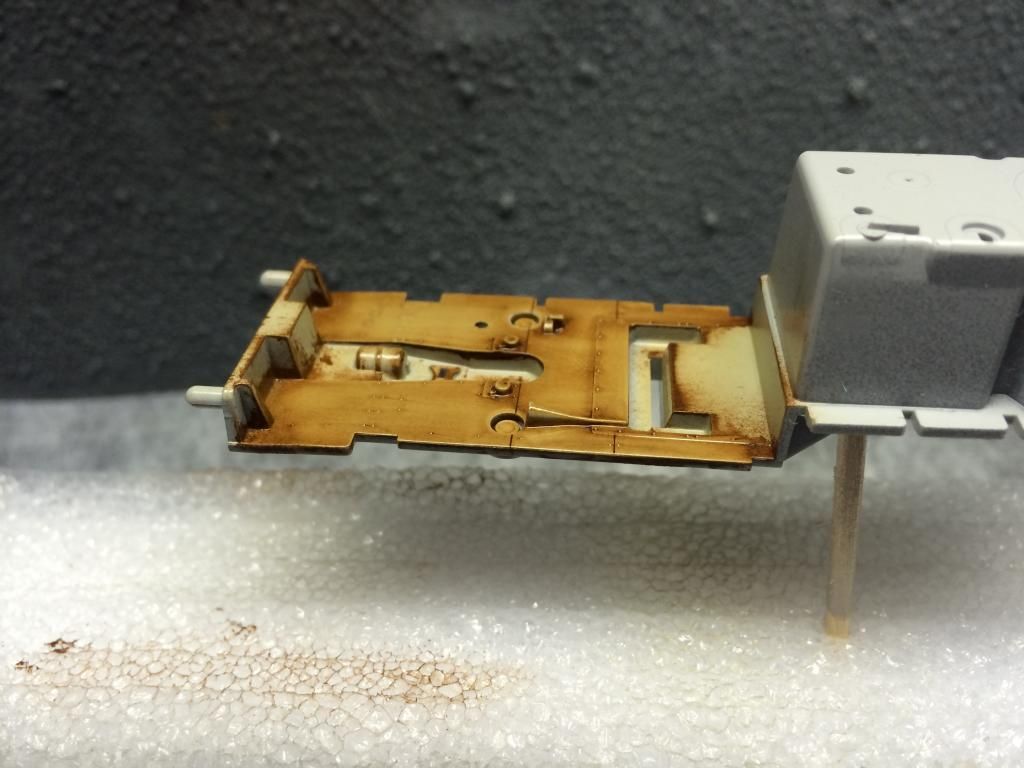
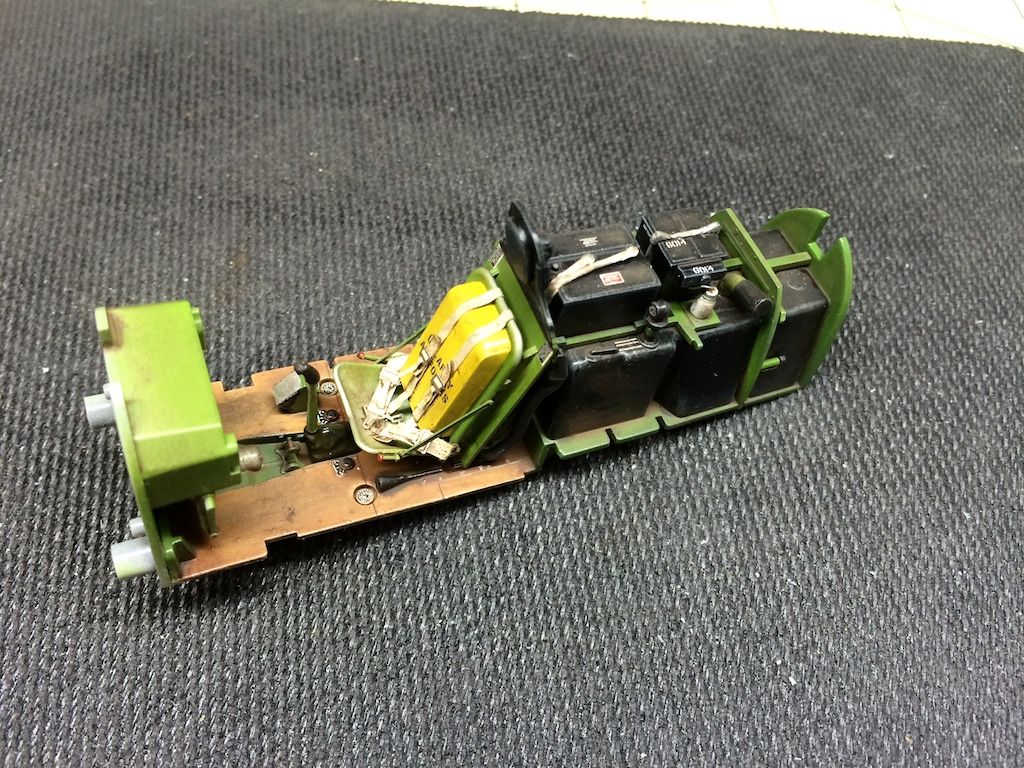
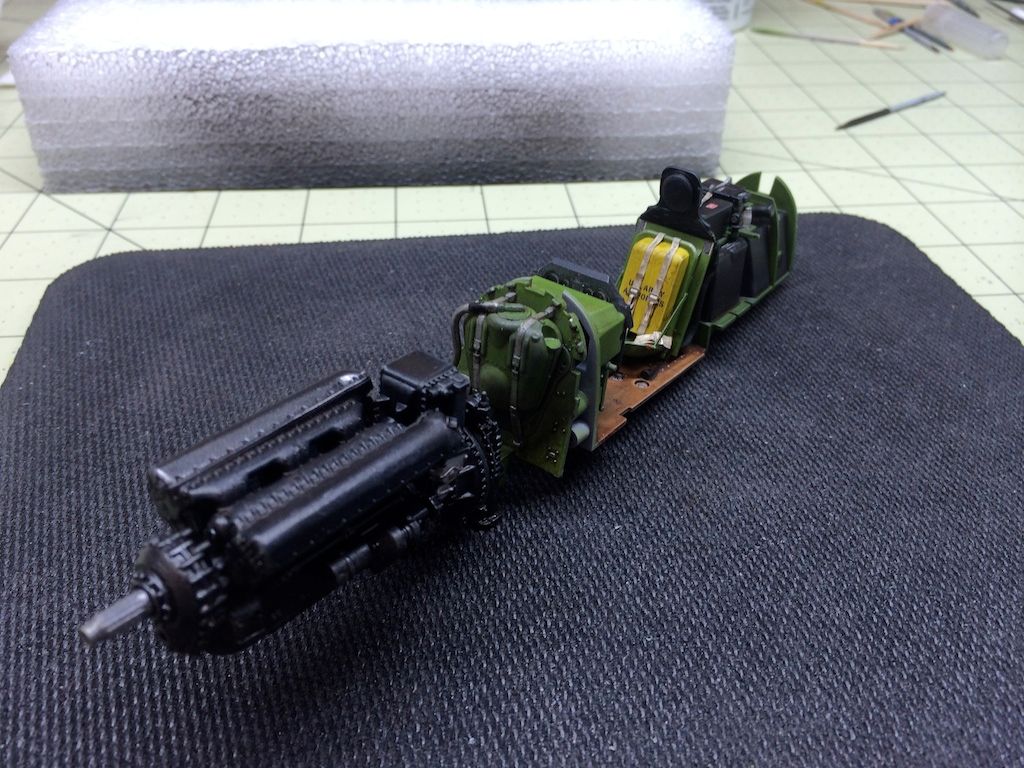
Laid down some more gray primer first, then sprayed on XF-55 Deck Tan as an undercoating for the plywood floor. I went out on a limb and did not paint the cockpit floor black - as is usual - and left it looking like wood. Call it modeling license, and I've done it elsewhere too...like the engine piping, but that's for later in the tale.
Then came a combination of turpentine and artist's oils - burnt sienna and raw umber - to create the plywood pattern. Just brushed it on and streaked it lightly, then left it to dry. Once dry, the remainder of the cockpit floor and fuel tanks were masked as needed and painted in their appropriate colors, then a clear gloss coat was applied, ready for decals, yes the floor gets decals too.
I purchased some assistance along the way from Barracuda Designs - fabric seat belts and canopy masks.
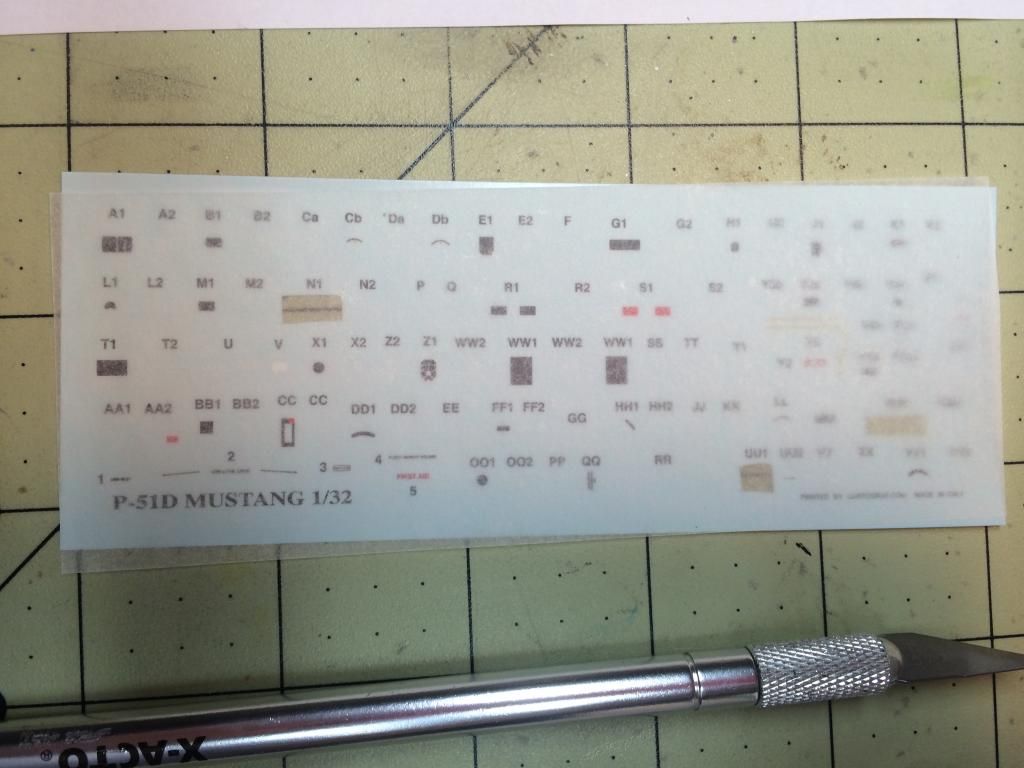
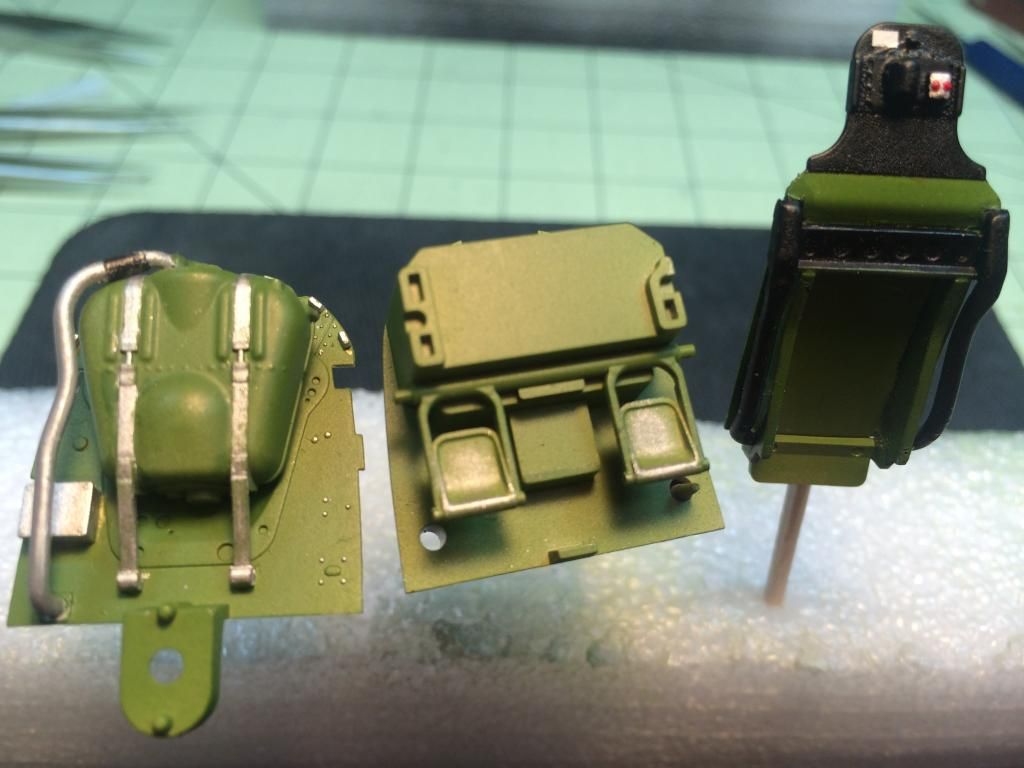
Time for the first of many stencil decals - also from Barracuda - and there are a lot!

Stencils on all of these components to the cockpit.
A little detail on the components - just the beginning of details...
Then, when all the stencils were placed, a clear coat on all of them.
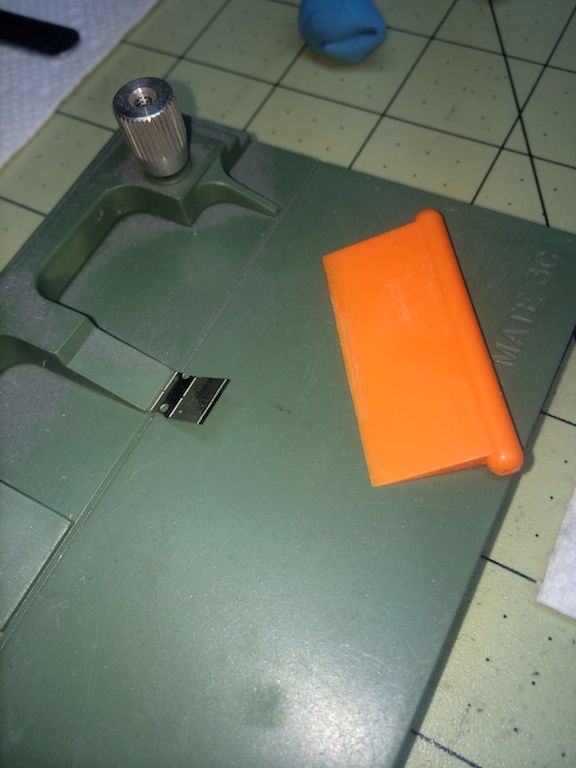
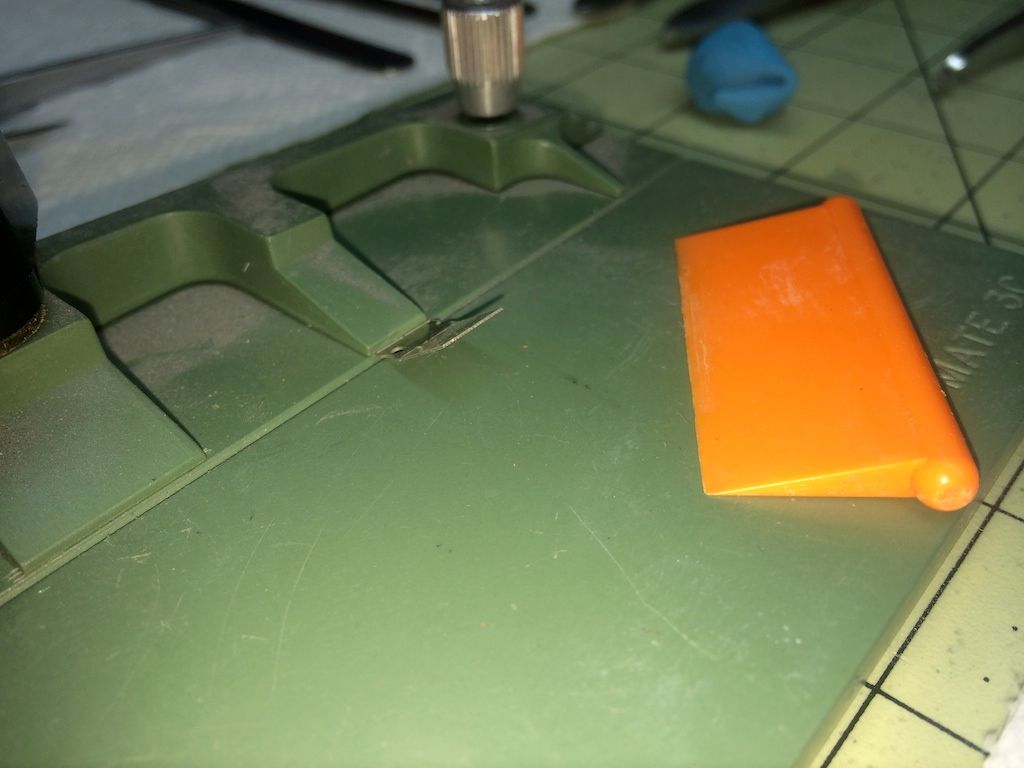
Sorry for the burr...

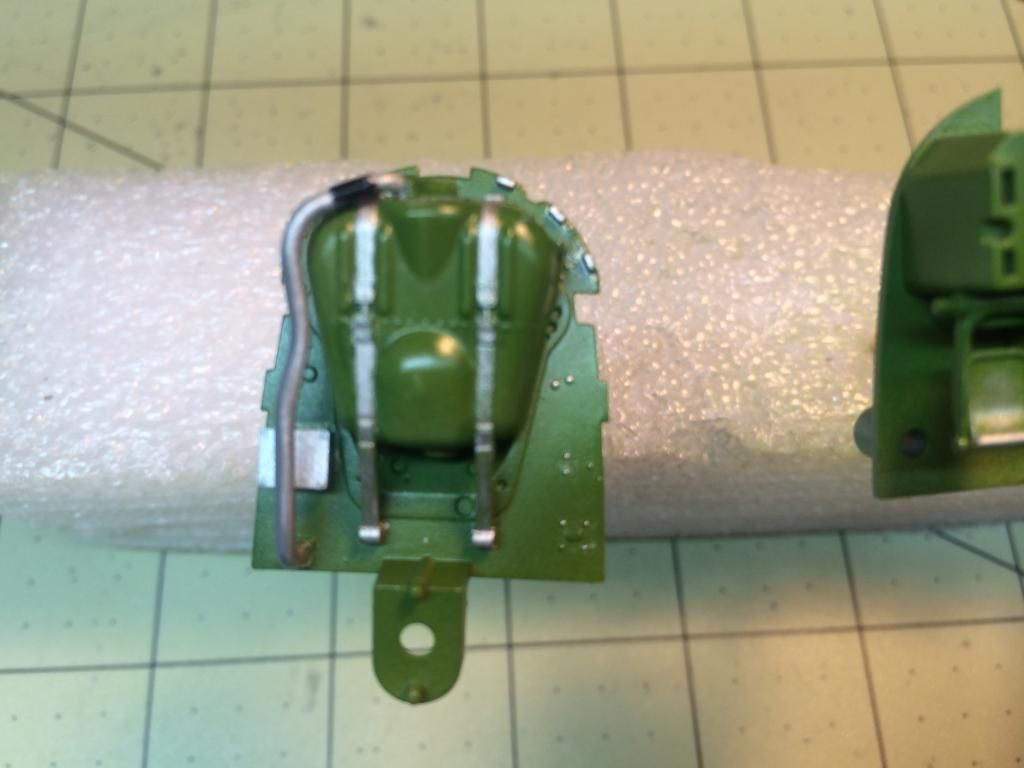
Then it was finally time for some serious assembly. Fits were absolutely fantastic with clicks into place with many pieces, like the pilot's seat assembly.
First let me say this kit is complicated...very complicated, with almost every section a kit in itself. I am enjoying building this, but...man-o-man is it taxing my mojo.

Started at the beginning of course, the engine. The depiction is so detailed I was amazed as I was assembling it, and kept repeating wow...wow...wow. I assembled the engine, oil tank, and instrument console.
Ready for a bit of primer - Tamiya gray rattle can...
Then the engine received Model Master Metallic Black gloss....I think it turned out great!
Then some details...
Then it was time to turn to the cockpit...what a project in itself!
Laid down some more gray primer first, then sprayed on XF-55 Deck Tan as an undercoating for the plywood floor. I went out on a limb and did not paint the cockpit floor black - as is usual - and left it looking like wood. Call it modeling license, and I've done it elsewhere too...like the engine piping, but that's for later in the tale.


Then came a combination of turpentine and artist's oils - burnt sienna and raw umber - to create the plywood pattern. Just brushed it on and streaked it lightly, then left it to dry. Once dry, the remainder of the cockpit floor and fuel tanks were masked as needed and painted in their appropriate colors, then a clear gloss coat was applied, ready for decals, yes the floor gets decals too.


I purchased some assistance along the way from Barracuda Designs - fabric seat belts and canopy masks.

Time for the first of many stencil decals - also from Barracuda - and there are a lot!

Stencils on all of these components to the cockpit.
A little detail on the components - just the beginning of details...

Then, when all the stencils were placed, a clear coat on all of them.


Sorry for the burr...


Then it was finally time for some serious assembly. Fits were absolutely fantastic with clicks into place with many pieces, like the pilot's seat assembly.
-
rodrant

- Chief Warrant Officer 2

- Posts: 1774
- Joined: Wed Feb 19, 2014 9:22 pm
- Location: Maia - Portugal

Re: Jon's 1:32 Tamiya P-51D Mustang LOU IV
Looking nice so far , great job doing the cockpit and painting the engine ...
Cheers ,
António
On the Bench
a lot of stuff right now
António
On the Bench
a lot of stuff right now
Re: Jon's 1:32 Tamiya P-51D Mustang LOU IV
UPDATE #2
Pressed the darn "Submit" instead of "Preview". Oh well...continuing on...where was I....oh yea....cockpit assembly...
Weathering the interior and other components with this and pure turpentine.
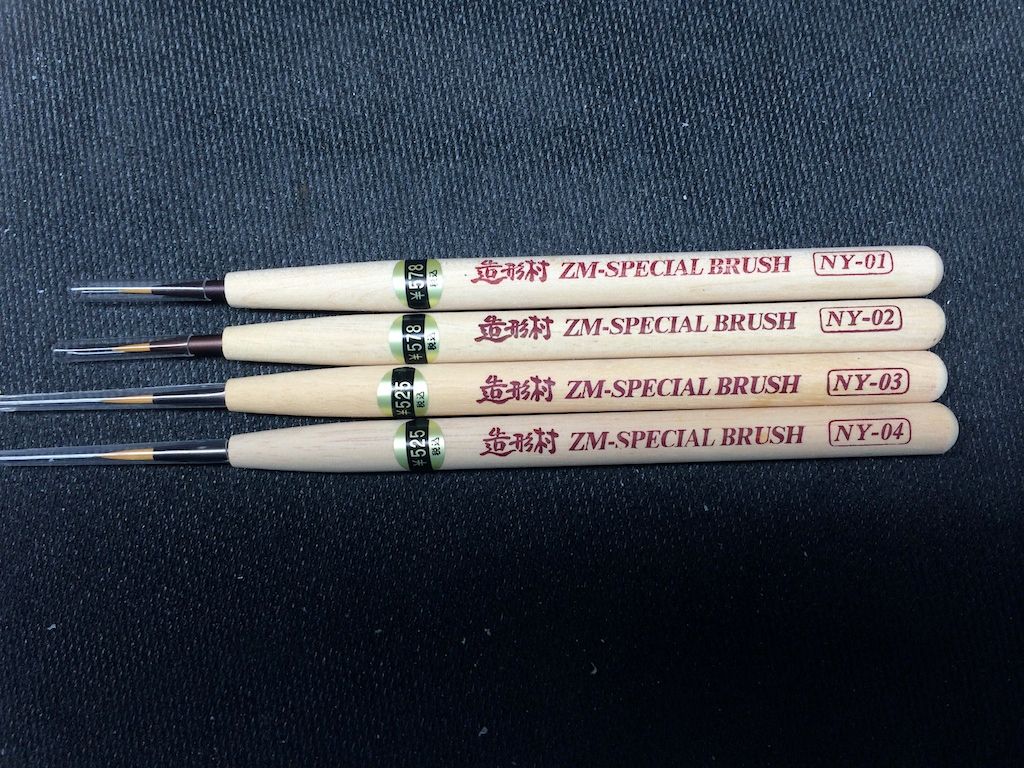
Still in need of some details, so based on Lee's great review video, I procured the ZM Special Brushes...fantastic Lee - really great - thanks!
Continuing the weathering report...
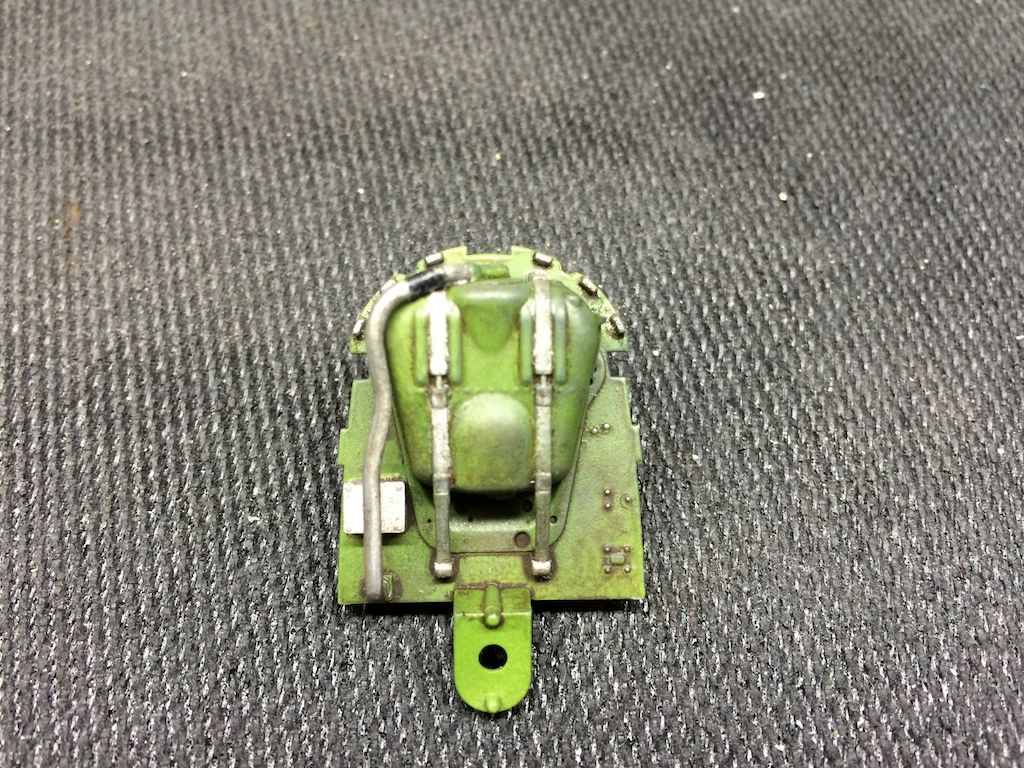
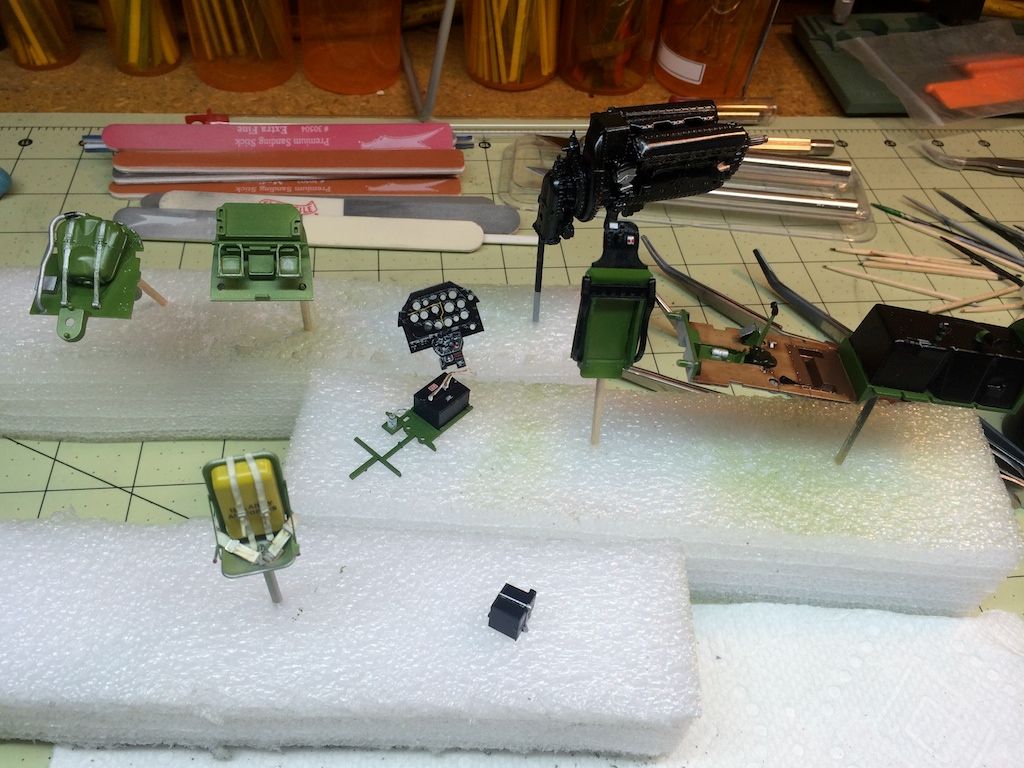
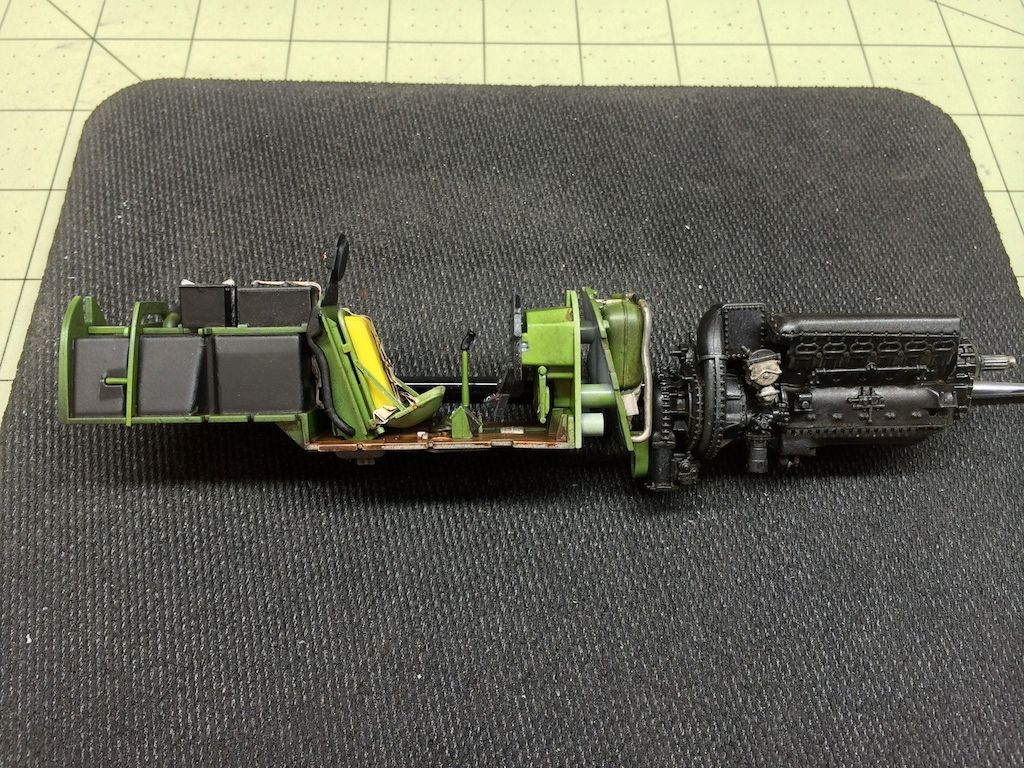
Ahhhh....ASSEMBLY! Finally.
Slightly different lighting...
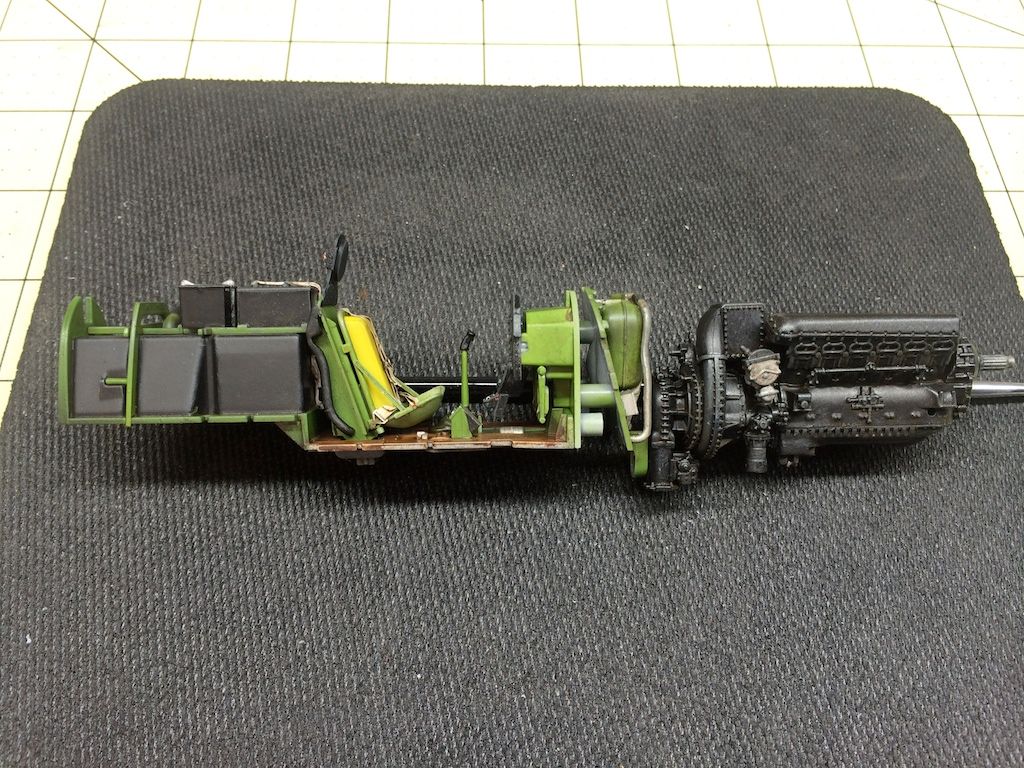
Holy Details Batman!
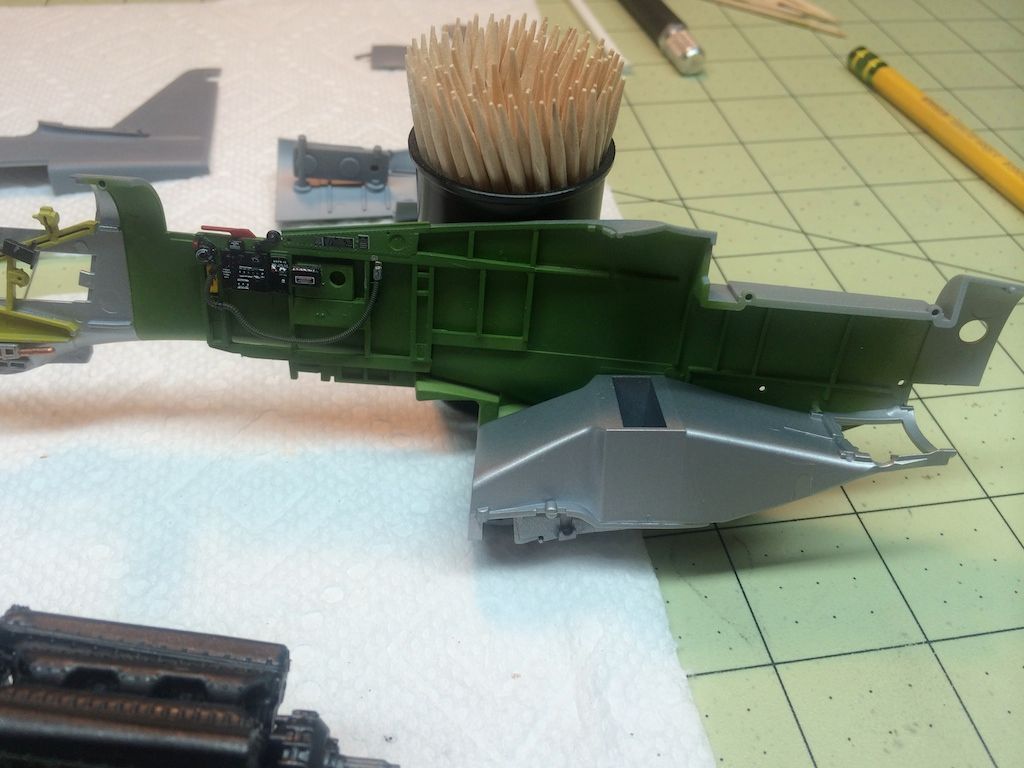
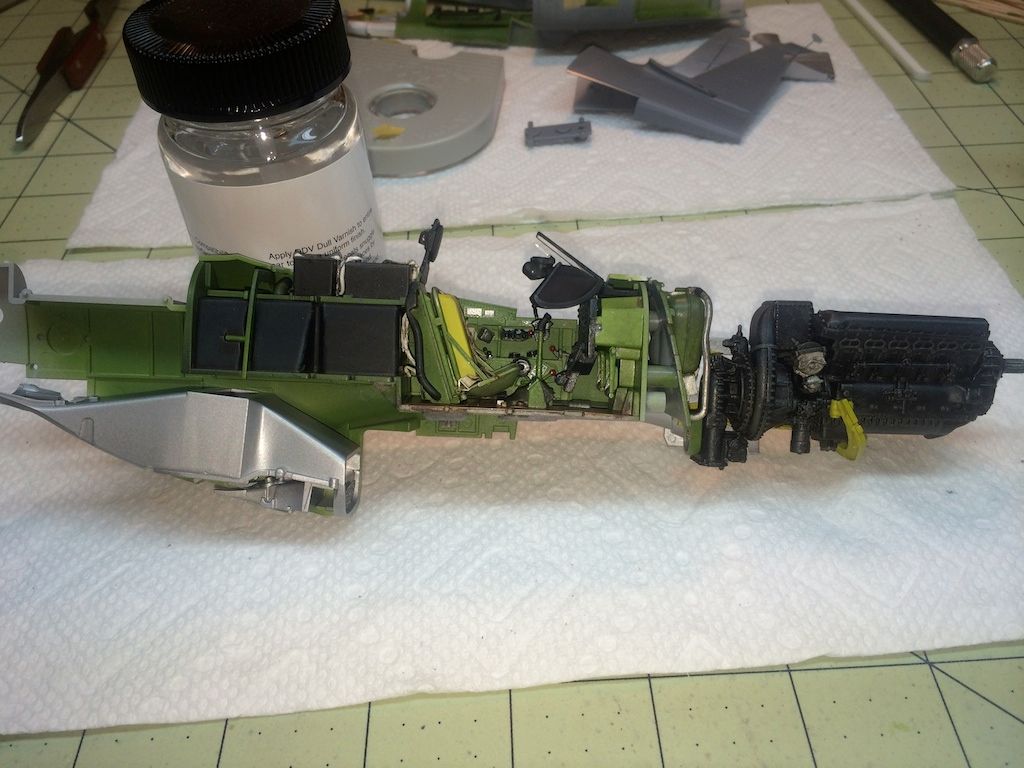
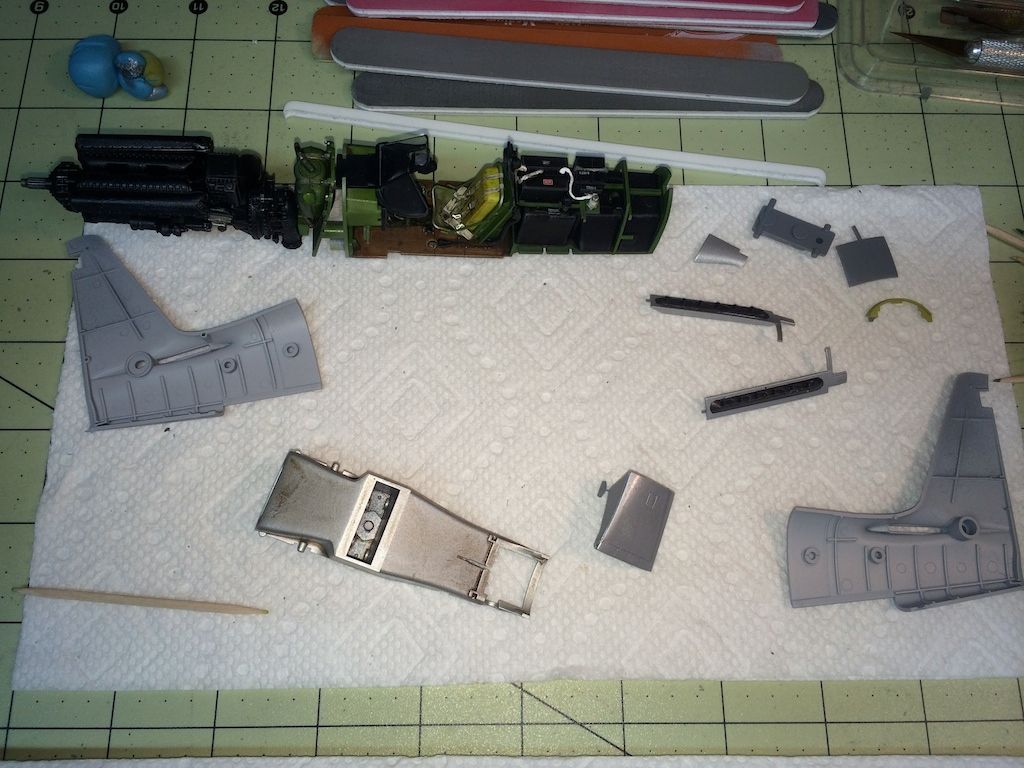
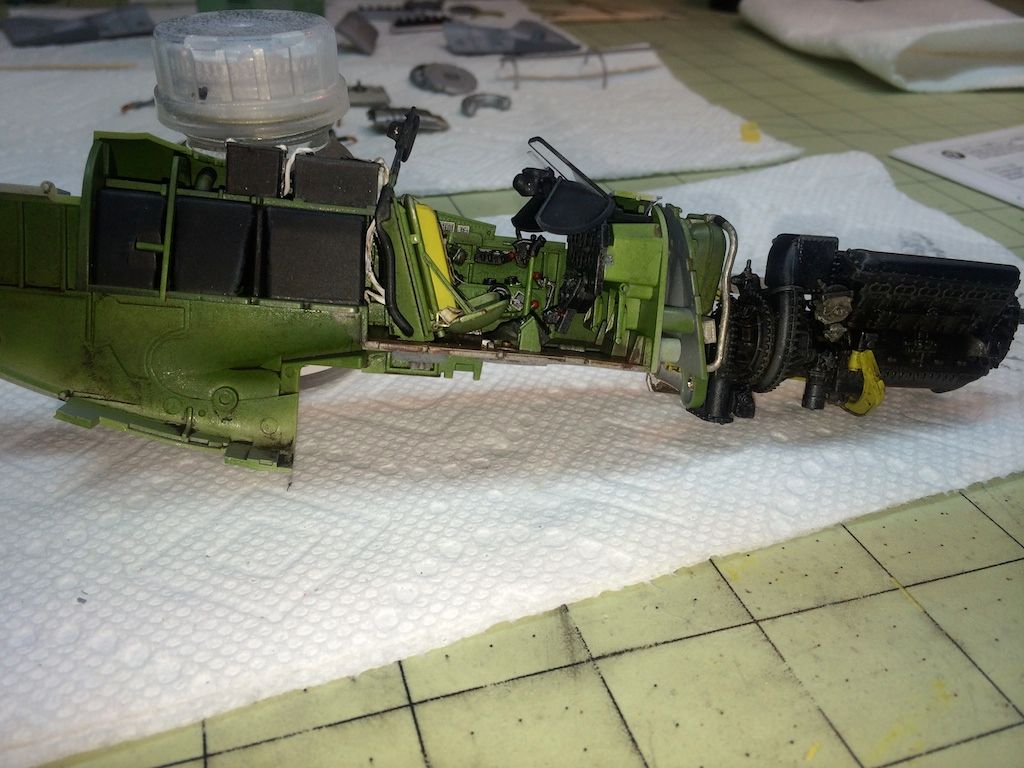
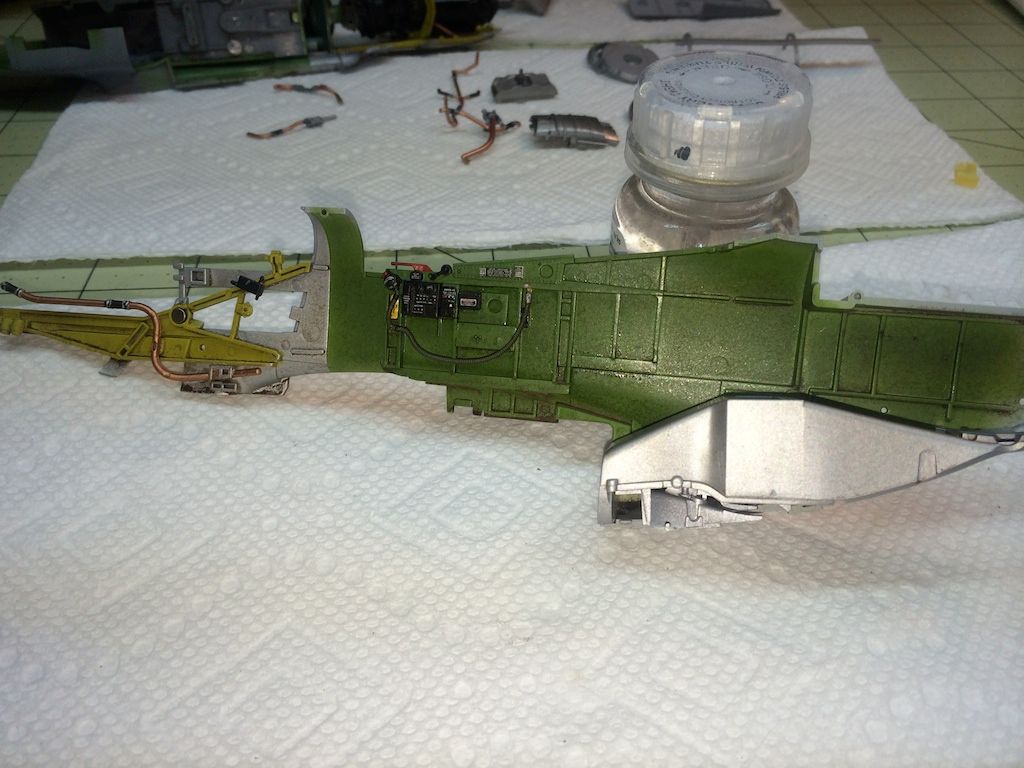
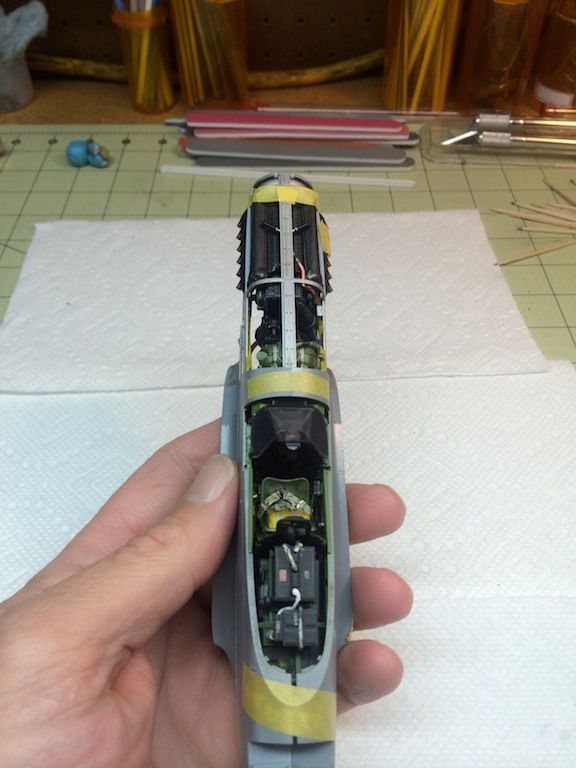
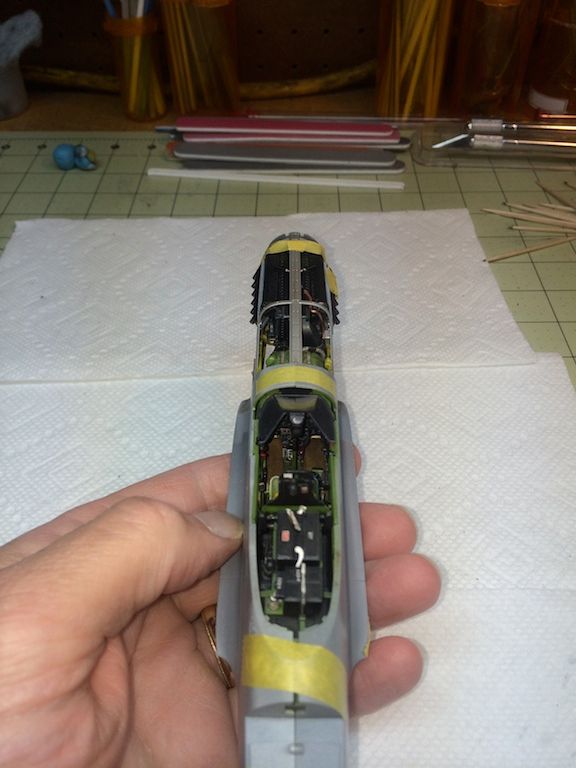
Then it was time for the fuselage kit...I say kit as this is a kit of mini-kits!
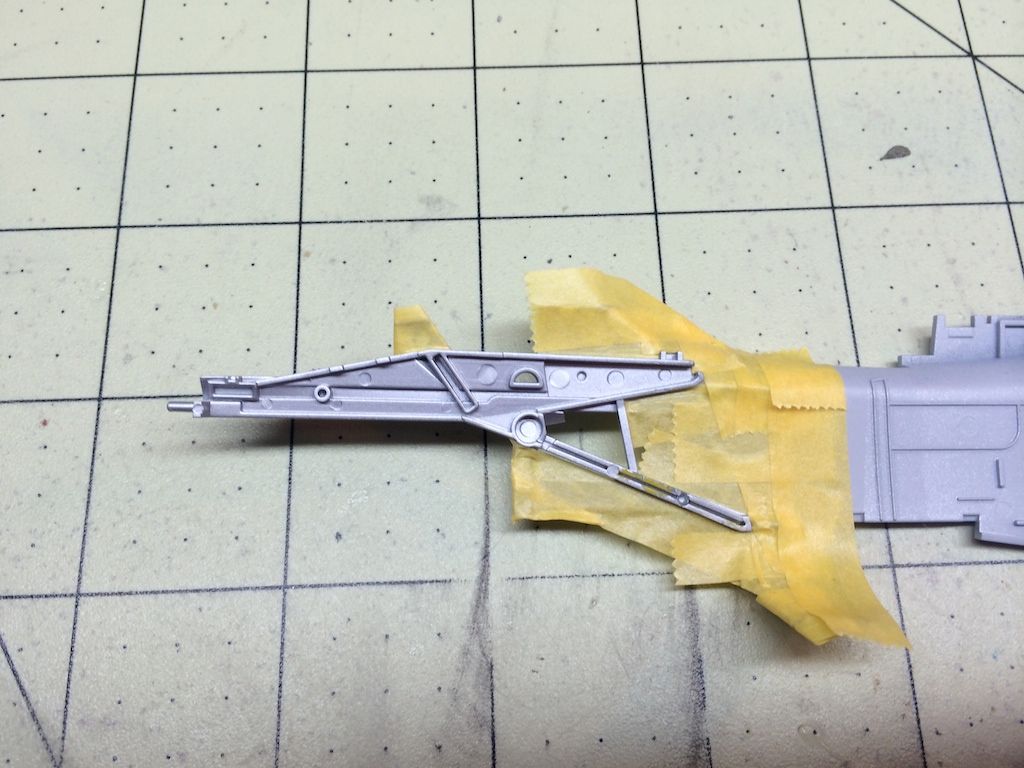
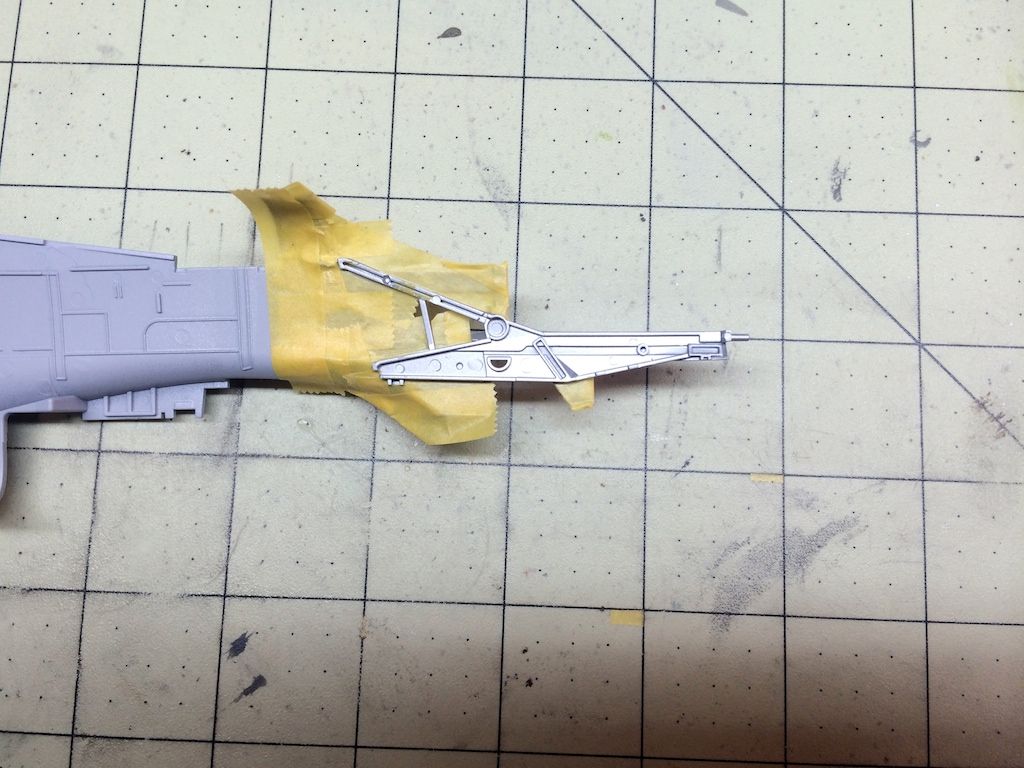
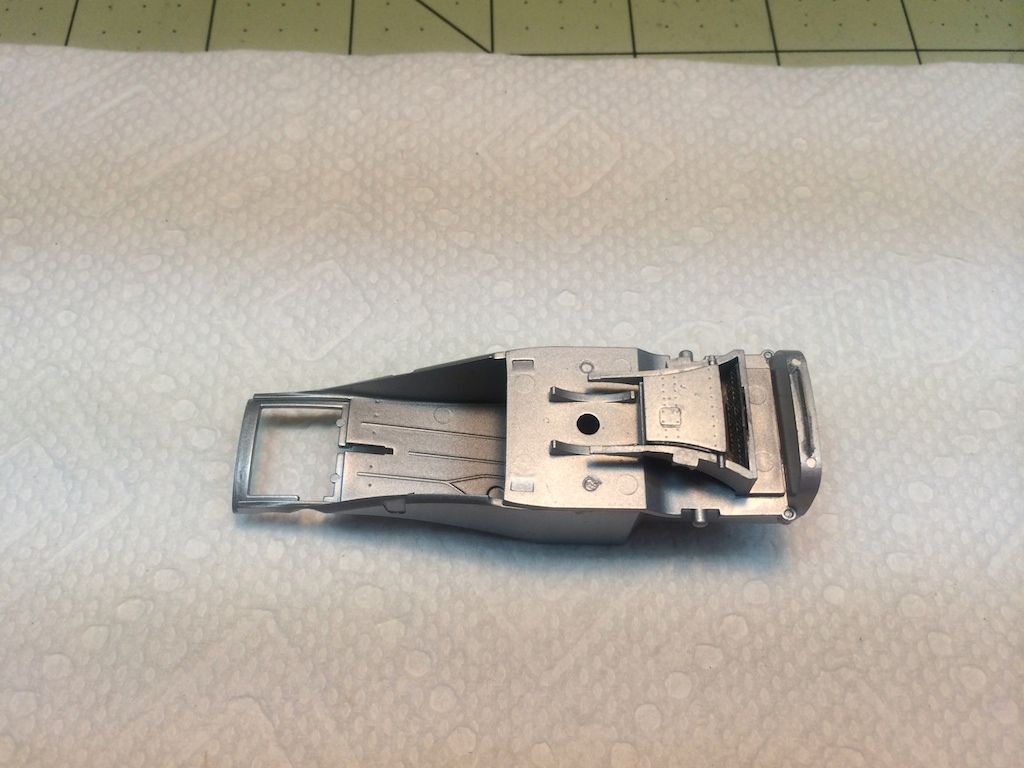
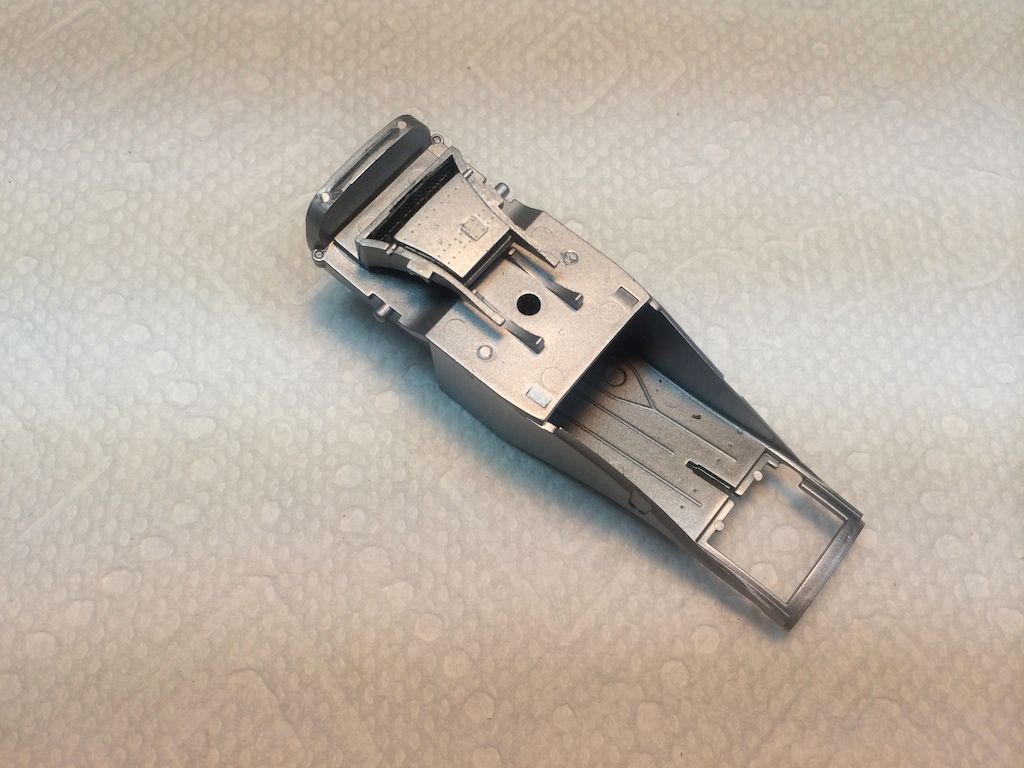
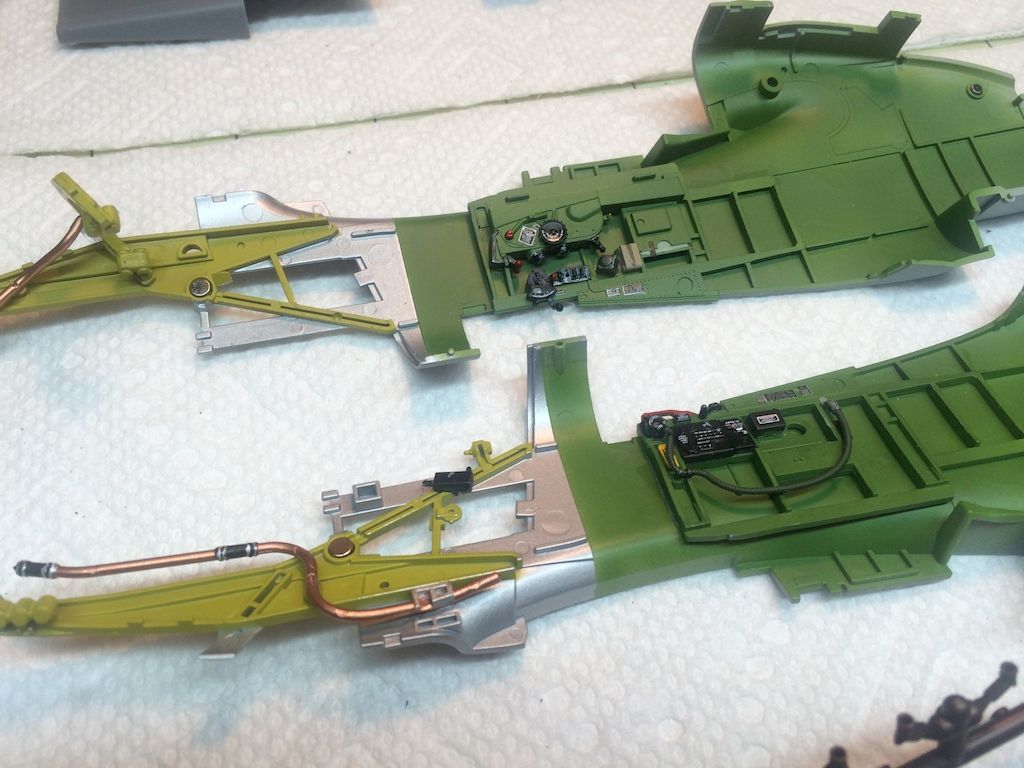
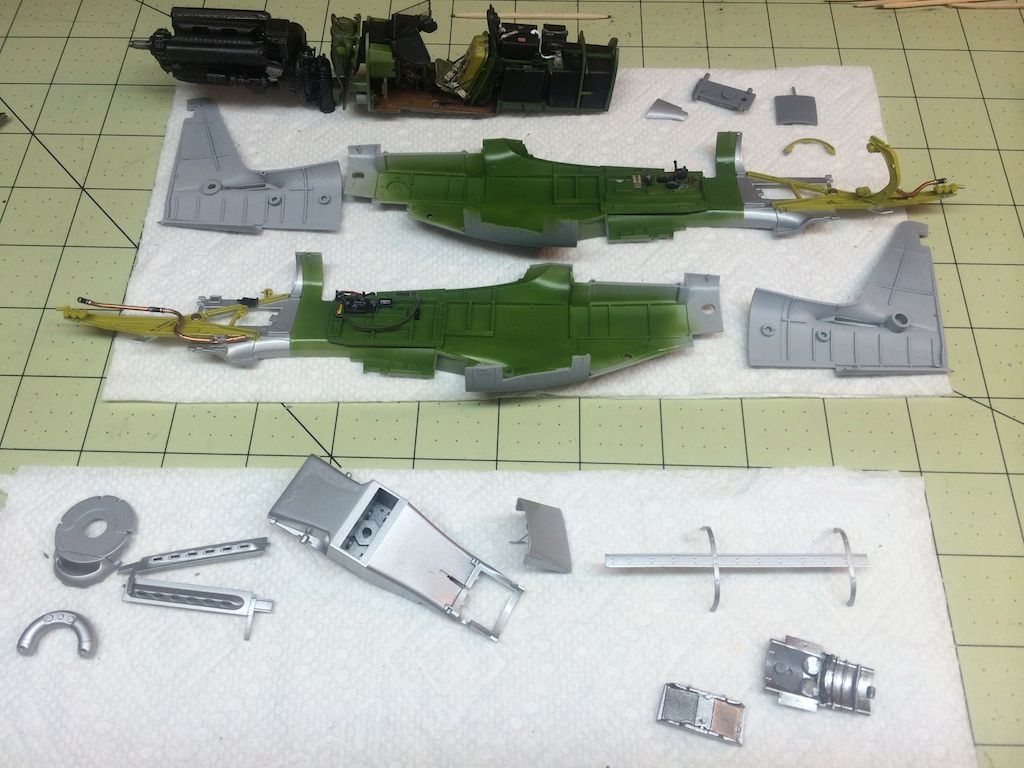
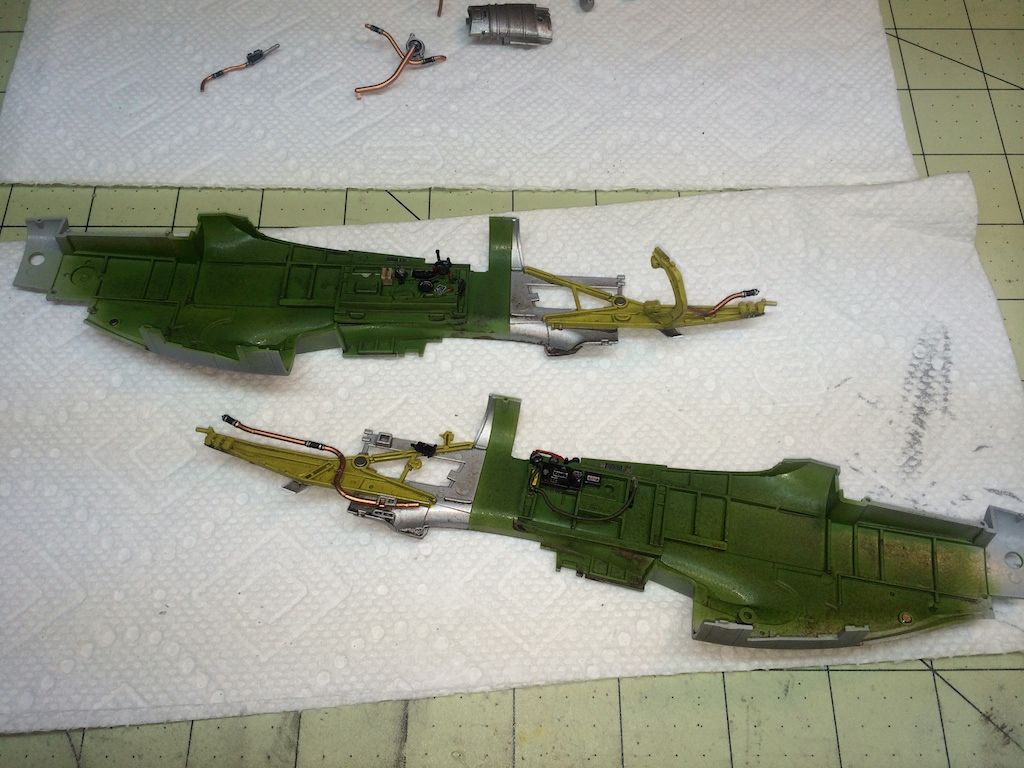
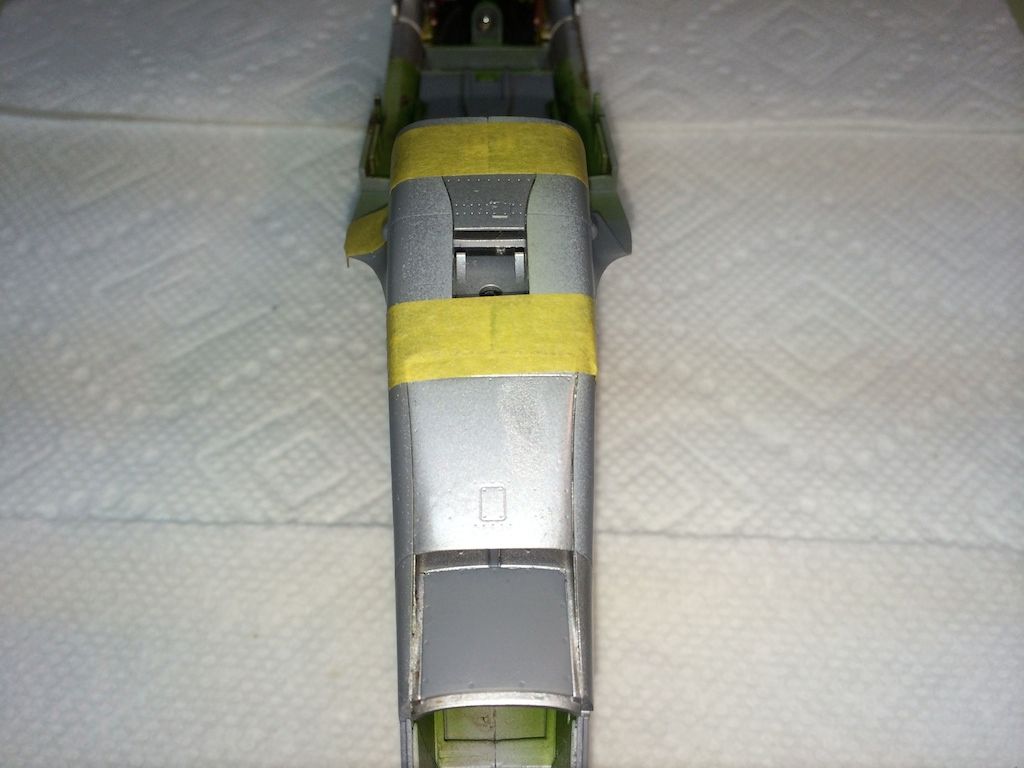
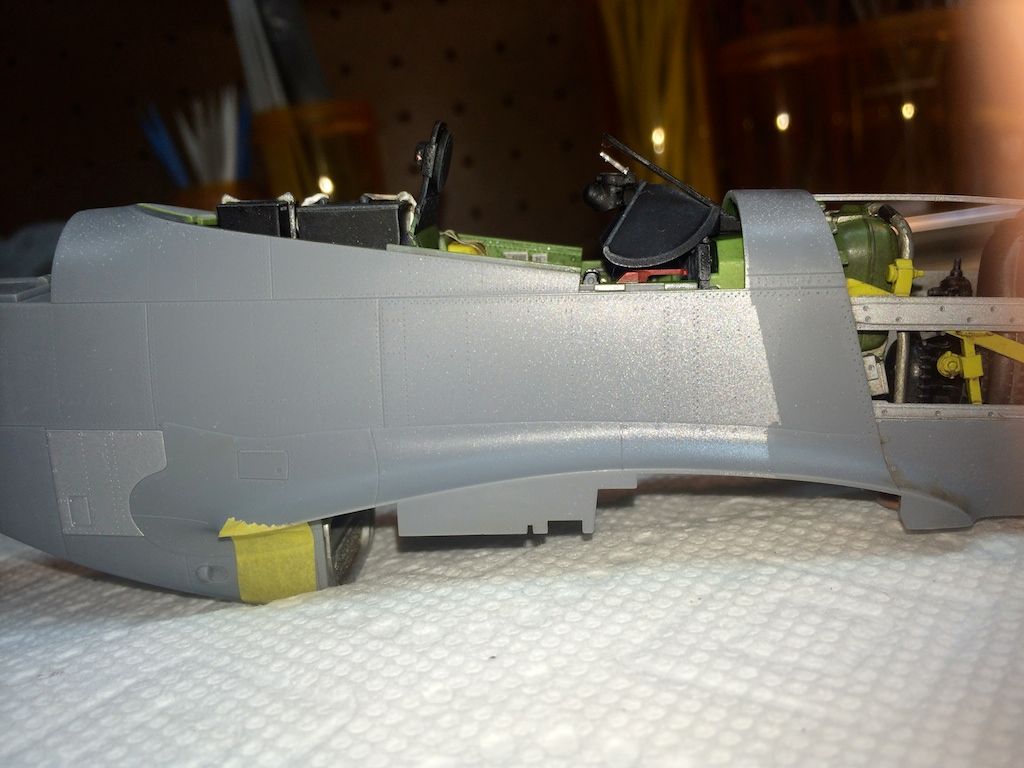
I primed both fuselage halves - with the gray rattle can stuff. I masked the forward fuselage and engine supports section and painted it Tamiya Bare Metal Silver AS-12 - rattle can again.
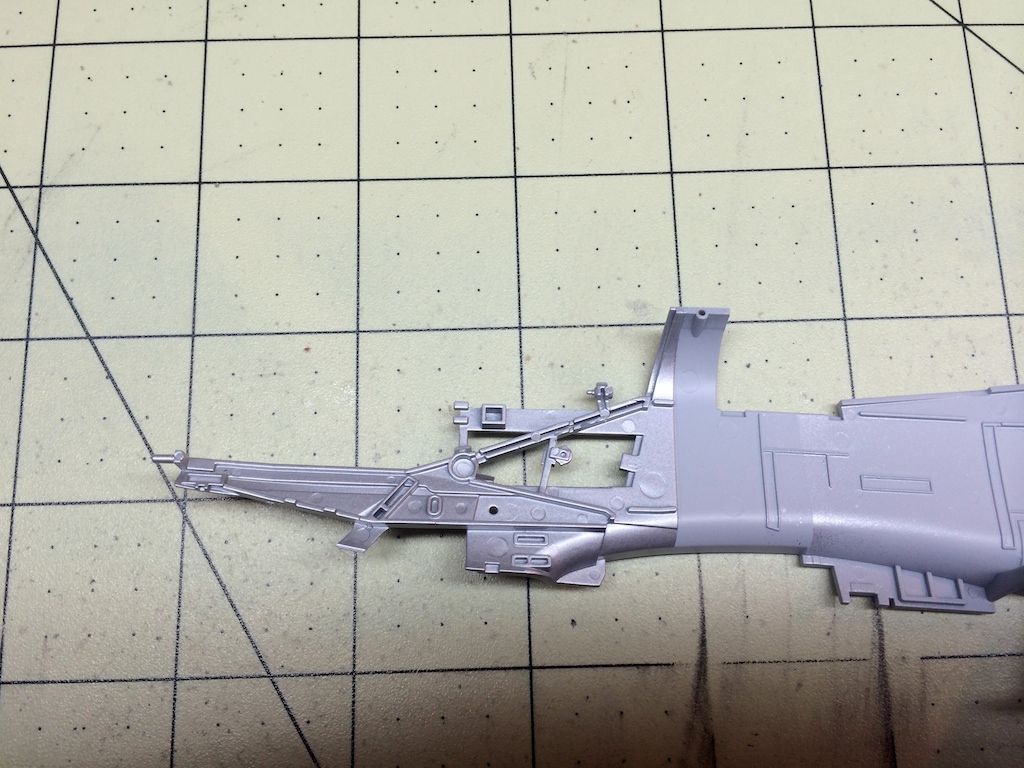
Then the parts to remain bare metal silver were masked and the chromate yellow was used.
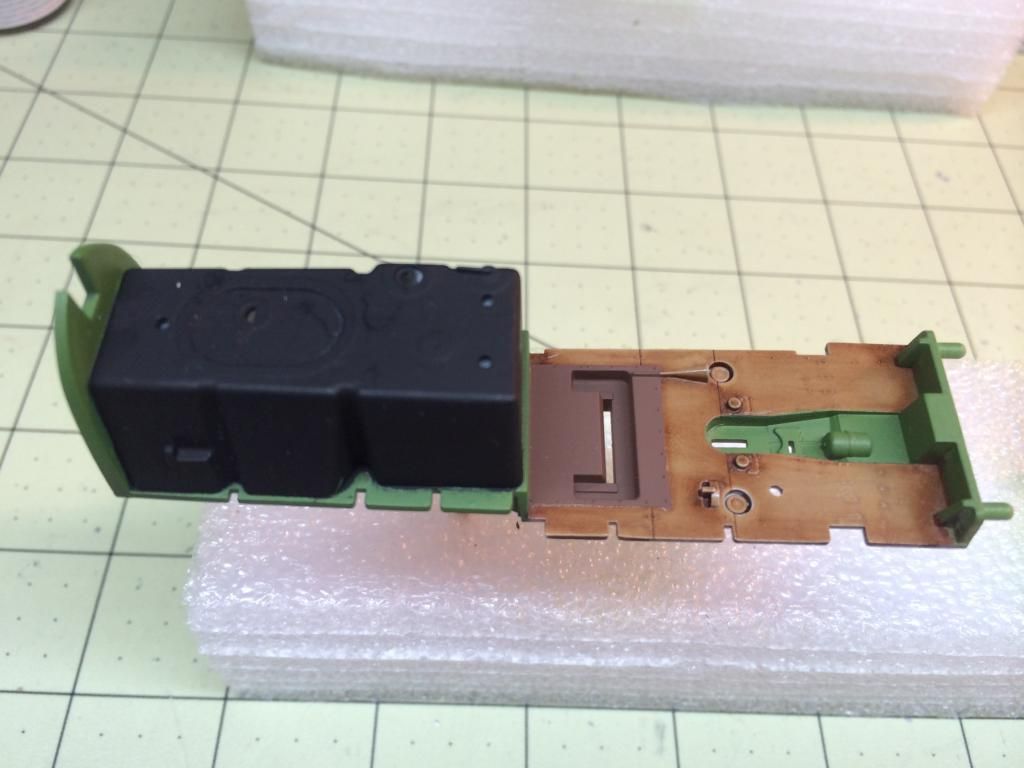
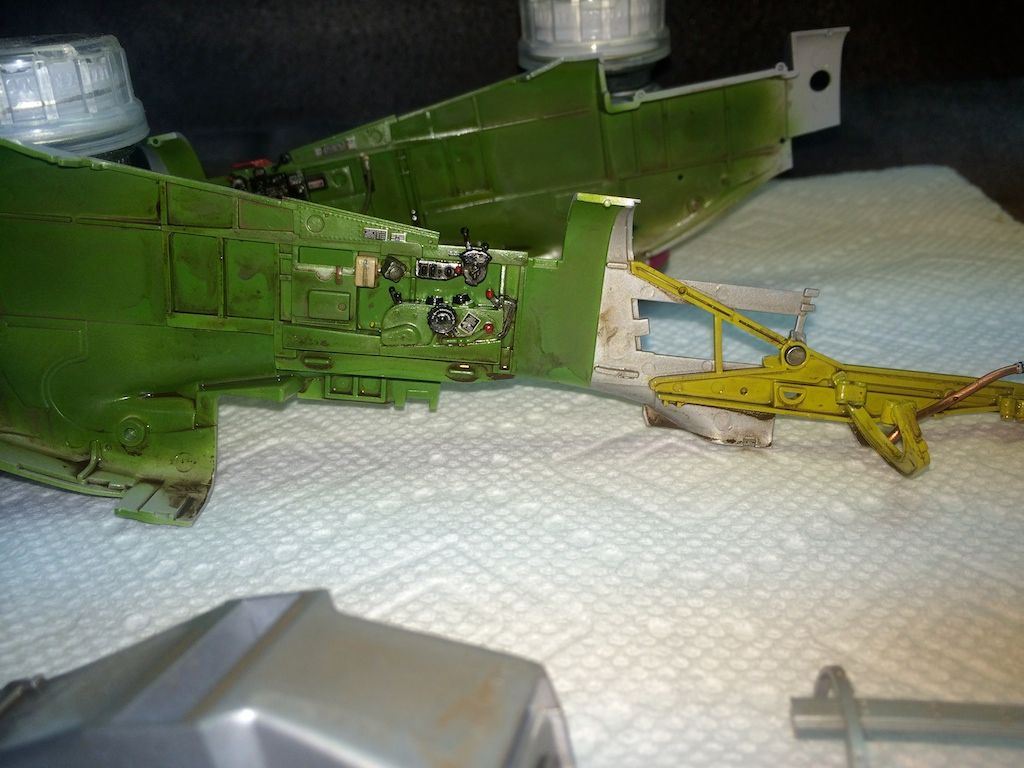
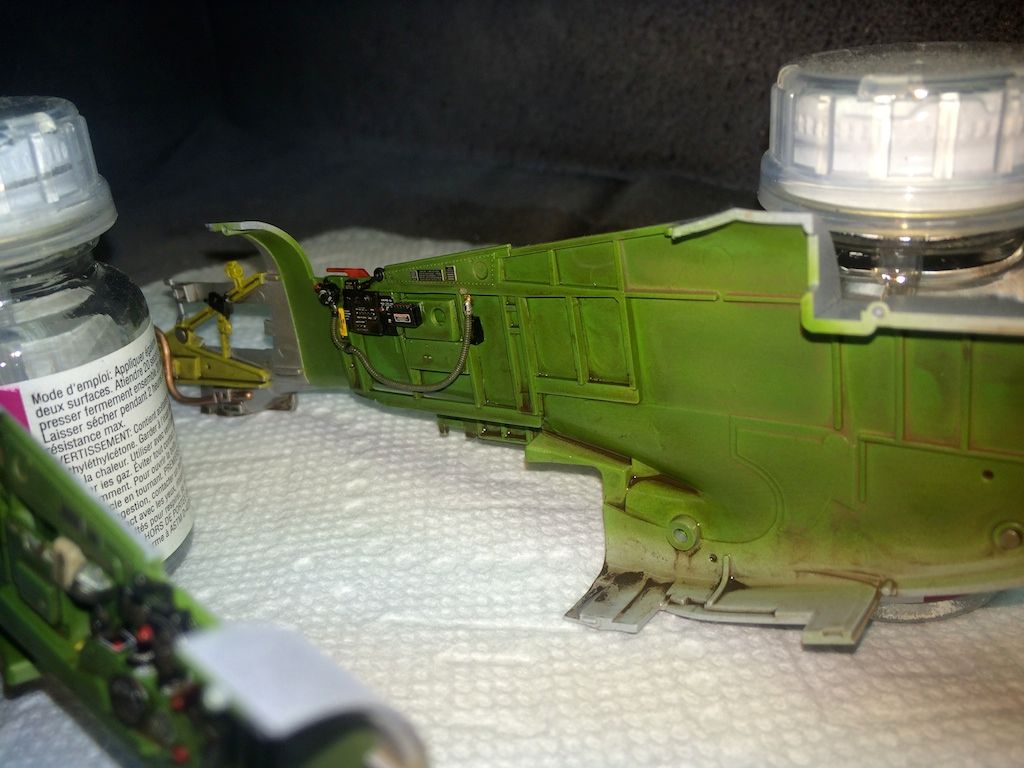
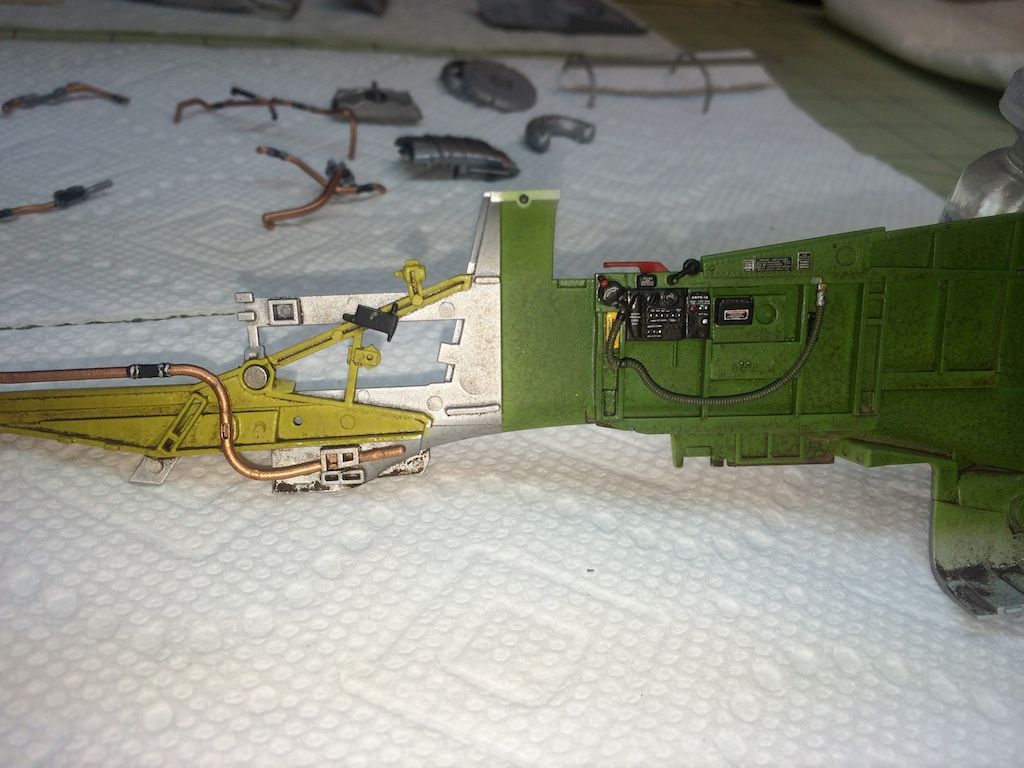
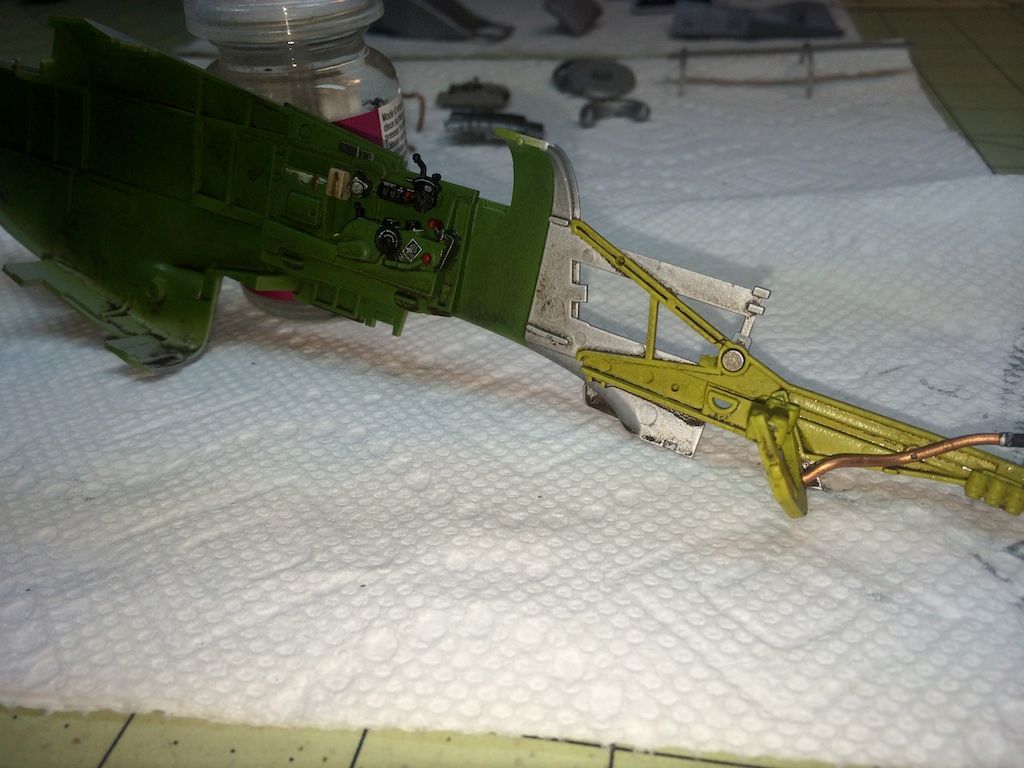
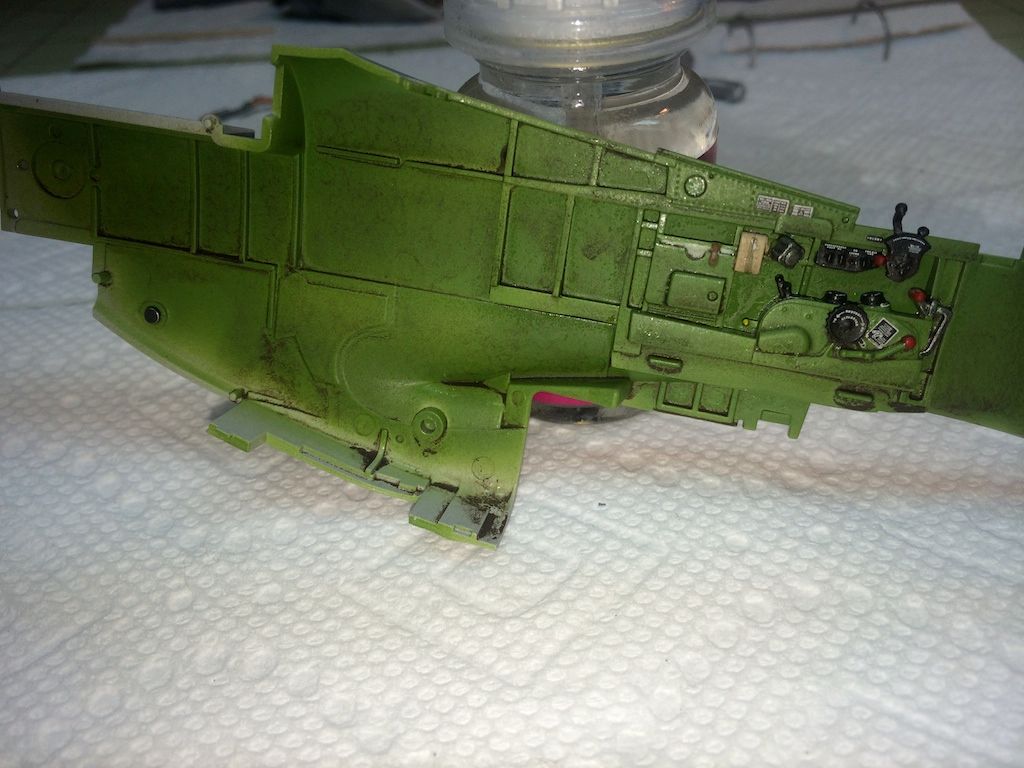
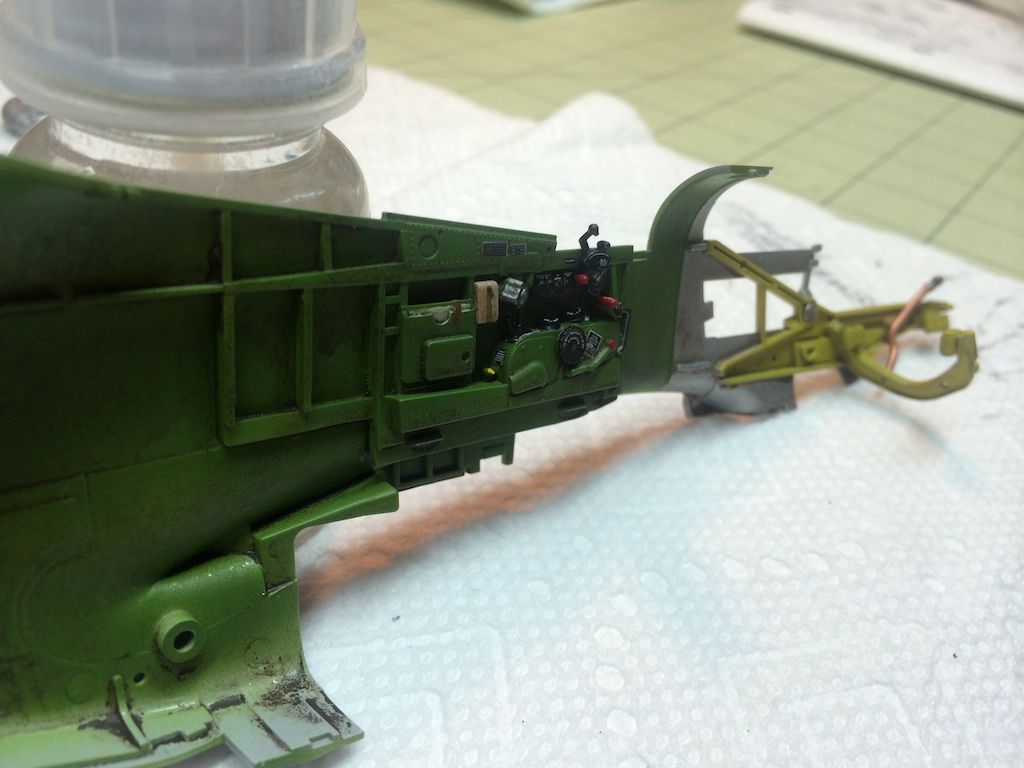
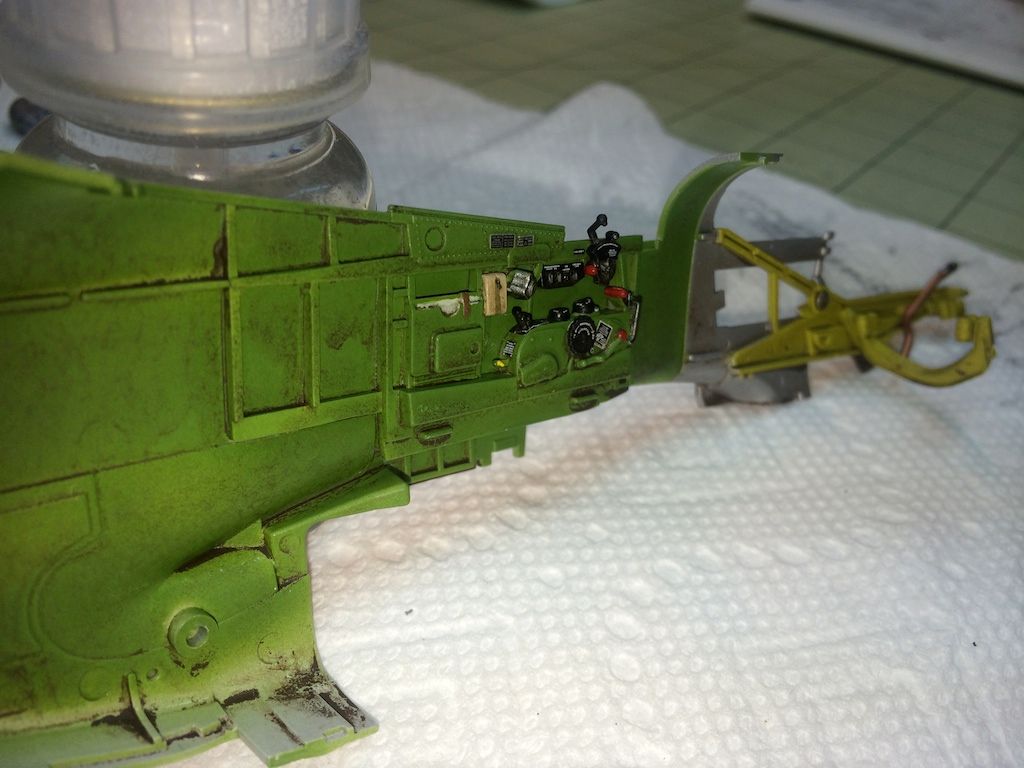
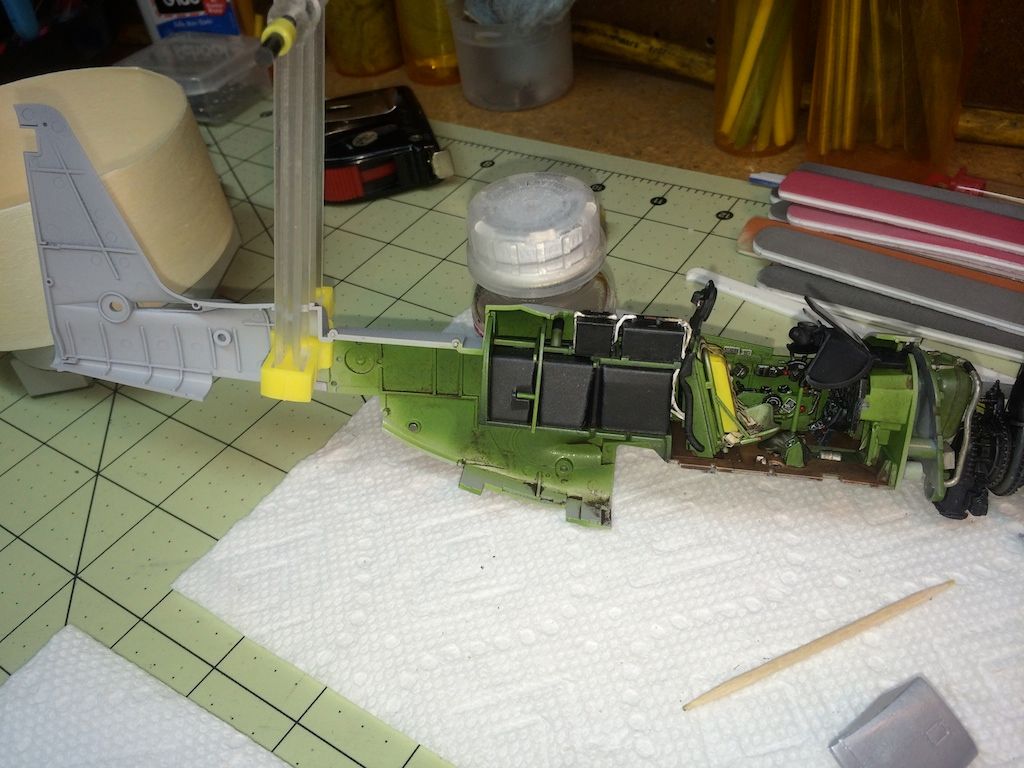
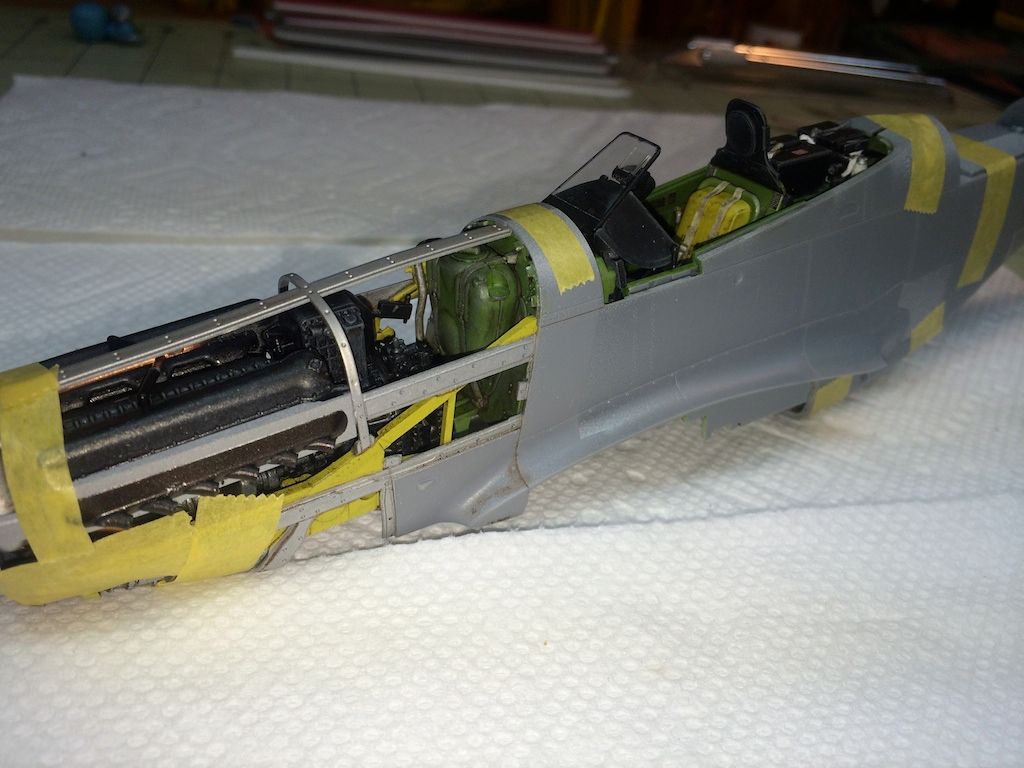
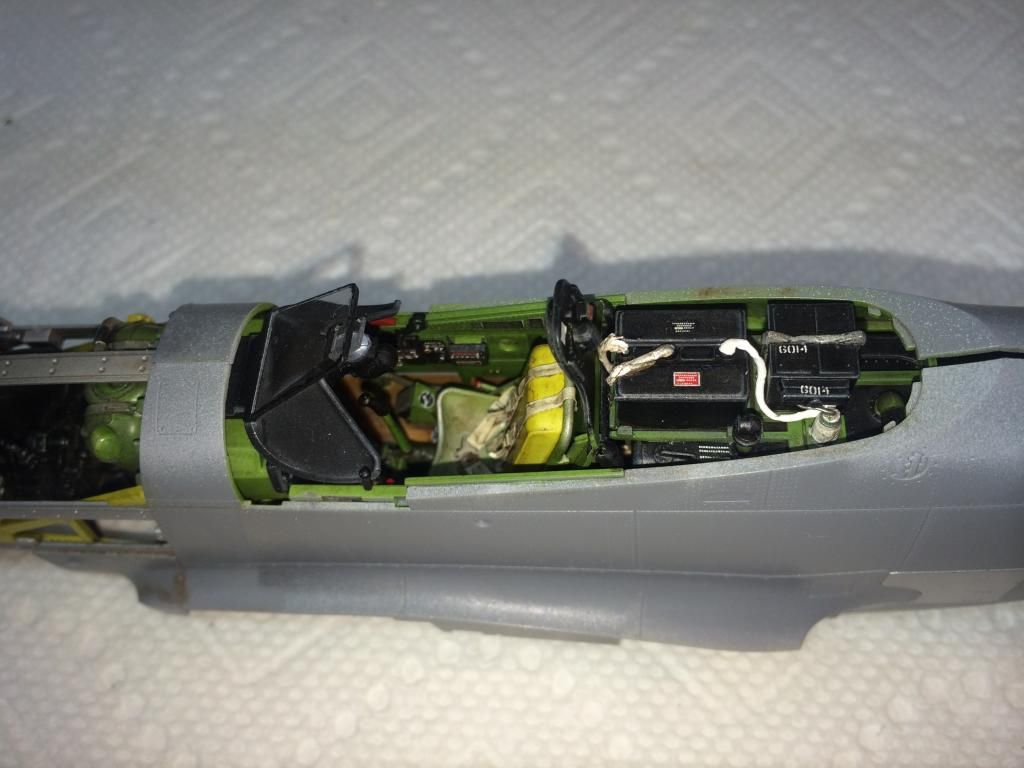
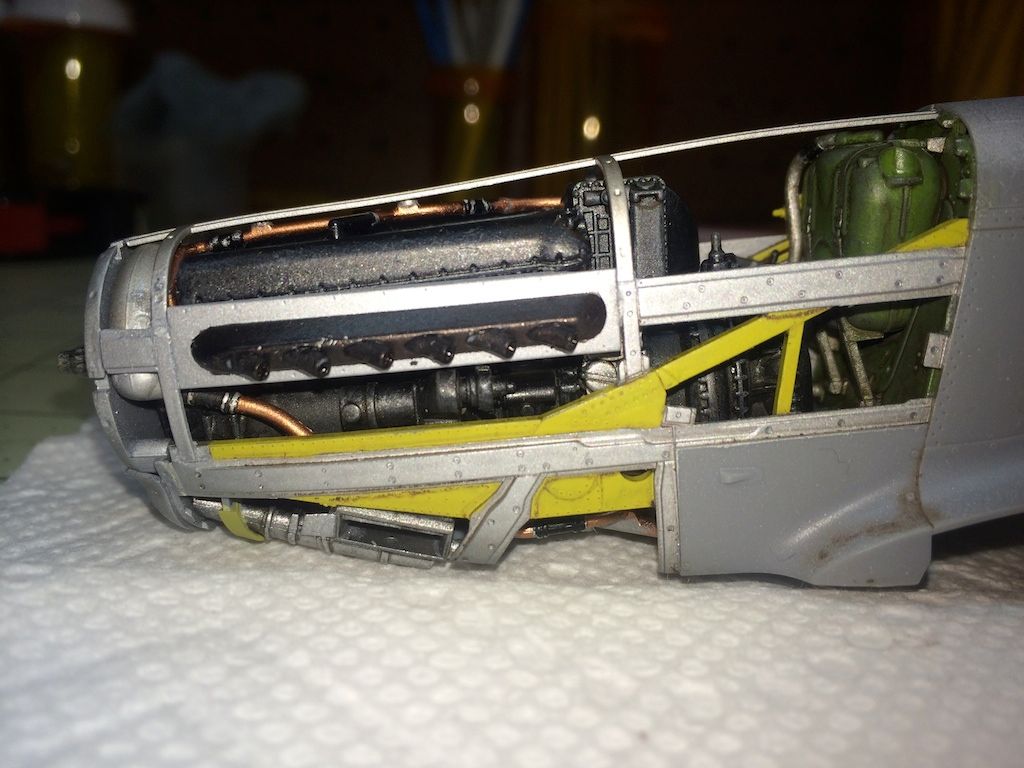
The separate cockpit walls were assembled and stencils applied. These were in turn glued to the fuselage halves, once all the chromate yellow and interior green painting was done with this as the final result...
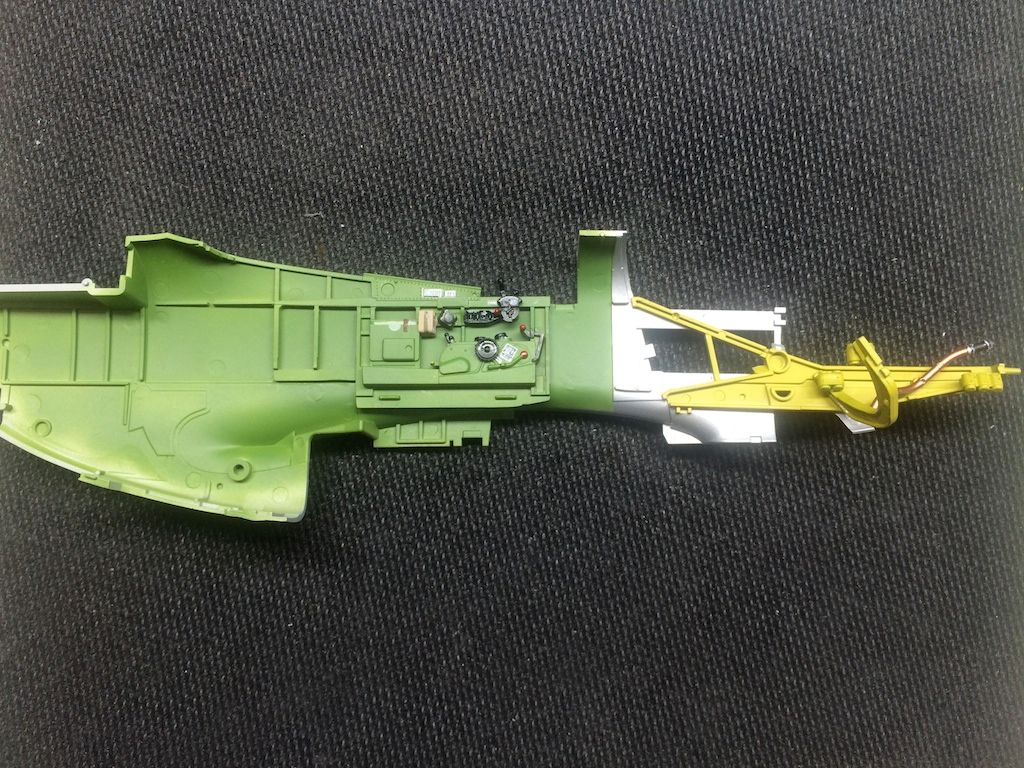
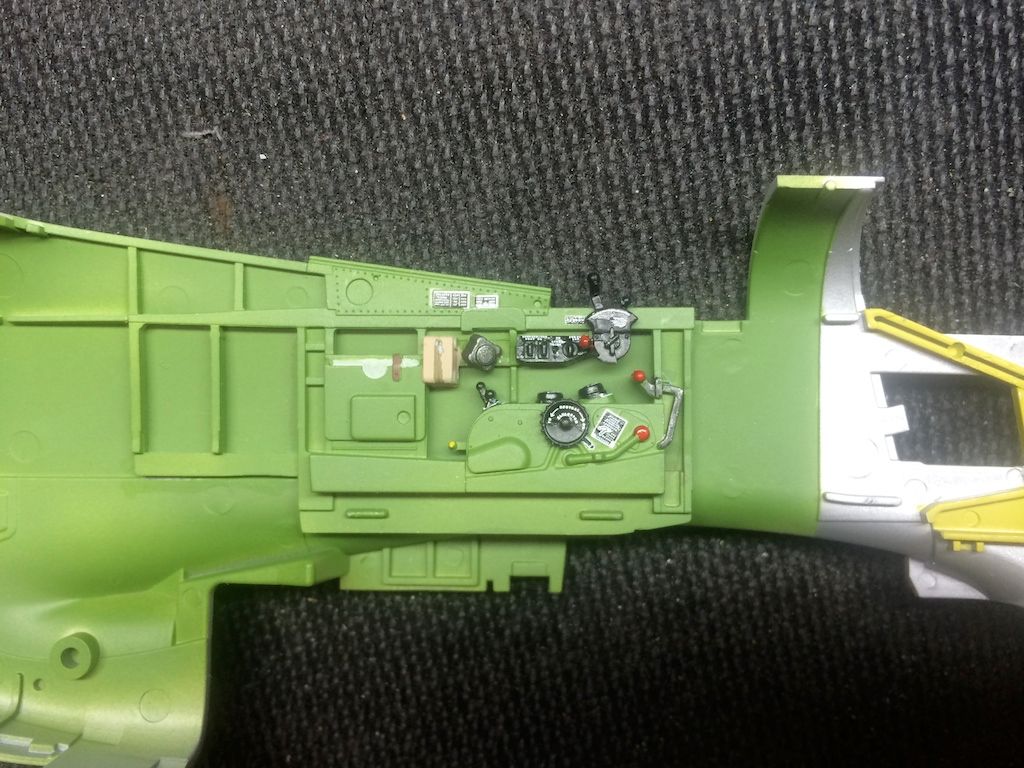
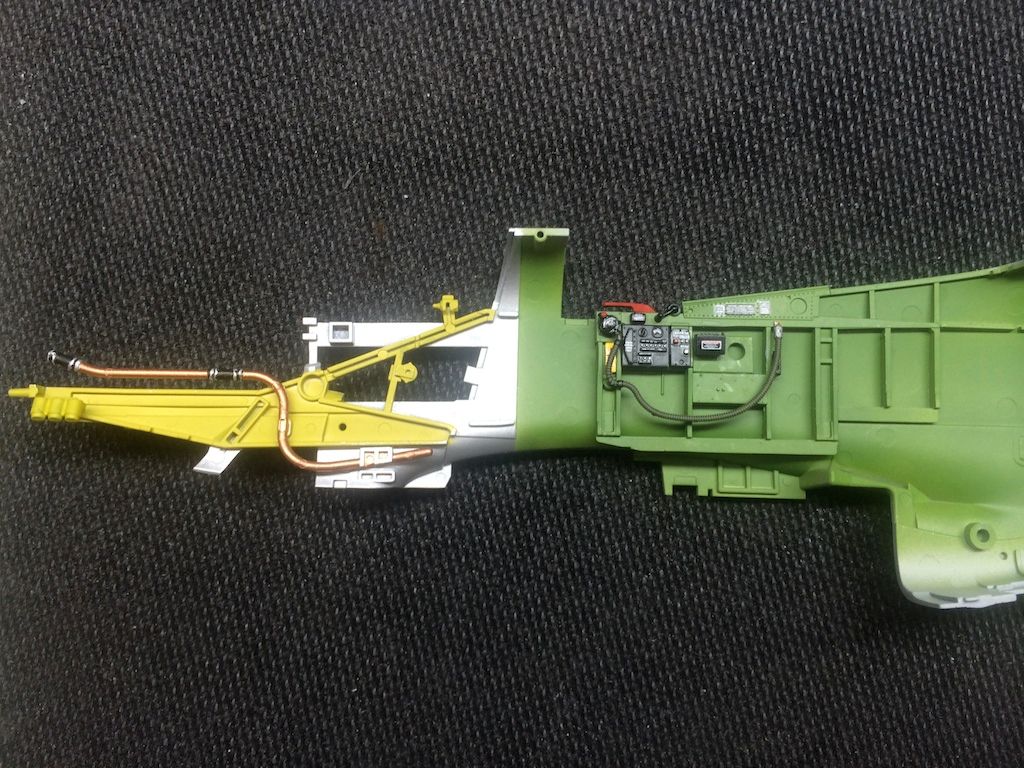
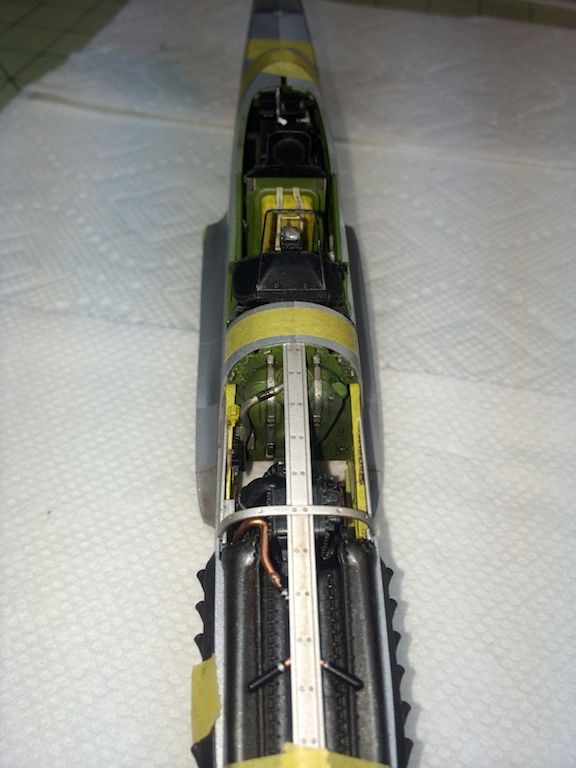
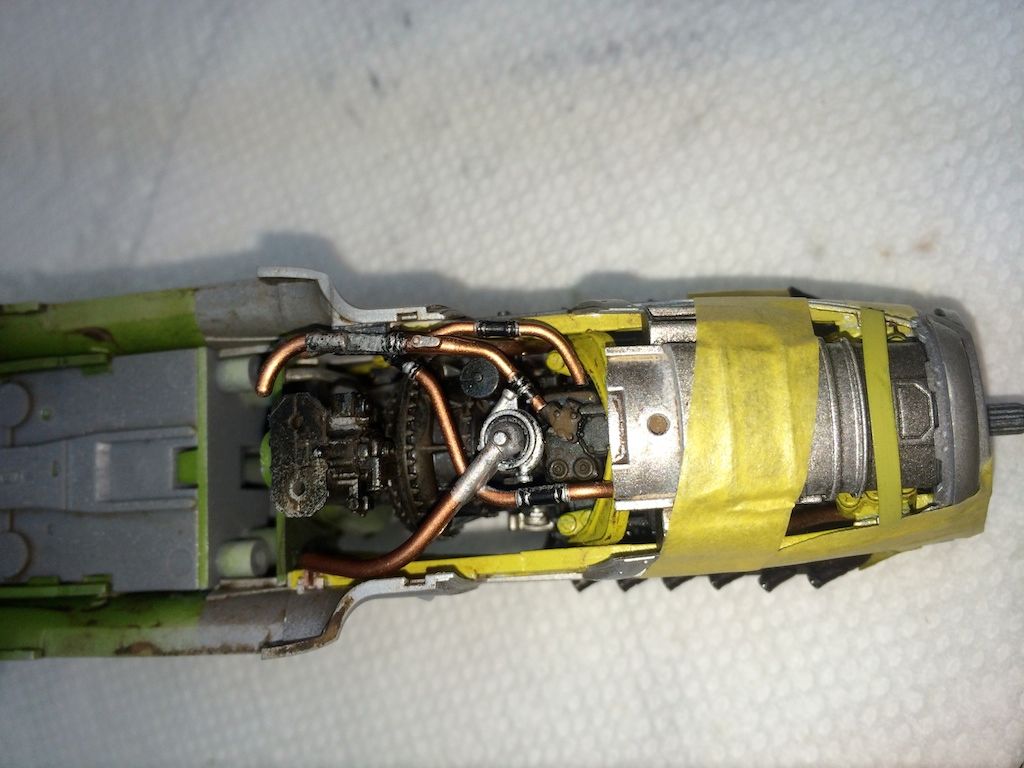
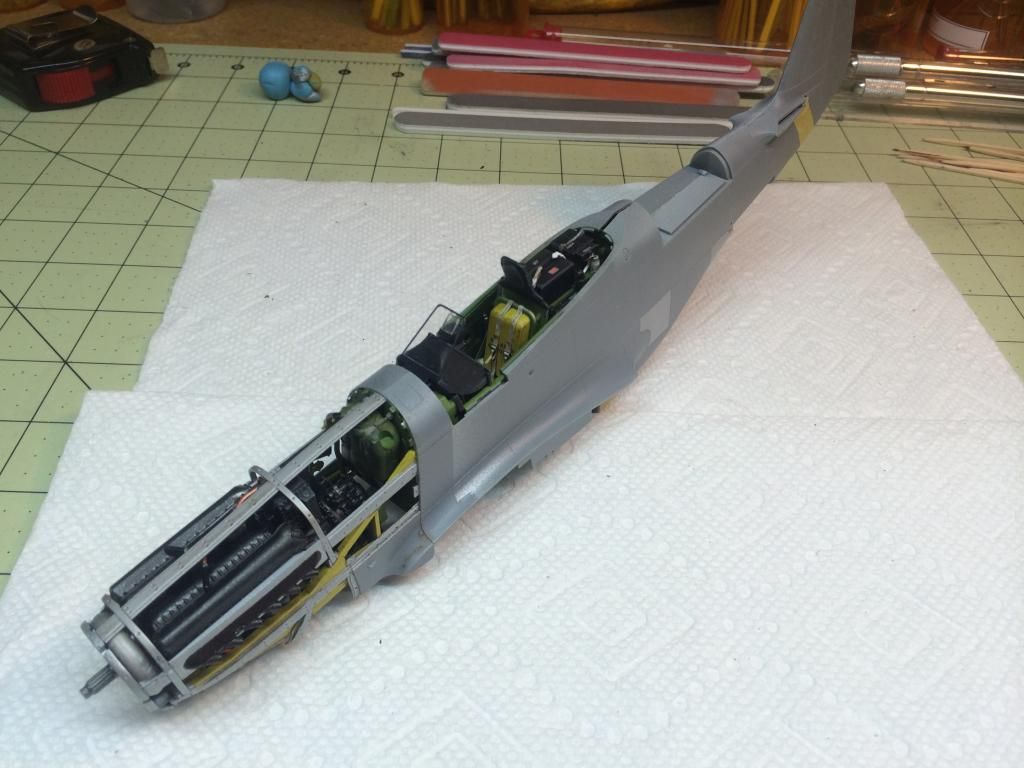
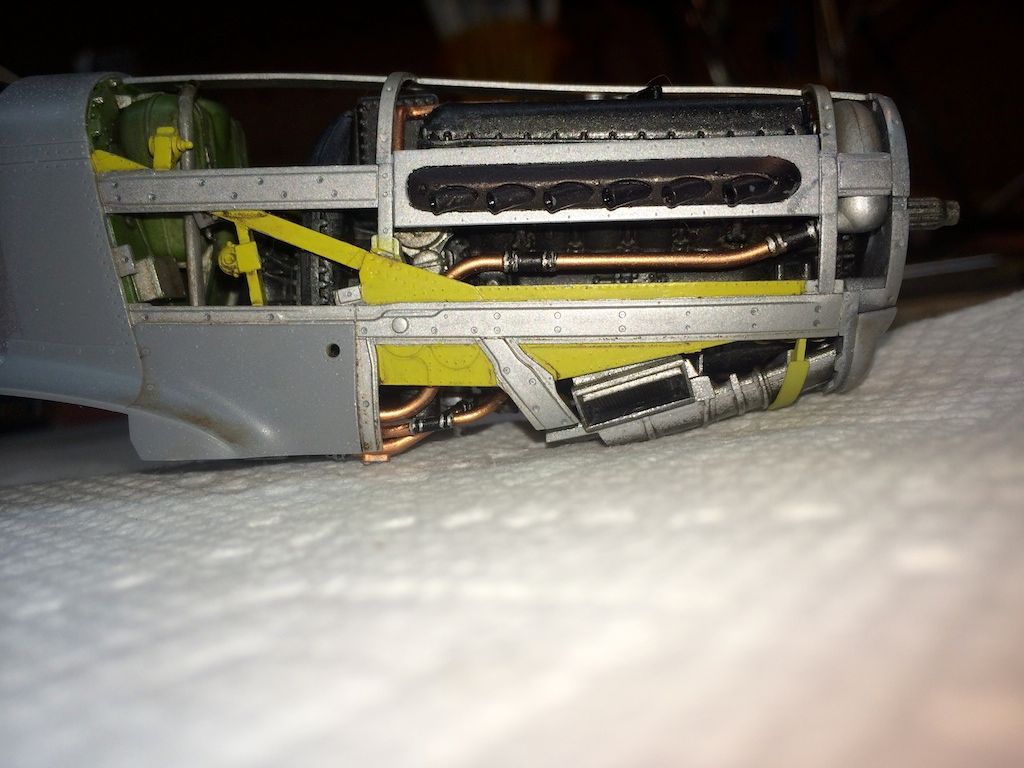
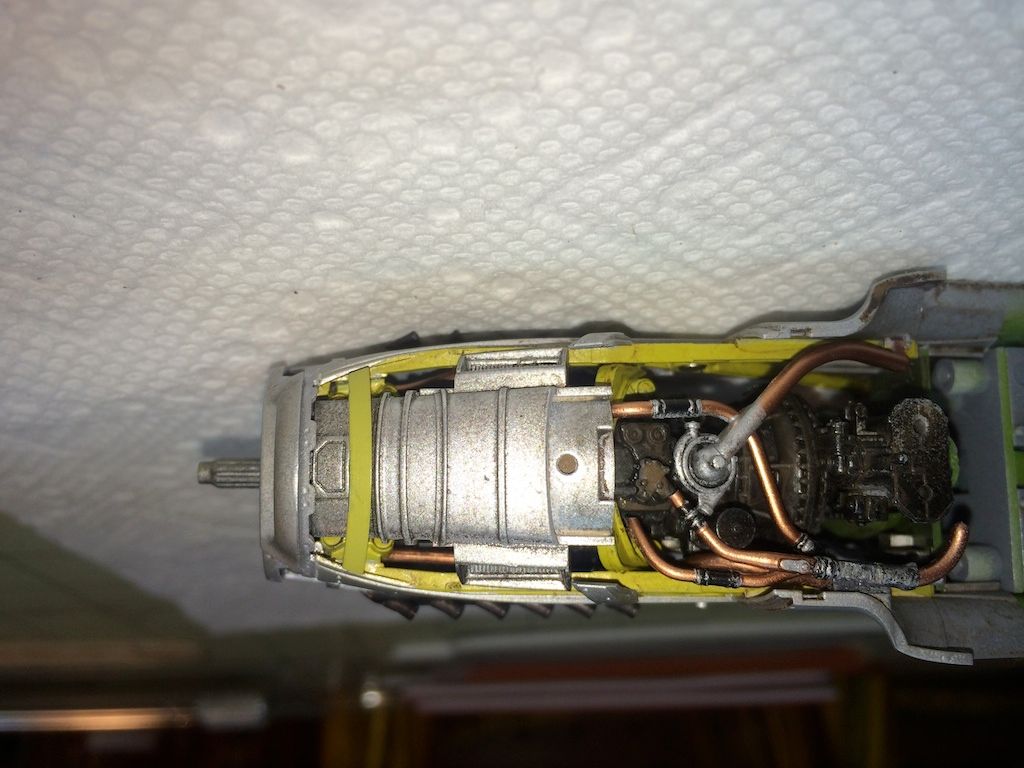
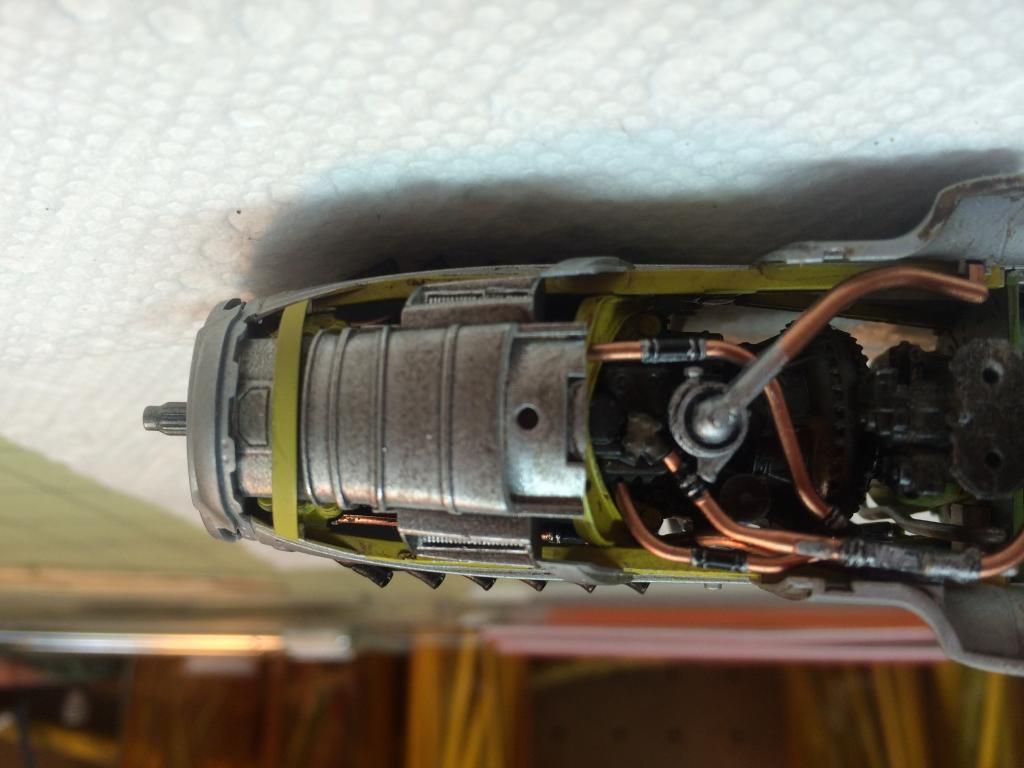
You'll notice my other modeling license taken - the engine piping was painted a metallic copper, highlighting the hose clamps and connection points. I thought this would "pop" the engine compartment upon display.
The next bit was the radiator and oil cooler kit. Besides using multimedia parts, I learned that handling the very strong magnets with tweezers, well, magnetizes them, making them useless for future PE work, except to pick up the metal pieces.

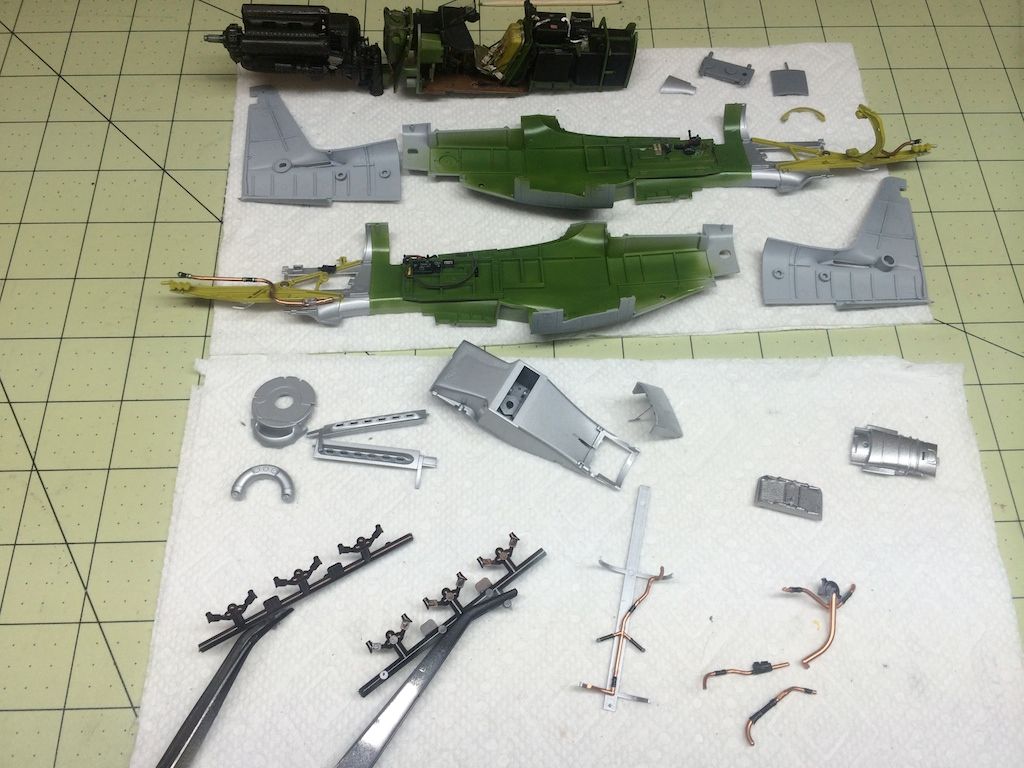
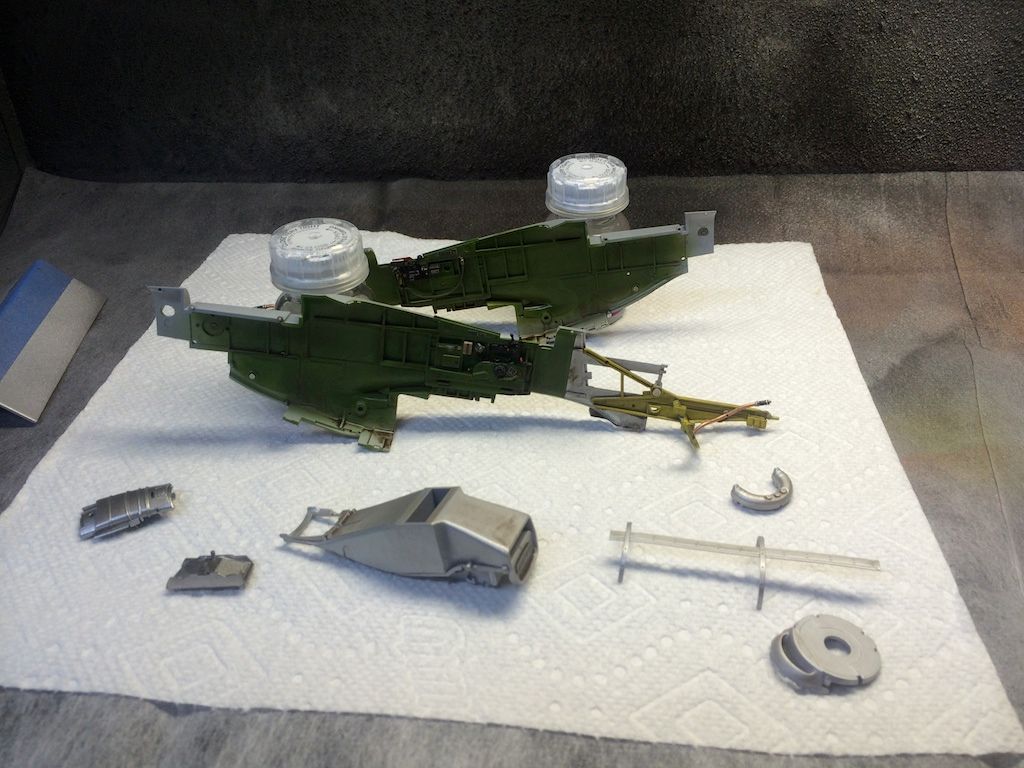
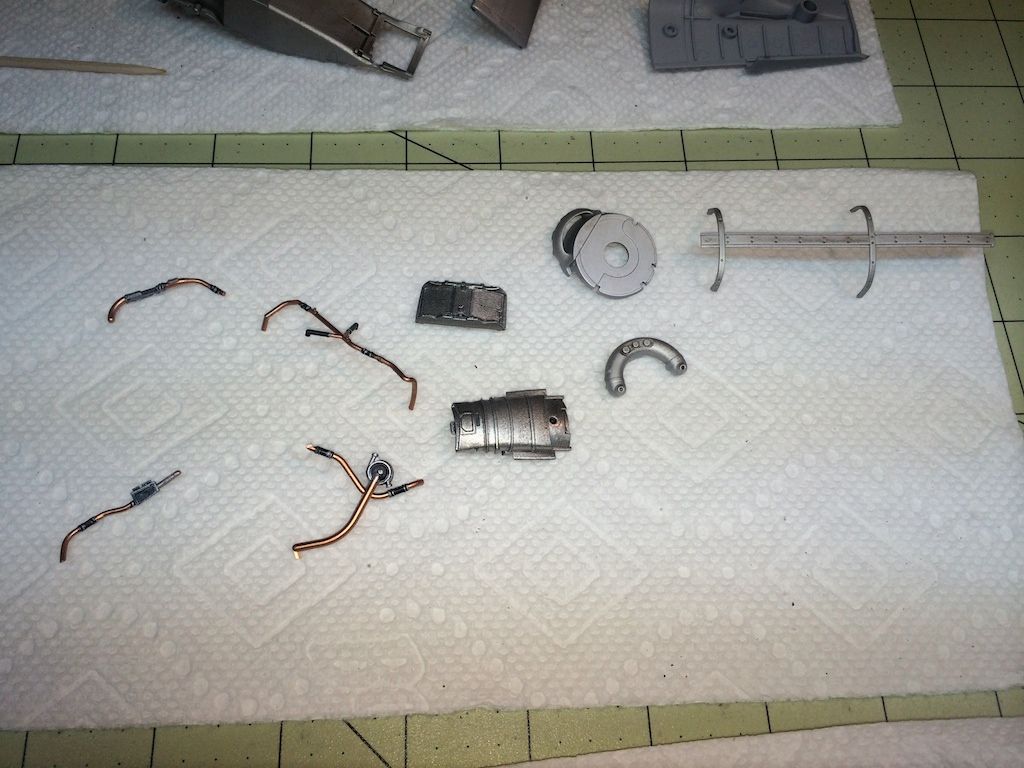
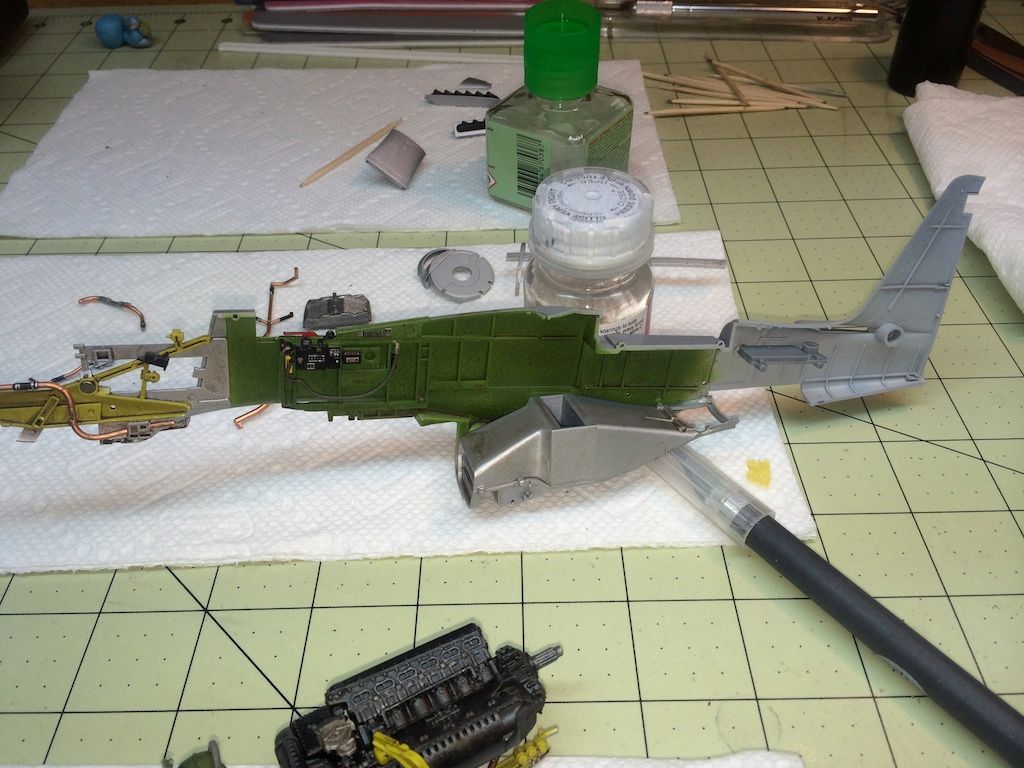
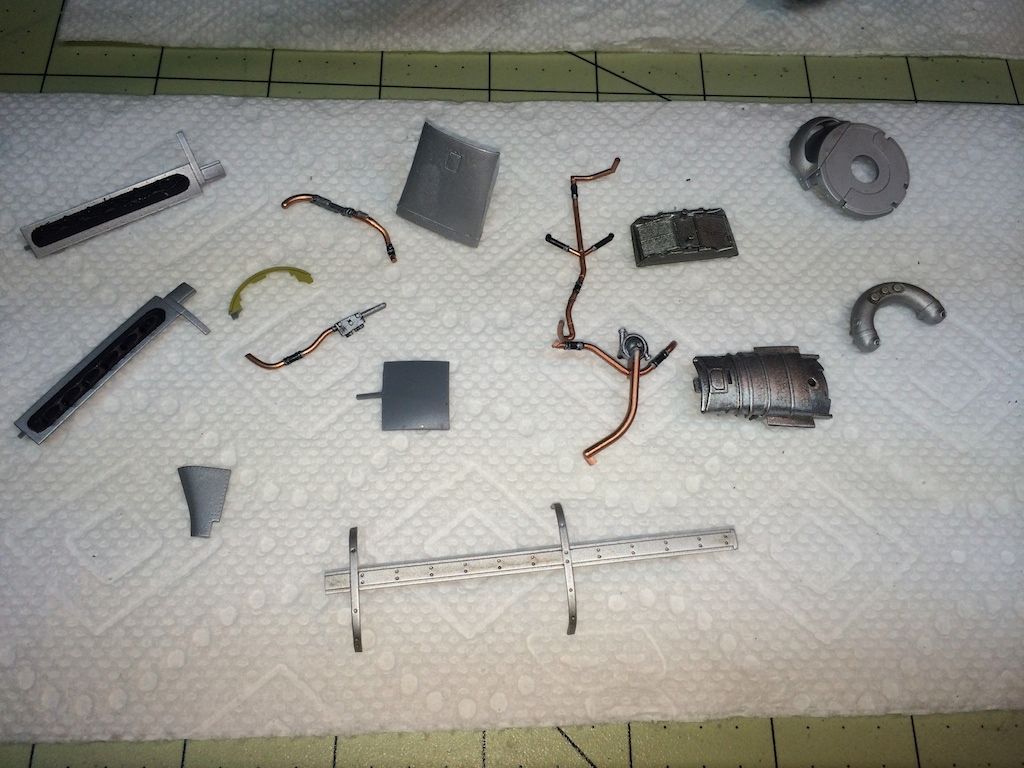
Then there were all the other bits and pieces to get together BEFORE assembling the fuselage...
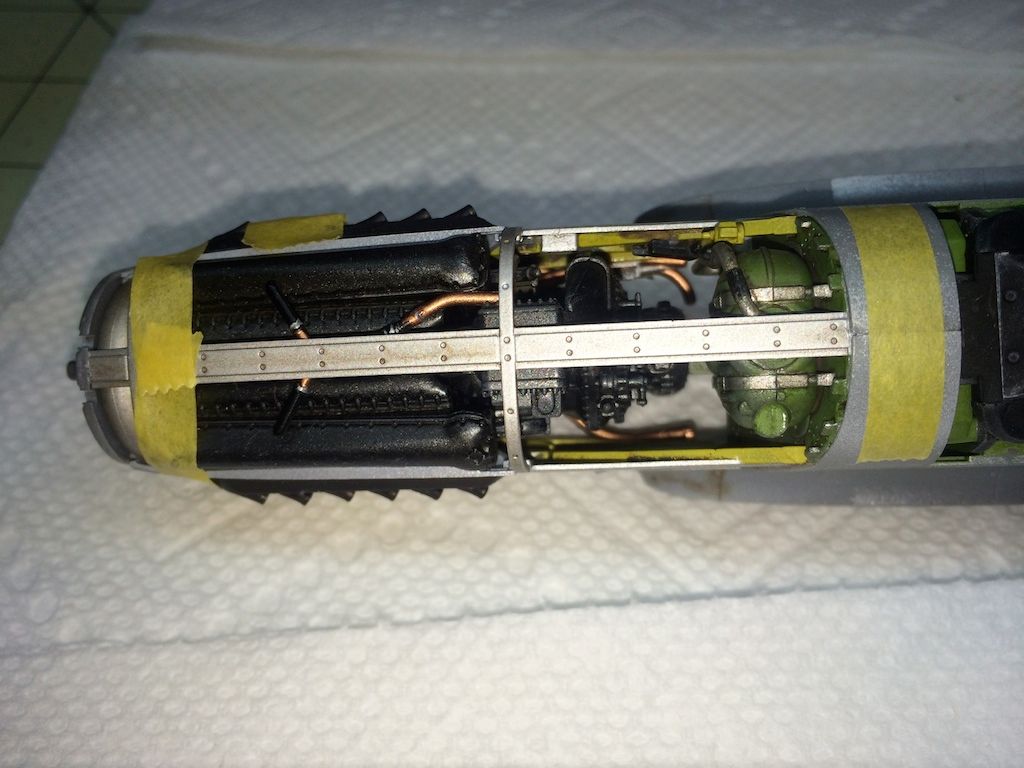
Shrouded exhaust pipes...
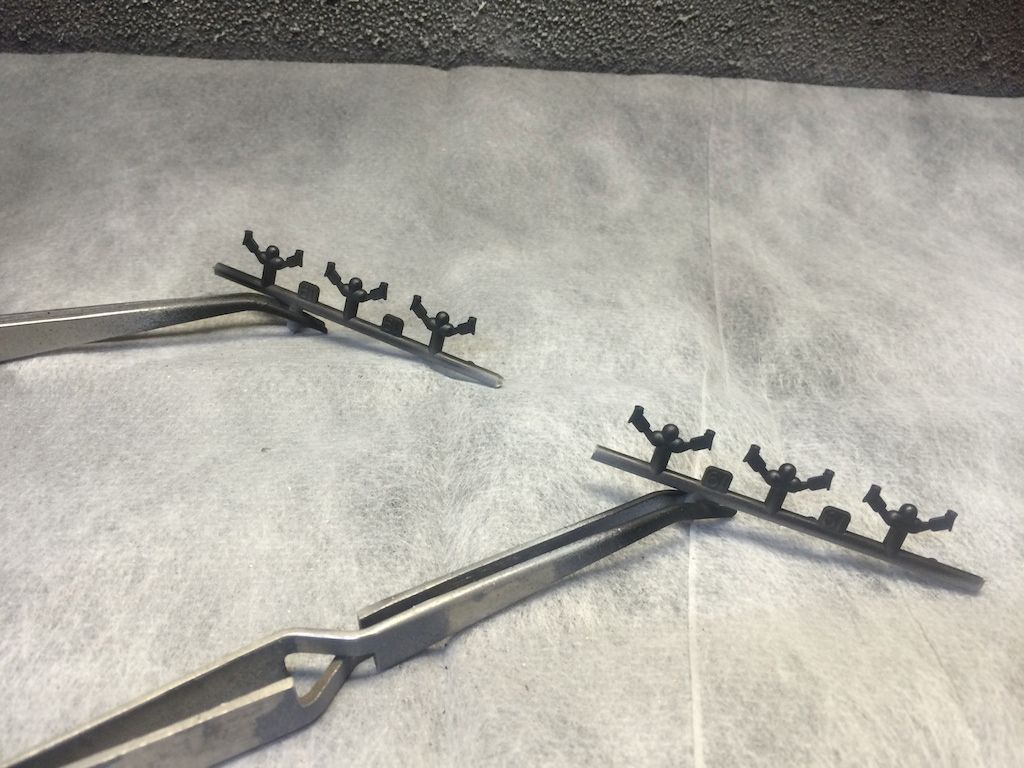

These were done with Alclad II lacquers - gloss black base and burnt iron.
Collection of bits and pieces to assemble keeps growing...
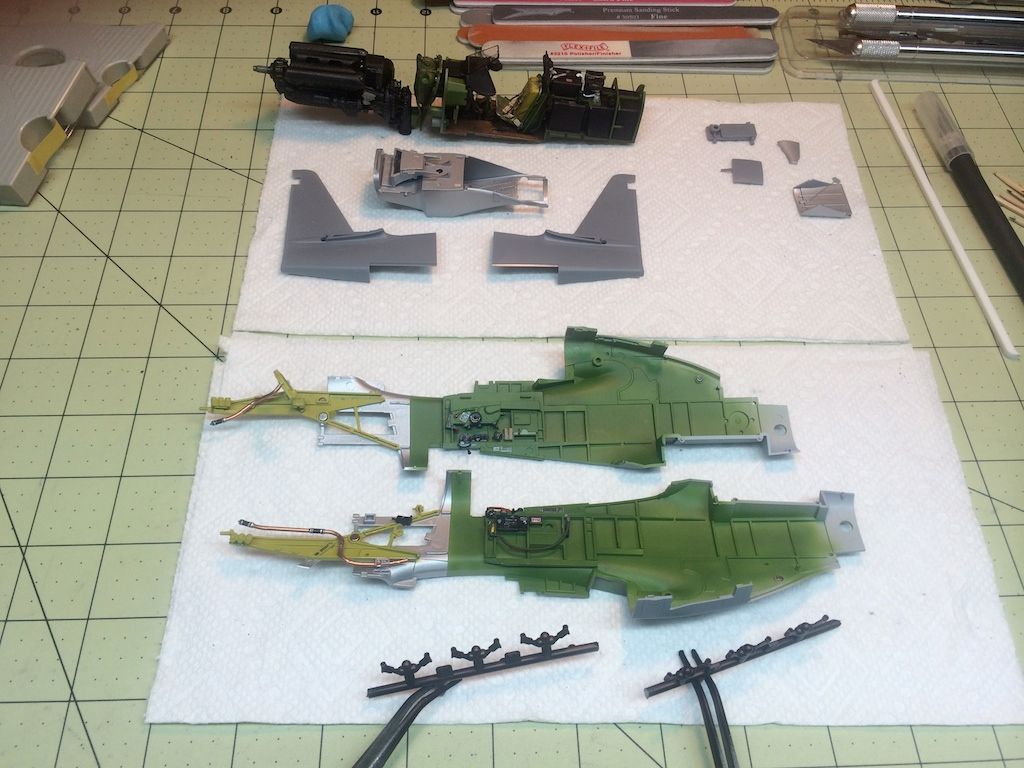
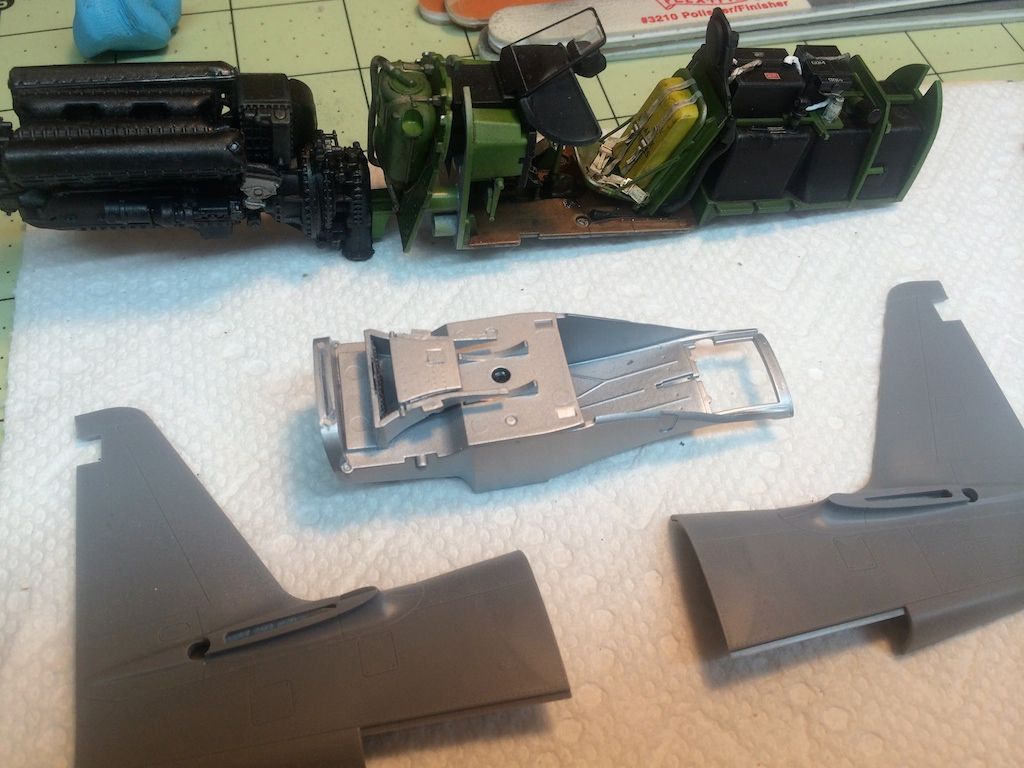
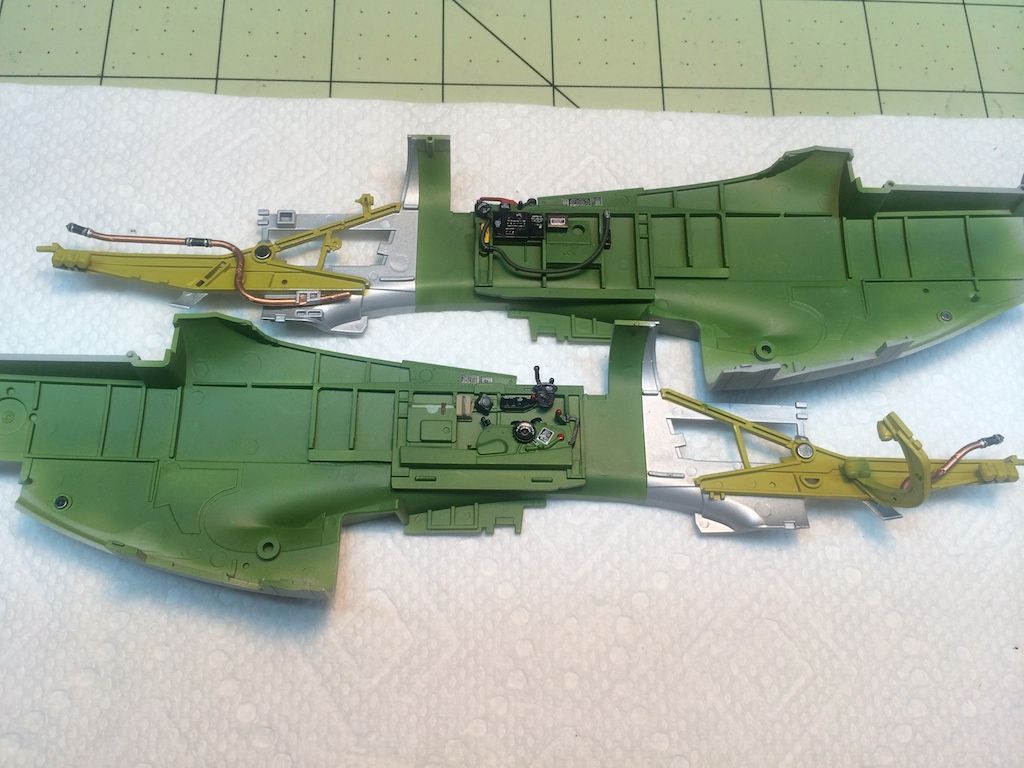
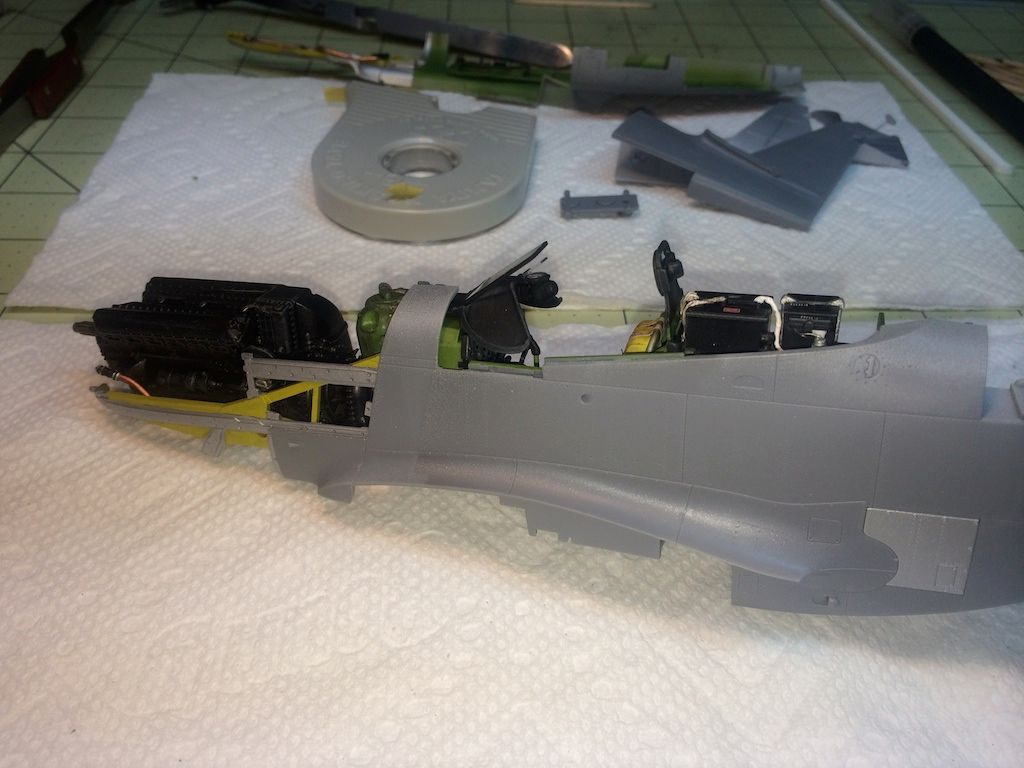
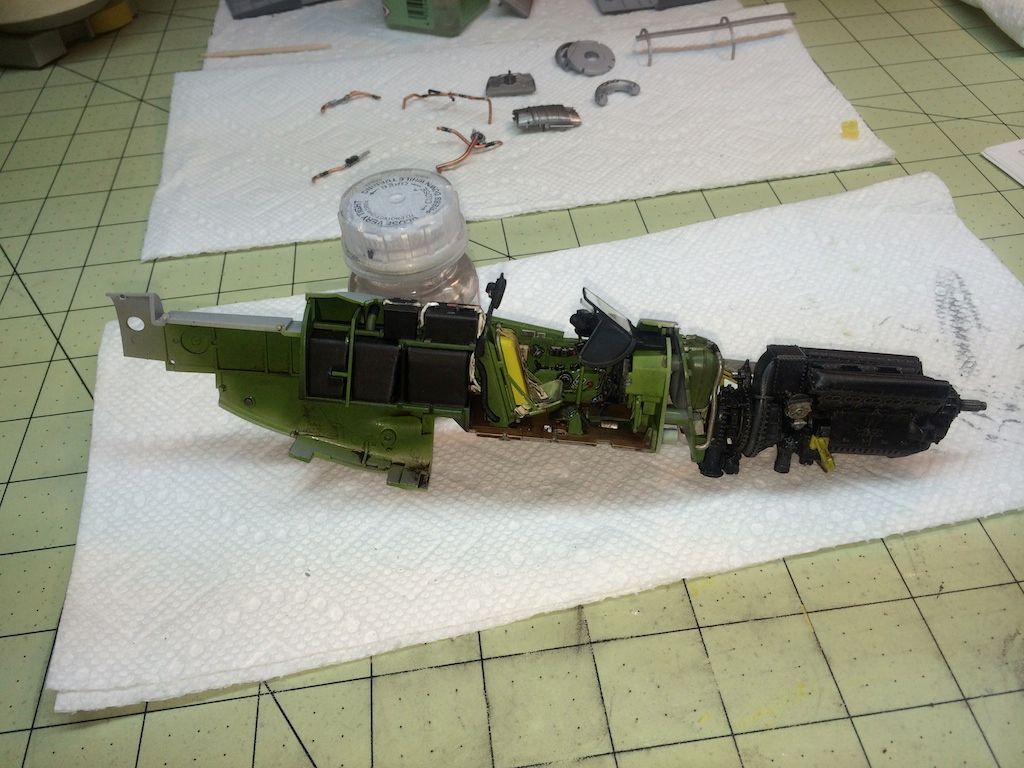
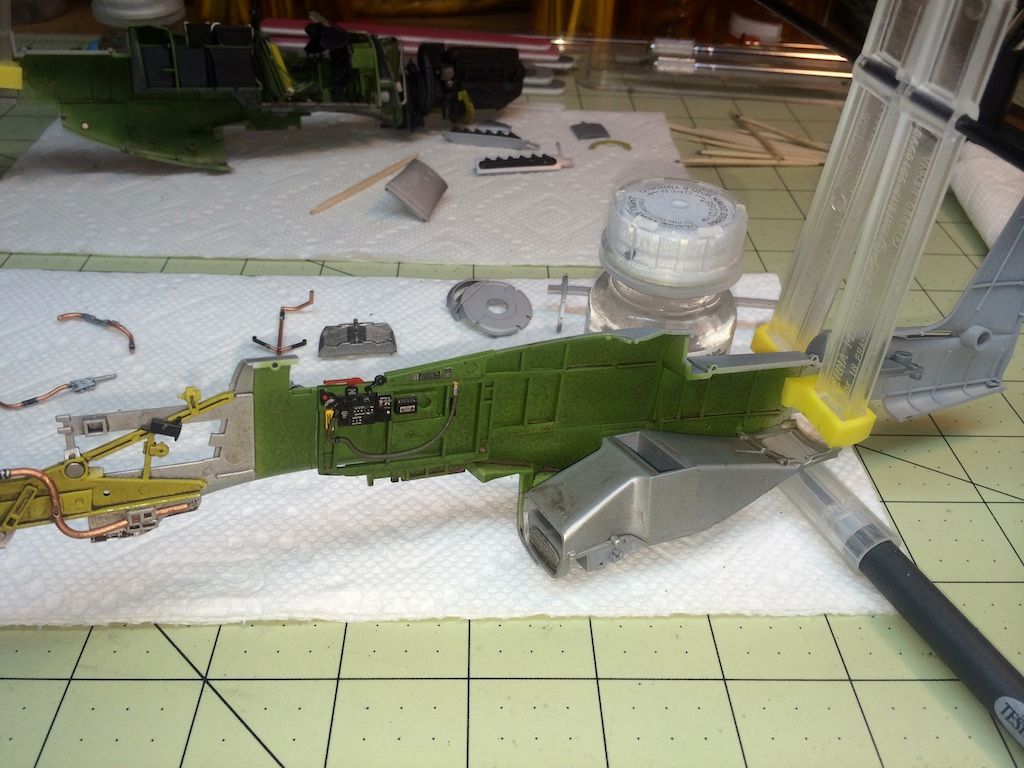
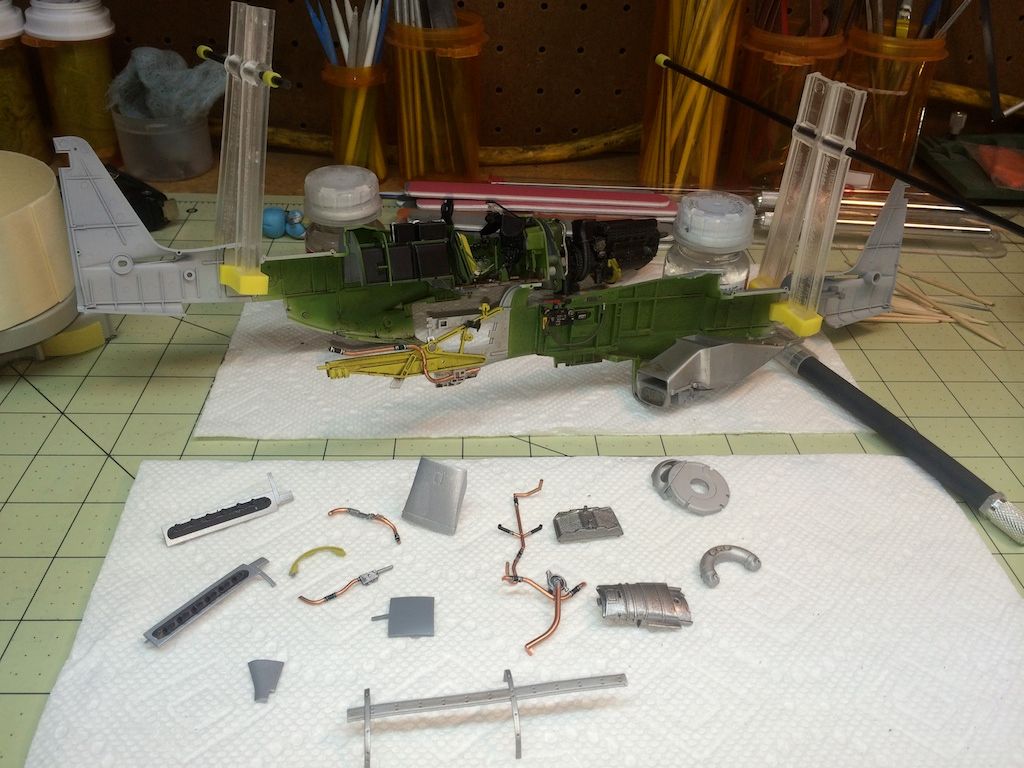
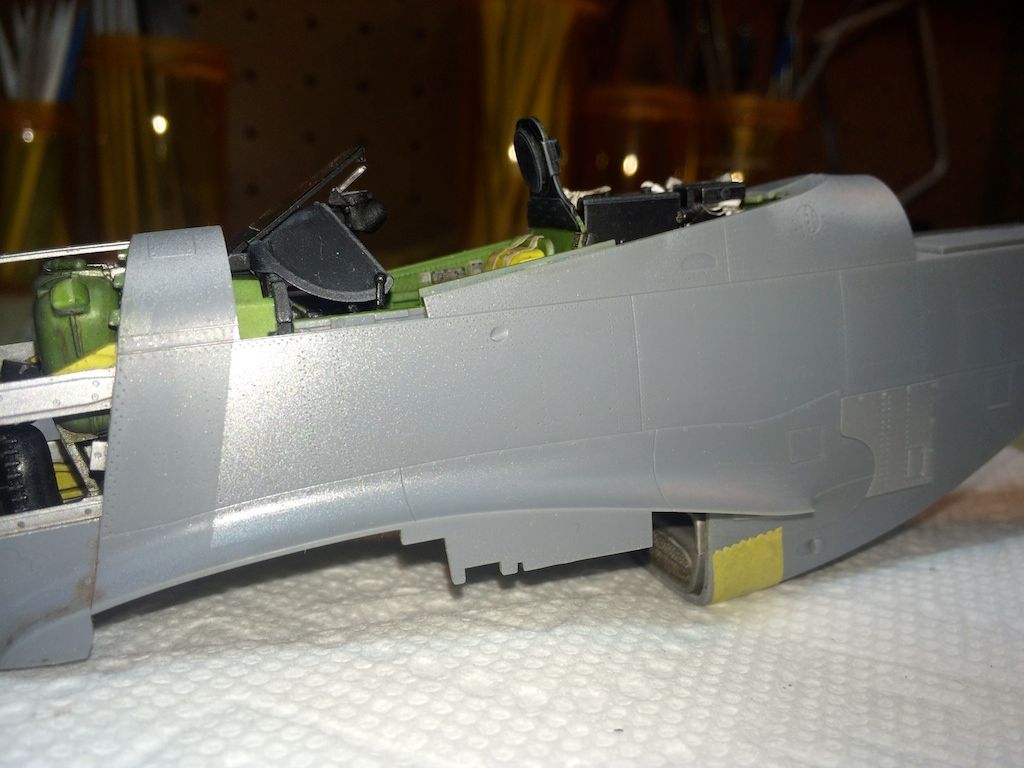
Some test fitting...
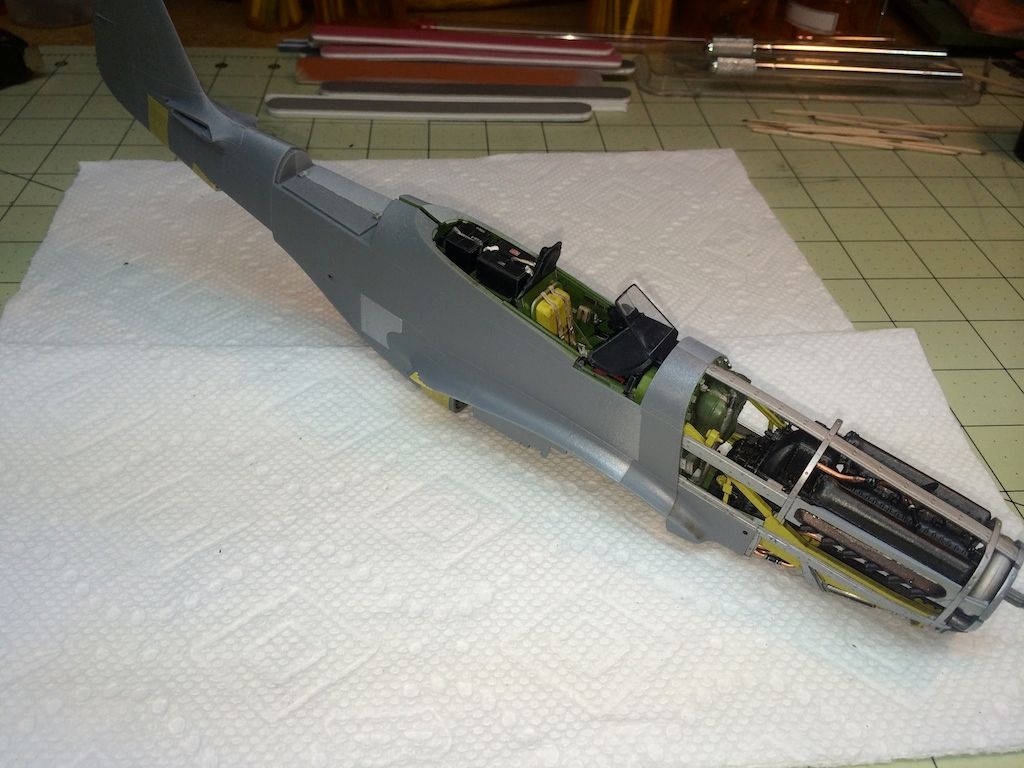
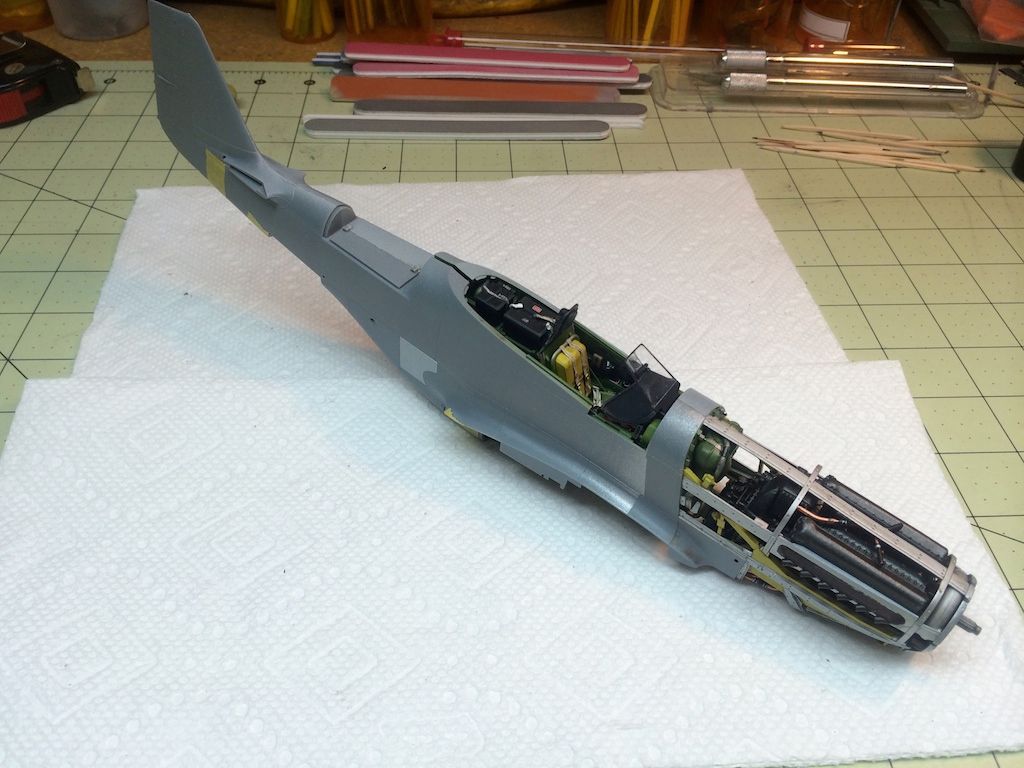
The fit between fuselage halves is amazing.

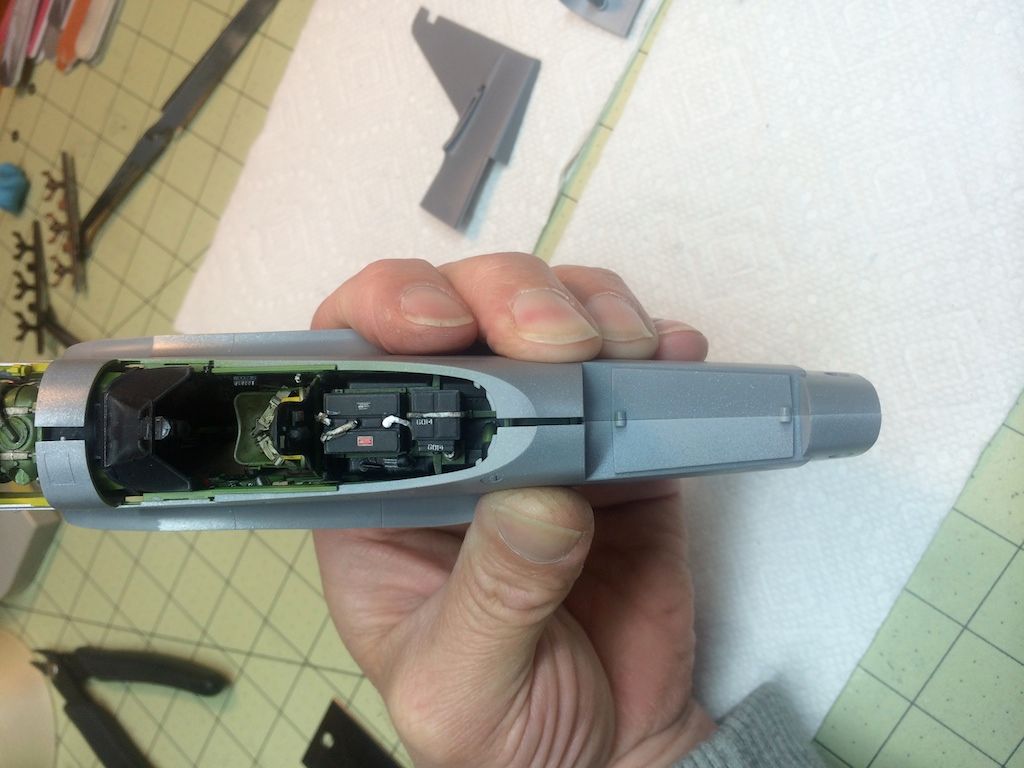
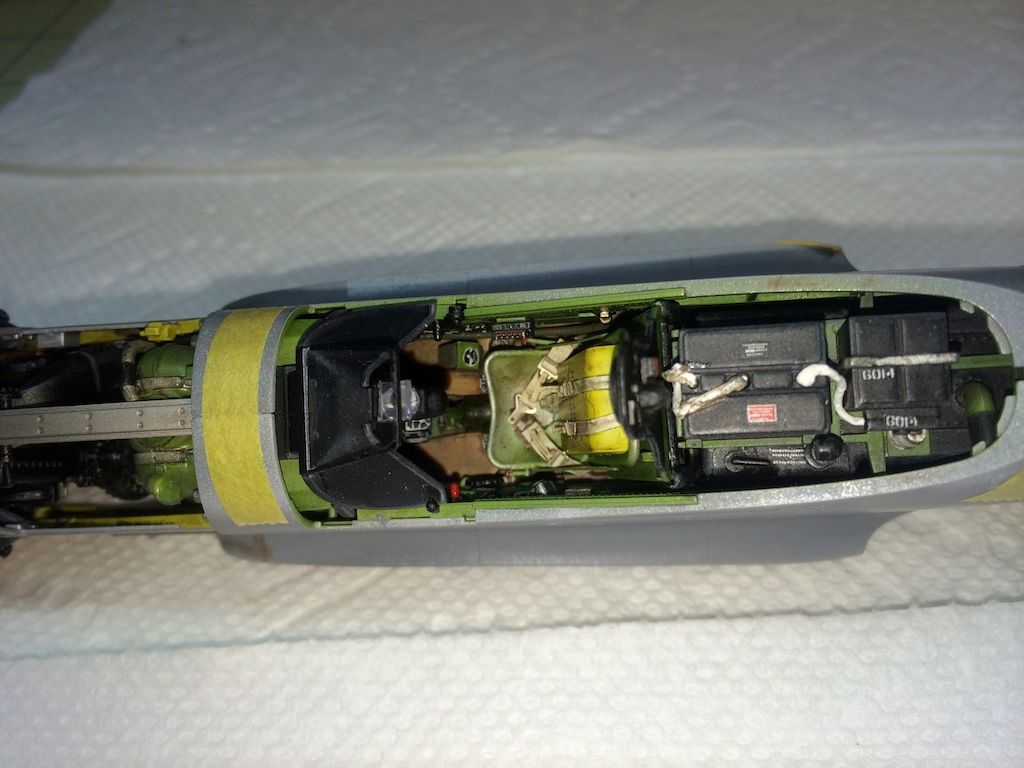
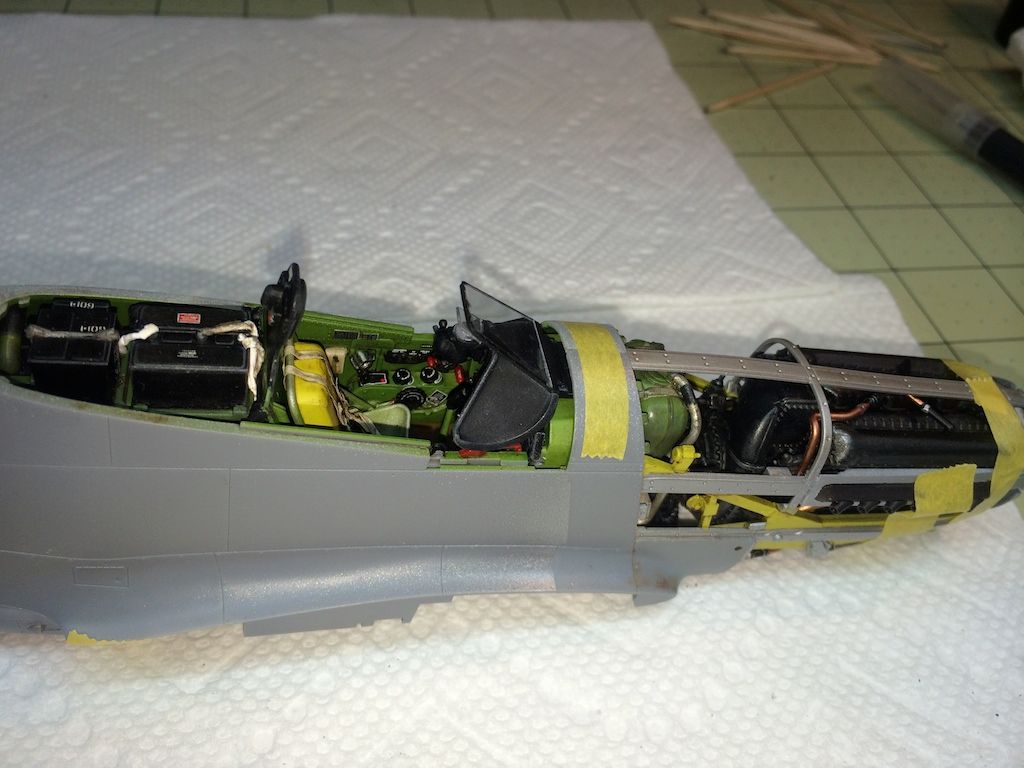
Cockpit looks pretty good in there too.
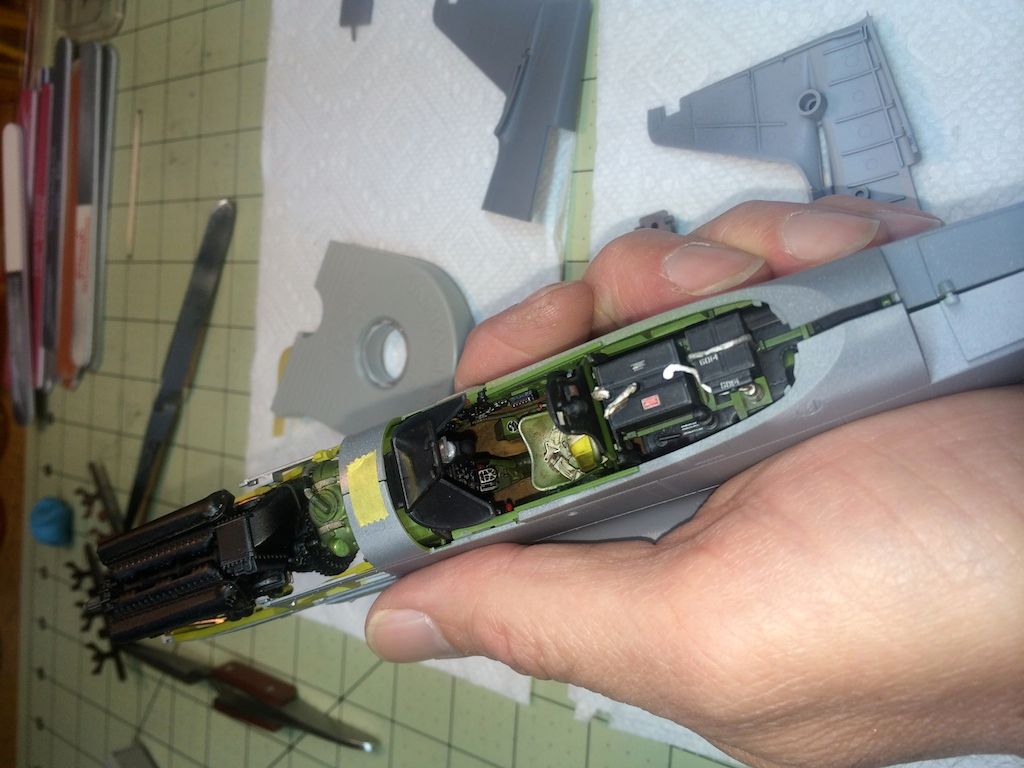
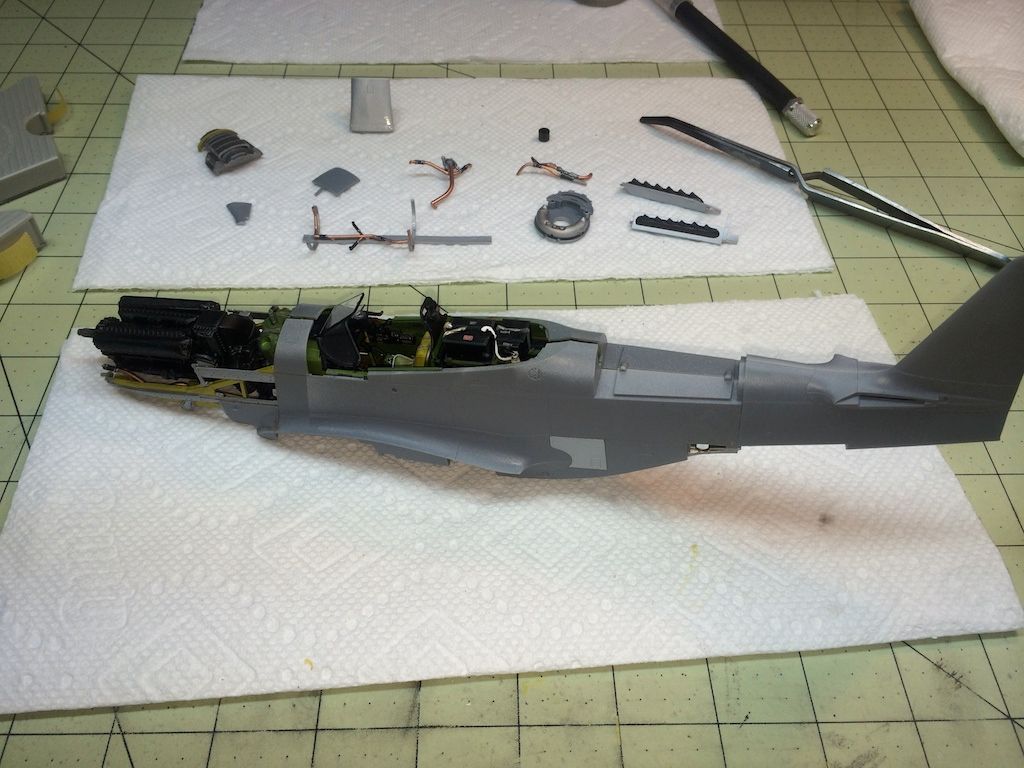
Taking it apart, the fuselage and radiator assemblies wanted to stay together...who am I to argue? Makes an interesting pseudo cut-away.
Neat looking...
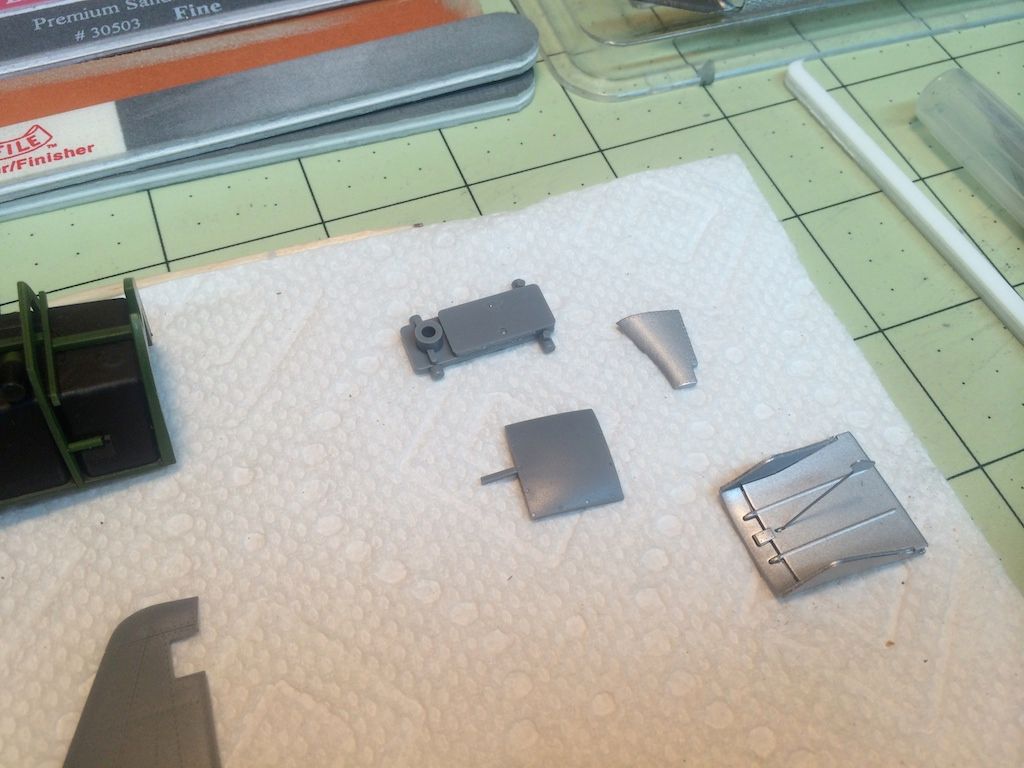
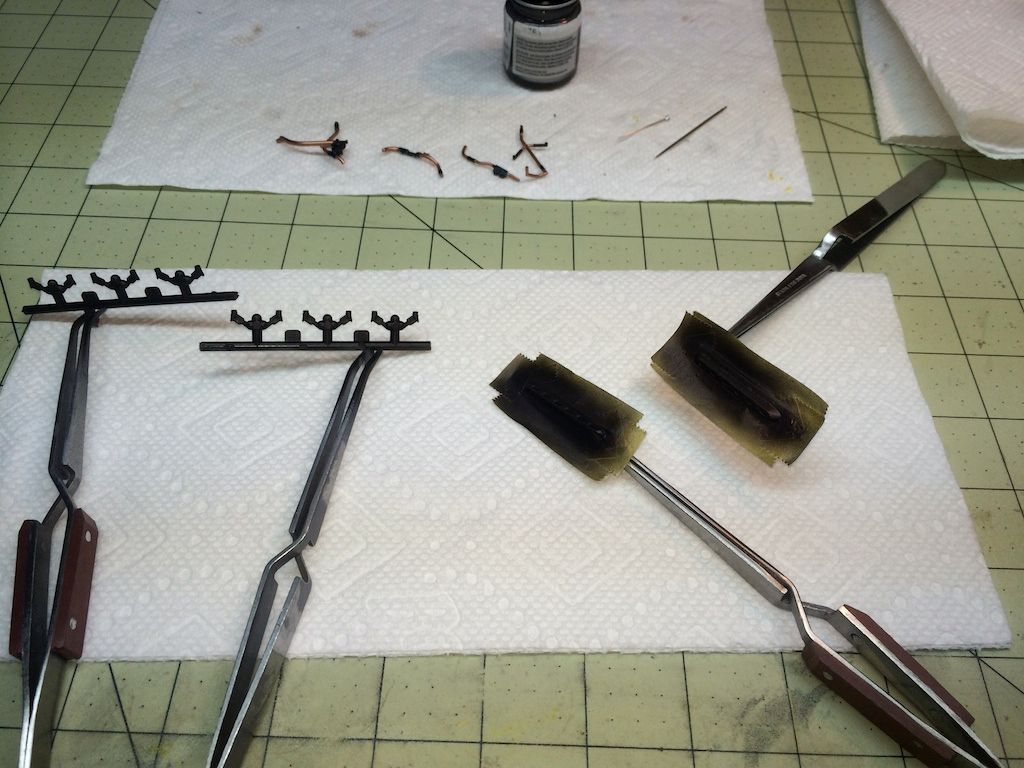
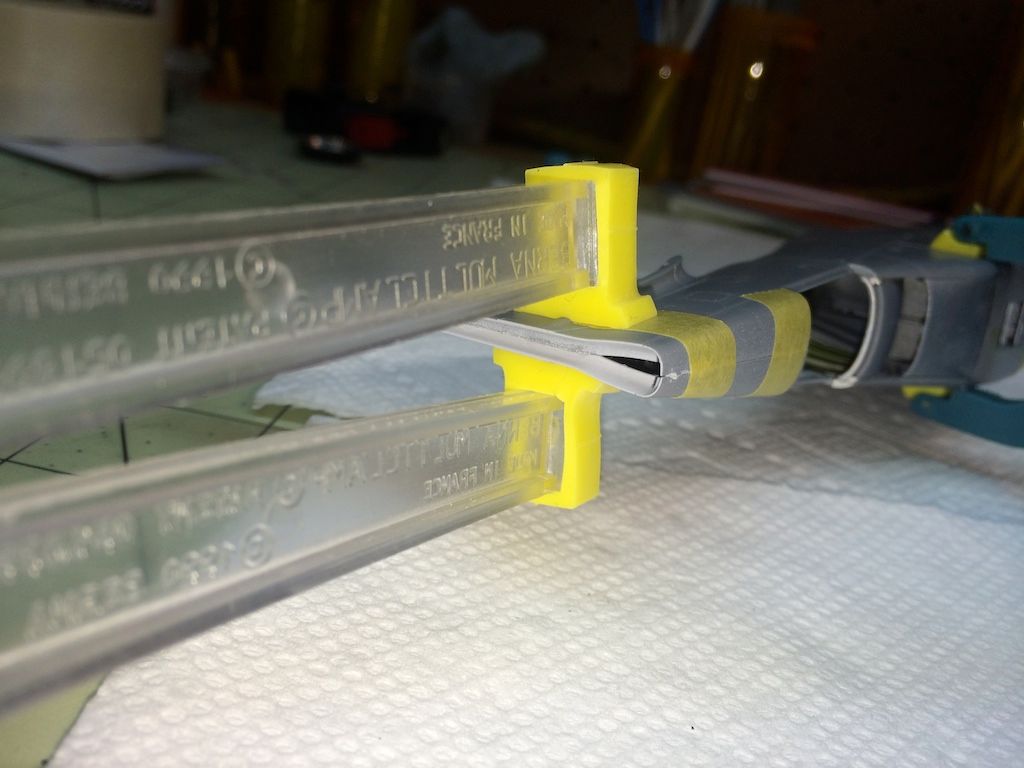
Had to actually pull out more tools - to bend PE properly for the carburetor air inlets.
All the parts to this carb air kit.
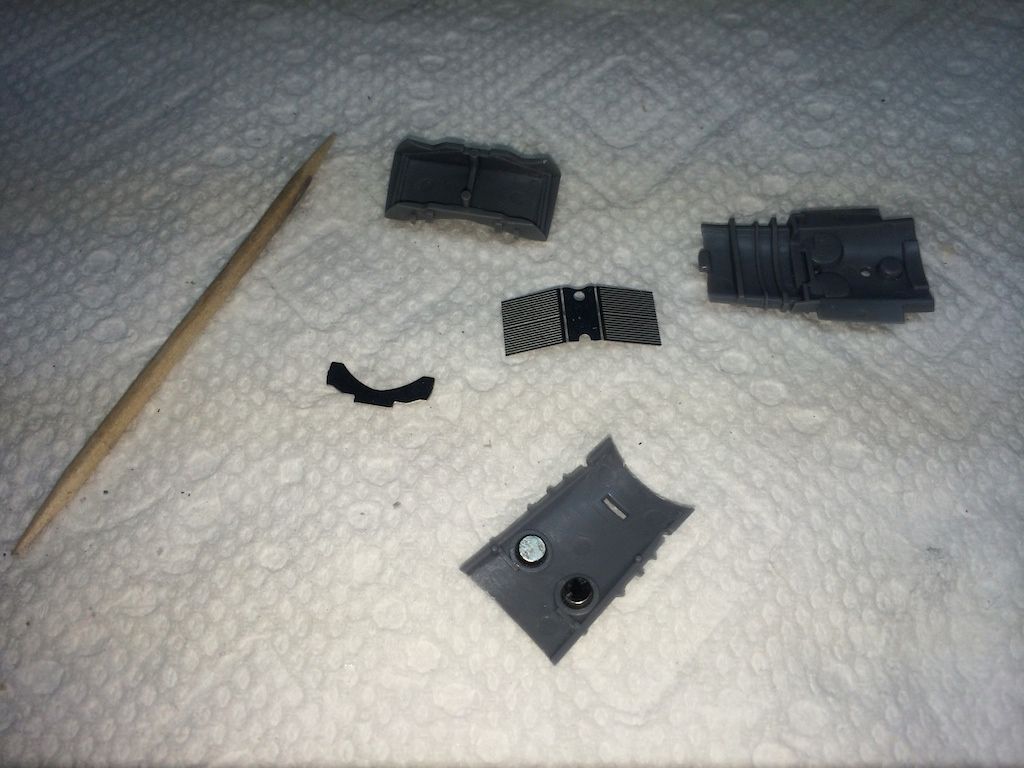
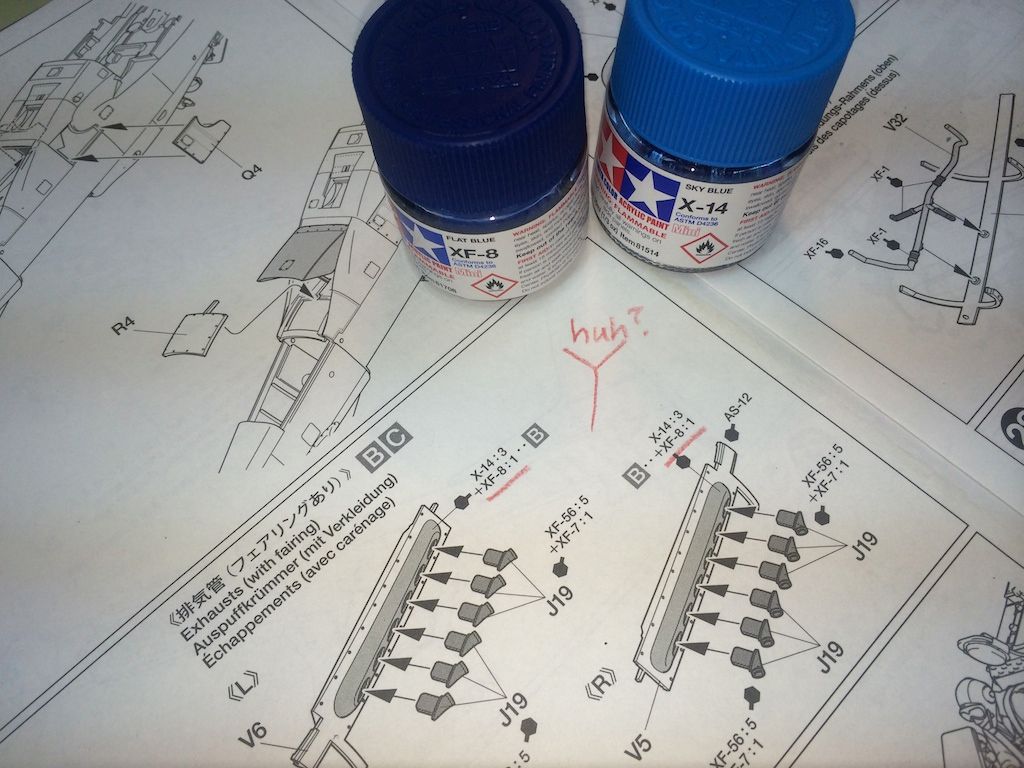
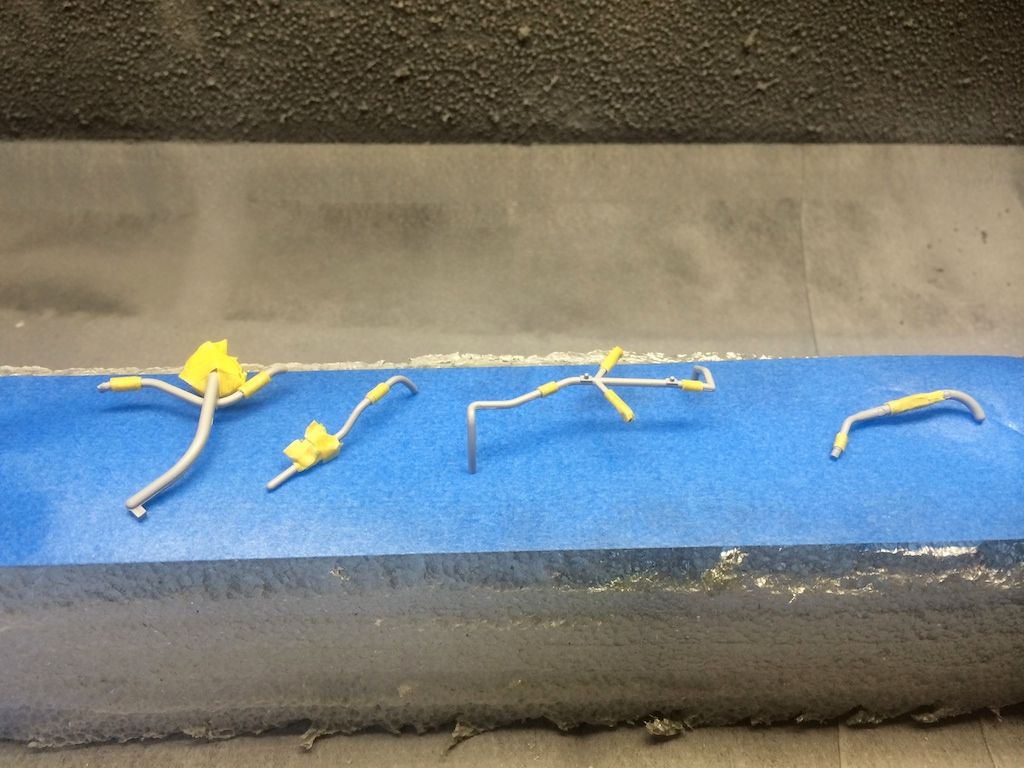
Then I ran across this color call out and thought, huh? X-14 Sky Blue with XF-8 Flat Blue makes.....some kind of blue. But for the exhaust stacks? WTF? I used Alclad IIs as noted above.
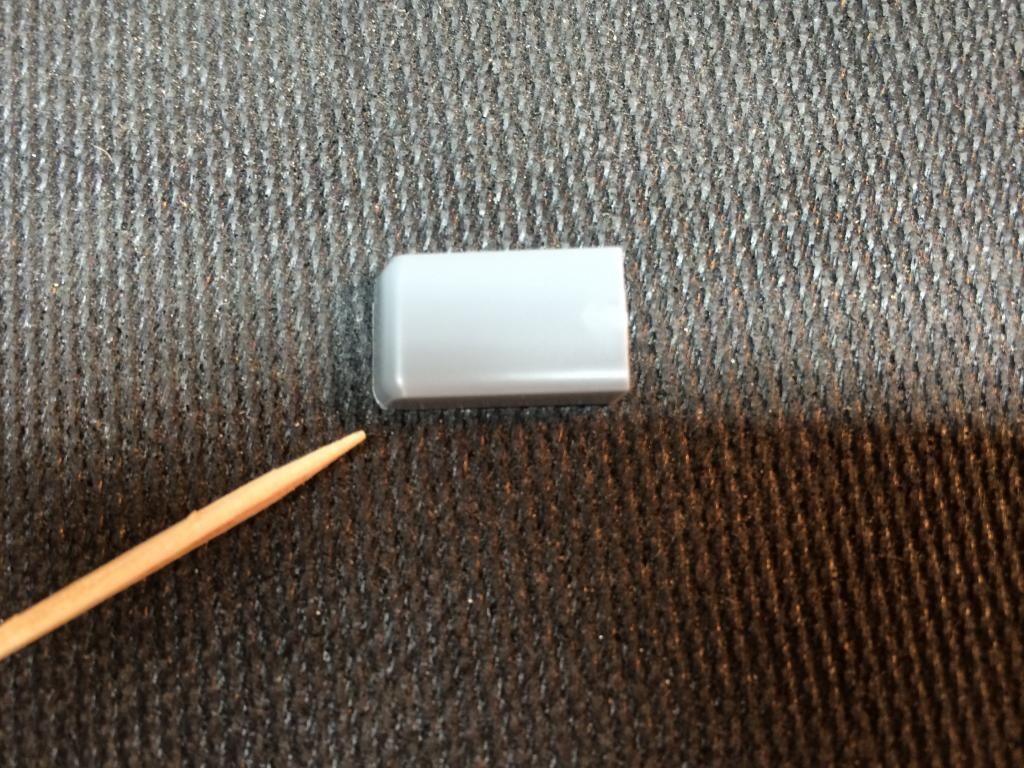
The last fiddly bits - primed and painted Bare Metal Silver for the engine housing parts. The carb air intake assembly was primed and painted with a Model Masters metallic platinum (rattle cans again).
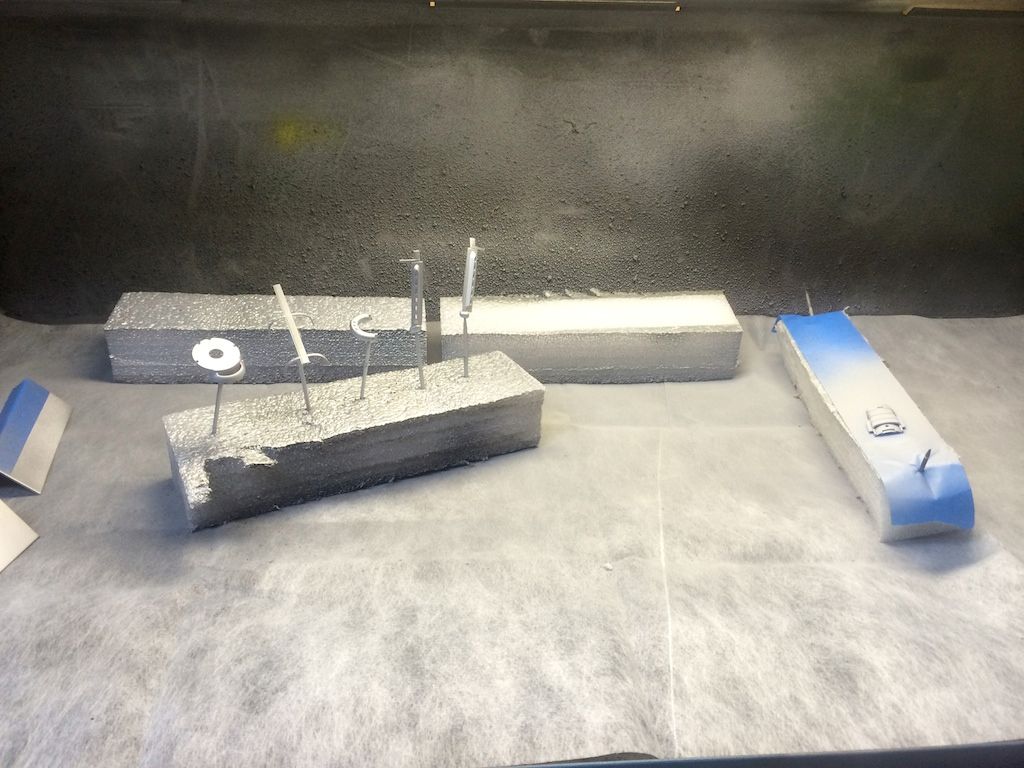
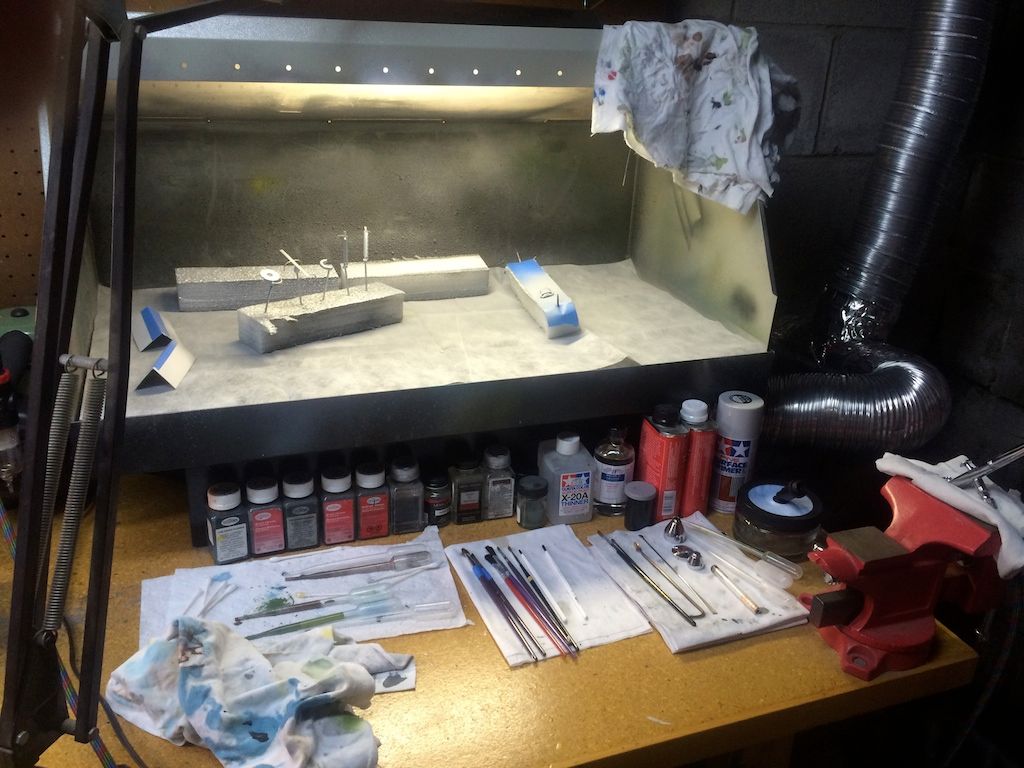
And I do use those rattle cans...as appropriate of course.
The remaining pipes were fun...if you like masking S&M that is.
Almost ready to assemble this huge section of the build.
Weathering has to be done first...again a mixture of raw umber and burnt sienna and turpentine.
Then to assemble those pesky exhaust stacks and shrouding.
Alclad II again - burnt iron on the pipes, exhaust manifold on the...well...exhaust manifold.
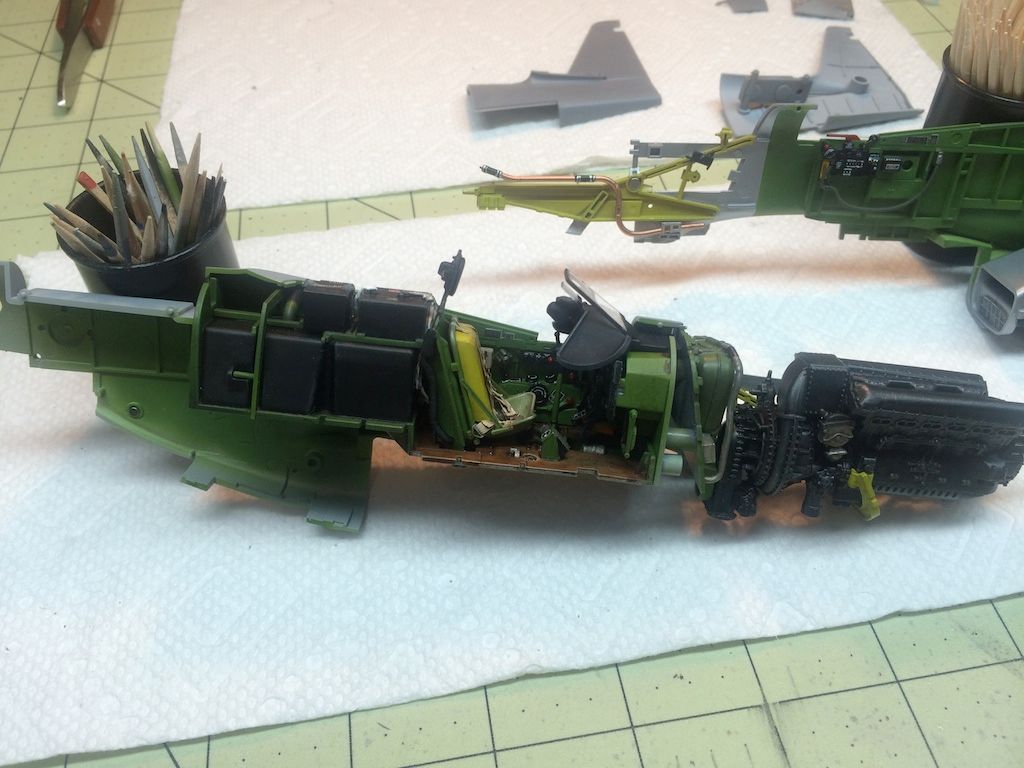
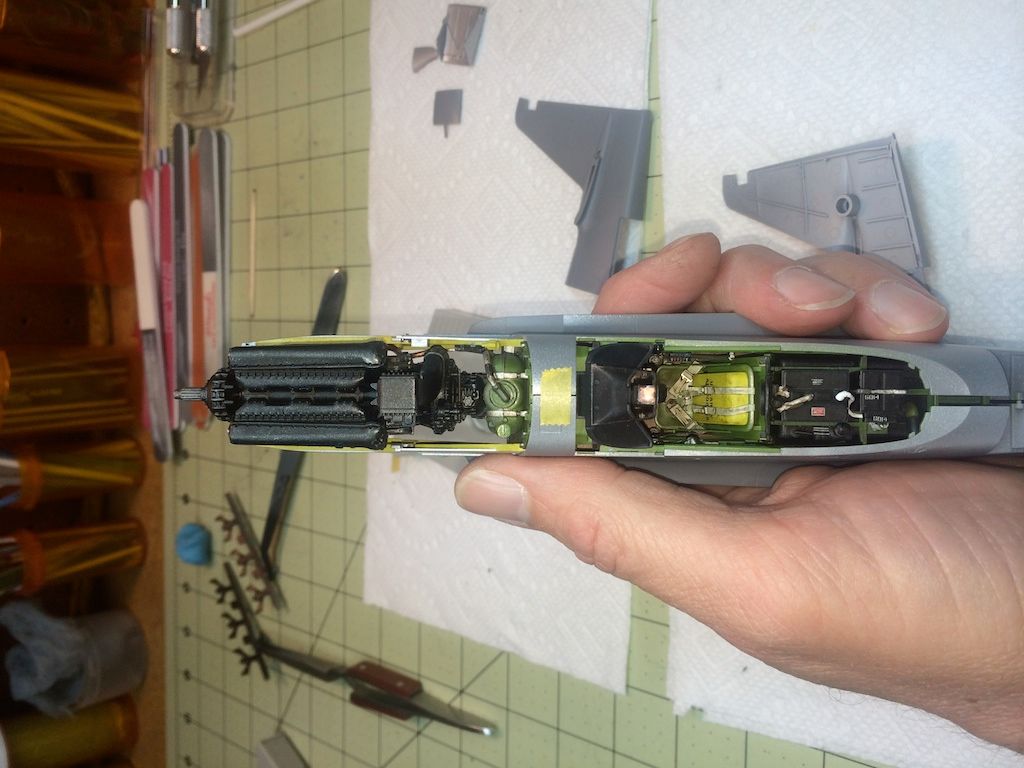
Everything is here...ready, set, assemble!
Holy Fiddly-bits Batman!
So, here I am as of 13 JUL. Nearly a full month after receiving the kit off a slow boat from China and this is it. Not even half way finished. Truly a model build that uses up a lot of mojo.
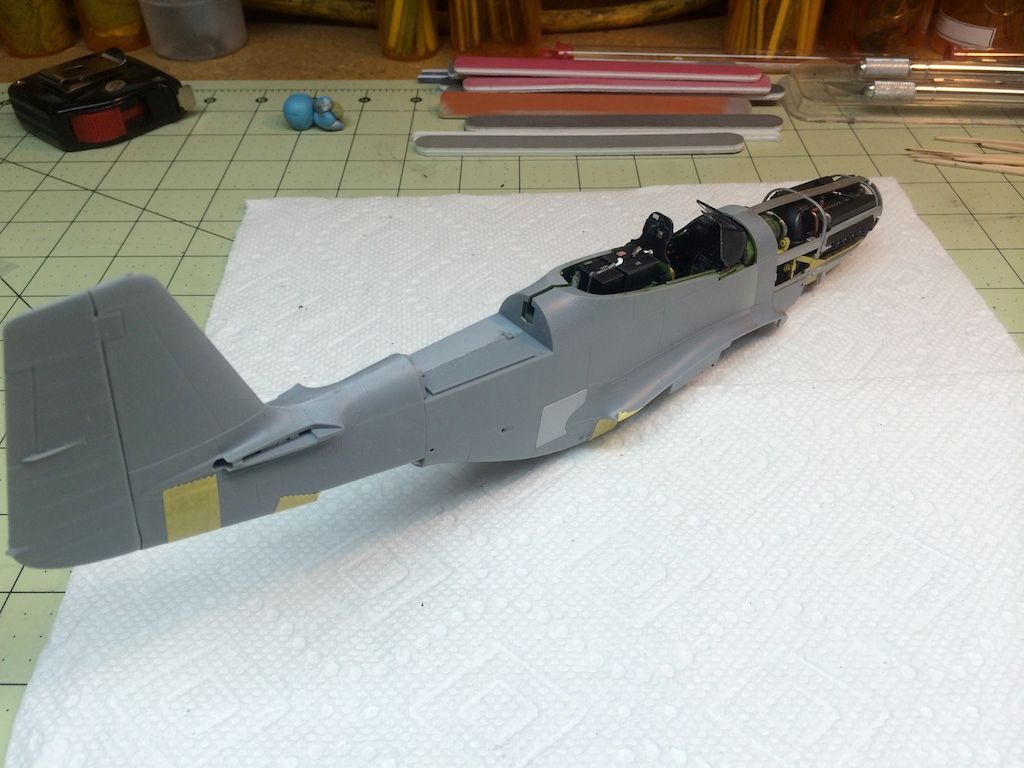
That's it for now. Through Step 28.
I hope you like it.
Jon
Pressed the darn "Submit" instead of "Preview". Oh well...continuing on...where was I....oh yea....cockpit assembly...


Weathering the interior and other components with this and pure turpentine.


Still in need of some details, so based on Lee's great review video, I procured the ZM Special Brushes...fantastic Lee - really great - thanks!

Continuing the weathering report...


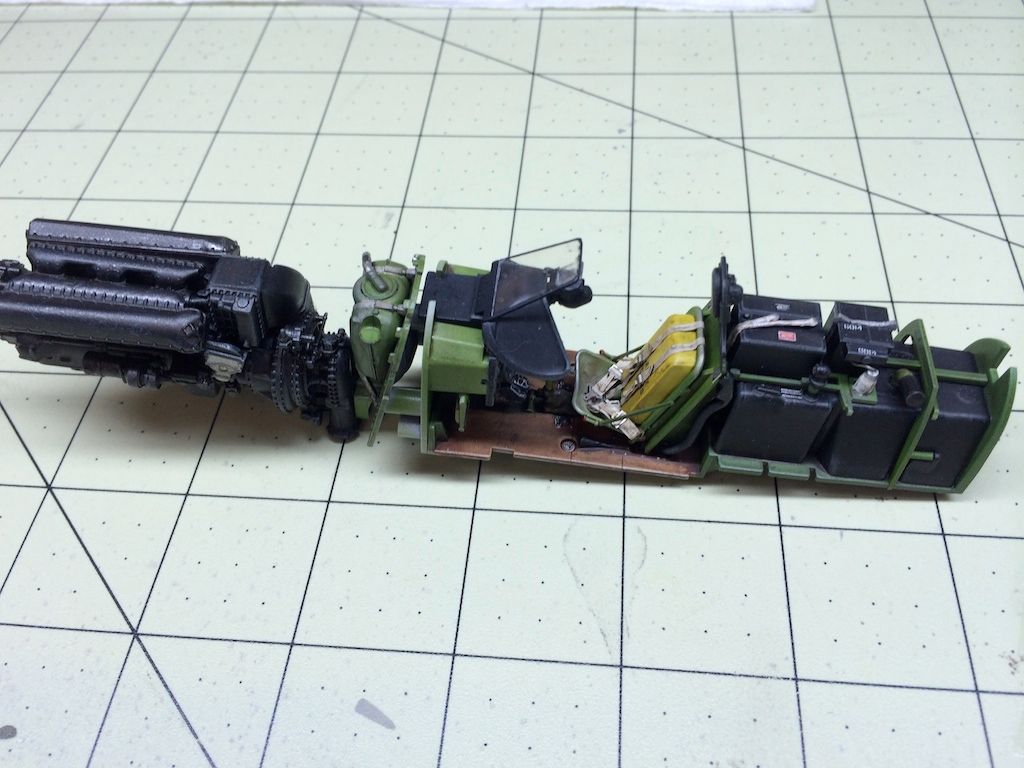
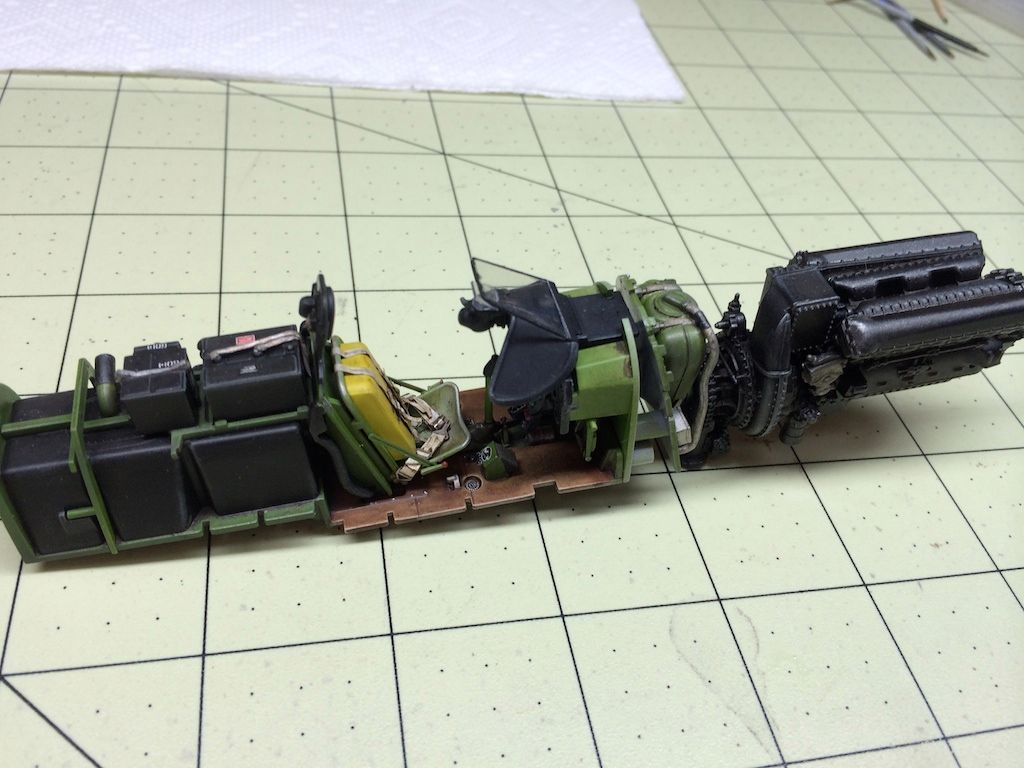
Ahhhh....ASSEMBLY! Finally.

Slightly different lighting...


Holy Details Batman!


Then it was time for the fuselage kit...I say kit as this is a kit of mini-kits!
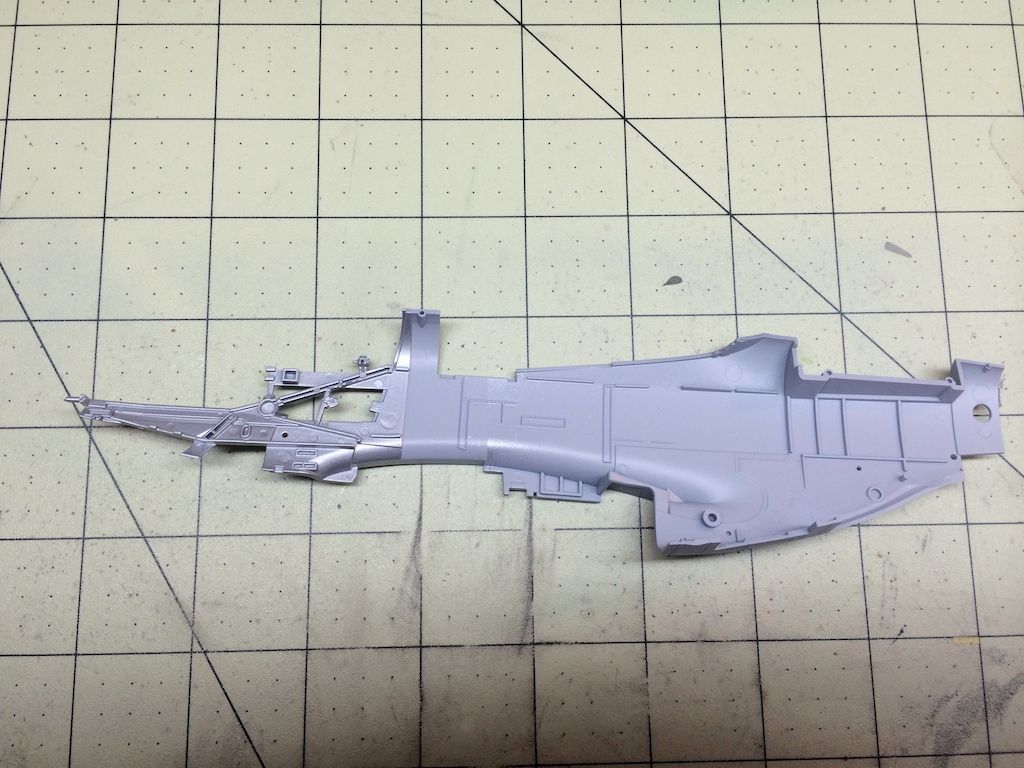
I primed both fuselage halves - with the gray rattle can stuff. I masked the forward fuselage and engine supports section and painted it Tamiya Bare Metal Silver AS-12 - rattle can again.


Then the parts to remain bare metal silver were masked and the chromate yellow was used.


The separate cockpit walls were assembled and stencils applied. These were in turn glued to the fuselage halves, once all the chromate yellow and interior green painting was done with this as the final result...


You'll notice my other modeling license taken - the engine piping was painted a metallic copper, highlighting the hose clamps and connection points. I thought this would "pop" the engine compartment upon display.

The next bit was the radiator and oil cooler kit. Besides using multimedia parts, I learned that handling the very strong magnets with tweezers, well, magnetizes them, making them useless for future PE work, except to pick up the metal pieces.


Then there were all the other bits and pieces to get together BEFORE assembling the fuselage...
Shrouded exhaust pipes...


These were done with Alclad II lacquers - gloss black base and burnt iron.
Collection of bits and pieces to assemble keeps growing...


Some test fitting...


The fit between fuselage halves is amazing.


Cockpit looks pretty good in there too.


Taking it apart, the fuselage and radiator assemblies wanted to stay together...who am I to argue? Makes an interesting pseudo cut-away.

Neat looking...

Had to actually pull out more tools - to bend PE properly for the carburetor air inlets.


All the parts to this carb air kit.

Then I ran across this color call out and thought, huh? X-14 Sky Blue with XF-8 Flat Blue makes.....some kind of blue. But for the exhaust stacks? WTF? I used Alclad IIs as noted above.

The last fiddly bits - primed and painted Bare Metal Silver for the engine housing parts. The carb air intake assembly was primed and painted with a Model Masters metallic platinum (rattle cans again).


And I do use those rattle cans...as appropriate of course.

The remaining pipes were fun...if you like masking S&M that is.

Almost ready to assemble this huge section of the build.


Weathering has to be done first...again a mixture of raw umber and burnt sienna and turpentine.


Then to assemble those pesky exhaust stacks and shrouding.
Alclad II again - burnt iron on the pipes, exhaust manifold on the...well...exhaust manifold.


Everything is here...ready, set, assemble!


Holy Fiddly-bits Batman!


So, here I am as of 13 JUL. Nearly a full month after receiving the kit off a slow boat from China and this is it. Not even half way finished. Truly a model build that uses up a lot of mojo.


That's it for now. Through Step 28.
I hope you like it.
Jon
-
UKguyInUSA
- Second Lieutenant
- Posts: 3429
- Joined: Sun Mar 30, 2014 10:19 pm
- Location: New Hampshire, USA formerly Palm Beach, Florida, USA and Leicestershire, UK (until 1999)
- Contact:
Re: Jon's 1:32 Tamiya P-51D Mustang LOU IV
"I hope you like it" he asks??!!!....
Dude, that's insanely gorgeous!
Looks like a fabulous kit, you have me tempted with this one.
Cheers,
Martin
Dude, that's insanely gorgeous!
Looks like a fabulous kit, you have me tempted with this one.
Cheers,
Martin
WIP:: Tamiya 1/48 F4U-1A Corsair
Non-WIP::Eduard 1/48 Fokker DVII, Revell 1/32 Arado AR196 and 1/32 BF109G10 Erla,
Non-WIP::Eduard 1/48 Fokker DVII, Revell 1/32 Arado AR196 and 1/32 BF109G10 Erla,
Re: Jon's 1:32 Tamiya P-51D Mustang LOU IV
Hey Jon. That detail looks magnificent and I really like the copper engine plumbing 'artistic license' or not.
Shaping up to be a super build.
Shaping up to be a super build.
Will
"A thing of orchestrated hell- a terrible symphony of light and flame."
Edward R Murrow
"A thing of orchestrated hell- a terrible symphony of light and flame."
Edward R Murrow
Re: Jon's 1:32 Tamiya P-51D Mustang LOU IV
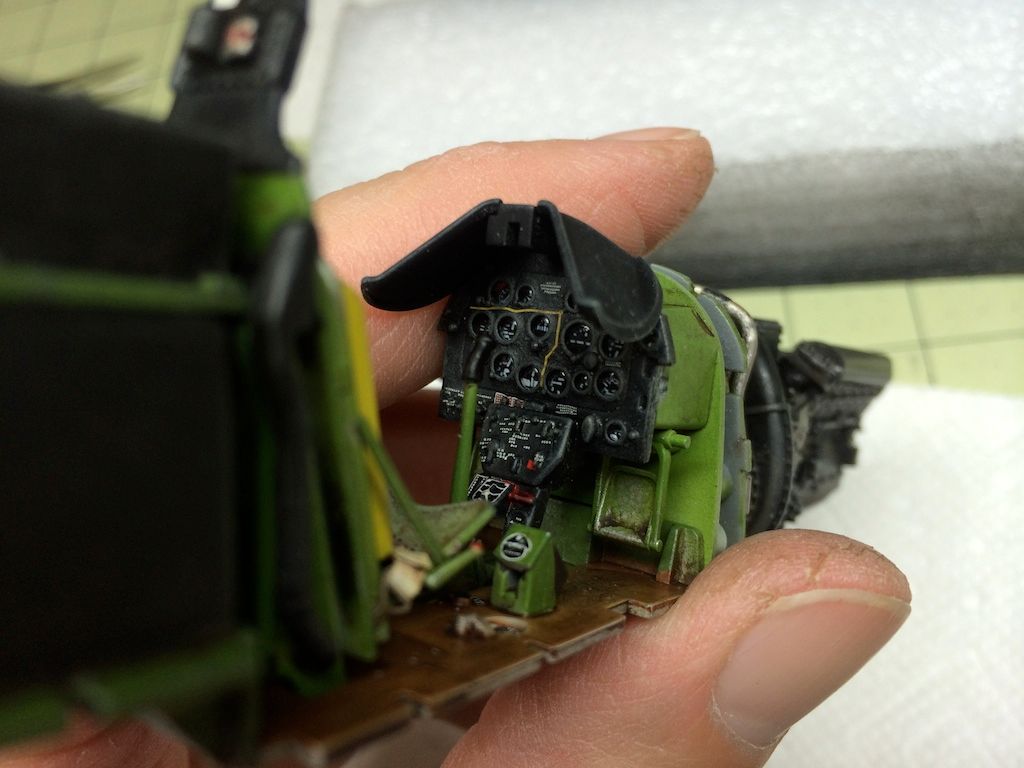
Thanks.
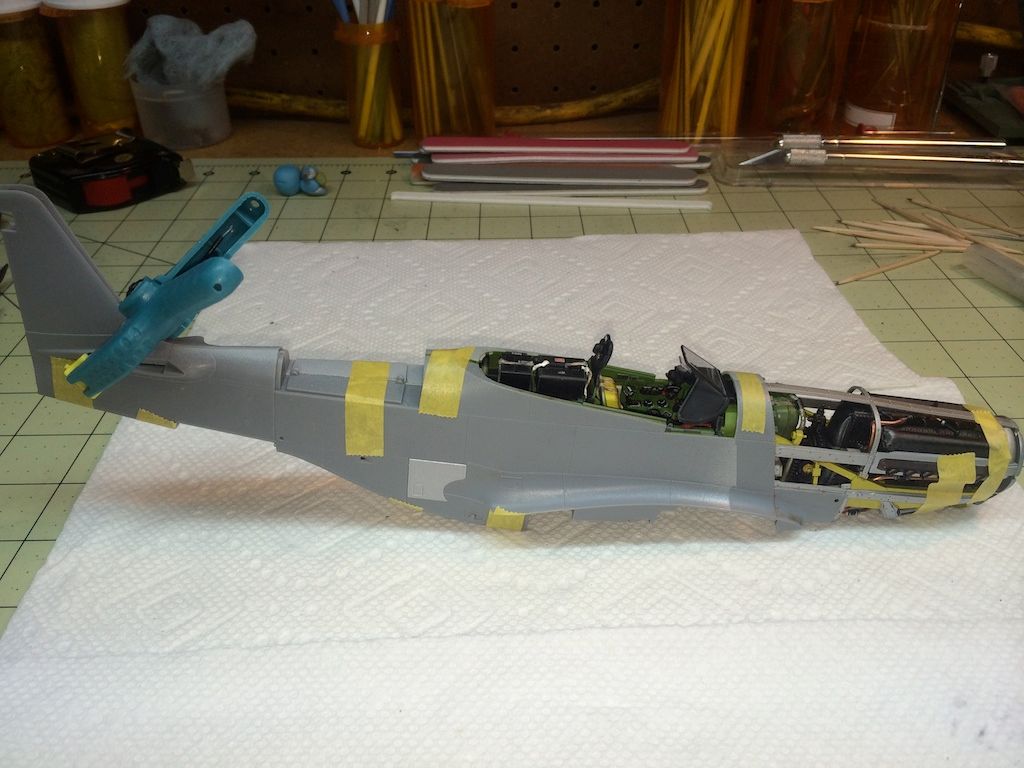
Couple of boo boos tho.
One of which is clearly captured in one or two images - the throttle handle is outside the instrument panel shroud...doh! It is corrected - no harm done. One of the pipes broke - rough handling during masking. CA glue and accelerator did that right - tricky though. CA and some kicker worked wonders with the upper cowling frame to the lower near the coolant tank too. All in all so far it has gone together very nicely. There will be some filler - maybe Mr. S 1000 - in a few places, but not too bad at all. Makes me think of all the ill-fitting models I've done in the past and how I do not enjoy those nearly as much as this one alone. Is is taxing of all the skills, no doubt about it. Not for a beginner.
Hope to be more than half way by month's end, with the landing gear bay, landing gear, gun bays, flight controls, canopy, ...hell I'm almost ready to paint!
The only ding so far is they supplied the wrong size poly cap...wtf? I had to scavenge from another kit and luckily found the right size. Oh well.
Taking a break this week - back in business starting the weekend!
Jon


Re: Jon's 1:32 Tamiya P-51D Mustang LOU IV
Cheers Steve
On The Bench:
Academy 1/72 Tempest Mk V
Master Box 1/35 Scout & Tracker
On The Bench:
Academy 1/72 Tempest Mk V
Master Box 1/35 Scout & Tracker


