Trumpeter 1/72 Hawker Sea Fury FB.11
Moderator: T3hGuppy
-
NorthernModeller

- Command Sergeant Major

- Posts: 927
- Joined: Sat Jan 09, 2016 8:39 pm
- Location: Preston, Lancashire, England
- Contact:

Re: Trumpeter 1/72 Hawker Sea Fury FB.11
Love it, your doing a sterling job mate
SAMI Magazine, Model aircraft and Tamiya Model Magazine contributor
-
TommyKillander

- Chief Warrant Officer 5

- Posts: 2776
- Joined: Sat Dec 27, 2014 1:59 pm
- Location: Gothenburg, Sweden

Re: Trumpeter 1/72 Hawker Sea Fury FB.11
Thanks a lot, Ivan
Glad you like it!
Tommy


Re: Trumpeter 1/72 Hawker Sea Fury FB.11
Fantastic job Tommy, l, like Ivan am loving it 
Yes.. It is supposed to look like that!
Tim (Ted)
British Aviation In Scale
https://www.facebook.com/groups/1185462564870290/
Tim (Ted)
British Aviation In Scale
https://www.facebook.com/groups/1185462564870290/
-
TommyKillander
- Chief Warrant Officer 5
- Posts: 2776
- Joined: Sat Dec 27, 2014 1:59 pm
- Location: Gothenburg, Sweden
Re: Trumpeter 1/72 Hawker Sea Fury FB.11
Thanks buddy!
Tommy
-
Twokidsnosleep

- General

- Posts: 18117
- Joined: Thu Aug 07, 2014 4:07 pm
- Location: BC,Canada

Re: Trumpeter 1/72 Hawker Sea Fury FB.11
Awesome job and I love how much testing you are doing with your spray colours....that is impressive 

Scott
On, Under or Near the Bench:
American Graffiti Ford Coupe
Headless Horseman...figure sig
1/72 Black Pearl Pirate Ship
On, Under or Near the Bench:
American Graffiti Ford Coupe
Headless Horseman...figure sig
1/72 Black Pearl Pirate Ship
-
TommyKillander
- Chief Warrant Officer 5
- Posts: 2776
- Joined: Sat Dec 27, 2014 1:59 pm
- Location: Gothenburg, Sweden
Re: Trumpeter 1/72 Hawker Sea Fury FB.11
Thanks Scott!Twokidsnosleep wrote: ↑Thu May 11, 2017 8:04 pm Awesome job and I love how much testing you are doing with your spray colours....that is impressive
The truth is that I have no idea what I'm doing, so I have to do a lot of testing
Ok... I finally got some time to sit down at the bench today. Yay!
The call sign numbers on the fuselage has a Sky background, so I removed the middle strip of tape and masked a square on each side big enough for the numbers. I hope to be able to salvage the "114" from the decals
 IMG_20170511_185718 by Tommy Killander, on Flickr
 The exhaust plate (heat shield?) should be metal, so I mixed a couple of drops of Crome and a drop of Duraluminium.
 IMG_20170511_191458 by Tommy Killander, on Flickr
...and masked it
 IMG_20170511_193606 by Tommy Killander, on Flickr
I mixed 150 drops of XF-21 Sky with 50 drops of XF-2 White and I got more or less the exact same result as the tip of the spoon. I added a couple of more drops of white to postshade some faded areas. The amount of paint I got was just enough for the aircraft - pure luck and coincidence
 IMG_20170511_203448 by Tommy Killander, on Flickr
Next up is tons of masking before I can put on the Dark Sea Grey...
But we are back in the game again and I'm happy with the progress today
Tommy
Last edited by TommyKillander on Sat Jul 01, 2017 11:49 am, edited 1 time in total.
-
demarcation

- Command Sergeant Major
- Posts: 960
- Joined: Wed May 13, 2015 11:34 pm
- Location: Denmark

Re: Trumpeter 1/72 Hawker Sea Fury FB.11
Looks fantastic so far Tommy, keep up the good work! 
//Anders


Re: Trumpeter 1/72 Hawker Sea Fury FB.11
Beautiful! 
-
TommyKillander
- Chief Warrant Officer 5
- Posts: 2776
- Joined: Sat Dec 27, 2014 1:59 pm
- Location: Gothenburg, Sweden
Re: Trumpeter 1/72 Hawker Sea Fury FB.11
Thanks Anders!
Many thanks, jdart58
I've been dodging the masking work for a day or so, but yesterday I finally pulled my stuff together and started masking for the Dark Sea Gray...
I used a strip of Tamiya curve tape for the spinner.
 IMG_20170514_103734 by Tommy Killander, on Flickr
Rest of the masking took nearly 2.5 hours(!)
 IMG_20170514_105920 by Tommy Killander, on Flickr
Painted the DSG with H331. Did some panel fading with a couple drops of XF-2 White added to the H331.
 IMG_20170514_113028 by Tommy Killander, on Flickr
Unmasking is the moment of truth...
 IMG_20170514_114846 by Tommy Killander, on Flickr
There are some overspray and paint leaking under the tape in some places, but its better than I expected - specially the black/white UN ident marking came out much better than would have hoped for.
 IMG_20170514_114322 by Tommy Killander, on Flickr
 IMG_20170514_121522 by Tommy Killander, on Flickr
I removed the tape covering the wheel bays by accident
 IMG_20170514_122022 by Tommy Killander, on Flickr
Most of the paintjob done, I'm happy with that!
 IMG_20170514_122120 by Tommy Killander, on Flickr
I bought a Korean War special while travelling a couple a weeks ago. Great inspiration and background info.
 IMG_20170514_131403 by Tommy Killander, on Flickr
There where only 3-4 pages about FAA in total, though and most of the picture are available on the web already.
 IMG_20170514_131537 by Tommy Killander, on Flickr
Stay tuned!
Tommy
Last edited by TommyKillander on Sat Jul 01, 2017 11:55 am, edited 1 time in total.
-
TommyKillander
- Chief Warrant Officer 5
- Posts: 2776
- Joined: Sat Dec 27, 2014 1:59 pm
- Location: Gothenburg, Sweden
Re: Trumpeter 1/72 Hawker Sea Fury FB.11
Not much done today. But a little something is better than a big nothing 
I had to put some masking tape back on the main wheel wells
 IMG_20170515_120828 by Tommy Killander, on Flickr
And I detail painted some small stuff and gloss-coated everything
 IMG_20170515_140625 by Tommy Killander, on Flickr
Next up is the decals - I have a bad feeling about them, so I'm preparing myself for the worst....
Luckily it's not so many of them

Tommy
I had to put some masking tape back on the main wheel wells
IMG_20170515_120828 by Tommy Killander, on FlickrAnd I detail painted some small stuff and gloss-coated everything
IMG_20170515_140625 by Tommy Killander, on FlickrNext up is the decals - I have a bad feeling about them, so I'm preparing myself for the worst....
Luckily it's not so many of them
Tommy
Last edited by TommyKillander on Sat Jul 01, 2017 11:56 am, edited 1 time in total.
-
TommyKillander
- Chief Warrant Officer 5
- Posts: 2776
- Joined: Sat Dec 27, 2014 1:59 pm
- Location: Gothenburg, Sweden
Re: Trumpeter 1/72 Hawker Sea Fury FB.11
Hey Guys!
It's time for applying the decals.
The decaling got a bad start... The first one wrinkled and folded into a pile of crap and I almost decided to bin the whole decal-sheet and order an aftermarket one instead....
But the carrier-film didn't break and I was able to "unwrap" the decal using lots of water and a soft brush.
 IMG_20170516_115337 by Tommy Killander, on Flickr
Some scissor-work to clear the call-number from the stripes
 IMG_20170516_115709 by Tommy Killander, on Flickr
Looking good I'm happy with that.
 IMG_20170516_121534 by Tommy Killander, on Flickr
UN-stripes seems to be painted over the markings, so lets cut them!
 IMG_20170516_133514 by Tommy Killander, on Flickr
Decals done, only 16 of them in total
They quality wasn't so bad after all once I got used to the thin carrier-film. They sinked in really nice into the panel-lines after a couple of coats of Micro Sol.
 IMG_20170516_142834 by Tommy Killander, on Flickr
So... next I started to look for the navigation lights on the wing-tips.
- not on the clear sprue...
- not in the small storage containers that I normally put all small parts for my WIPs...
- not on the bench
- not on the floor
Can't find it anywhere... Apparently I have taken it from the sprue on a piece of the stem, so I have probably put it in some clever location, I thought.
After spending 30 minutes checking every possible place I finally digged into the garbage bin. Guess what!
 IMG_20170516_165040 by Tommy Killander, on Flickr

 Stooopid me

So after calming down a bit I started working on the nav lights, checking references on the Internets. Clear glass and a tinted bulb...
Let's drill it with a 0.3 mm drillbit
 IMG_20170516_171827 by Tommy Killander, on Flickr
I diluted the Tamiya clear colous with some thinner to get them easier to work with
 IMG_20170516_172148 by Tommy Killander, on Flickr
And there you go!
 IMG_20170516_173601 by Tommy Killander, on Flickr
A bit of a roller-coaster build today....
Next step will be to start the weathering.
Tommy
It's time for applying the decals.
The decaling got a bad start... The first one wrinkled and folded into a pile of crap and I almost decided to bin the whole decal-sheet and order an aftermarket one instead....
But the carrier-film didn't break and I was able to "unwrap" the decal using lots of water and a soft brush.
IMG_20170516_115337 by Tommy Killander, on FlickrSome scissor-work to clear the call-number from the stripes
IMG_20170516_115709 by Tommy Killander, on FlickrLooking good
IMG_20170516_121534 by Tommy Killander, on FlickrUN-stripes seems to be painted over the markings, so lets cut them!
IMG_20170516_133514 by Tommy Killander, on FlickrDecals done, only 16 of them in total
They quality wasn't so bad after all once I got used to the thin carrier-film. They sinked in really nice into the panel-lines after a couple of coats of Micro Sol.
IMG_20170516_142834 by Tommy Killander, on FlickrSo... next I started to look for the navigation lights on the wing-tips.
- not on the clear sprue...
- not in the small storage containers that I normally put all small parts for my WIPs...
- not on the bench
- not on the floor
Can't find it anywhere... Apparently I have taken it from the sprue on a piece of the stem, so I have probably put it in some clever location, I thought.
After spending 30 minutes checking every possible place I finally digged into the garbage bin. Guess what!
IMG_20170516_165040 by Tommy Killander, on FlickrSo after calming down a bit I started working on the nav lights, checking references on the Internets. Clear glass and a tinted bulb...
Let's drill it with a 0.3 mm drillbit
IMG_20170516_171827 by Tommy Killander, on FlickrI diluted the Tamiya clear colous with some thinner to get them easier to work with
IMG_20170516_172148 by Tommy Killander, on FlickrAnd there you go!
IMG_20170516_173601 by Tommy Killander, on FlickrA bit of a roller-coaster build today....
Next step will be to start the weathering.
Tommy
Last edited by TommyKillander on Sat Jul 01, 2017 12:00 pm, edited 1 time in total.
-
TommyKillander
- Chief Warrant Officer 5
- Posts: 2776
- Joined: Sat Dec 27, 2014 1:59 pm
- Location: Gothenburg, Sweden
Re: Trumpeter 1/72 Hawker Sea Fury FB.11
Hey Guys!
Next step will be the weathering. I'm using a mix of raw umber and black oils (1:1 ratio) diluted with odourless turpentine for this.
 IMG_20170517_154056 by Tommy Killander, on Flickr
...at this point I still feel a little bit worried
 IMG_20170517_154119 by Tommy Killander, on Flickr
But it turned out ok. Thinking of it, I can't remember having issues with oilswashes
 IMG_20170517_170510 by Tommy Killander, on Flickr
 IMG_20170517_172247 by Tommy Killander, on Flickr
I did the washes yesterday and today I have glossed everything. Tomorrow I will continue with the weathering with pigments and some oilstreaks.
Besides there are only two things left to do before I make the final assembly, mask and paint the canopy and scratchbuild 4 small barrels for the 20 mm cannons.
Tommy
Next step will be the weathering. I'm using a mix of raw umber and black oils (1:1 ratio) diluted with odourless turpentine for this.
IMG_20170517_154056 by Tommy Killander, on Flickr...at this point I still feel a little bit worried
IMG_20170517_154119 by Tommy Killander, on FlickrBut it turned out ok. Thinking of it, I can't remember having issues with oilswashes
IMG_20170517_170510 by Tommy Killander, on FlickrIMG_20170517_172247 by Tommy Killander, on FlickrI did the washes yesterday and today I have glossed everything. Tomorrow I will continue with the weathering with pigments and some oilstreaks.
Besides there are only two things left to do before I make the final assembly, mask and paint the canopy and scratchbuild 4 small barrels for the 20 mm cannons.
Tommy
Last edited by TommyKillander on Sat Jul 01, 2017 12:02 pm, edited 1 time in total.
-
jnbattleship

- Sergeant

- Posts: 138
- Joined: Sat Aug 06, 2016 5:19 am
Re: Trumpeter 1/72 Hawker Sea Fury FB.11
Pretty cool! End in sight and it looks wonderful.
Google / Youtube - TheRohalla
-
TommyKillander
- Chief Warrant Officer 5
- Posts: 2776
- Joined: Sat Dec 27, 2014 1:59 pm
- Location: Gothenburg, Sweden
Re: Trumpeter 1/72 Hawker Sea Fury FB.11
Thanks jnbattleship !
I have fully enjoyed the research and building this kit. Awesome aircraft!
Tommy
-
Twokidsnosleep
- General
- Posts: 18117
- Joined: Thu Aug 07, 2014 4:07 pm
- Location: BC,Canada
Re: Trumpeter 1/72 Hawker Sea Fury FB.11
Looking great
Invasion Stripes look perfect, loving the weathering and great save from the garbage can
Almost every part seems to need to find its way onto my floor...I swear, and yes I do swear, they all need to be flavoured by floor dust before assembly. Drives me bonkers
Hang in ther bud, it is looking awesome
Scott
On, Under or Near the Bench:
American Graffiti Ford Coupe
Headless Horseman...figure sig
1/72 Black Pearl Pirate Ship
On, Under or Near the Bench:
American Graffiti Ford Coupe
Headless Horseman...figure sig
1/72 Black Pearl Pirate Ship
-
TommyKillander
- Chief Warrant Officer 5
- Posts: 2776
- Joined: Sat Dec 27, 2014 1:59 pm
- Location: Gothenburg, Sweden
Re: Trumpeter 1/72 Hawker Sea Fury FB.11
Thanks ScottTwokidsnosleep wrote: ↑Sat May 20, 2017 4:44 pm Looking great
Invasion Stripes look perfect, loving the weathering and great save from the garbage can
Almost every part seems to need to find its way onto my floor...I swear, and yes I do swear, they all need to be flavoured by floor dust before assembly. Drives me bonkers
Hang in ther bud, it is looking awesome

Yeah, it seems that every small part in the kits I build wants to play "hide-and-seek" or "catch me if you can"
So I have proceeded with the weathering using AK enamel washes and Abt502 oilpaints. I used the AK products to tint the natual metal plate and to build up some grime on the fuselage. After that I painted some oil and exhaust streaks with the oilpaint on top of that.
 IMG_20170520_144929 by Tommy Killander, on Flickr
 IMG_20170520_145114 by Tommy Killander, on Flickr
The canopy had a real ugly ridge on the outside that needed some treatment
 IMG_20170520_154633 by Tommy Killander, on Flickr
There are different methods to get rid of ridge using a scalpel or a sanding stick. I prefer to use a flat hard sanding stick that I try to keep "perpendicular" with the canopy so I touch as little as possible of the curved surface. After that I use an Ultimate buffing stick, green side first and then buff it with the white side until it's transparent again.
 IMG_20170520_155309 by Tommy Killander, on Flickr
Polished to a sheen using Tamiya polishing compound.
 IMG_20170520_155938 by Tommy Killander, on Flickr
Masking of the canopy using the masking kit and some masking fluid. Inside is masked with a lump of white-tac.
 IMG_20170520_161714 by Tommy Killander, on Flickr
Painted with H331. Ready for flatcoat.
 IMG_20170520_165810 by Tommy Killander, on Flickr
Scratchbuilding the gunbarrels, I will paint them with X-10 Gun Metal.
 IMG_20170520_174341 by Tommy Killander, on Flickr
 IMG_20170520_184958 by Tommy Killander, on Flickr
I use Microscale Flat varnish thinned with Isopropylalcohol (IPA). What I think happened here is that I emptied the airbrush and there where some unthinned flatcoat "sludge" at the bottom of the cup that hit the wingtips. Maybe I didn't mix it good enough, though I always premix the flacoat in a separate paintjar to avoid issues like this.
Anyway, this was fixed by misting a *very* thin layer of pure IPA over the wingsection.
An advice of warning if you do that - Do Not Flood the surface with IPA. That will make the underlying coats of paint and varnish crack !!!!
So I was able to fix this to an acceptable level
 IMG_20170520_190124 by Tommy Killander, on Flickr
Cheers
Tommy
Last edited by TommyKillander on Sat Jul 01, 2017 12:08 pm, edited 1 time in total.


Re: Trumpeter 1/72 Hawker Sea Fury FB.11
Some good recovery work going on there Tommy.
Regards, Dave.
-
TommyKillander
- Chief Warrant Officer 5
- Posts: 2776
- Joined: Sat Dec 27, 2014 1:59 pm
- Location: Gothenburg, Sweden
Re: Trumpeter 1/72 Hawker Sea Fury FB.11
Yeah, I was lucky to not go into "full panic-mode"
Instead I kept my cool and I remembered posts that I have seen where people where using self-leveling thinners to make varnish spread evenly over a surface. I thought that IPA might work in the same way and obviously it did this time.
Tommy
-
TommyKillander
- Chief Warrant Officer 5
- Posts: 2776
- Joined: Sat Dec 27, 2014 1:59 pm
- Location: Gothenburg, Sweden
Re: Trumpeter 1/72 Hawker Sea Fury FB.11
Hey Guys!
It's been a good day at the bench
Started unmasking and assembling the aircraft today
 IMG_20170521_104332 by Tommy Killander, on Flickr
 IMG_20170521_115436 by Tommy Killander, on Flickr
 IMG_20170521_121032 by Tommy Killander, on Flickr
 IMG_20170521_121800 by Tommy Killander, on Flickr
 IMG_20170521_130416 by Tommy Killander, on Flickr
These brackets are needed to get stability of the wingtips when in folded position...
 IMG_20170521_131211 by Tommy Killander, on Flickr
And we have completed the final assembly !
 IMG_20170521_140328 by Tommy Killander, on Flickr
 IMG_20170521_140339 by Tommy Killander, on Flickr
 IMG_20170521_140354 by Tommy Killander, on Flickr
 IMG_20170521_140407 by Tommy Killander, on Flickr
 IMG_20170521_140450 by Tommy Killander, on Flickr
Instead of drilling holes in the gun barrels I used an ink-pen to paint the muzzle.
 IMG_20170521_140620 by Tommy Killander, on Flickr
 IMG_20170521_140718 by Tommy Killander, on Flickr
The are some weathering with left to do, but I do that last thing....
Also I have s sprue of rockets to decide what to do with them.... I think it looks a bit wierd with folded wings and rockets
 IMG_20170521_141518 by Tommy Killander, on Flickr
But I have decided to make a base for the aircraft
 IMG_20170521_141544 by Tommy Killander, on Flickr
Stay tuned!
Tommy
It's been a good day at the bench
Started unmasking and assembling the aircraft today
IMG_20170521_104332 by Tommy Killander, on FlickrIMG_20170521_115436 by Tommy Killander, on FlickrIMG_20170521_121032 by Tommy Killander, on FlickrIMG_20170521_121800 by Tommy Killander, on FlickrIMG_20170521_130416 by Tommy Killander, on FlickrThese brackets are needed to get stability of the wingtips when in folded position...
IMG_20170521_131211 by Tommy Killander, on FlickrAnd we have completed the final assembly !
IMG_20170521_140328 by Tommy Killander, on FlickrIMG_20170521_140339 by Tommy Killander, on FlickrIMG_20170521_140354 by Tommy Killander, on FlickrIMG_20170521_140407 by Tommy Killander, on FlickrIMG_20170521_140450 by Tommy Killander, on FlickrInstead of drilling holes in the gun barrels I used an ink-pen to paint the muzzle.
IMG_20170521_140620 by Tommy Killander, on FlickrIMG_20170521_140718 by Tommy Killander, on FlickrThe are some weathering with left to do, but I do that last thing....
Also I have s sprue of rockets to decide what to do with them.... I think it looks a bit wierd with folded wings and rockets
IMG_20170521_141518 by Tommy Killander, on FlickrBut I have decided to make a base for the aircraft
IMG_20170521_141544 by Tommy Killander, on FlickrStay tuned!
Tommy
Last edited by TommyKillander on Sat Jul 01, 2017 12:13 pm, edited 1 time in total.
-
jnbattleship
- Sergeant
- Posts: 138
- Joined: Sat Aug 06, 2016 5:19 am
Re: Trumpeter 1/72 Hawker Sea Fury FB.11
Very well executed build! You right, RPs would look ... strange on folded wings but I think that was quite a normal occurrence, wasn't it.
Google / Youtube - TheRohalla
-
Twokidsnosleep
- General
- Posts: 18117
- Joined: Thu Aug 07, 2014 4:07 pm
- Location: BC,Canada
Re: Trumpeter 1/72 Hawker Sea Fury FB.11
Top notch job, a great way to finish
She looks awesome all weathered and folded up
She looks awesome all weathered and folded up
Scott
On, Under or Near the Bench:
American Graffiti Ford Coupe
Headless Horseman...figure sig
1/72 Black Pearl Pirate Ship
On, Under or Near the Bench:
American Graffiti Ford Coupe
Headless Horseman...figure sig
1/72 Black Pearl Pirate Ship
-
TommyKillander
- Chief Warrant Officer 5
- Posts: 2776
- Joined: Sat Dec 27, 2014 1:59 pm
- Location: Gothenburg, Sweden
Re: Trumpeter 1/72 Hawker Sea Fury FB.11
Thank you very much, sir!jnbattleship wrote: ↑Mon May 22, 2017 3:11 pm Very well executed build! You right, RPs would look ... strange on folded wings but I think that was quite a normal occurrence, wasn't it.
I guess that there might be occasions where aircrafts returned to homeplate with unreleased weapons.
I might put the rails on, but leave the rockets on the deck or something like that.
Thanks a lot, Scott!Twokidsnosleep wrote: ↑Mon May 22, 2017 3:22 pm Top notch job, a great way to finish
She looks awesome all weathered and folded up
I will make a base as well, but sofar I haven't had much luck with my research on RN WWII carrier deck details and colour schemes.. But as soon as I have something to work with I will get started on that.
Tommy
-
TommyKillander
- Chief Warrant Officer 5
- Posts: 2776
- Joined: Sat Dec 27, 2014 1:59 pm
- Location: Gothenburg, Sweden
Re: Trumpeter 1/72 Hawker Sea Fury FB.11
Hey Guys!
I have tried to find some reliable information on the colour used on the flight deck of late WWII RN carriers, but I haven't been successful in that quest...
Anyway, the best information I got was from the magazine Scale Aircraft Modelling, March 2017 (Vol 39 Issue 01) is that at Dark Amirality Grey, Home Fleet Grey or possible Deck Blue 20-B where used. The article suggest the following Vallejo paints:
71.022 RLM 02 Grey
71.020 German Green (but slightly darker)
71.056 Black Grey (but slightly greyer)
71.053 Dark Seagreen
I don't have any of those paints at hand, so I might try to do something with Tamiya paints... I like the idea of having a green tint to the deck
Here's a picture of HMS Glory (Japanese capitulation, Rabaul)
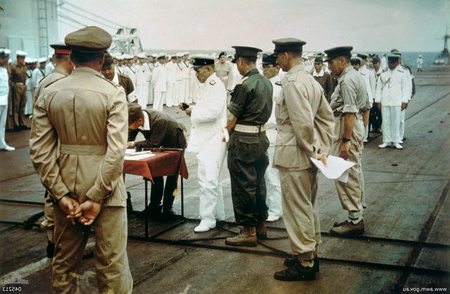
This might be a colourised BW photo so I'm not sure about the colours.
I have found a site with colour chips http://www.steelnavy.com/rnchips.htm
I'm not sure that is much helpful. I'm not totally convinced that I should use those colours...
But let's get started anyway... I don't want this to be a blocker for the build.
This is a snapshot of a scene from the Sea Fury documentary
 FAA deck by Tommy Killander, on Flickr
I will use an IKEA photoframe and a piece of 10mm plywood.
 IMG_20170521_143158 by Tommy Killander, on Flickr
The plywood will be dressed with plasticard.
 IMG_20170521_152849 by Tommy Killander, on Flickr
Sides ready
 IMG_20170521_201242 by Tommy Killander, on Flickr
Approximated some measurements for the tiedowns from the screenshot above
 IMG_20170523_204422 by Tommy Killander, on Flickr
Drilling with a 2.0 mm drillbit
 IMG_20170523_205035 by Tommy Killander, on Flickr
Holes in the deck are enlarged and coated with black Ultimate primer so no details are shown
 IMG_20170523_211103 by Tommy Killander, on Flickr
 IMG_20170523_213648 by Tommy Killander, on Flickr
Deck is glued on
 IMG_20170523_214609 by Tommy Killander, on Flickr
Stay tuned!
Tommy
I have tried to find some reliable information on the colour used on the flight deck of late WWII RN carriers, but I haven't been successful in that quest...
Anyway, the best information I got was from the magazine Scale Aircraft Modelling, March 2017 (Vol 39 Issue 01) is that at Dark Amirality Grey, Home Fleet Grey or possible Deck Blue 20-B where used. The article suggest the following Vallejo paints:
71.022 RLM 02 Grey
71.020 German Green (but slightly darker)
71.056 Black Grey (but slightly greyer)
71.053 Dark Seagreen
I don't have any of those paints at hand, so I might try to do something with Tamiya paints... I like the idea of having a green tint to the deck
Here's a picture of HMS Glory (Japanese capitulation, Rabaul)
This might be a colourised BW photo so I'm not sure about the colours.
I have found a site with colour chips http://www.steelnavy.com/rnchips.htm
I'm not sure that is much helpful. I'm not totally convinced that I should use those colours...
But let's get started anyway... I don't want this to be a blocker for the build.
This is a snapshot of a scene from the Sea Fury documentary
FAA deck by Tommy Killander, on FlickrI will use an IKEA photoframe and a piece of 10mm plywood.
IMG_20170521_143158 by Tommy Killander, on FlickrThe plywood will be dressed with plasticard.
IMG_20170521_152849 by Tommy Killander, on FlickrSides ready
IMG_20170521_201242 by Tommy Killander, on FlickrApproximated some measurements for the tiedowns from the screenshot above
IMG_20170523_204422 by Tommy Killander, on FlickrDrilling with a 2.0 mm drillbit
IMG_20170523_205035 by Tommy Killander, on FlickrHoles in the deck are enlarged and coated with black Ultimate primer so no details are shown
IMG_20170523_211103 by Tommy Killander, on FlickrIMG_20170523_213648 by Tommy Killander, on FlickrDeck is glued on
IMG_20170523_214609 by Tommy Killander, on FlickrStay tuned!
Tommy
Last edited by TommyKillander on Sat Jul 01, 2017 12:22 pm, edited 1 time in total.


Re: Trumpeter 1/72 Hawker Sea Fury FB.11
Really nice looking so for can't wait to see it when it's finished. 
Cheers Steve
On The Bench:
Academy 1/72 Tempest Mk V
Master Box 1/35 Scout & Tracker
On The Bench:
Academy 1/72 Tempest Mk V
Master Box 1/35 Scout & Tracker
-
TommyKillander
- Chief Warrant Officer 5
- Posts: 2776
- Joined: Sat Dec 27, 2014 1:59 pm
- Location: Gothenburg, Sweden
Re: Trumpeter 1/72 Hawker Sea Fury FB.11
Thanks Muzrik!
Okay... I back from a fantastic weekend with my IPMS buddies, where we spent 3 days building models, BBQing, discussing scalemodelling and military assets and just random chit chat... We meet once a year to do a "styrene-bootcamp" like this and it's one of the hightlights of the year
So, I haven't painted the deck yet, I need to do some more research before I can do that and maybe get some more paints.
Started by removing the warhead from the parts. I will reconstruct the rocket tube/body with a styrene rod.
 IMG_20170526_162502 by Tommy Killander, on Flickr
Sanded the rocket tube away from the rails, drilled a hole in the warhead (
 IMG_20170526_201435 by Tommy Killander, on Flickr
I built a small rig to attach the tailfins at the correct height.
 IMG_20170526_215830 by Tommy Killander, on Flickr
Scratchbuild an ammorack.
 IMG_20170526_224800 by Tommy Killander, on Flickr
Tommy
Last edited by TommyKillander on Sat Jul 01, 2017 12:32 pm, edited 1 time in total.
Re: Trumpeter 1/72 Hawker Sea Fury FB.11
Great idea, I like the sound of the Ammo rack.
Cheers Steve
On The Bench:
Academy 1/72 Tempest Mk V
Master Box 1/35 Scout & Tracker
On The Bench:
Academy 1/72 Tempest Mk V
Master Box 1/35 Scout & Tracker
-
TommyKillander
- Chief Warrant Officer 5
- Posts: 2776
- Joined: Sat Dec 27, 2014 1:59 pm
- Location: Gothenburg, Sweden
Re: Trumpeter 1/72 Hawker Sea Fury FB.11
Thanks Muzrik
I have painted up the RP-3s and the rack today. I have no idea what colour it should be so I used two shades of Olive Green, just to get some contrast. The rails have been painted using my "Sky"-mix, so they get the same colour tone as the rest of the aircraft.
 IMG_20170526_233740 by Tommy Killander, on Flickr
I have continued with the base aswell; to be honest I couldn't make any sense in the directions of the deck colour that I found on the Internet and the magazine that I had. So I just went with what I could see in on B/W-photos and the documentary. It seems that depending on the lighting conditions the deck has basically the same colour as Dark Sea Grey with some faded areas that was lighter.
I decided to preshade a "marble"-pattern to get some randomness to the surface using plain XF-83. .
 IMG_20170530_211435 by Tommy Killander, on Flickr
Then I sprayed highly diluted XF-83 with a couple of drops of XF-1 Black mixed.
Based on a tip I got from a fellow modeller I stopped coating when I thought that "one more pass and it will look perfect". The reason for this is that the gloss varnish will have the same effect, so that final pass is not needed.
 IMG_20170530_212727 by Tommy Killander, on Flickr
Next I will paint the markings on the deck. They should be white I think.
Tommy
Last edited by TommyKillander on Sat Jul 01, 2017 12:33 pm, edited 1 time in total.
-
TommyKillander
- Chief Warrant Officer 5
- Posts: 2776
- Joined: Sat Dec 27, 2014 1:59 pm
- Location: Gothenburg, Sweden
Re: Trumpeter 1/72 Hawker Sea Fury FB.11
Ohai fellas!
I have continued with the base today.
After studying a couple of magazines for details I found some decent pictures and a text about the size of the carrier deck centerline stripes that seems reasonable; the broken centerline was approx 10 feet in length with a 10 feet spacing and the width was 18 inches. In scale 1/72 this gives something like 42 mm in length and 6.5 mm width. So I decided to go for that.
 IMG_20170531_201033 by Tommy Killander, on Flickr
Added the lines using plain XF-2 White.
 IMG_20170531_203140 by Tommy Killander, on Flickr
Drybrushed some scratch and abrasion marks in different colours.
 IMG_20170531_203916 by Tommy Killander, on Flickr
Finally I sealed everything with Aqua Gloss and next I will start to apply washes.
Tommy
I have continued with the base today.
After studying a couple of magazines for details I found some decent pictures and a text about the size of the carrier deck centerline stripes that seems reasonable; the broken centerline was approx 10 feet in length with a 10 feet spacing and the width was 18 inches. In scale 1/72 this gives something like 42 mm in length and 6.5 mm width. So I decided to go for that.
IMG_20170531_201033 by Tommy Killander, on FlickrAdded the lines using plain XF-2 White.
IMG_20170531_203140 by Tommy Killander, on FlickrDrybrushed some scratch and abrasion marks in different colours.
IMG_20170531_203916 by Tommy Killander, on FlickrFinally I sealed everything with Aqua Gloss and next I will start to apply washes.
Tommy
Last edited by TommyKillander on Sat Jul 01, 2017 12:34 pm, edited 1 time in total.
-
TommyKillander
- Chief Warrant Officer 5
- Posts: 2776
- Joined: Sat Dec 27, 2014 1:59 pm
- Location: Gothenburg, Sweden
Re: Trumpeter 1/72 Hawker Sea Fury FB.11
Hey Guys!
Got some more work done yesterday while watching the ISM Friday show.
I continued with weathering the base. I found out when I did the Easy Eight for the "I Heart Tamiya" that Ultimate washes had a nice range of colours when they where diluted with water, so I decided to try that again. This time, however, I soaked the baseplate with water and added drops of washes in different places, spreading them around a bit. It's almost like aquarelle painting
 IMG_20170601_210247 by Tommy Killander, on Flickr
After that I left the baseplate over night for the water to evaporate and when it where completely dry I sealed everything with Aqua Gloss.
 IMG_20170603_084503 by Tommy Killander, on Flickr
Maybe it's a little bit over the top, but hey it looks cool I think
I couldn't find any good pictures of the trolley/ammo rack for the RP-3 rockets, so I had to do some improvising.
 IMG_20170602_221650 by Tommy Killander, on Flickr
 IMG_20170602_222613 by Tommy Killander, on Flickr
 IMG_20170602_225151 by Tommy Killander, on Flickr
I might add a handle-bar as well
Tommy
Got some more work done yesterday while watching the ISM Friday show.
I continued with weathering the base. I found out when I did the Easy Eight for the "I Heart Tamiya" that Ultimate washes had a nice range of colours when they where diluted with water, so I decided to try that again. This time, however, I soaked the baseplate with water and added drops of washes in different places, spreading them around a bit. It's almost like aquarelle painting
IMG_20170601_210247 by Tommy Killander, on FlickrAfter that I left the baseplate over night for the water to evaporate and when it where completely dry I sealed everything with Aqua Gloss.
IMG_20170603_084503 by Tommy Killander, on FlickrMaybe it's a little bit over the top, but hey it looks cool I think
I couldn't find any good pictures of the trolley/ammo rack for the RP-3 rockets, so I had to do some improvising.
IMG_20170602_221650 by Tommy Killander, on FlickrIMG_20170602_222613 by Tommy Killander, on FlickrIMG_20170602_225151 by Tommy Killander, on FlickrI might add a handle-bar as well
Tommy
Last edited by TommyKillander on Sat Jul 01, 2017 12:36 pm, edited 1 time in total.
-
TommyKillander
- Chief Warrant Officer 5
- Posts: 2776
- Joined: Sat Dec 27, 2014 1:59 pm
- Location: Gothenburg, Sweden
Re: Trumpeter 1/72 Hawker Sea Fury FB.11
Hey Guys!
I continued with the base today and the RP-3 rocket trolley/cart (I'm not sure what to call it)
I added a handle bar to make it more "convincing" as a rocket trolley.
 IMG_20170603_194738 by Tommy Killander, on Flickr
Painted the business end of the RP-3 to with white - according to reference pictures there should be red/white stripes and also a blue or green depending on the type. But it's too difficult for me to paint in 1/72
 IMG_20170603_184217 by Tommy Killander, on Flickr
Ready!
 IMG_20170603_210557 by Tommy Killander, on Flickr
Added the rails for PR-3 rockets and also weathered the rails and wings with some black soot pigments
 IMG_20170603_194828 by Tommy Killander, on Flickr
A couple of fuelstains. I'm not sure if the Bristol Centaurus was prone to leak oil, but it's an English design so I guess that it has to
 IMG_20170603_212730 by Tommy Killander, on Flickr
The last piece of PE I use is the nameplate
 IMG_20170603_212852 by Tommy Killander, on Flickr
Sometimes it can be difficult to get CA-glue to grip onto the surface of PE, using a glass-fibre pen (made for cleaning printed circuit boards) to make the surface more rugged is a good trick. Only drawback is that it will set instantly and it's no way that you can pry the part loose without using a CA-debonder.
 IMG_20170603_214114 by Tommy Killander, on Flickr
....aaaand it's finished - I'm calling this done !
 IMG_20170603_214618 by Tommy Killander, on Flickr
 IMG_20170603_214722 by Tommy Killander, on Flickr
 IMG_20170603_215326 by Tommy Killander, on Flickr
I'll setup the photo-booth tomorrow and take better photos for the reveal!
Tommy
I continued with the base today and the RP-3 rocket trolley/cart (I'm not sure what to call it)
I added a handle bar to make it more "convincing" as a rocket trolley.
IMG_20170603_194738 by Tommy Killander, on FlickrPainted the business end of the RP-3 to with white - according to reference pictures there should be red/white stripes and also a blue or green depending on the type. But it's too difficult for me to paint in 1/72
IMG_20170603_184217 by Tommy Killander, on FlickrReady!
IMG_20170603_210557 by Tommy Killander, on FlickrAdded the rails for PR-3 rockets and also weathered the rails and wings with some black soot pigments
IMG_20170603_194828 by Tommy Killander, on FlickrA couple of fuelstains. I'm not sure if the Bristol Centaurus was prone to leak oil, but it's an English design so I guess that it has to
IMG_20170603_212730 by Tommy Killander, on FlickrThe last piece of PE I use is the nameplate
IMG_20170603_212852 by Tommy Killander, on FlickrSometimes it can be difficult to get CA-glue to grip onto the surface of PE, using a glass-fibre pen (made for cleaning printed circuit boards) to make the surface more rugged is a good trick. Only drawback is that it will set instantly and it's no way that you can pry the part loose without using a CA-debonder.
IMG_20170603_214114 by Tommy Killander, on Flickr....aaaand it's finished - I'm calling this done !
IMG_20170603_214618 by Tommy Killander, on FlickrIMG_20170603_214722 by Tommy Killander, on FlickrIMG_20170603_215326 by Tommy Killander, on FlickrI'll setup the photo-booth tomorrow and take better photos for the reveal!
Tommy
Last edited by TommyKillander on Sat Jul 01, 2017 12:40 pm, edited 1 time in total.
-
sheppsea

- Command Sergeant Major
- Posts: 882
- Joined: Mon Aug 01, 2016 6:22 am
- Location: Essex, United Kingdom
Re: Trumpeter 1/72 Hawker Sea Fury FB.11
Excellent work, it looks fantastic
-
TommyKillander
- Chief Warrant Officer 5
- Posts: 2776
- Joined: Sat Dec 27, 2014 1:59 pm
- Location: Gothenburg, Sweden
Re: Trumpeter 1/72 Hawker Sea Fury FB.11
Thank you very much sheppsea !
Tommy
-
TommyKillander
- Chief Warrant Officer 5
- Posts: 2776
- Joined: Sat Dec 27, 2014 1:59 pm
- Location: Gothenburg, Sweden
Re: Trumpeter 1/72 Hawker Sea Fury FB.11
Hey Guys!
I managed to take some photos today that are now posted in the Reveal section: viewtopic.php?f=592&t=22521
I have really enjoyed this build; doing the research and reading about this awesome aircraft as well as building it. The Trumpeter kit is not bad, but there are some minor fitting issues and wierd design solutions here and there There are also a couple of inaccuracies and I have to admit that I messed up myself in a couple of places - but I'm happy with the result anyway.
Thanks for watching and throwing in some cheers now and then to keep me going It's much appreciated 
Tommy
I managed to take some photos today that are now posted in the Reveal section: viewtopic.php?f=592&t=22521
I have really enjoyed this build; doing the research and reading about this awesome aircraft as well as building it. The Trumpeter kit is not bad, but there are some minor fitting issues and wierd design solutions here and there
Thanks for watching and throwing in some cheers now and then to keep me going
Tommy
-
Technophobe
- Sergeant
- Posts: 151
- Joined: Wed Oct 05, 2016 12:08 am
- Location: If you find out, please let me know
Re: Trumpeter 1/72 Hawker Sea Fury FB.11
How dare youTommyKillander wrote: ↑Sat Jun 03, 2017 9:31 pm A couple of fuelstains. I'm not sure if the Bristol Centaurus was prone to leak oil, but it's an English design so I guess that it has to
...and pray that there's intelligent life somewhere up in Space cos there's bugger all, down here on Earth!
-
TommyKillander
- Chief Warrant Officer 5
- Posts: 2776
- Joined: Sat Dec 27, 2014 1:59 pm
- Location: Gothenburg, Sweden
Re: Trumpeter 1/72 Hawker Sea Fury FB.11
Haha, that's a good one - I'll remember thatTechnophobe wrote: ↑Sun Jun 04, 2017 10:52 pmHow dare youTommyKillander wrote: ↑Sat Jun 03, 2017 9:31 pm A couple of fuelstains. I'm not sure if the Bristol Centaurus was prone to leak oil, but it's an English design so I guess that it has to
Leaking a oil is not neccecarily a bad thing - I remember a friend who had an old Triumph motorcycle, he always said that as long as it's leaking oil I know that the engine is healty.
Tommy
-
TommyKillander
- Chief Warrant Officer 5
- Posts: 2776
- Joined: Sat Dec 27, 2014 1:59 pm
- Location: Gothenburg, Sweden
Re: Trumpeter 1/72 Hawker Sea Fury FB.11
Photobucket have decided to hold my pictures hostage until I have paid $400/year for their release.
I have switched over to Flickr as a hosting service for my future work and Facebook for my reveal photos, but I can't be asked to backtrack the whole buildthread and update the pictures without actually see what I'm replacing.
*EDIT*
After I have calmed down a little bit over this PB drama I decided to recover the images, it will take some time and effort to do it, so please bare with me...


Tommy
I have switched over to Flickr as a hosting service for my future work and Facebook for my reveal photos, but I can't be asked to backtrack the whole buildthread and update the pictures without actually see what I'm replacing.
*EDIT*
After I have calmed down a little bit over this PB drama I decided to recover the images, it will take some time and effort to do it, so please bare with me...
Tommy
-
TommyKillander
- Chief Warrant Officer 5
- Posts: 2776
- Joined: Sat Dec 27, 2014 1:59 pm
- Location: Gothenburg, Sweden
Re: Trumpeter 1/72 Hawker Sea Fury FB.11
The buildthread have now been updated and pictures now link to Flickr instead.
Tommy
Tommy
