Aoshima Thunderbirds "The Mole"

Post Reply
WebbyNZ
Master Sergeant
Master Sergeant
Posts: 393
Joined: Thu May 30, 2013 11:02 am
Location: Manawatu, New Zealand
Contact:

Aoshima Thunderbirds "The Mole"

Post by WebbyNZ »

They say better late than never, and with over a week gone I have finally chosen my project for the SiG.

This will be a kit of first's.
My first thunderbirds kit.
My first build on the new workbench.
My first build started on ISM.
My first 'SiG' Although I have done contests and group builds in other places.
My first tracked model, everything else has had wheels, wings or feet :-)
My first 'wathered' build. I have used a lil dust and dirt for accents this will be the first muddy/chipped/dented build I have done.

Photo's and build diary will start tomorrow as its 2345 here in NZ
With that said im off to watch the German Gran Prix in 10mins
Stand aside caffine, this is a job for alcohol.
User avatar
Bagpiper
Command Sergeant Major
Posts: 755
Joined: Mon May 27, 2013 6:12 am
Location: St. Louis. MO. USA
Contact:
United States of America

Re: Aoshima Thunderbirds "The Mole"

Post by Bagpiper »

Welcome to the Sci-Fi SiG. You've got plenty of time :-) Looking forward to seeing this build

Cheers
Jim
User avatar
Lee
Site Admin
Site Admin
Posts: 7312
Joined: Thu May 23, 2013 4:38 pm
Location: Lincolnshire
Contact:
Great Britain

Re: Aoshima Thunderbirds "The Mole"

Post by Lee »

Looking toward to this build :)
Image

Where does all the bloody time go.....?
WebbyNZ
Master Sergeant
Master Sergeant
Posts: 393
Joined: Thu May 30, 2013 11:02 am
Location: Manawatu, New Zealand
Contact:

Re: Aoshima Thunderbirds "The Mole"

Post by WebbyNZ »

And im off.
Image

1st suprise, this kit is motorised and lit. well kinda. it has 1 led and you have to buy a motor but the rest of the stuff you need is included.
Lets start with the unboxing.

Lots of pieces to build the tracks, they really could have taken the lead of some armour kits out there.
Image

The body of the transporter/base etc
Image

These parts make up most of the actual Mole, not a huge amount of detial but thats understandable considering the purpose of this vehicle.
Image

And the drill, which will move, providing i setup the motor and wiring correctly.
Image

There are more of these parts than there are actual parts for the model.
Image
Stand aside caffine, this is a job for alcohol.
WebbyNZ
Master Sergeant
Master Sergeant
Posts: 393
Joined: Thu May 30, 2013 11:02 am
Location: Manawatu, New Zealand
Contact:

Re: Aoshima Thunderbirds "The Mole"

Post by WebbyNZ »

So I started with the tracks as they looked like a lot of repetitive work which is all i felt like doing.
They got a coat of Vallejo primer mainly because I wanted to try it and so far I have no complaints.
Image

As olive drab is not the ideal colour for tracks they then got a coat of VMA Steel
Image

The individual track were attched to some tape to hit the ends with that were sanded after being removed from the sprue.
I then gave them a light spray with Vallejo wash Dark Rust to take the pop out of the steel.
Image

Then it was onto the wiring, these are all required to hold the guts of the hole together (not literally guts or a mole)
Image

And after some fiddling and head scratching at the 98% japanese instructions I have this.
Image

Thats it for update 1, next job is to get a motor.
Stand aside caffine, this is a job for alcohol.
User avatar
T3hGuppy
Second Lieutenant
Second Lieutenant
Posts: 3467
Joined: Wed Jun 12, 2013 11:20 pm
Location: Bournemouth, UK
Contact:
Great Britain

Re: Aoshima Thunderbirds "The Mole"

Post by T3hGuppy »

Looks like you've got a great kit their!!

Great start! :thumb2:
On the bench

Too much to list. !!


Youtube channel:https://www.youtube.com/user/bnealuk
User avatar
Paul
Site Admin
Site Admin
Posts: 12622
Joined: Thu May 23, 2013 4:47 pm
Location: Merseyside, England, UK
Contact:
England

Re: Aoshima Thunderbirds "The Mole"

Post by Paul »

Wow that's a cool kit :banana:
WebbyNZ
Master Sergeant
Master Sergeant
Posts: 393
Joined: Thu May 30, 2013 11:02 am
Location: Manawatu, New Zealand
Contact:

Re: Aoshima Thunderbirds "The Mole"

Post by WebbyNZ »

Got a motor on order but used a slightly larger one as a test and all the wiring works :dance:

Also did some more studying of the instructions and realised that on top of the drill spinning controlled by a switch under the body (tempted to put a smaller one in) the led lights only when attached to the base, which itself has a motor that can drive it forward or back via a small switch on the back.

When I got this kit I thought it was a lil on the expensive side, now i;m starting to think it was a bargin.
Stand aside caffine, this is a job for alcohol.
User avatar
Bagpiper
Command Sergeant Major
Posts: 755
Joined: Mon May 27, 2013 6:12 am
Location: St. Louis. MO. USA
Contact:
United States of America

Re: Aoshima Thunderbirds "The Mole"

Post by Bagpiper »

Excellent start there mate. Looking good and thanks for the details on how you did the tracks.

Cheers
Jim
User avatar
Nige201980
Captain
Captain
Posts: 4095
Joined: Wed Jun 05, 2013 9:30 am
Location: Doncaster South Yorkshire UK
Contact:

Re: Aoshima Thunderbirds "The Mole"

Post by Nige201980 »

What a cool looking kit looking forward to this coming together.
http://www.youtube.com/channel/UCy-TGcs5u_ZXSZ9kObNfsPg


On the go at the Mo

Quite a few :banana:
User avatar
5Craven
Sergeant Major
Sergeant Major
Posts: 652
Joined: Sun May 26, 2013 6:51 pm
Location: Weymouth, Dorset, UK

Re: Aoshima Thunderbirds "The Mole"

Post by 5Craven »

This promises to be an epic build, I'll get comfy :pop:
On the Bench

1/48 Revell SH-60B Seahawk (on hold)
1/72 Matchbox Supermarine Walrus II (Decalling)
1/48 Hasegawa Idolm@ster F-16C (Decals complete)
1/35 Hobbyboss ZSL-92 IFV (Building)
User avatar
schweinhund227
Chief Warrant Officer 4
Posts: 2627
Joined: Fri May 24, 2013 9:51 pm
Location: Ontario,Canada
Contact:
Canada

Re: Aoshima Thunderbirds "The Mole"

Post by schweinhund227 »

Going to town on this.... . WICKED !!!

My fav. TV shows in the late 60's

Keep up the good work !

:banana:
HobbyModeller
Sergeant First Class
Posts: 332
Joined: Wed May 29, 2013 4:47 pm

Re: Aoshima Thunderbirds "The Mole"

Post by HobbyModeller »

WOW I am green with envy I must find one !!
User avatar
BrummieModeller
Sergeant Major
Sergeant Major
Posts: 663
Joined: Sun May 26, 2013 5:47 pm
Location: Birmingham, UK

Re: Aoshima Thunderbirds "The Mole"

Post by BrummieModeller »

Ooooo thunderbirds i used to love it as a kid :th: looking forward to seeing this build :)
Dan

WIP Kits on the Bench

Revell 1/144 Airbus A320 Thomas Cook Livery
Airfix 1/72 Brewster Buffalo F2A-1
Revell 1/24 Mini Cooper Mk1
Airfix 1/76 Panther

My Facebook Page

Image
User avatar
DC87
Chief Warrant Officer 2
Posts: 1799
Joined: Wed Jun 05, 2013 7:16 pm
Location: Exeter, Devon, UK
England

Re: Aoshima Thunderbirds "The Mole"

Post by DC87 »

Best of luck for achieving all those firsts and building this kit. Such a great subject, I loved the show despite being a child of the 90's.

Are you going to place it in a diorama at all?
Dan C

Filling the workbench with:
Sopwith Snipe late post war
WW1 RFC SE5a

WW1-1/32 Snipe
Workbench gets full with models being built - Buys another workbench!

Image
User avatar
RED
Sergeant
Sergeant
Posts: 148
Joined: Sat Jun 29, 2013 12:01 am
Location: Queensland, Australia

Re: Aoshima Thunderbirds "The Mole"

Post by RED »

looks awesome mate
Cheers

Shaun


On the Bench
spit
109
harricane
superbug
abrams
M41 walker
....... and many more
spruecutter
Sergeant Major
Sergeant Major
Posts: 664
Joined: Tue Jun 18, 2013 12:06 am
Location: Deeside, UK

Re: Aoshima Thunderbirds "The Mole"

Post by spruecutter »

This should look good when completed
WebbyNZ
Master Sergeant
Master Sergeant
Posts: 393
Joined: Thu May 30, 2013 11:02 am
Location: Manawatu, New Zealand
Contact:

Re: Aoshima Thunderbirds "The Mole"

Post by WebbyNZ »

DC87 wrote:Best of luck for achieving all those firsts and building this kit. Such a great subject, I loved the show despite being a child of the 90's.

Are you going to place it in a diorama at all?
Thinking about a small dio for it. Will see how cruel Father Time is on the build.
Stand aside caffine, this is a job for alcohol.
WebbyNZ
Master Sergeant
Master Sergeant
Posts: 393
Joined: Thu May 30, 2013 11:02 am
Location: Manawatu, New Zealand
Contact:

Re: Aoshima Thunderbirds "The Mole"

Post by WebbyNZ »

Right, Update Time.
Thanks for all the positive comments guys, it defiantly helps with motivation.

The 'guts' of the mole semi mocked up and test fitted. The motor I had is not correct but lets me know the wiring is correct :)
The blue piece in the middle is a small cam that will cause the led to flash which kinda seems over engineered considering how easy flasher circuits are these days, but is very cool.
Image

That's as far as I can go with the mole for now so i separated all the parts for that
Image

And attached everything i can. Hopefully the motors arrive in the next couple of days while im out of town so i can get back into this next weekend.
Image

Onto the 'crawler' part. Cool little track tensioner.
Image

Again im surprised by the detail in this kit with the hydraulic cylinder and the electronics. The metal pins you see sit inside the ramp frame with a spring between to pass the power from the mole to the base which does not have its own battery source.
Image

Vallejo Olive Drab primer on (and still wet) to darken up the blue plastic this was molded in. First time ive used the Vallejo primer on a kit and I'm going to be ordering some more colours next week, im that impressed with the coverage and the ease of cleanup.
Image

The Vallejo primers also make great base for the Vallejo Model Air paints (something wrong if they didn't).
Tried a couple of colours but settled on the Dark Sea Blue which is a vast improvement on the original plastic colour.
Ill probably be darkening/weathering/muddying this up but I'm happy with the current 'showroom' colour.
Image

Right, so what is left that I can do on this kit.
The drill (or whatever you call it) has some awful chrome and molding lines on it.
Image

And thats it for this weekend. So everything nicely back in the box till next weekend so I can keep the workbench tidy.
Image

Except for the chrome parts which are currently going through the simple green/ultrasonic cleaner de-chroming bath.
Image

Scraped those back w the handy hobby knife.
Image

I was not worried about a clean job as this is the business end of the mole so I expect it to not be in perfect condition so i chipped and scratched it up a but.
This will also help the dechroming process if there are some holes in it.
Image
Stand aside caffine, this is a job for alcohol.
User avatar
T3hGuppy
Second Lieutenant
Second Lieutenant
Posts: 3467
Joined: Wed Jun 12, 2013 11:20 pm
Location: Bournemouth, UK
Contact:
Great Britain

Re: Aoshima Thunderbirds "The Mole"

Post by T3hGuppy »

Great update.

Kit is coming together really well.

:th:
On the bench

Too much to list. !!


Youtube channel:https://www.youtube.com/user/bnealuk
User avatar
Lee
Site Admin
Site Admin
Posts: 7312
Joined: Thu May 23, 2013 4:38 pm
Location: Lincolnshire
Contact:
Great Britain

Re: Aoshima Thunderbirds "The Mole"

Post by Lee »

Great start Webby :th:
Image

Where does all the bloody time go.....?
User avatar
DC87
Chief Warrant Officer 2
Posts: 1799
Joined: Wed Jun 05, 2013 7:16 pm
Location: Exeter, Devon, UK
England

Re: Aoshima Thunderbirds "The Mole"

Post by DC87 »

Really good so far, enjoying this already :D .
Dan C

Filling the workbench with:
Sopwith Snipe late post war
WW1 RFC SE5a

WW1-1/32 Snipe
Workbench gets full with models being built - Buys another workbench!

Image
User avatar
muskegman
First Sergeant
First Sergeant
Posts: 479
Joined: Thu May 30, 2013 1:23 am
Location: British Columbia , Canada
Canada

Re: Aoshima Thunderbirds "The Mole"

Post by muskegman »

Brings back memories of my younger years. Looks like a great kit you have there and I am looking forward to watching you build it :th:

Mark.
User avatar
Bagpiper
Command Sergeant Major
Posts: 755
Joined: Mon May 27, 2013 6:12 am
Location: St. Louis. MO. USA
Contact:
United States of America

Re: Aoshima Thunderbirds "The Mole"

Post by Bagpiper »

Looking good. I see what you mean about being over engineered with the cam for the LED. I guess it is easier to produce some plastic parts rather than add some electronics to keep the costs down. Glad you removed those seam lines too mate :-) Looked bad in the photographs. :thumb2:

Coming along nicely. :-)

Cheers
Jim
User avatar
schweinhund227
Chief Warrant Officer 4
Posts: 2627
Joined: Fri May 24, 2013 9:51 pm
Location: Ontario,Canada
Contact:
Canada

Re: Aoshima Thunderbirds "The Mole"

Post by schweinhund227 »

Nice work... it won't look as a TOY now that you have put all that work into it.... AWESOME !!!
WebbyNZ
Master Sergeant
Master Sergeant
Posts: 393
Joined: Thu May 30, 2013 11:02 am
Location: Manawatu, New Zealand
Contact:

Re: Aoshima Thunderbirds "The Mole"

Post by WebbyNZ »

Sorry for the lack of updates. It has been a mad couple of weeks between a major project at work, a $2000+ vet bill and a cough ive had for almost 3 weeks the workbench has not always been on my priority list but excuses no more as I have a happy cat, a big box of antibiotics & a couple of long weekends ahead.

The motors arrived so the guts of the mole have been fitted.
Here you see all the wires being held in place as the gorilla glue sets them well away from any of the moving parts.

Image

Here are all the guts in their final location, all greased up and ready for closure

Image

I also got the gears into the 'crawler' and fitted the wheels onto their pins which were a nice tight fit so I found i could gently force them in easier by using the clamp

Image

Also made fitting the drive wheels easier

Image

All the guts of the crawler are wired and in, much easier than the actual mole parts.
The connectors mentioned previously that connect the base to the mole sit on the metal plates when the mole is lowered and my turning the little switch at the back the mole will drive forwards or backwards.

Image

The ramp (for lack of a better term) can be raised or lowered and locks in those positions thanks to moulded in recesses below the hinge

Image

Back to the mole that unforunatley I tried to close up under the influence of cold medication and while trying to get the LED down to a decent height managed to shatter it completley

Image

So I attached a new one which thankfully sits better and is a brighter flash.

Image

With the mole tacked together and the LED and tracks masked off I started with a coat of Vallejo German Red Brown Primer

Image

The drill also got a coat of the Vallejo Verde Olive US primer

Image

The mole now has a layer of VMA Gold Yellow which the primer helped give a darker 'mustard' colour which im happy with.

Image

The last little panels etc were applied to cover up the screw holes etc and any any bits of mole that had been missed (there are lits of little nooks and crannies under this) were hit with the VMA Gold Yellow.

Image

There were still some seam lines on the drill standing out to me so i took them back and went over those spots with VMA Gun Grey

Image

The VMA Gun Grey then got a light coat (look heavier in the pics) over the rest of the drill parts
Image

Then randomly I applied a small amount of Army Painter Warpaints Quickshade Soft Tone to see what effect that had, which was random experimentation as this will be painted over again soon.

Image

Thats it for now but hopefully a lot more gets done over the next couple of weeks.
Stand aside caffine, this is a job for alcohol.
User avatar
Lee
Site Admin
Site Admin
Posts: 7312
Joined: Thu May 23, 2013 4:38 pm
Location: Lincolnshire
Contact:
Great Britain

Re: Aoshima Thunderbirds "The Mole"

Post by Lee »

Nice update... Loving this build :th:
Image

Where does all the bloody time go.....?
User avatar
Paul
Site Admin
Site Admin
Posts: 12622
Joined: Thu May 23, 2013 4:47 pm
Location: Merseyside, England, UK
Contact:
England

Re: Aoshima Thunderbirds "The Mole"

Post by Paul »

Great work webby it's looking awesome :th:
User avatar
Nige201980
Captain
Captain
Posts: 4095
Joined: Wed Jun 05, 2013 9:30 am
Location: Doncaster South Yorkshire UK
Contact:

Re: Aoshima Thunderbirds "The Mole"

Post by Nige201980 »

Loving this build can't wait to see it moving about on your work bench.
http://www.youtube.com/channel/UCy-TGcs5u_ZXSZ9kObNfsPg


On the go at the Mo

Quite a few :banana:
User avatar
T3hGuppy
Second Lieutenant
Second Lieutenant
Posts: 3467
Joined: Wed Jun 12, 2013 11:20 pm
Location: Bournemouth, UK
Contact:
Great Britain

Re: Aoshima Thunderbirds "The Mole"

Post by T3hGuppy »

Really coming together now buddy :th:
On the bench

Too much to list. !!


Youtube channel:https://www.youtube.com/user/bnealuk
User avatar
muskegman
First Sergeant
First Sergeant
Posts: 479
Joined: Thu May 30, 2013 1:23 am
Location: British Columbia , Canada
Canada

Re: Aoshima Thunderbirds "The Mole"

Post by muskegman »

Starting to look really good so far, looking forward to seeing more :thumb2:

Mark
spruecutter
Sergeant Major
Sergeant Major
Posts: 664
Joined: Tue Jun 18, 2013 12:06 am
Location: Deeside, UK

Re: Aoshima Thunderbirds "The Mole"

Post by spruecutter »

Good stuff :thumb2:
WebbyNZ
Master Sergeant
Master Sergeant
Posts: 393
Joined: Thu May 30, 2013 11:02 am
Location: Manawatu, New Zealand
Contact:

Re: Aoshima Thunderbirds "The Mole"

Post by WebbyNZ »

Ok guys, thanks for you kind words that I have cruely ignored with no updates for over 2 weeks :oops:
The good news is last weekend went well and so here is a nice big update.

The mole than got a coat of Vallejo Chipping Medium which as you will see later I applied too heavily.
Image

While that dried some of the Dark Sea Blue was mixed with Black and sprayed over the bottom of the base, then White was added to the Dark Sea Blue and sprayed from above to give it a bit of shading/modulation to break up the large dark blue surfaces.
Image

Once the Chipping Medium was dry I went over the whole mole with Medium Yellow.
Image

Here you can see the effect of excessive Chipping Medium as it crackled the Medium yellow coat of paint.
As this is going to be worn I was not super concerned about it and will try and minimise the effect later.
Image

I then liberally sprayed water over the top and waited a minute or so for the top coat to soften up and started chipping with both ends of a paint brush, trying to stay in the direction the mole would be moving when in use and around protruding areas
Image

Some washes etc should bring the effect out even more
Image

Next i tried to darken up some of the panel lies but the cracking took the wash and spread it in an unfortunate way, luckily it cleans up easily when still wet.
Image

So after doing a little work on the panels i hit it with a layer of Klear (closest thing to future I have been able to lay my hands on)
Image

While that dried for a couple of days it was back to the drill which got a coat of the Chipping Medium (much lighter this time) and a topcoat of Steel
Image

Once dry I was able to chip away the Steel to reveal the darker colours underneath
Image

The drill is pretty much done now.
Image

I remembered from some reference pics that there was a rocket engine in the back of the mole so the tip of that got some weathering with Tamiya Weathering Master powders.
First some Gun Metal
Image

Then Burnt Blue and Burnt Red to get a slightly more heat stained look.
Image

Once the Klear was fully dried it was onto the decals. There are a fewq and they seem to be focused on one side of the mole.
Image

Once they are on they really help break up the yellow.
Image

Unfortunately the decal that goes over the round external part broke going over (don't think it would have gone out without breaking to be honest) but im not sad as it adds to the worn effect
Image

Here you see how few decals are on the other side, and that was me moving one to this side that was supposed to be on the other.
Image

Modellers best friends when it comes to decals has to be Micro Set and Micro Sol
Here they helped the decals conform to the panel lines and chips in the mole.
Image

I tried some chrome powder to add a little depth to the drill but this stuff really does not like to shine unless its over a gloss back base so it went back in the drawers.
Image

The drill got a light wash with Flory Models Concrete to add some lil chunks and shading.
It then had Vallejo Gloss Varnish applied before being attached to the Mole which has the final details brush painted on in VMA Gun Grey and VMA Steel before a coat of Vallejo Satin Varnish which really knocked back the shine from the Klear and brought the final look together.
Image

The final result is something im very happy with, obviously its not perfect but 'completion over perfection' should always apply.
Image

The yellow over-spray on the tracks needs to be cleaned up but for now its done.
Image

Time for a quick spin to check all the electronics survived paint process.
[youtube][/youtube]

Now it needs something to live on so back to the base which gets its decals.
Image

Once again one side has more decals but not as bad as the mole. Now its ready for a clear-coat
Image

Once the clear had fully dried it was onto some weathering, starting with some mud slashes with MIG Mud Splash Wash (the first enamel product on this kit).
It goes on a lot clearer and darker than but dries to a great looking dirt effect.
Image

I just loaded up a larger brush and flicked that at the kit trying to focus on the parts where mud is most likely to splatter but also giving it an all over dirty. Any excess will be cleaned with MIG thinners once its dried fully and the effect is revealed.
Image

And now back to the job I have kinda been putting off, the tracks, not because of any reason other than I wanted some time I knew I would not be interrupted doing them.
Image

The Mr Hobby CA applicator set is one of my favourite purchases, just look for Mr Glue on sites like HLJ.com and you will find them.
Really easy to use and clean-up afterwards.
Image

Once the tracks were done they were slipped on and the parts came together for the first time.
Image

Obviously some last little touch-up bits needed bits 100% but at 9pm on a Sunday night i am happy for now.
Image

Coming soon will be the completed kit photos, but until then.
Image

[youtube]4gfUQ9BWye4[/youtube]

(Fixed your vid link Webby.. Coen)
Stand aside caffine, this is a job for alcohol.
User avatar
T3hGuppy
Second Lieutenant
Second Lieutenant
Posts: 3467
Joined: Wed Jun 12, 2013 11:20 pm
Location: Bournemouth, UK
Contact:
Great Britain

Re: Aoshima Thunderbirds "The Mole"

Post by T3hGuppy »

Wow massive update.

She looks great dude. :th:
On the bench

Too much to list. !!


Youtube channel:https://www.youtube.com/user/bnealuk
User avatar
Lee
Site Admin
Site Admin
Posts: 7312
Joined: Thu May 23, 2013 4:38 pm
Location: Lincolnshire
Contact:
Great Britain

Re: Aoshima Thunderbirds "The Mole"

Post by Lee »

What an update!

Really looks awesome :th:
Image

Where does all the bloody time go.....?
User avatar
Paul
Site Admin
Site Admin
Posts: 12622
Joined: Thu May 23, 2013 4:47 pm
Location: Merseyside, England, UK
Contact:
England

Re: Aoshima Thunderbirds "The Mole"

Post by Paul »

Great work mate, it looks superb, look forward to the final pics :th:
User avatar
wappynutter
Chief Warrant Officer 3
Posts: 2256
Joined: Mon Jun 17, 2013 11:39 pm
Location: Sutton in Ashfield, Nottinghamshire. UK
Great Britain

Re: Aoshima Thunderbirds "The Mole"

Post by wappynutter »

Gorgeous looking mole Webby........ :crazy:
Top thumbs all day long.... :th: :th: :th: :thumb1: :thumb1: :thumb1: :thumb2: :thumb2: :thumb2:
Well done mate its the mutts nutts...... :clap:

:cheers2:
Regards Andy...Image
YouTube Channel..... http://www.youtube.com/channel/UCRdZFBjr6oO-T-2ydSB4HIg
User avatar
5Craven
Sergeant Major
Sergeant Major
Posts: 652
Joined: Sun May 26, 2013 6:51 pm
Location: Weymouth, Dorset, UK

Re: Aoshima Thunderbirds "The Mole"

Post by 5Craven »

Looks fantastic mate :thumb2: :bow::
On the Bench

1/48 Revell SH-60B Seahawk (on hold)
1/72 Matchbox Supermarine Walrus II (Decalling)
1/48 Hasegawa Idolm@ster F-16C (Decals complete)
1/35 Hobbyboss ZSL-92 IFV (Building)
spruecutter
Sergeant Major
Sergeant Major
Posts: 664
Joined: Tue Jun 18, 2013 12:06 am
Location: Deeside, UK

Re: Aoshima Thunderbirds "The Mole"

Post by spruecutter »

It's turned out really well :thumb2:
HobbyModeller
Sergeant First Class
Posts: 332
Joined: Wed May 29, 2013 4:47 pm

Re: Aoshima Thunderbirds "The Mole"

Post by HobbyModeller »

Love it! Fantastic job I'd love to build this although it wouldn't be anywhere as good as this :clap:
longlance67
Warrant Officer
Warrant Officer
Posts: 1371
Joined: Fri Aug 16, 2013 5:22 pm
Location: Galway, Ireland

Re: Aoshima Thunderbirds "The Mole"

Post by longlance67 »

great build, you did a fine job ! :)


Shane
On the Bench:
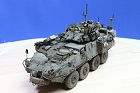
Trumpeter Stryker ESV
Hobby Boss 1/48 F18 Hornet
1/72 Dragon King Tiger with Zimm
28mm Napoleonic project
28mm Norman Conquest of Ireland painting project

My Channel:
http://www.youtube.com/user/longlance67
User avatar
alextheblue
Chief Warrant Officer 5
Posts: 2679
Joined: Mon Jul 15, 2013 11:30 am
Location: Slough, United Kingdom
Contact:
Scotland

Re: Aoshima Thunderbirds "The Mole"

Post by alextheblue »

Have been following this one, but must have got distracted as I missed the latest updates.

Looks real good Webby, you've done a brilliant job on it and it could be the model off of the program (only yours looks better! :th: )

Brought back memories of watching it as a kid!
"Courage is feeling fear and acting anyway."

www.alextheblue.com
UKscalemodeller
Chief Warrant Officer 3
Posts: 2062
Joined: Tue May 28, 2013 12:31 pm

Re: Aoshima Thunderbirds "The Mole"

Post by UKscalemodeller »

That (cuts through) rocks!

Seriously excellent work.
User avatar
Coen
General
General
Posts: 10136
Joined: Wed May 29, 2013 2:04 am
Location: Nova Scotia, Canada
Contact:
Canada

Re: Aoshima Thunderbirds "The Mole"

Post by Coen »

UKscalemodeller wrote:That (cuts through) rocks!

Seriously excellent work.
Haha...funny!
Markc428
Private First Class
Private First Class
Posts: 30
Joined: Thu Sep 18, 2014 11:30 am
Location: Salisbury England

Re: Aoshima Thunderbirds "The Mole"

Post by Markc428 »

Just recently joined the forum and found this thread, I LOVE THIS BUILD. I've always been a Thunderbirds fan, this is so cool and would have won if I had been the judge.

Thanks :cheers2:
Move fast stay low

On the bench

Tamiya King Tiger 1/35
User avatar
UKguyInUSA
Second Lieutenant
Second Lieutenant
Posts: 3429
Joined: Sun Mar 30, 2014 10:19 pm
Location: New Hampshire, USA formerly Palm Beach, Florida, USA and Leicestershire, UK (until 1999)
Contact:

Re: Aoshima Thunderbirds "The Mole"

Post by UKguyInUSA »

Great looking "Mole"....takes me back to my youth! :thumb1: :clap:
WIP:: Tamiya 1/48 F4U-1A Corsair

Non-WIP::Eduard 1/48 Fokker DVII, Revell 1/32 Arado AR196 and 1/32 BF109G10 Erla,
Post Reply

Return to “Builds”