Update # 1: road wheels, suspension and lower hull
Found some time to start the adventure on the Leo during the week. Now, here is my first report (please excuse my awful English

- hopefully you’ll occasionally understand what I mean at least) …
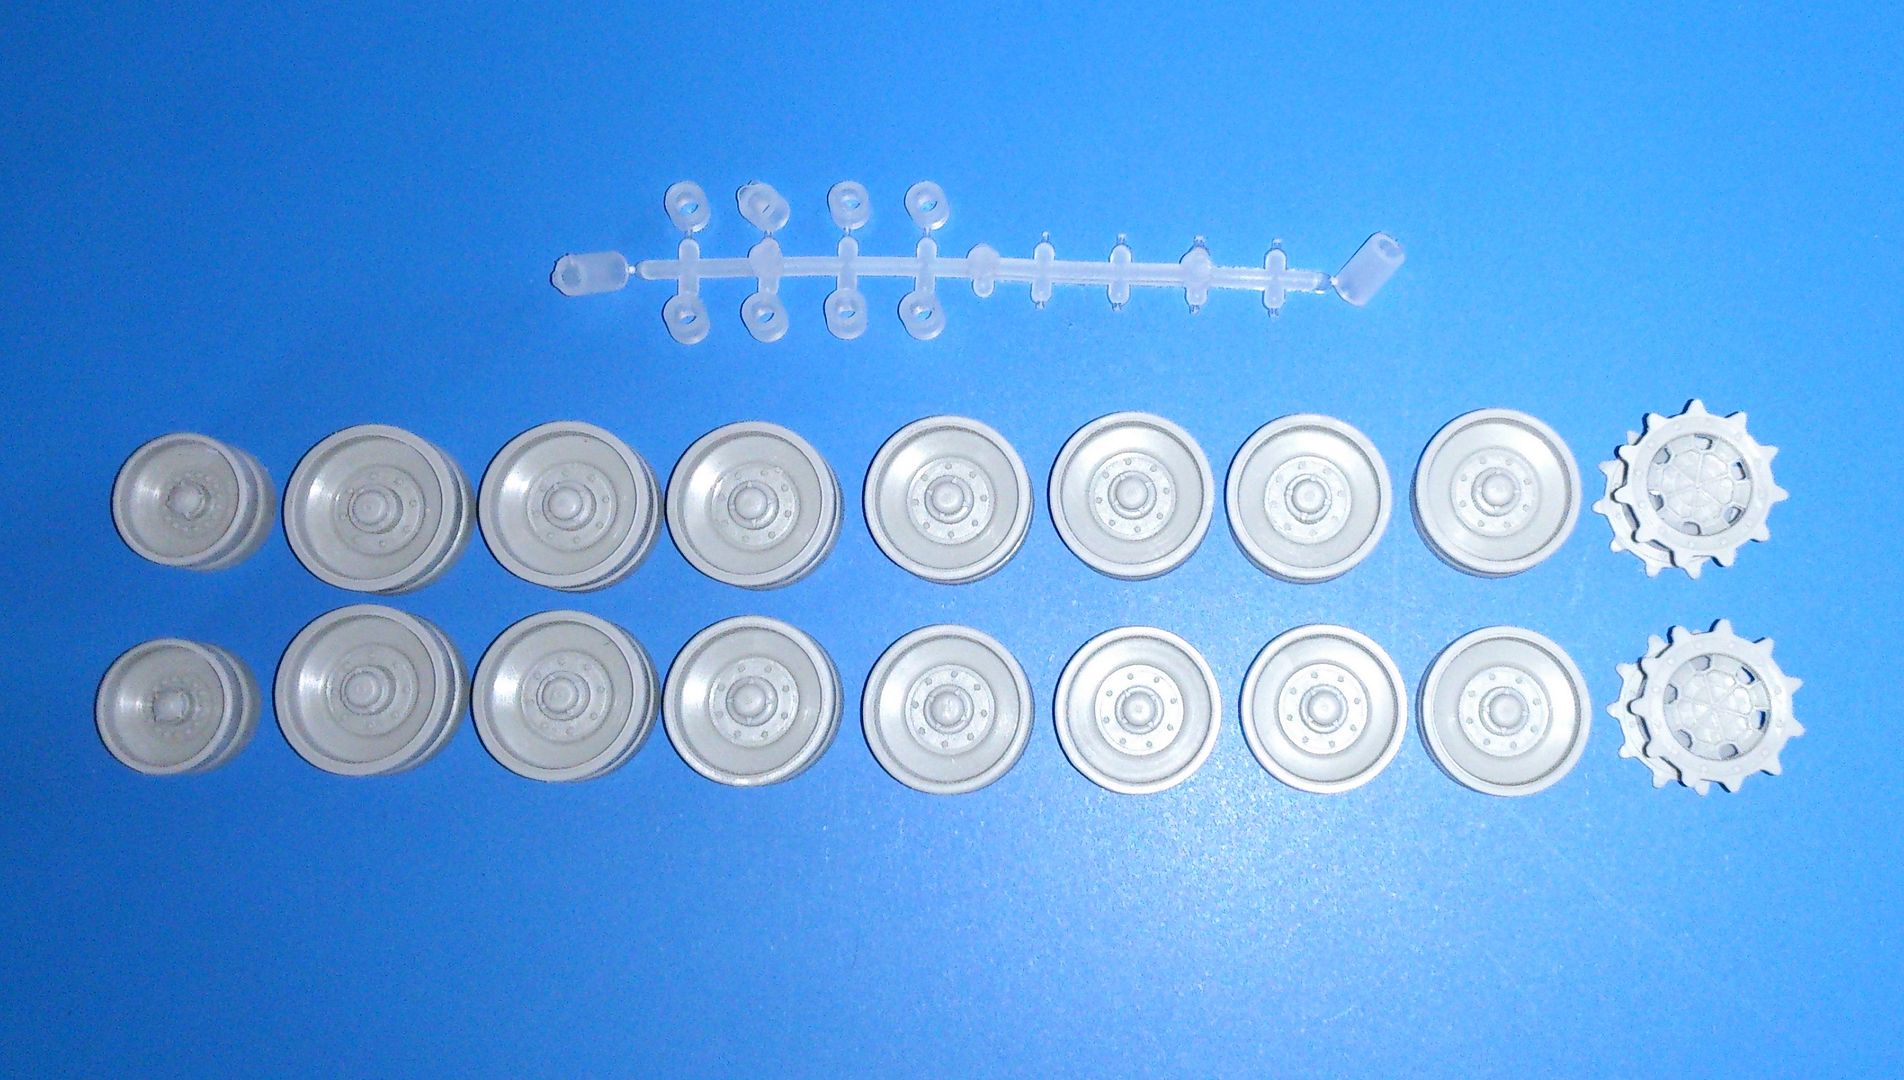
Commenced assembling the road wheels as customary and it went off without a hitch unsurprisingly. Nonetheless here are two supplementary notes as well:
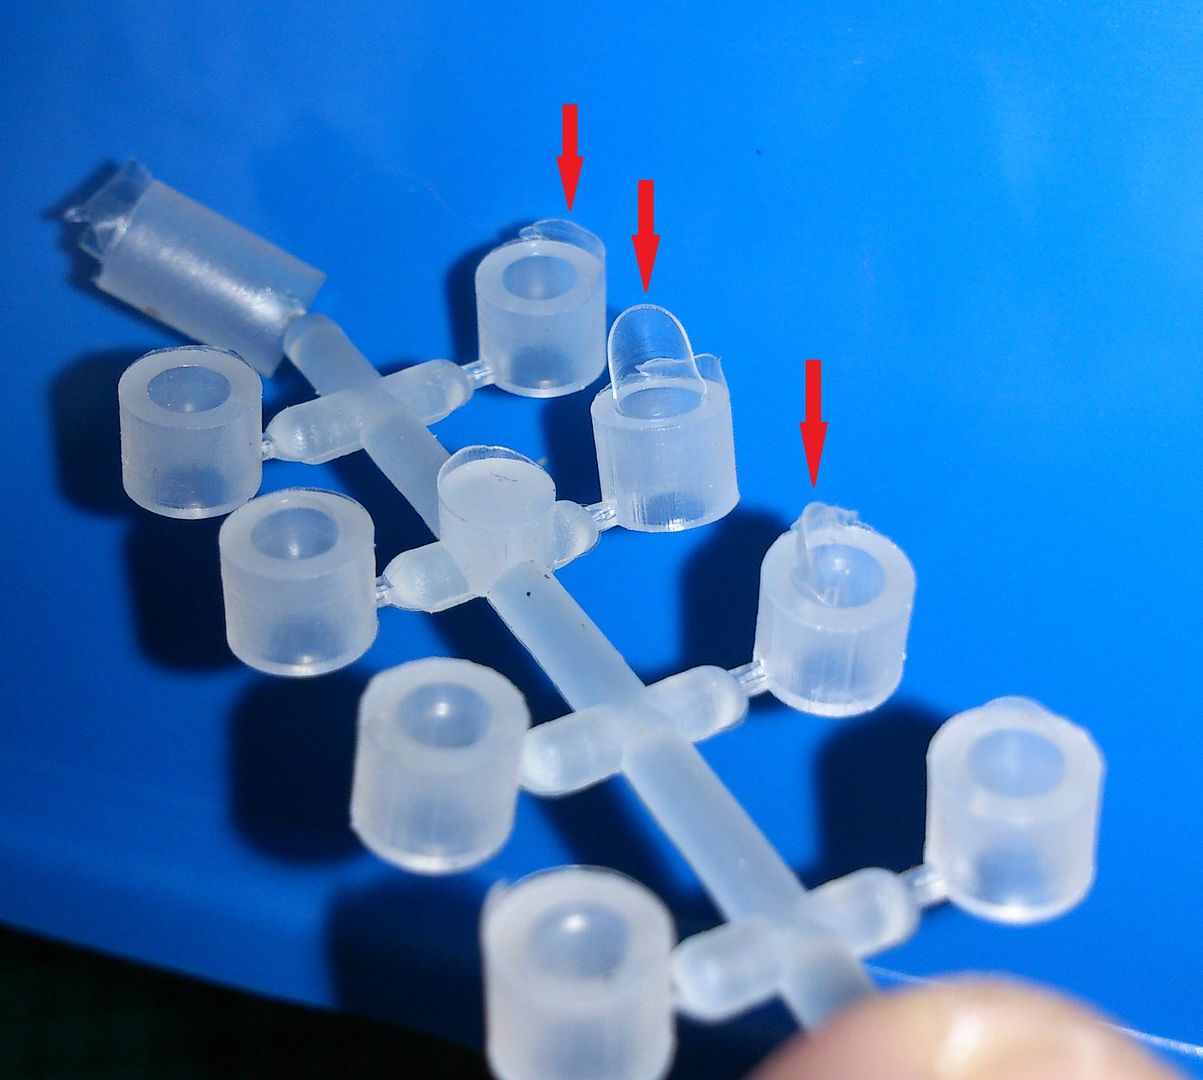
1. All parts are covered with flash (not exclusively the road wheels – even the poly caps as you hopefully can see) that you have to take your time to clean them all up.
2. Use care on assembling the divided sprocket wheels cos of fitting issues! Both parts of one single sprocket wheel gotta adjust exactly to one another. Otherwise the tracks doesn’t figure later on.
Following suspension assembling:
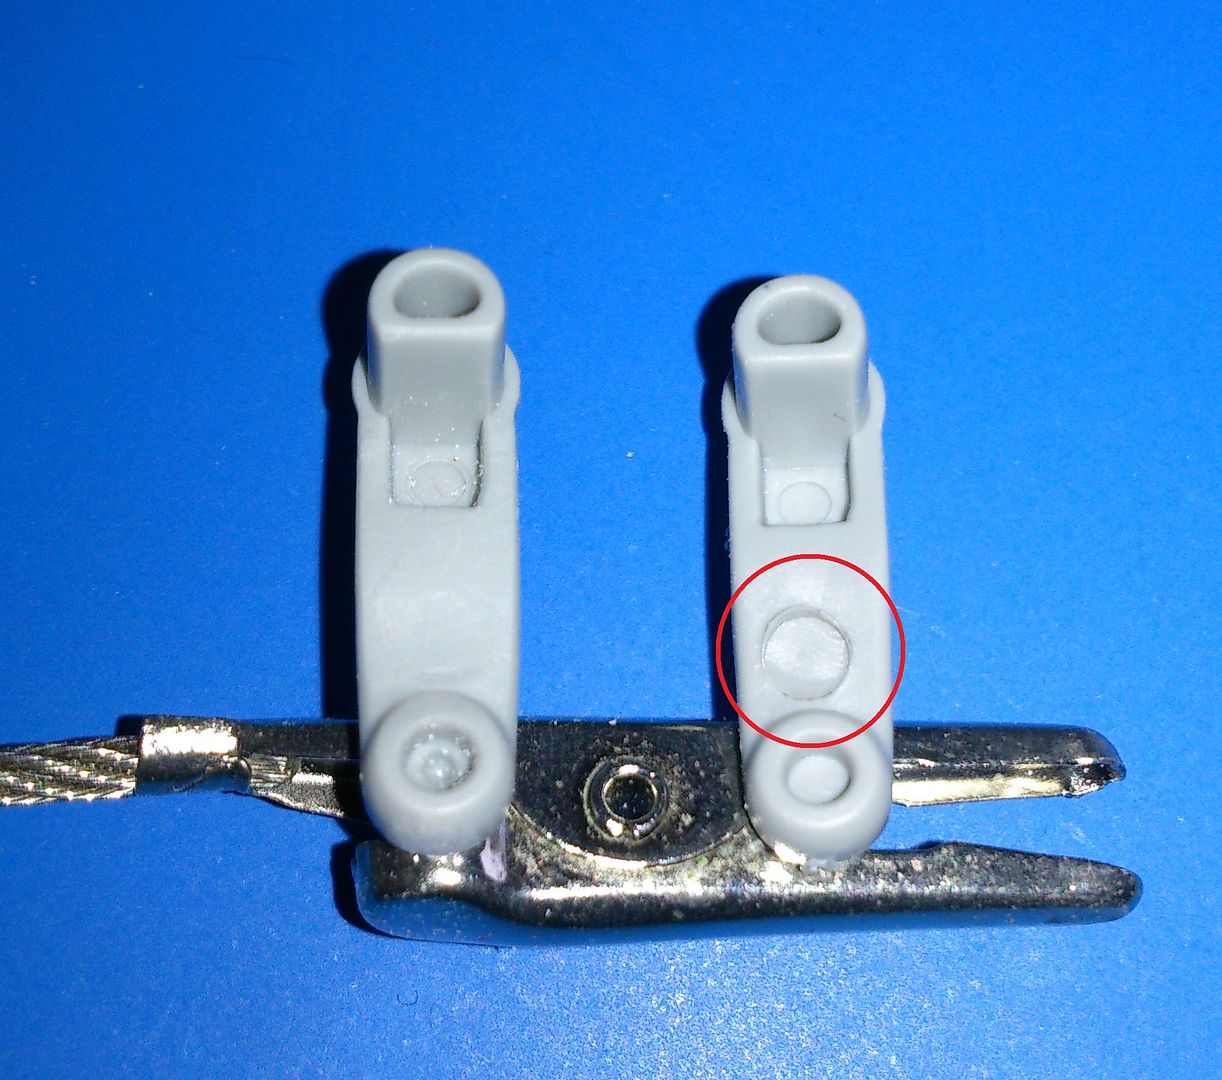
Ugly pinmarks on each suspension arm

… but don’t panic! It’s not as bad as it looks. Sanding smooth slightly is quite enough (no filler needed). On the right-hand side you can see one part before sanding and another one after reworking on the left:
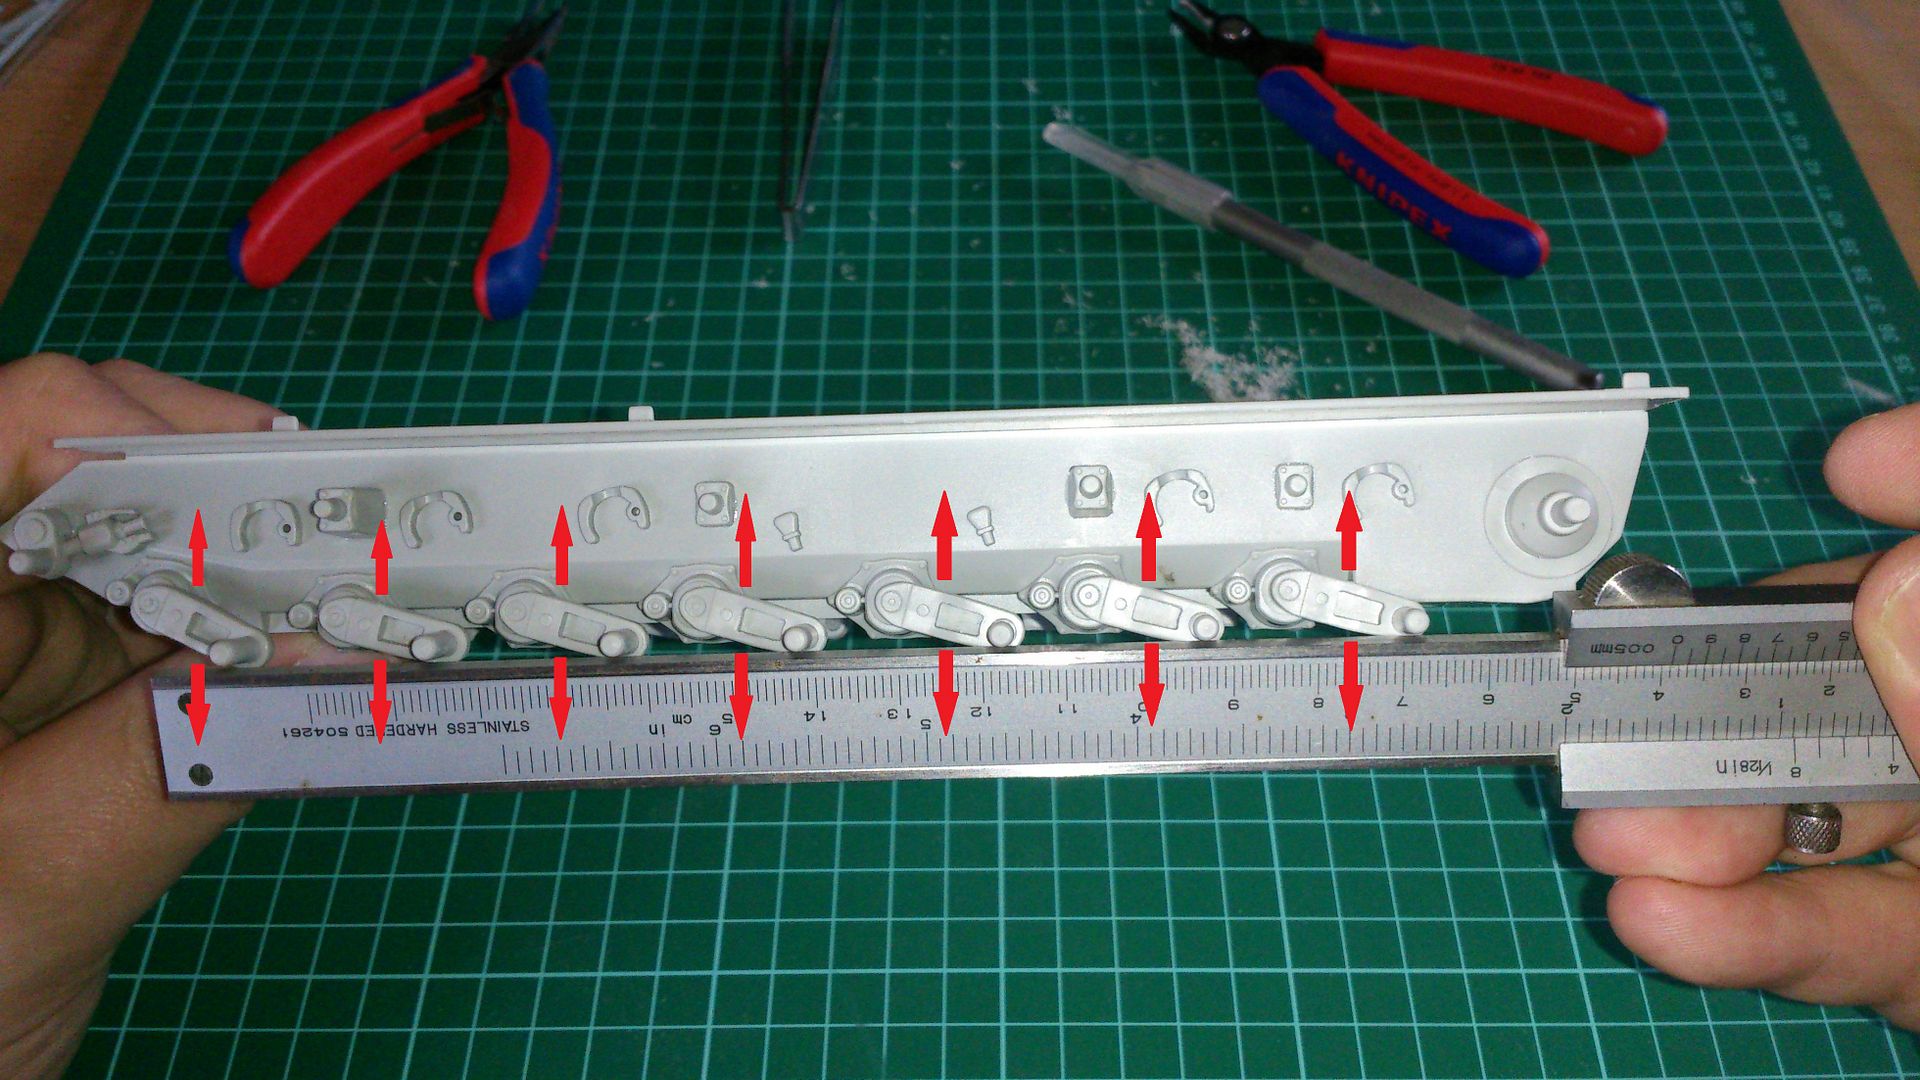
The suspension arms have to be lined up (to both sides) in any case as several connectors have much circumferential backlash. If you don’t use caution here your cat will set askew.
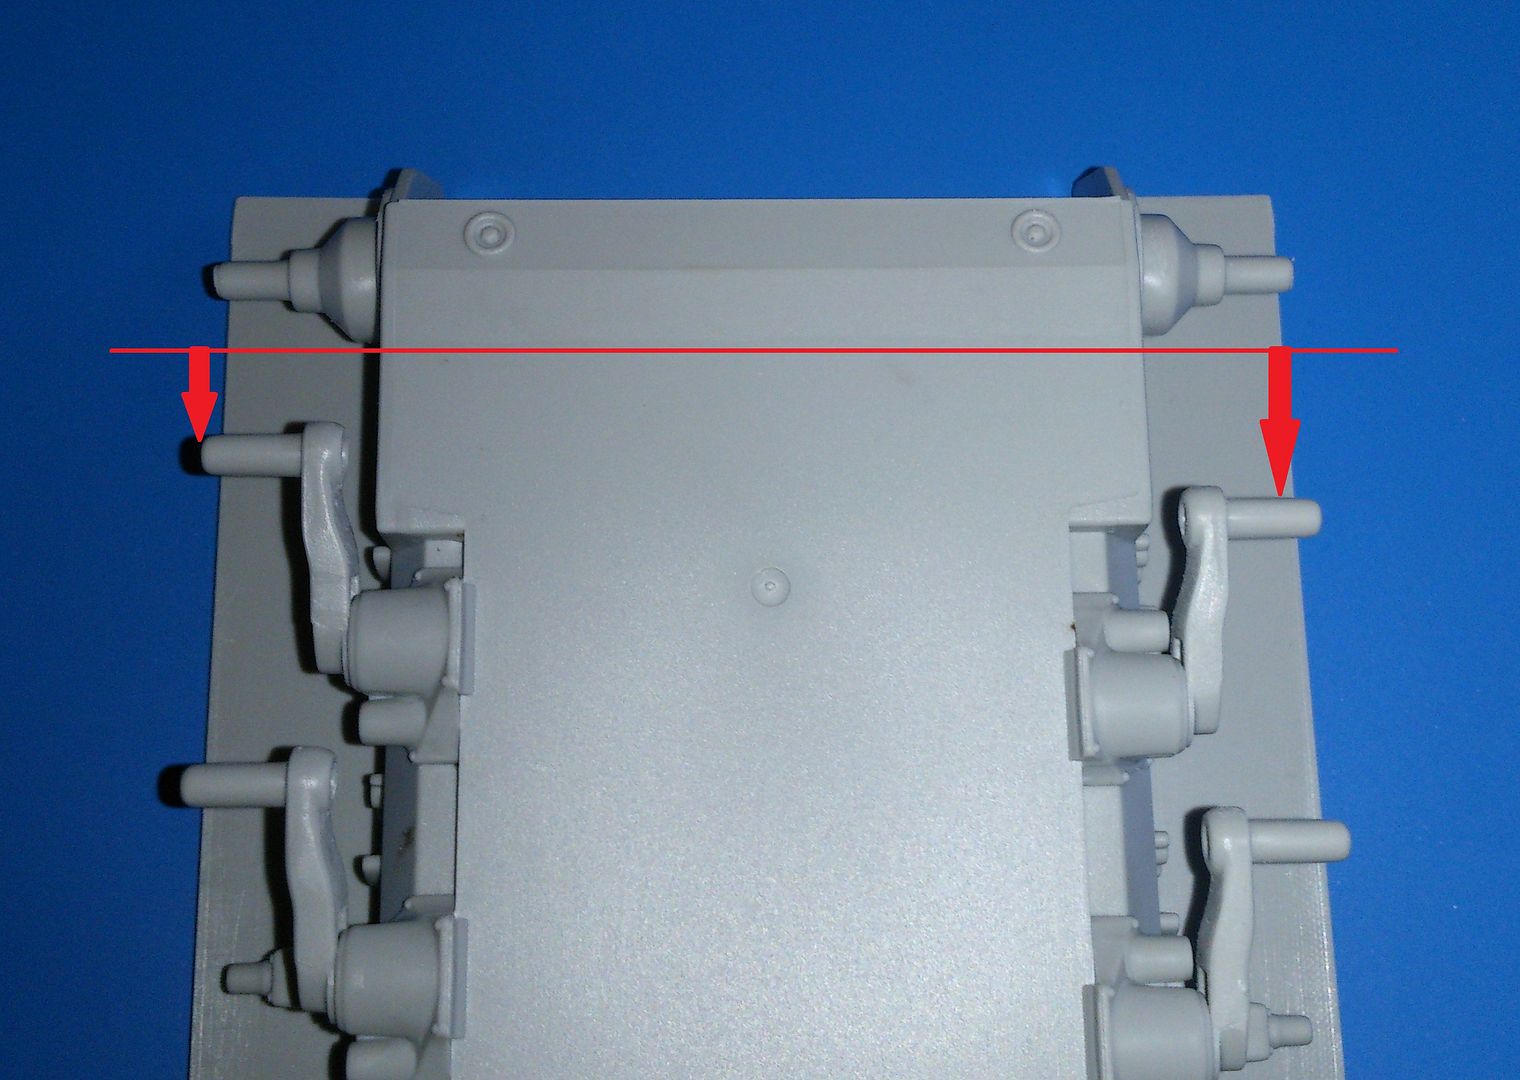
Already seen this oddly centre distances on other kits but haven’t any idea what’s the point of that

. That’s not how it goes at the real vehicle I guess, is it

? Maybe one of you knows …
????
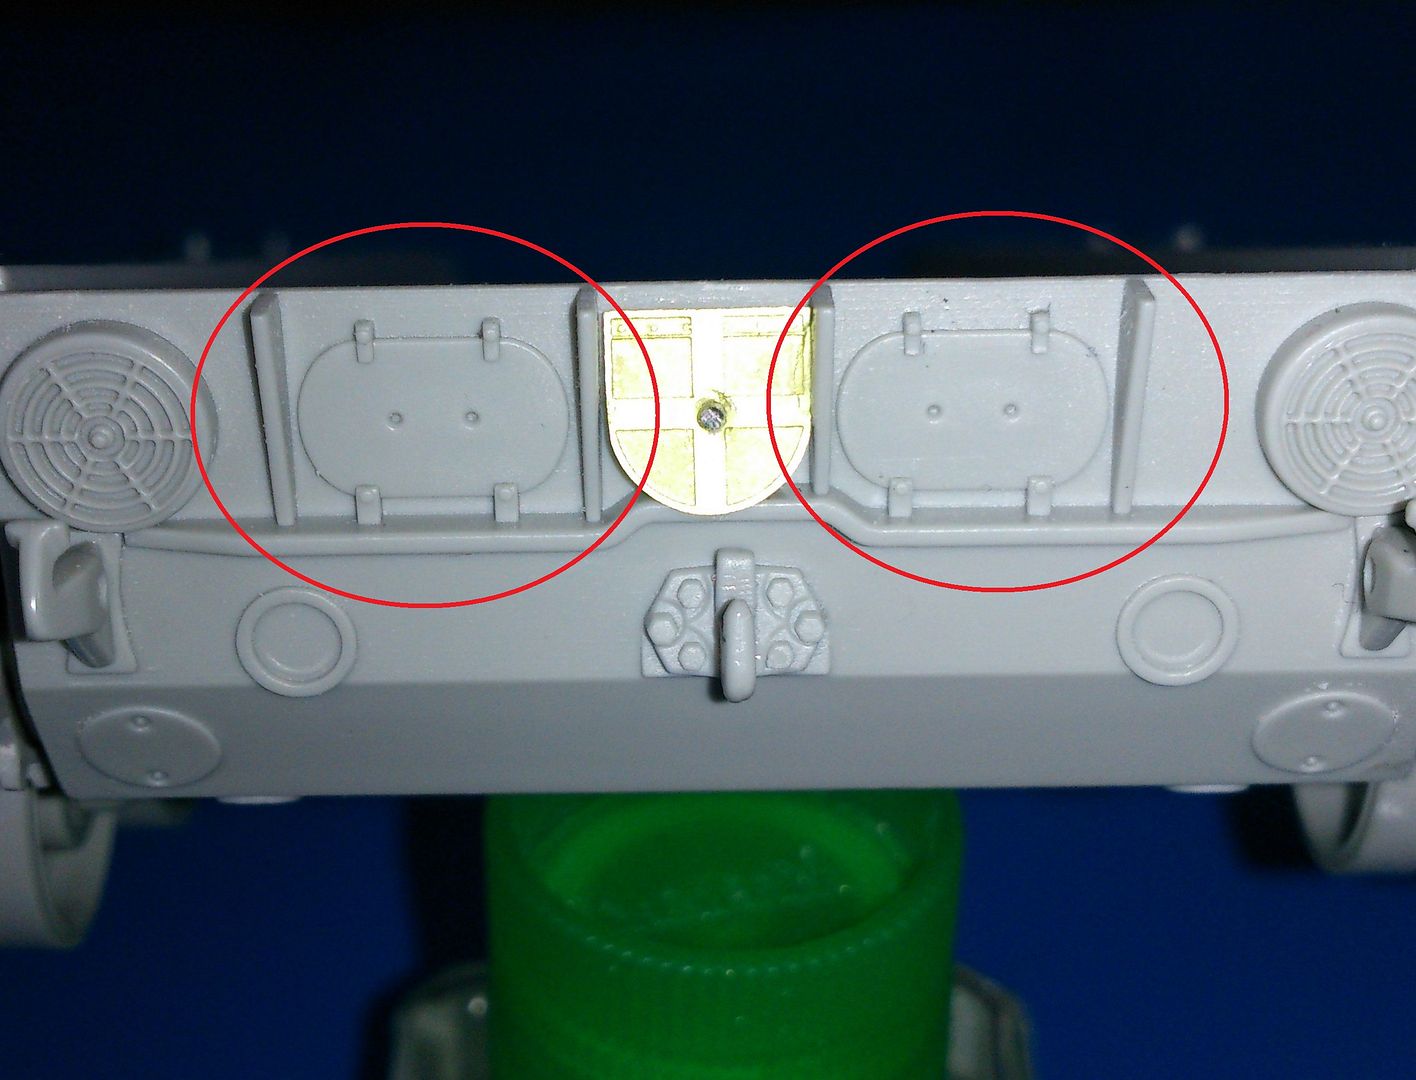
My very first PE (“Leitkreuz”) is glued in place

.
As far as I know both of these maintenance apertures (red marks) on the rear hull are usually covered with one plate each. The Bundeswehr usually attached the NATO-standardized tactical sign (branch of service, unit number) on the left plate and the vehicle registration mark on the right. Unfortunately there are no conforming parts included that a little scratch work was needed …
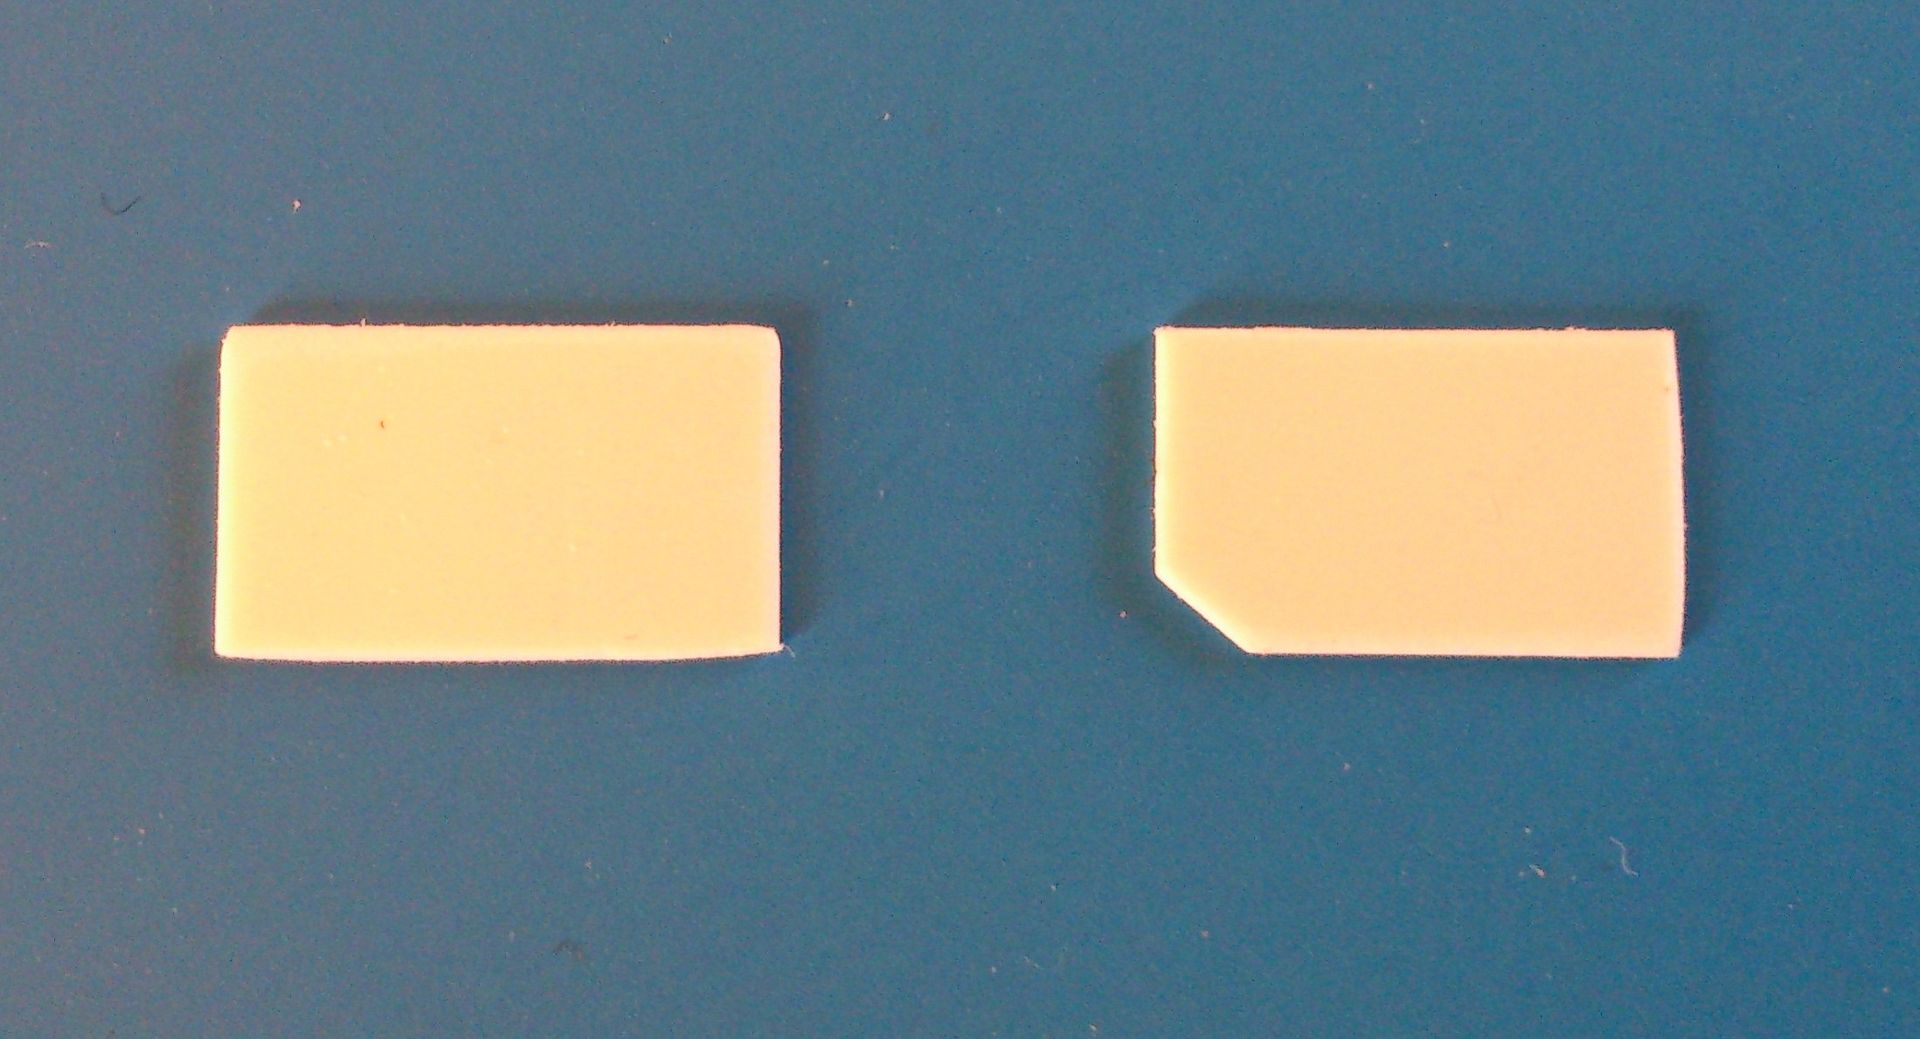
Used a styrene-sheet to cut the two plates to shape (the right one must be angled at it) …
Now a little fine-tuning: At the original vehicles two gib heads jut out upon the plates which I’ve tried to recreate. Sadly no punch-and-die tool was available so I had to improvise …
With a gimlet I’ve drilled two holes in each plate to define the gibs position exactly.
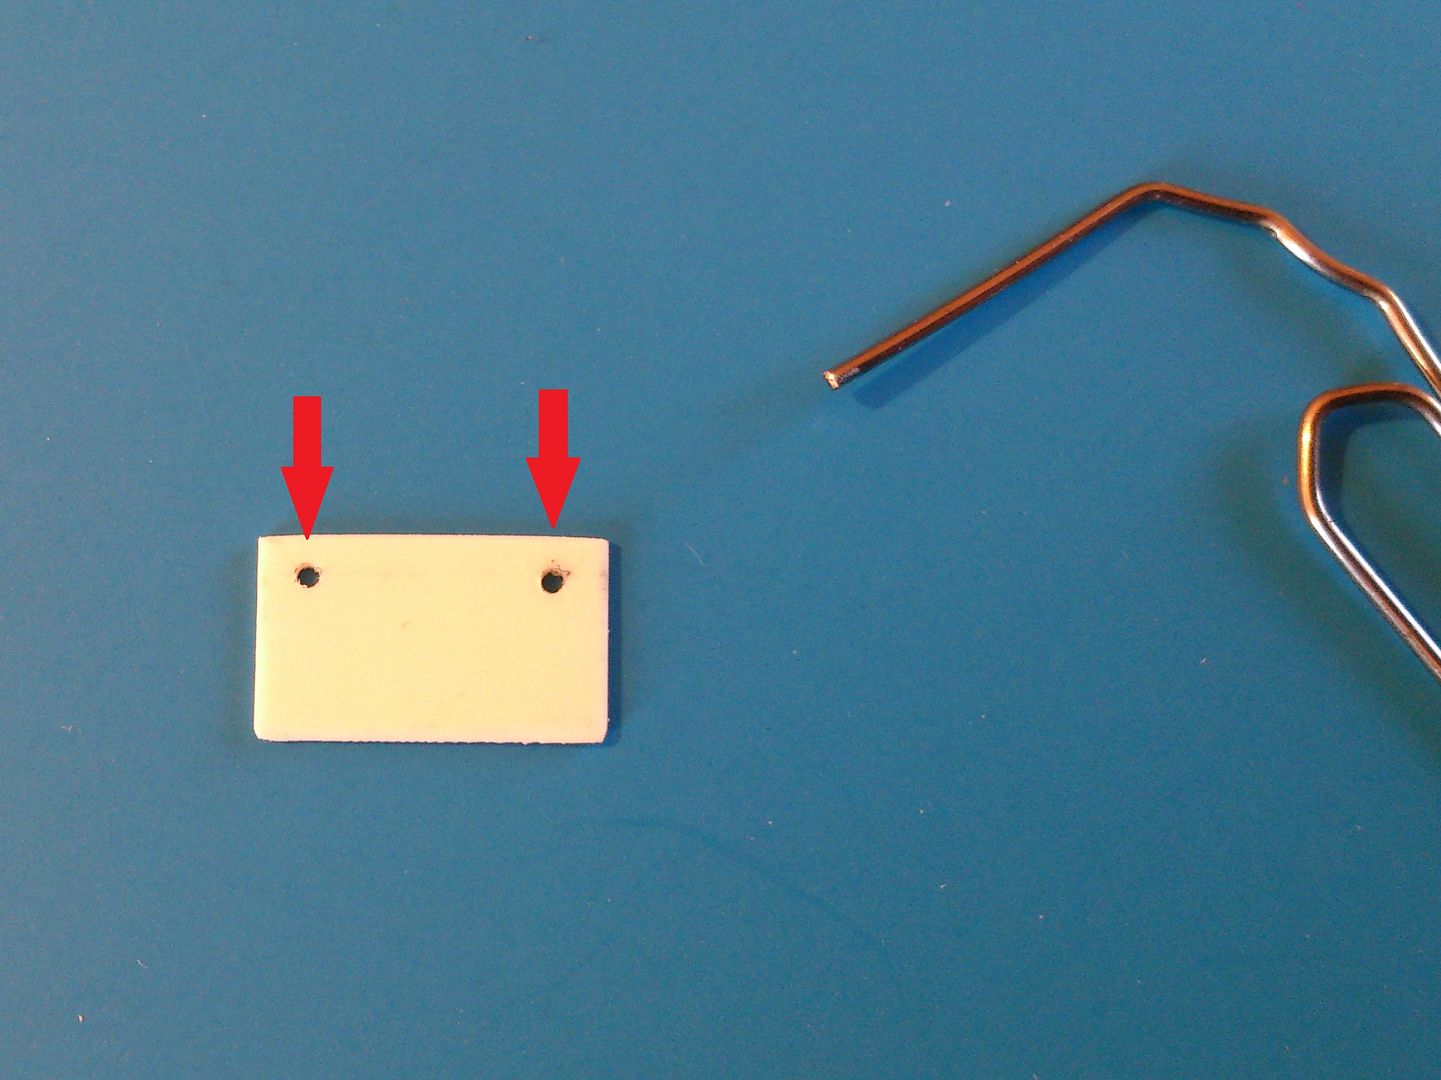
Afterwards the forward end of a paperclip was blunted with a file. Then I shoved the wire through the drilled hole that the rounded end protruded a little bit, cut the surplus wire off and super-glued the rivet from behind.

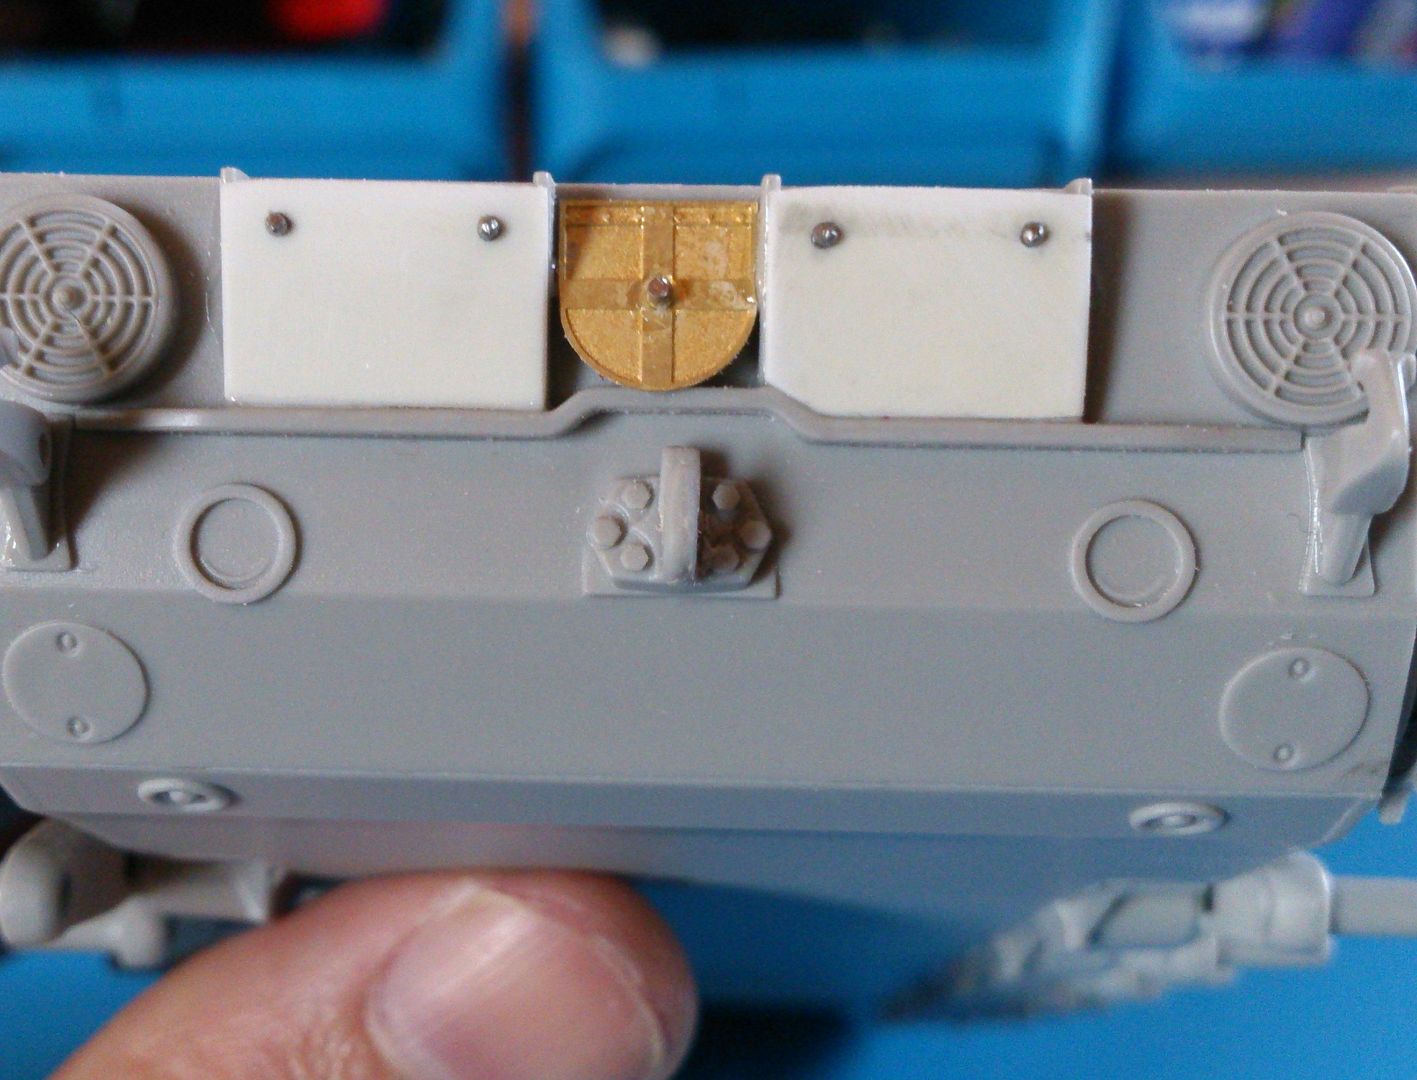
And that’s the result …

Thought that’s good enough for me

and glued both in place (and I’m afraid that the “Leitkreuz” is placed too high as I see right now) …
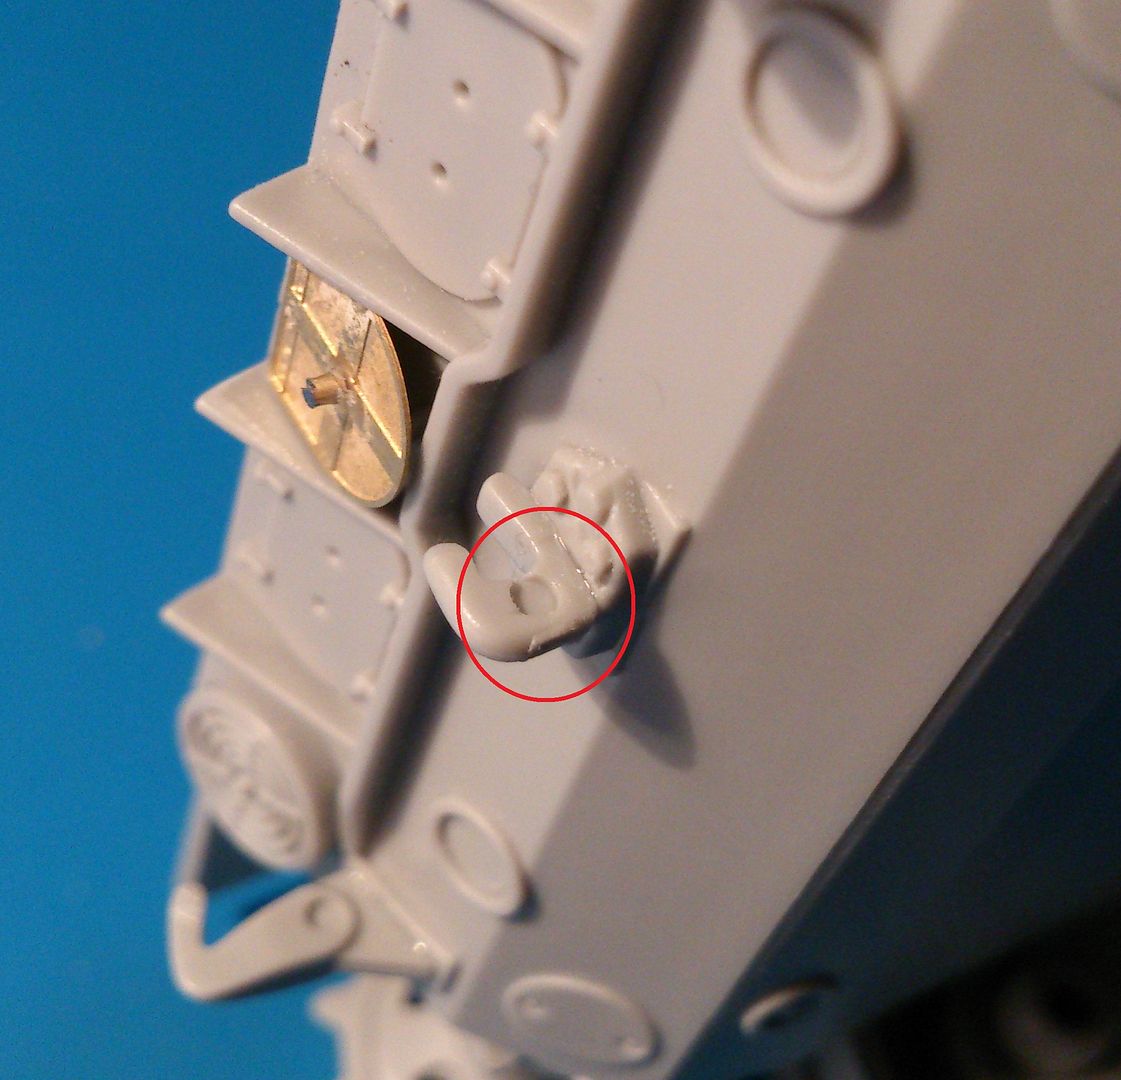
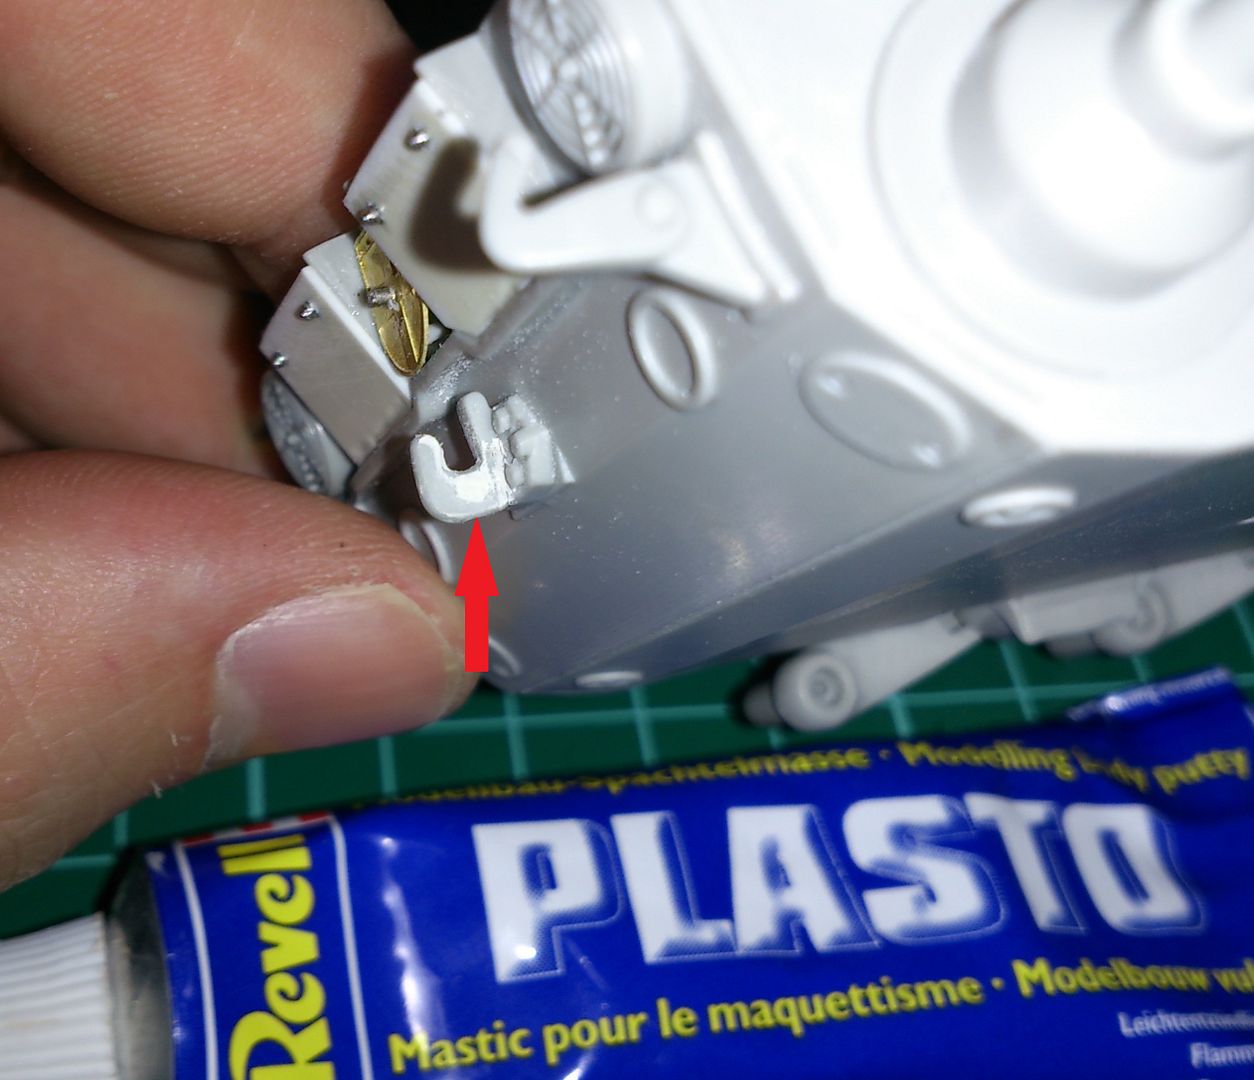
Any more pinmarks

. Some Plasto needed …
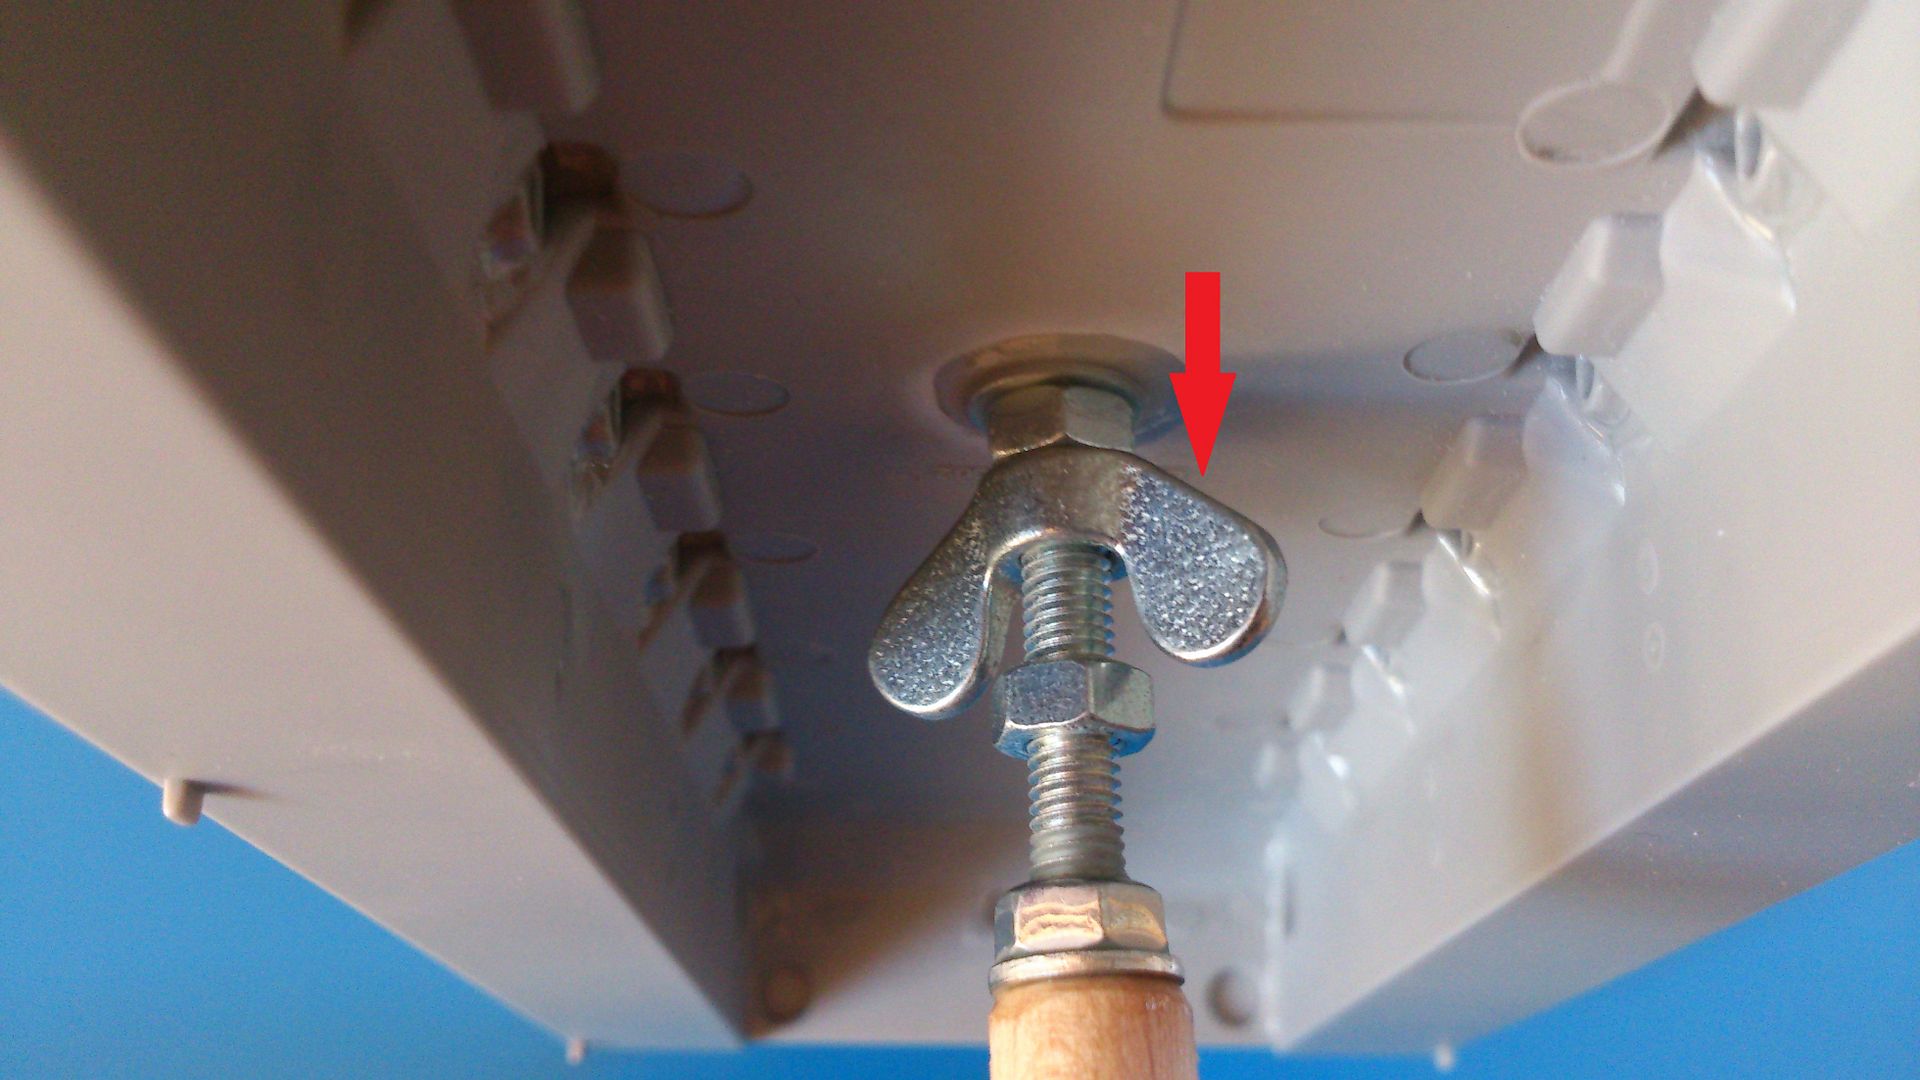
Finally I’ve super-glued a screw-nut at the inner surface of the hull to affix my painting-handle onto. The handle is made of roundwood in which I’ve drilled a hole to stick a threaded rot into. The threaded rot gets fixed with superglue onto the roundwood.

A butterfly nut at the handle itself serves as a locknut.

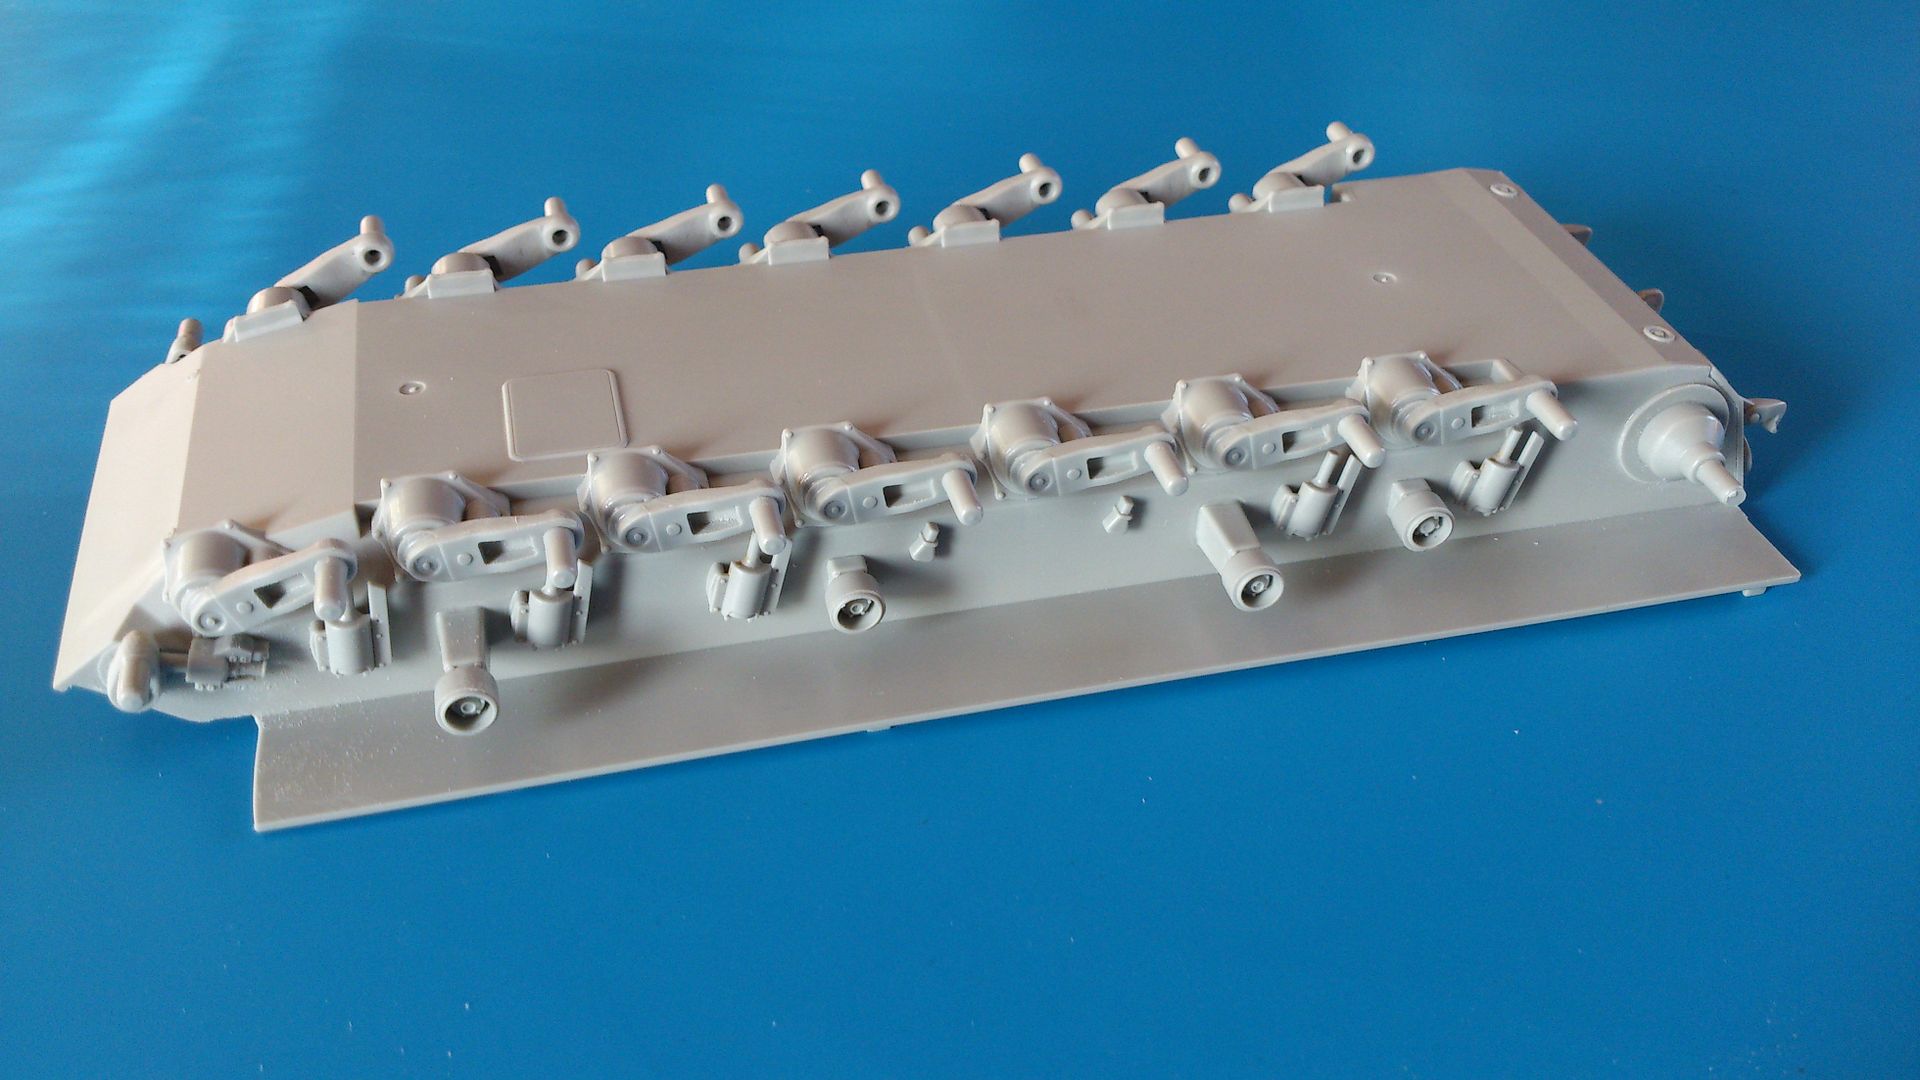
Assembling stage until now …
My preliminary conclusion up to here:
The kit worth its money I guess. I’ve paid less than 20 € for it and got several nice detailed parts inclusively one PE-sheet and a few clear parts for the periscopes so I can’t complain

!
However … the kit always has its weak points that’s a given! There are some fitting issues and most parts are covered with ever so much flash in conspicuous or at hard-to-reach spots. But anyways … you can’t have everything.
That’s it for now! Next update will follow maybe next week and will hopefully deal with the track assembling (that’s what I intend to do for once – and I’m Brad Pitt-scared of it

)…
Please feel free to post any comments (also criticism is allowed)!