Page 1 of 1
Two Hawker Typhoons in 1/48 Hasegawa.
Posted: Mon May 05, 2014 4:33 pm
by Willem
Hi all.
The Hawker Typhoon is probably one of my favourite aircraft ever. It suffered from problems in early development but became a highly effective fighter bomber.

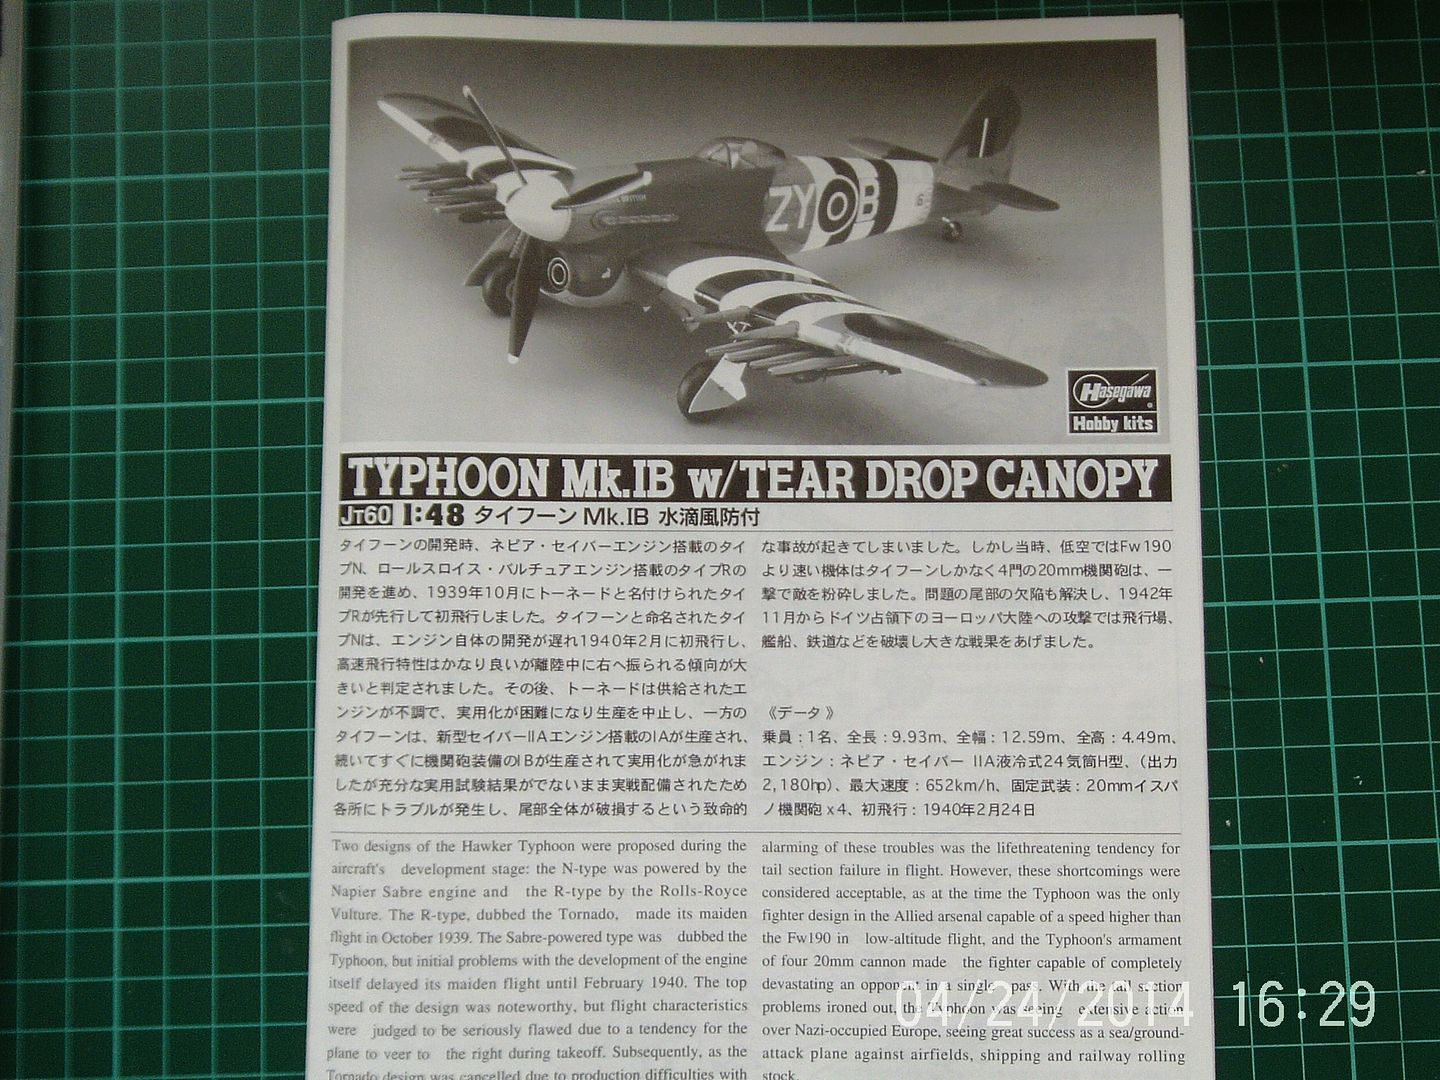
The Hasegawa Typhoon kits initially came out in the mid 1990s and have been periodically reissued. The subject of this build is the Mk Ib bubbletop. Although the kit has been around for a while, I think that it is the best Tiffie in 1/48.
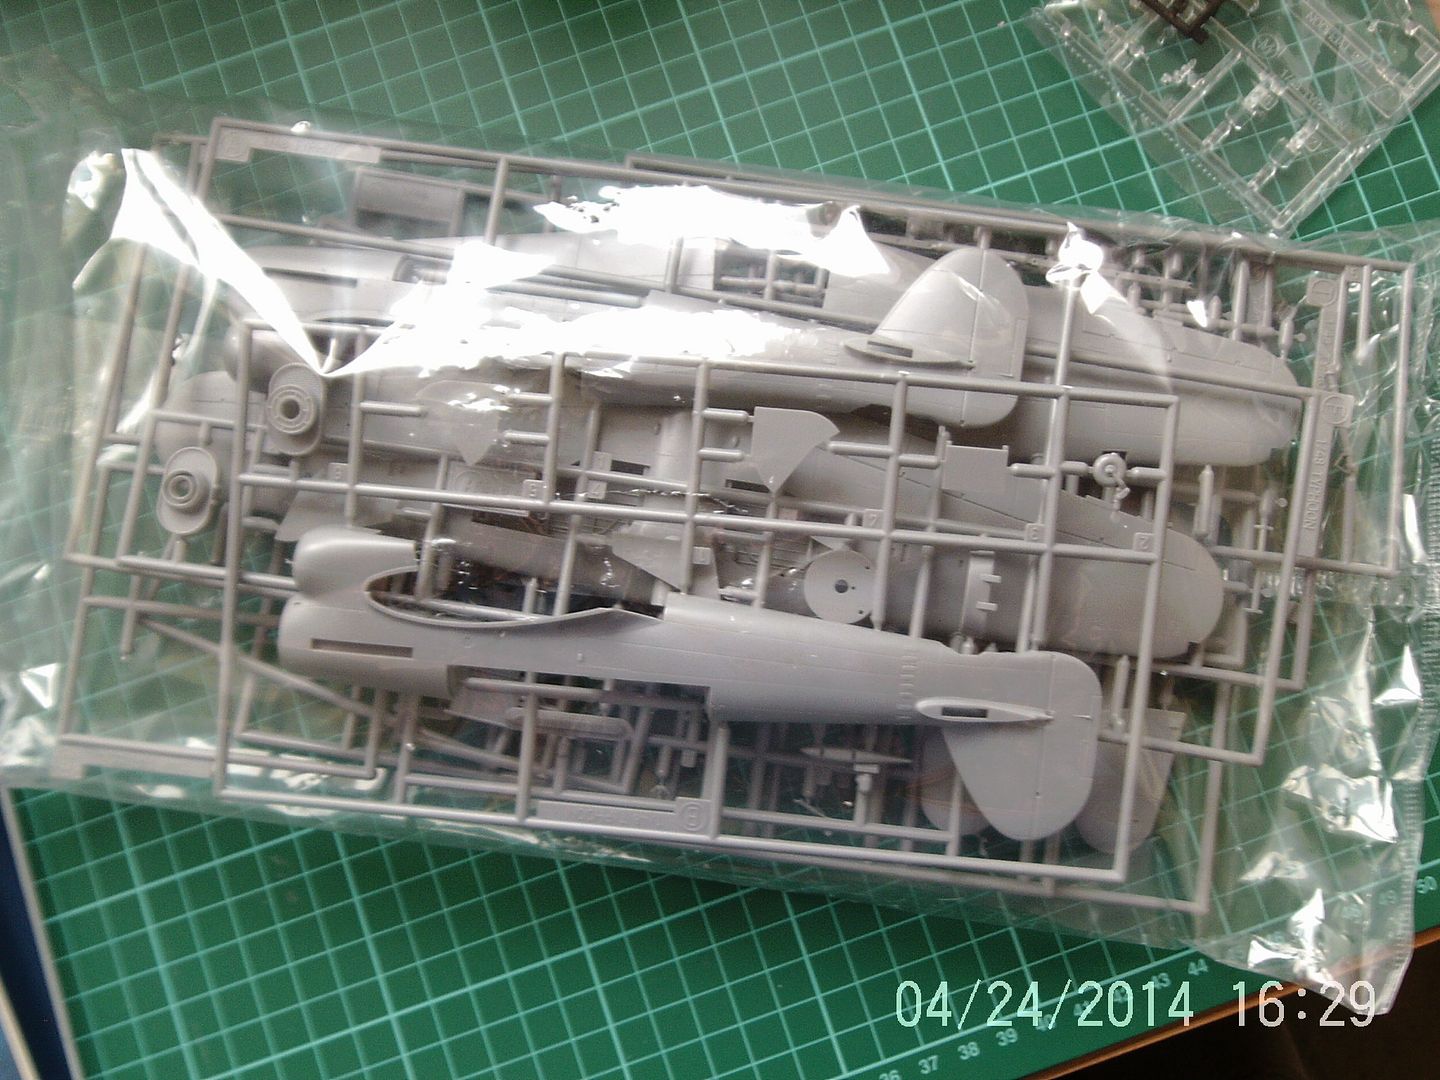
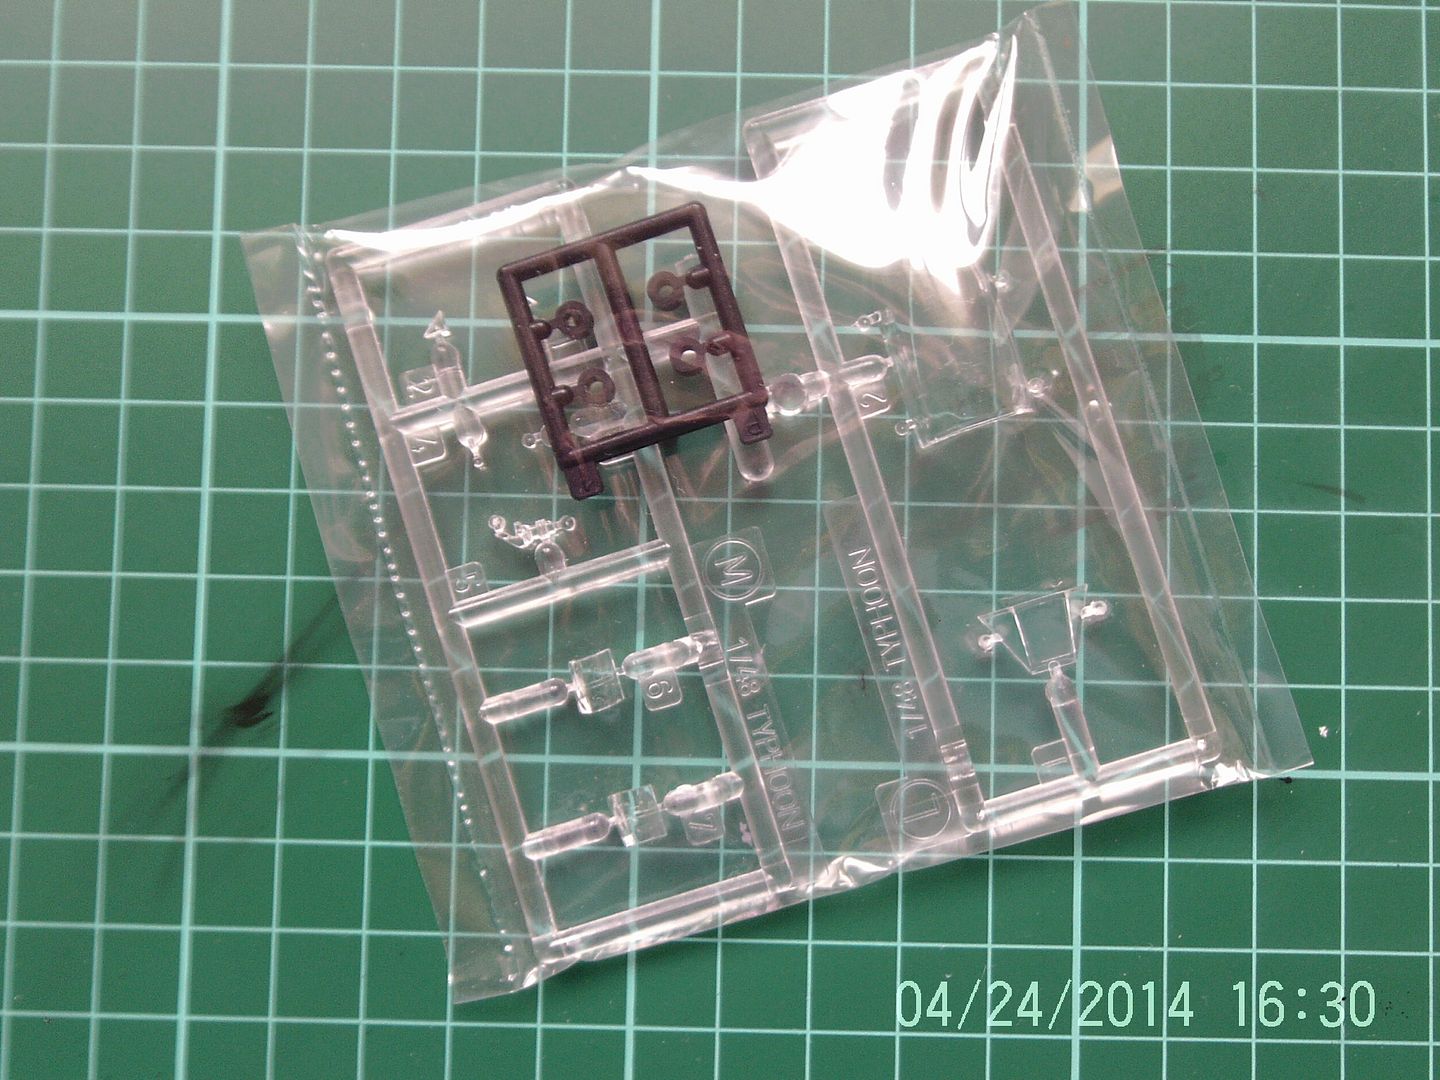
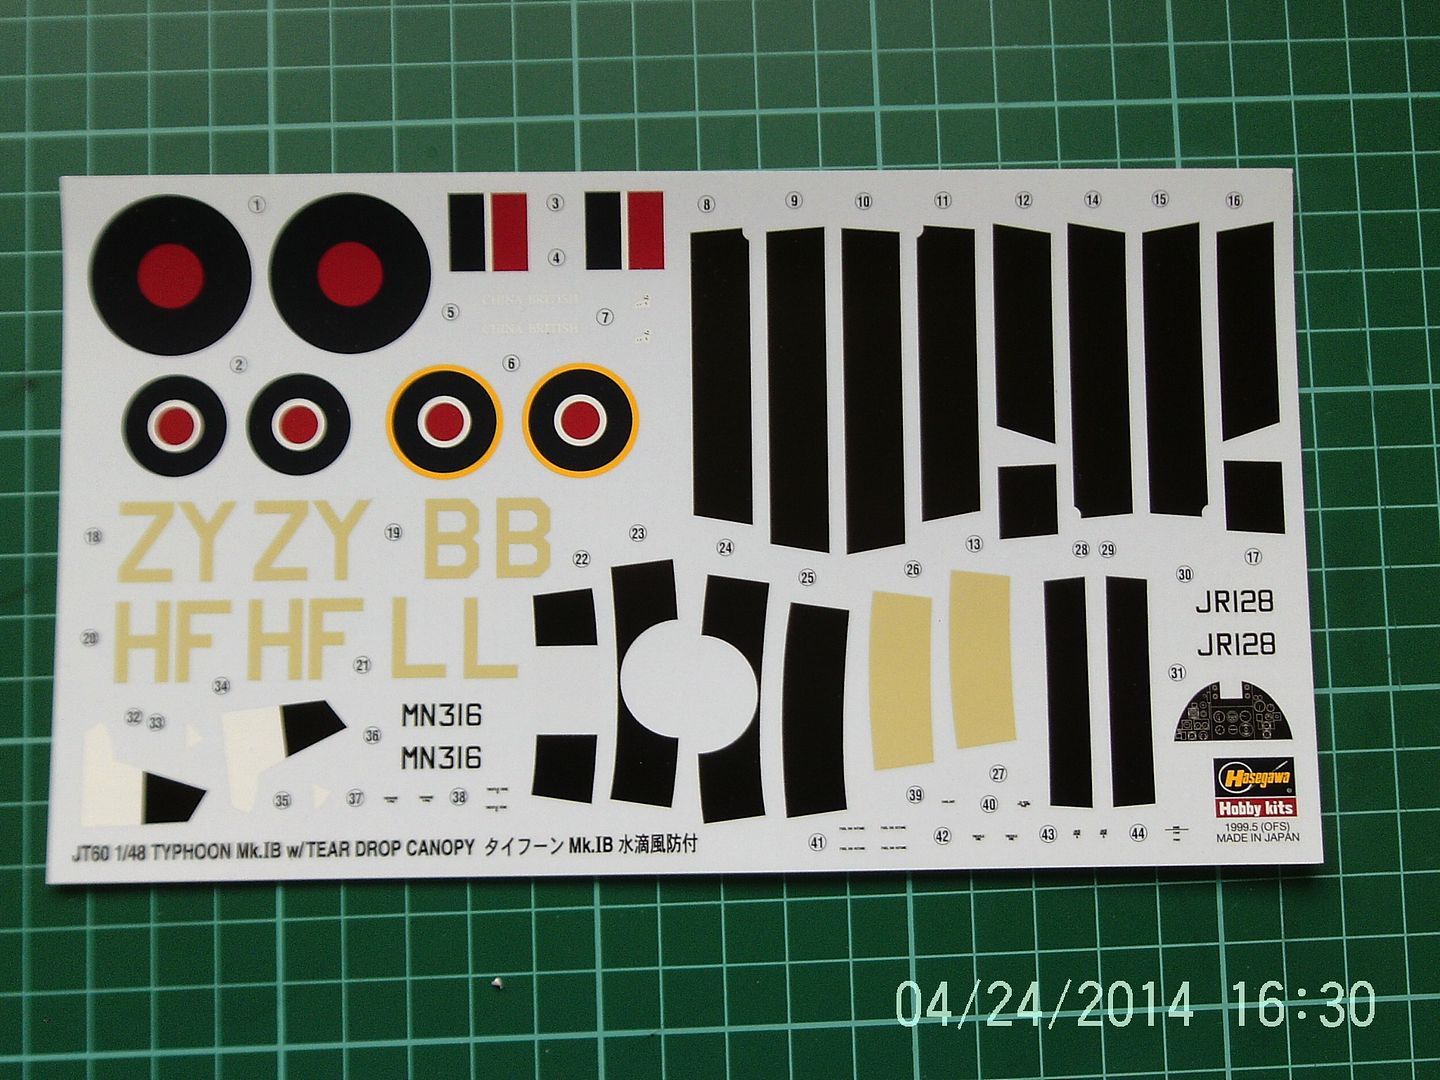
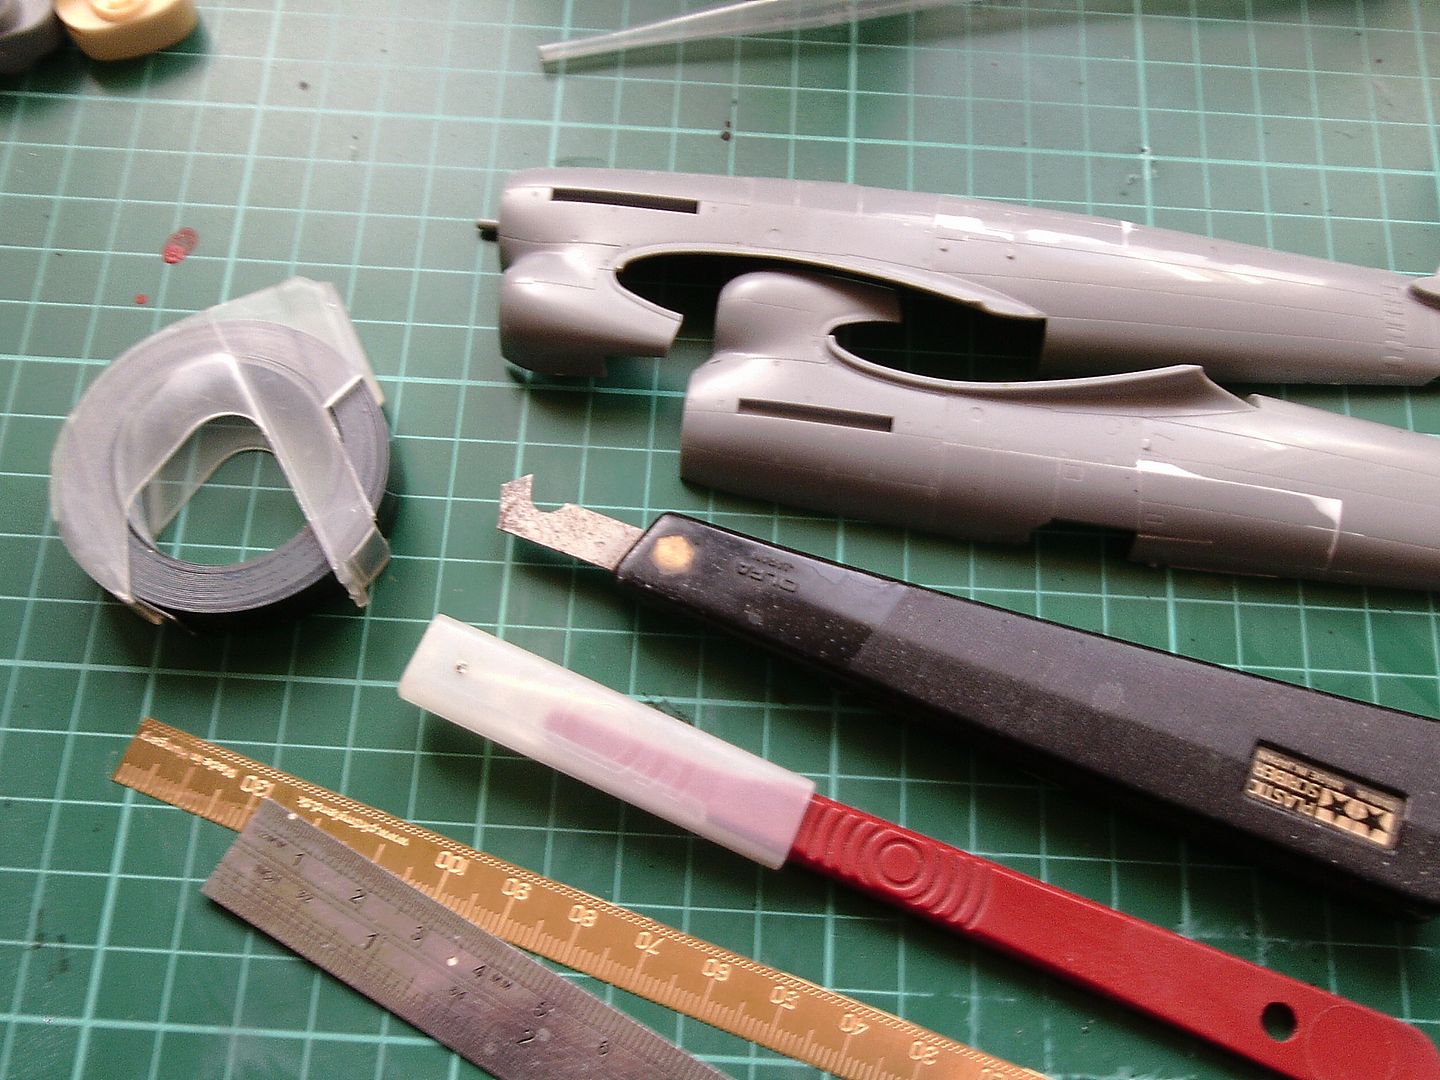
Inside the box:
I bought some extras for this build:
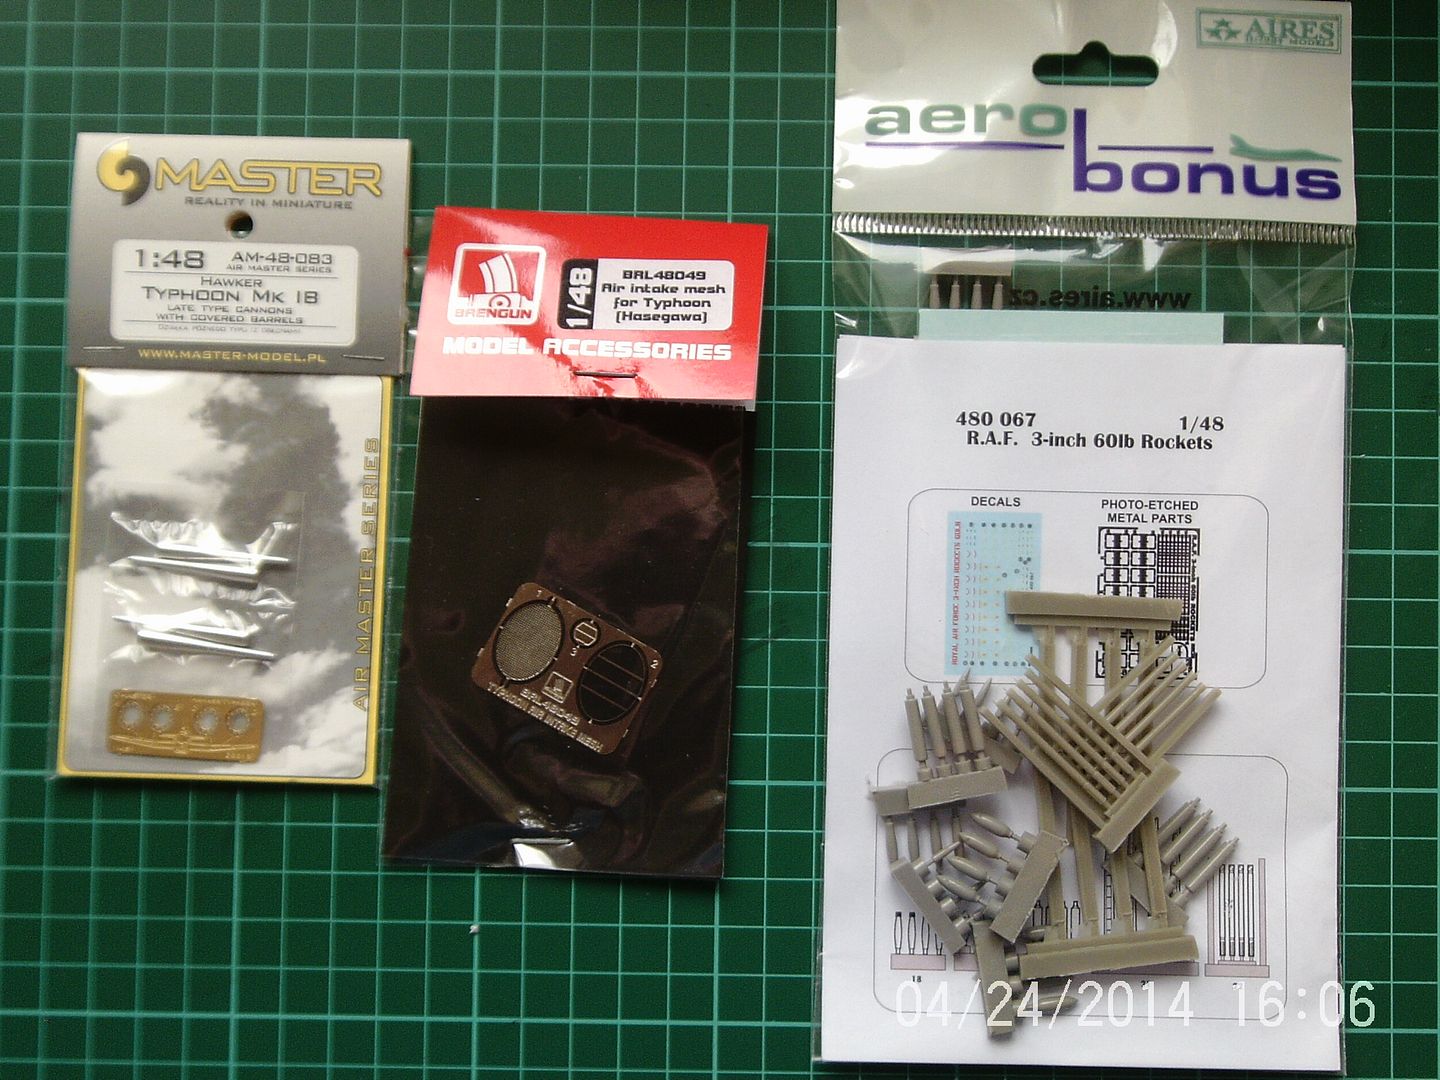
Some resin bits and bobs left over from a previous build:
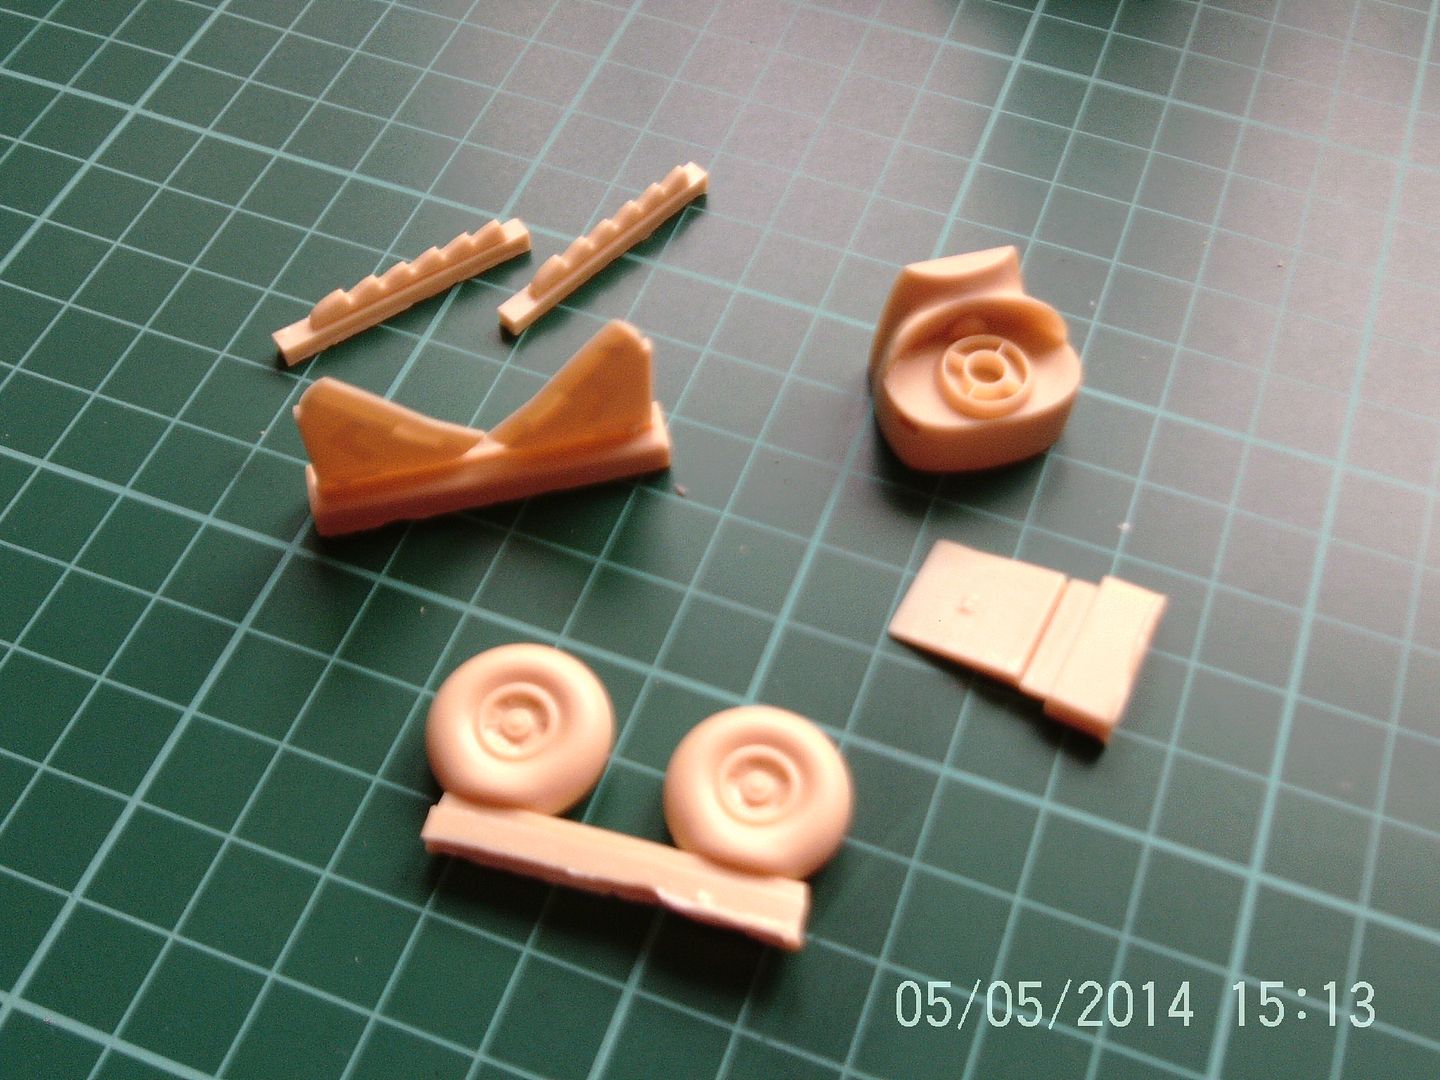
How much of these get used remains to be seen.
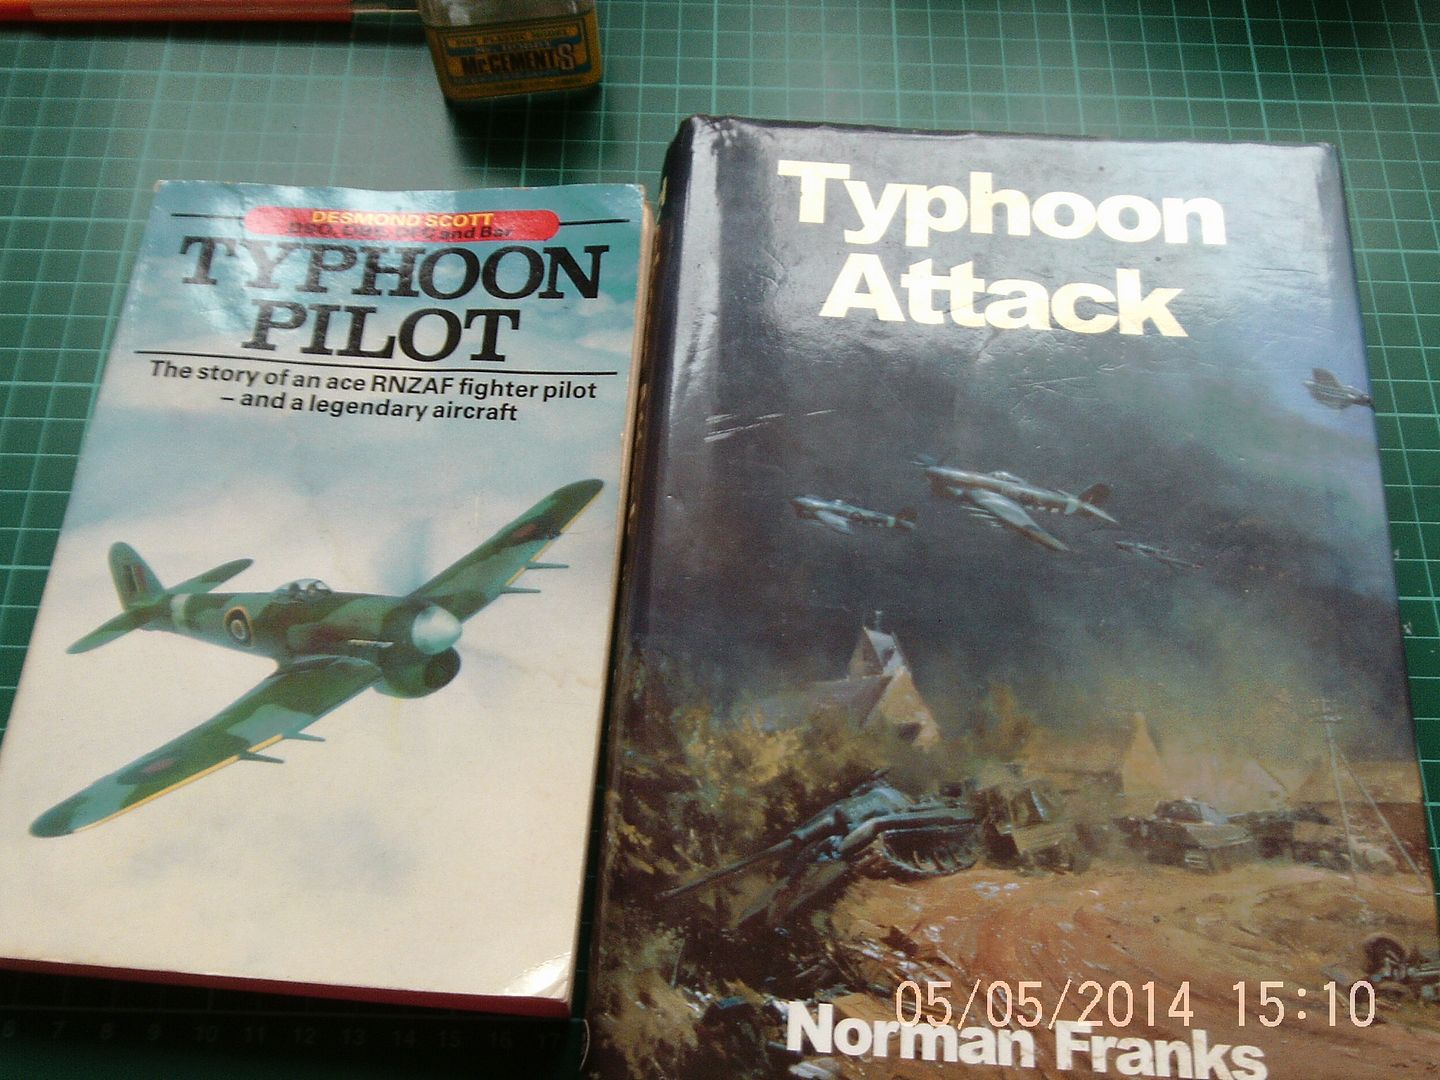
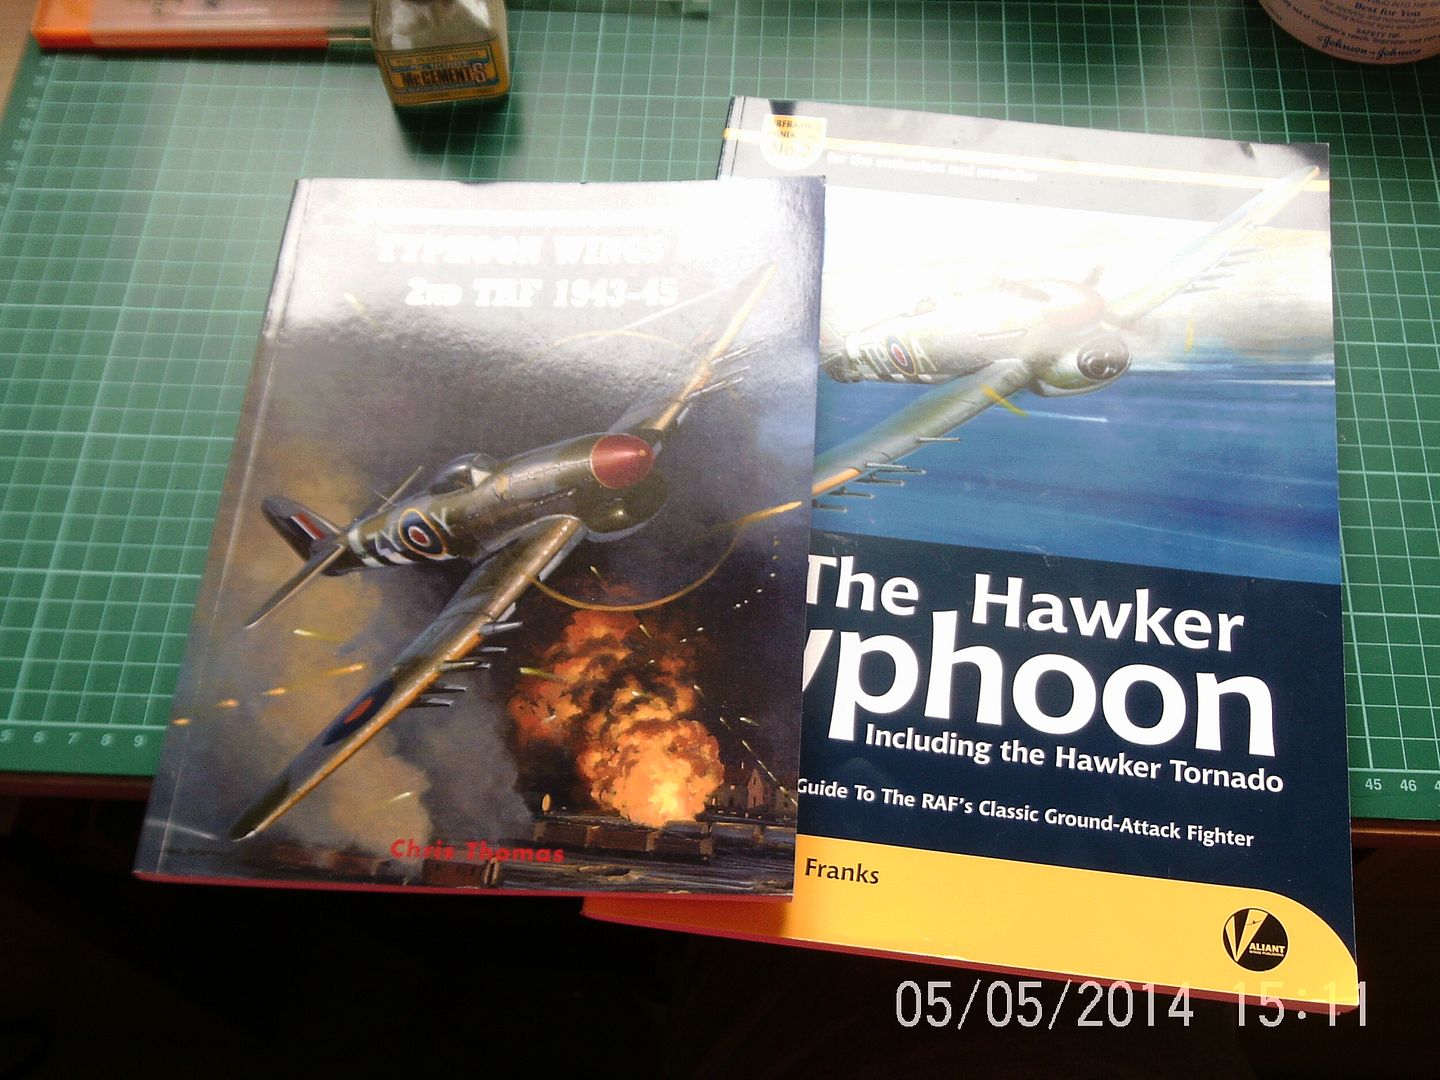
The reference material that I will be using. This is one of the most enjoyable aspects of the hobby for me:
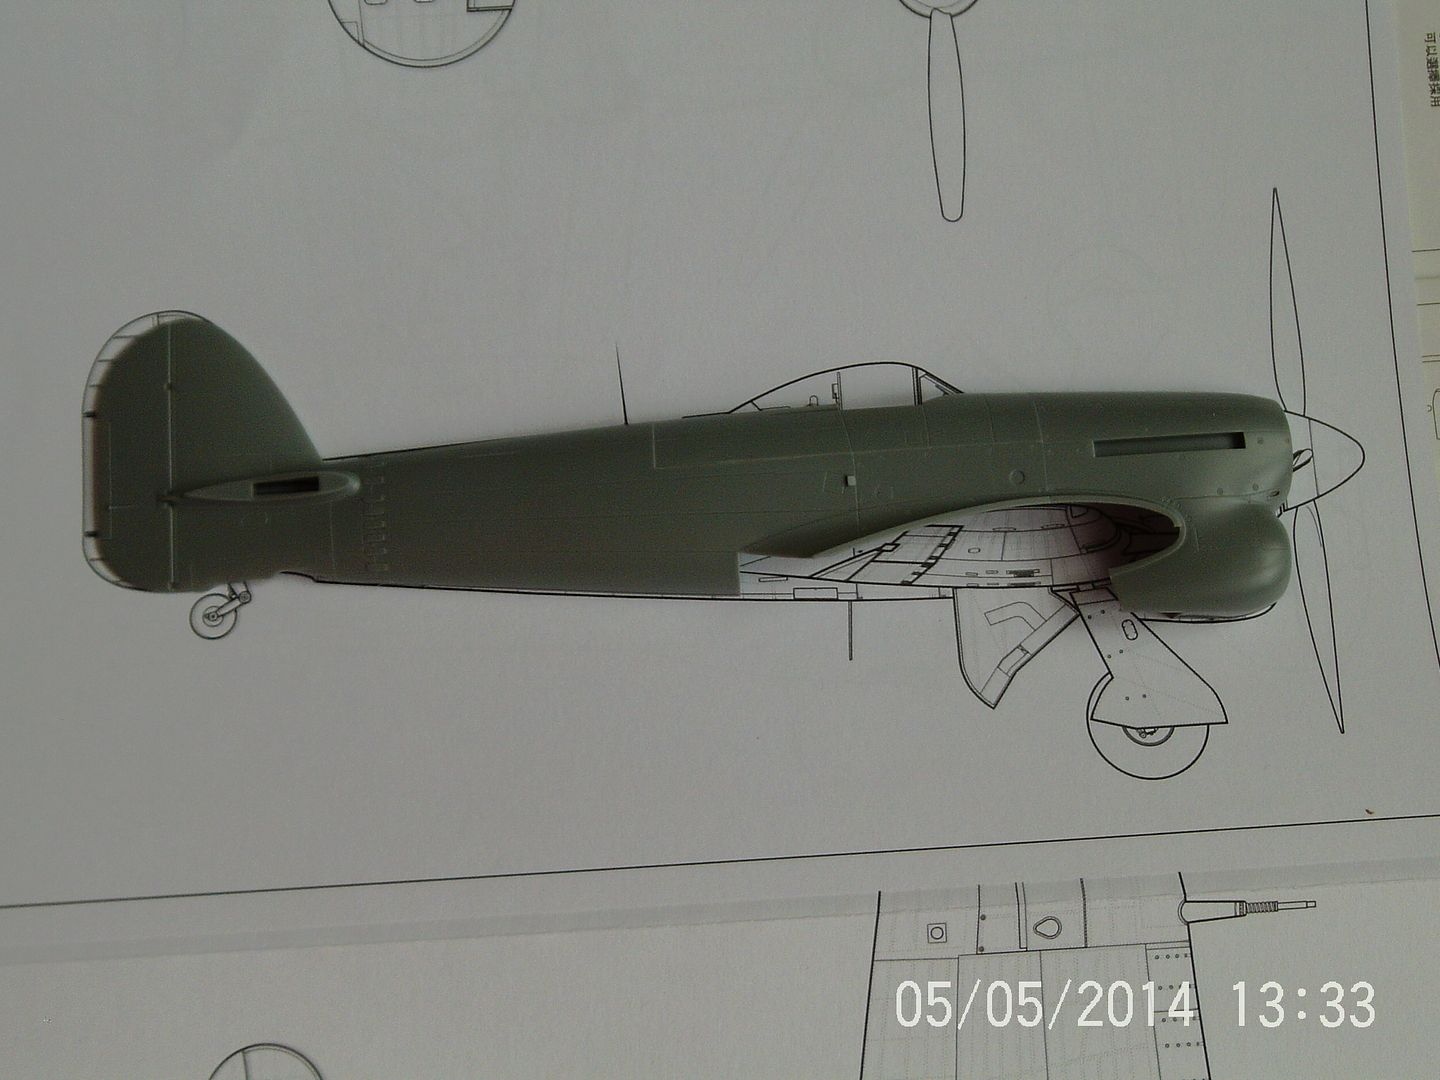
The subject of this build:
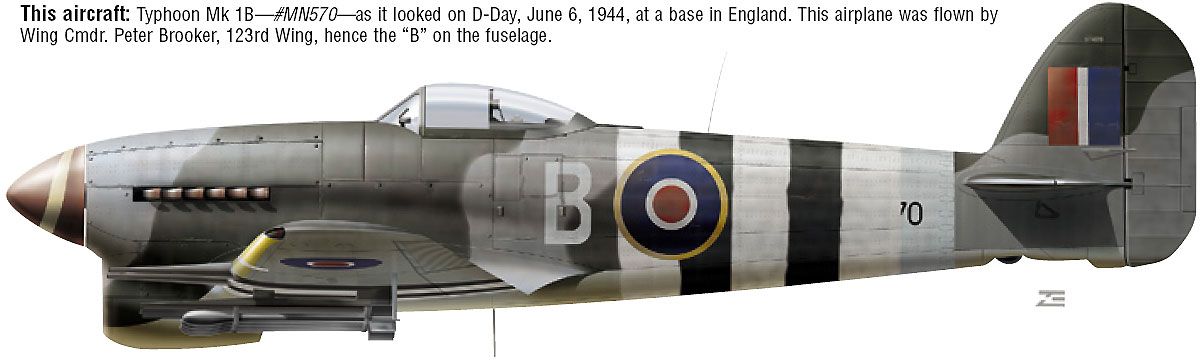
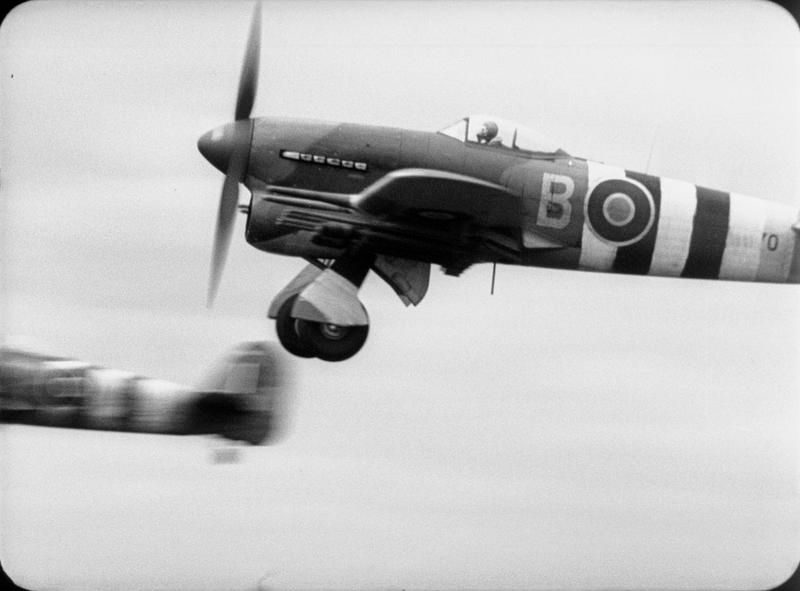
Wing Commander Brooker's aircraft pictured taking off for a sortie from Thorney Island on D-Day (IWM FLM 3107).
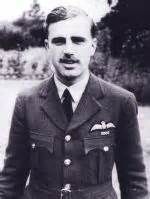
The man himself. Brooker became an ace flying Hurricanes in the Far East before returning to the UK to take command of No 123 Wing.
I was going to save this build for the D-Day group build but I was looking for something to get my interest back and I've already made a start.
More pics to follow.
Re: Hasegawa 1/48 Hawker Typhoon Mk Ib Bubbletop.
Posted: Mon May 05, 2014 4:37 pm
by Nige201980
Love the tiffy mate look forward to this one
Re: Hasegawa 1/48 Hawker Typhoon Mk Ib Bubbletop.
Posted: Mon May 05, 2014 5:09 pm
by Willem
First build pics.
As I've said, I think this kit is the best option for the scale. Because Hasegawa also released the earlier car door version there is an awkward cockpit/fuselage insert:
I decided to tackle this first and glue the inserts onto each fuselage half so as to try and get the best fit possible without too much filling, sanding and swearing later:
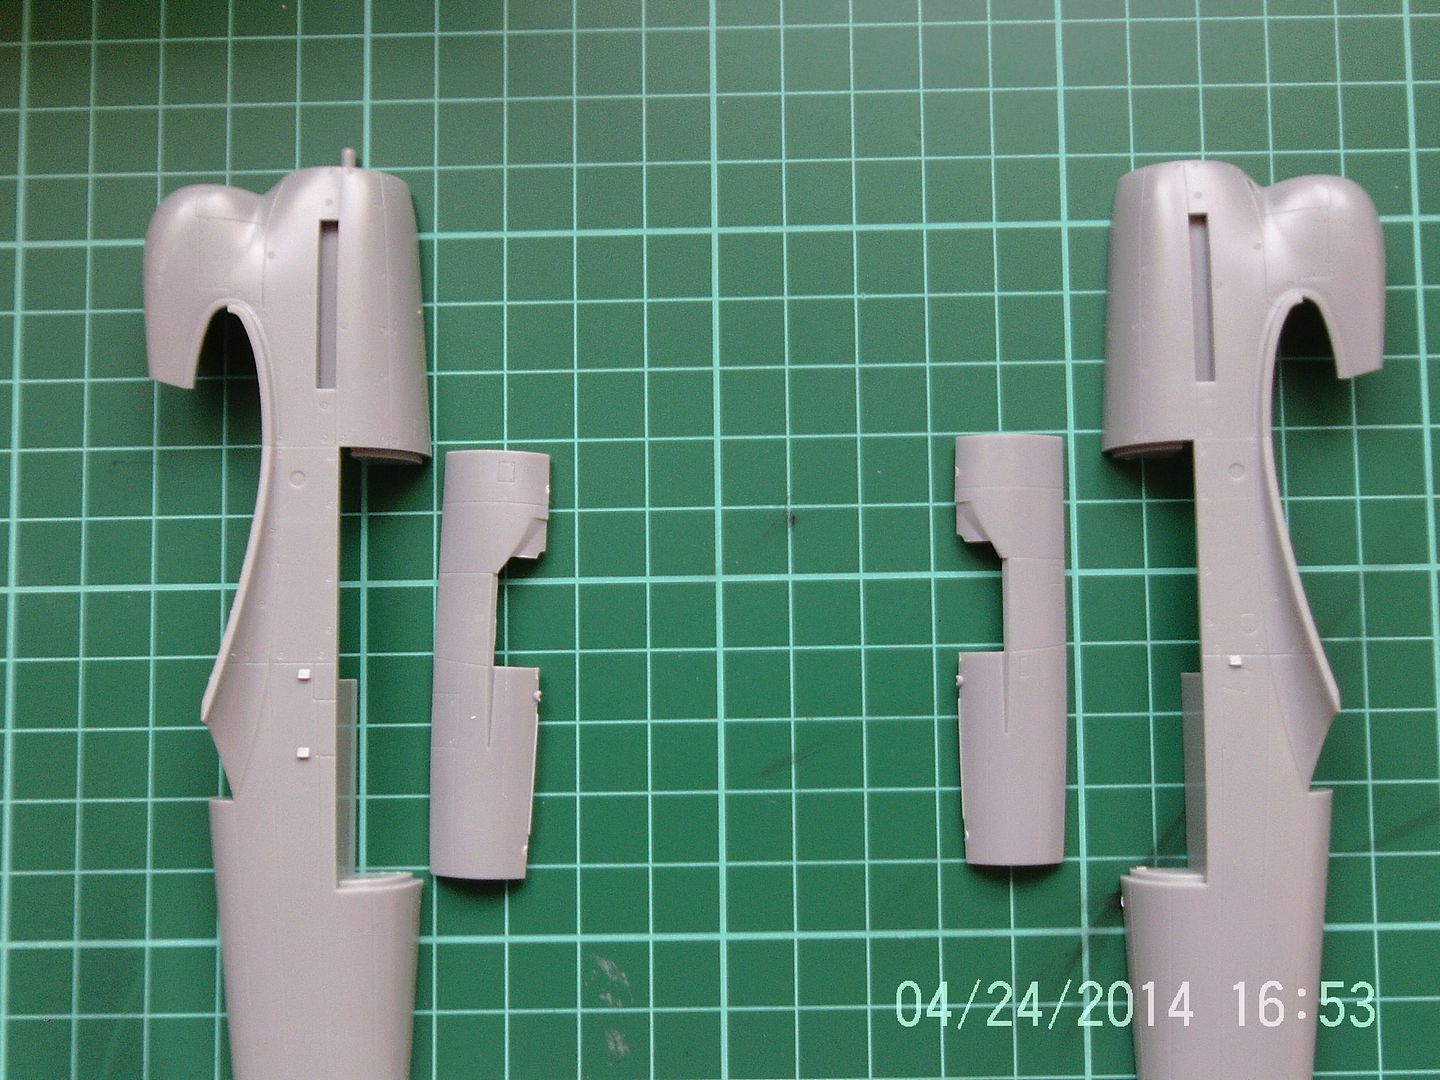
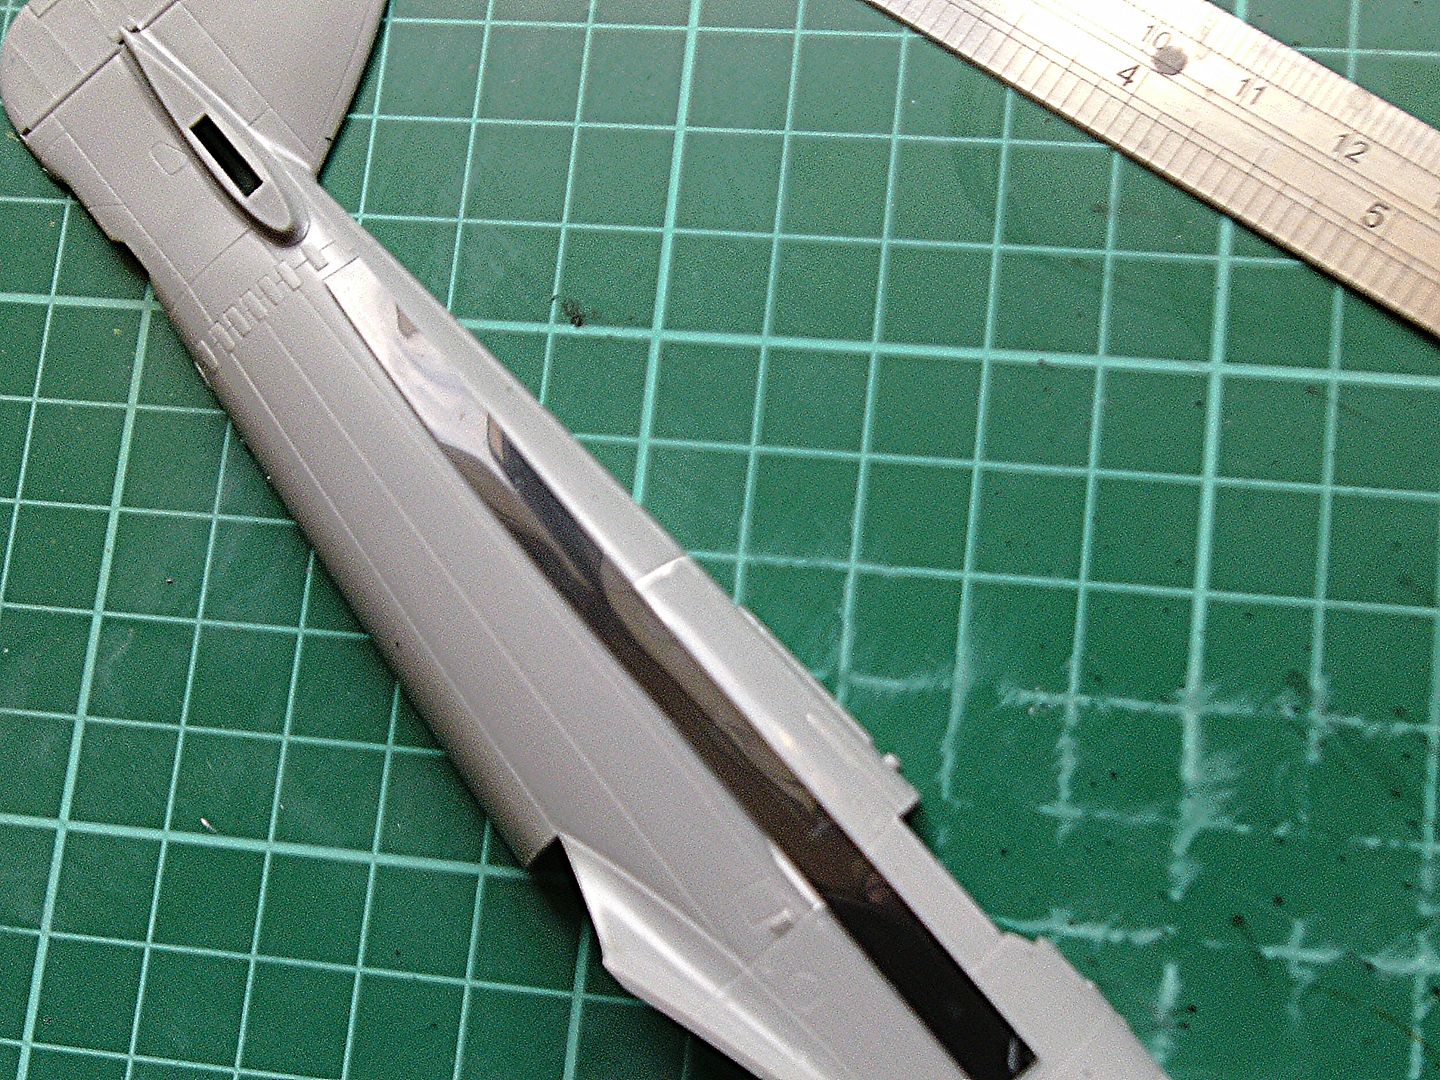
I lined up the fuselage with a set of 1/48 plans to find it a bit short at the tail:
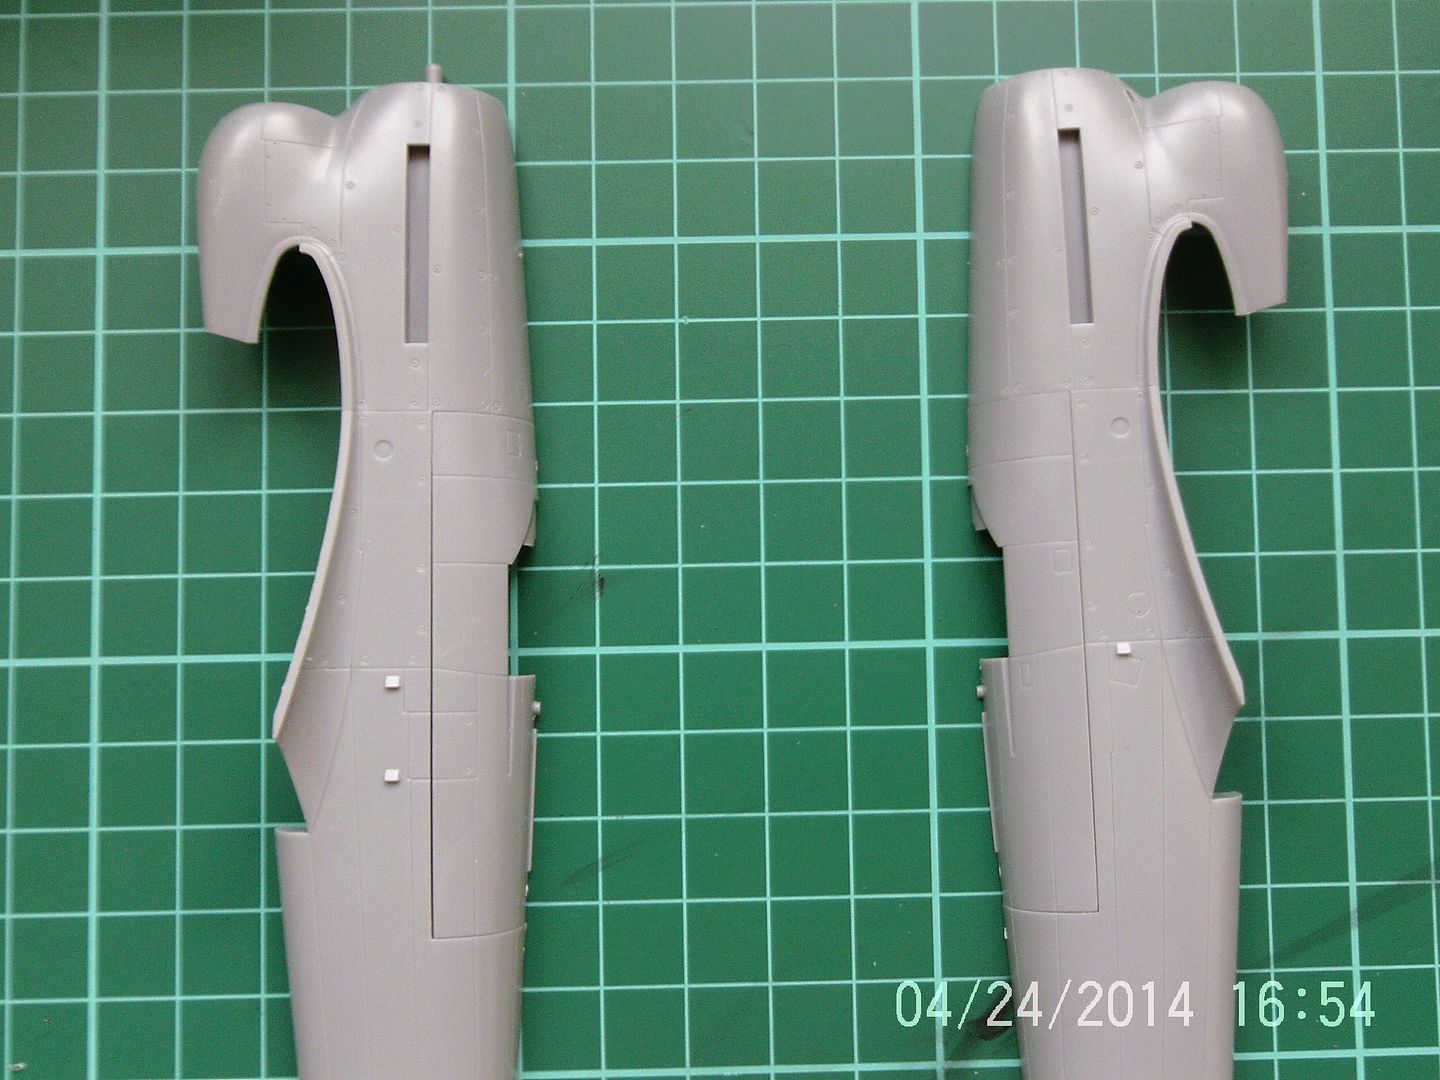
I started by running extra thin cement into the join and worked from the rear to the front. I then left to dry for a good while and got on with making a start on the cockpit:
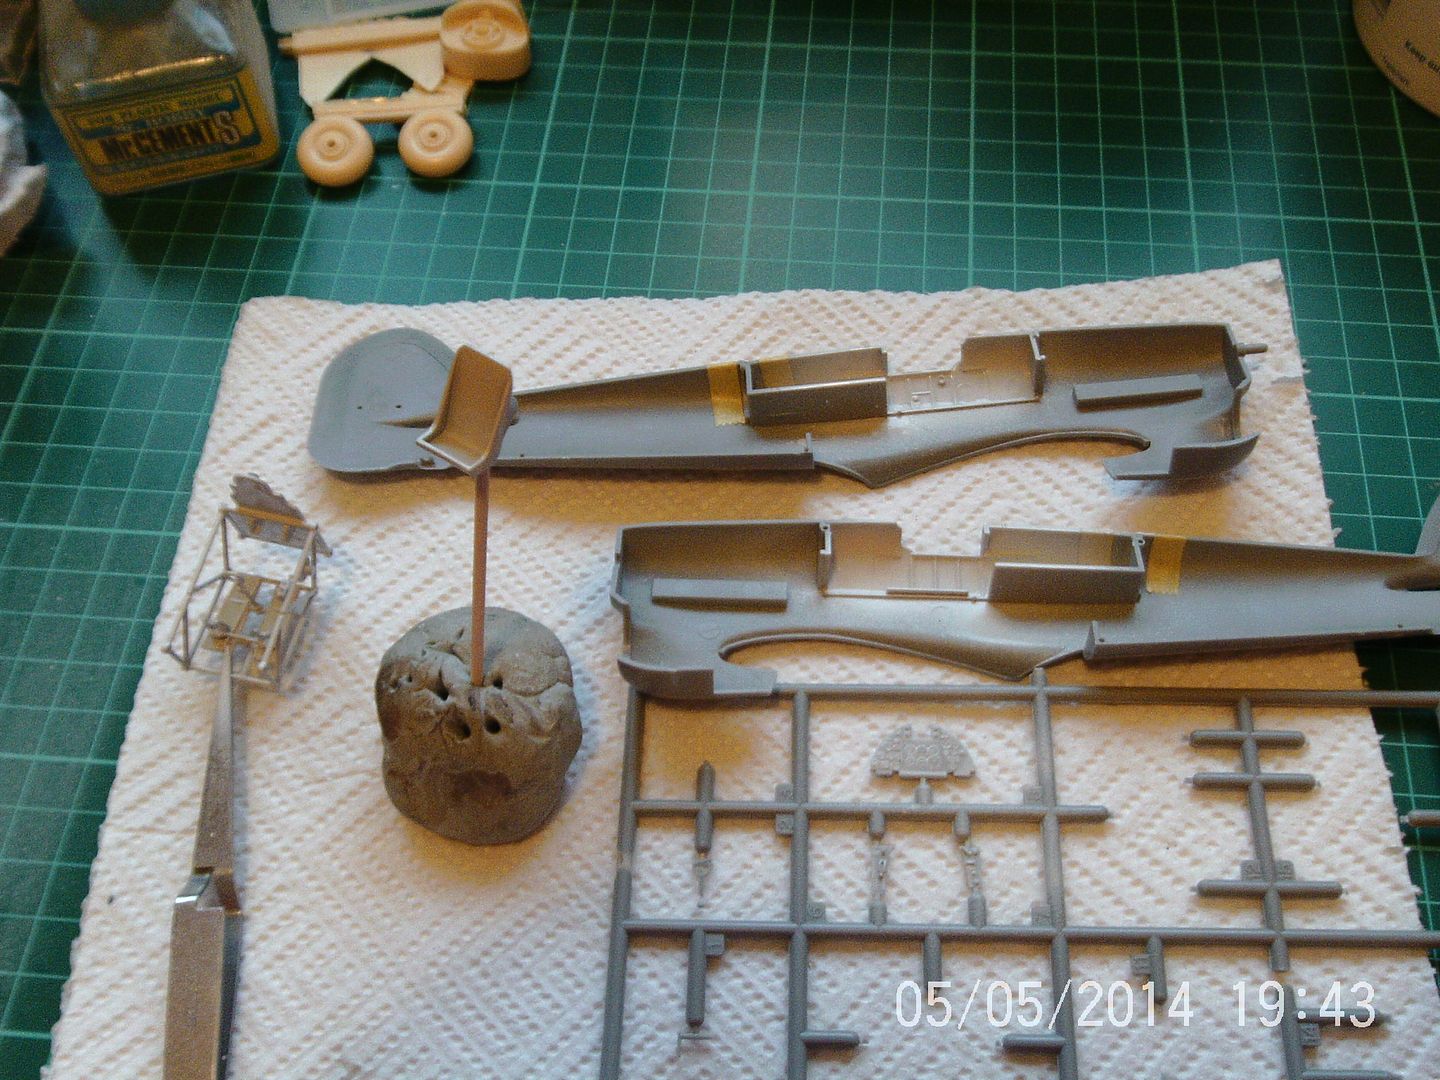
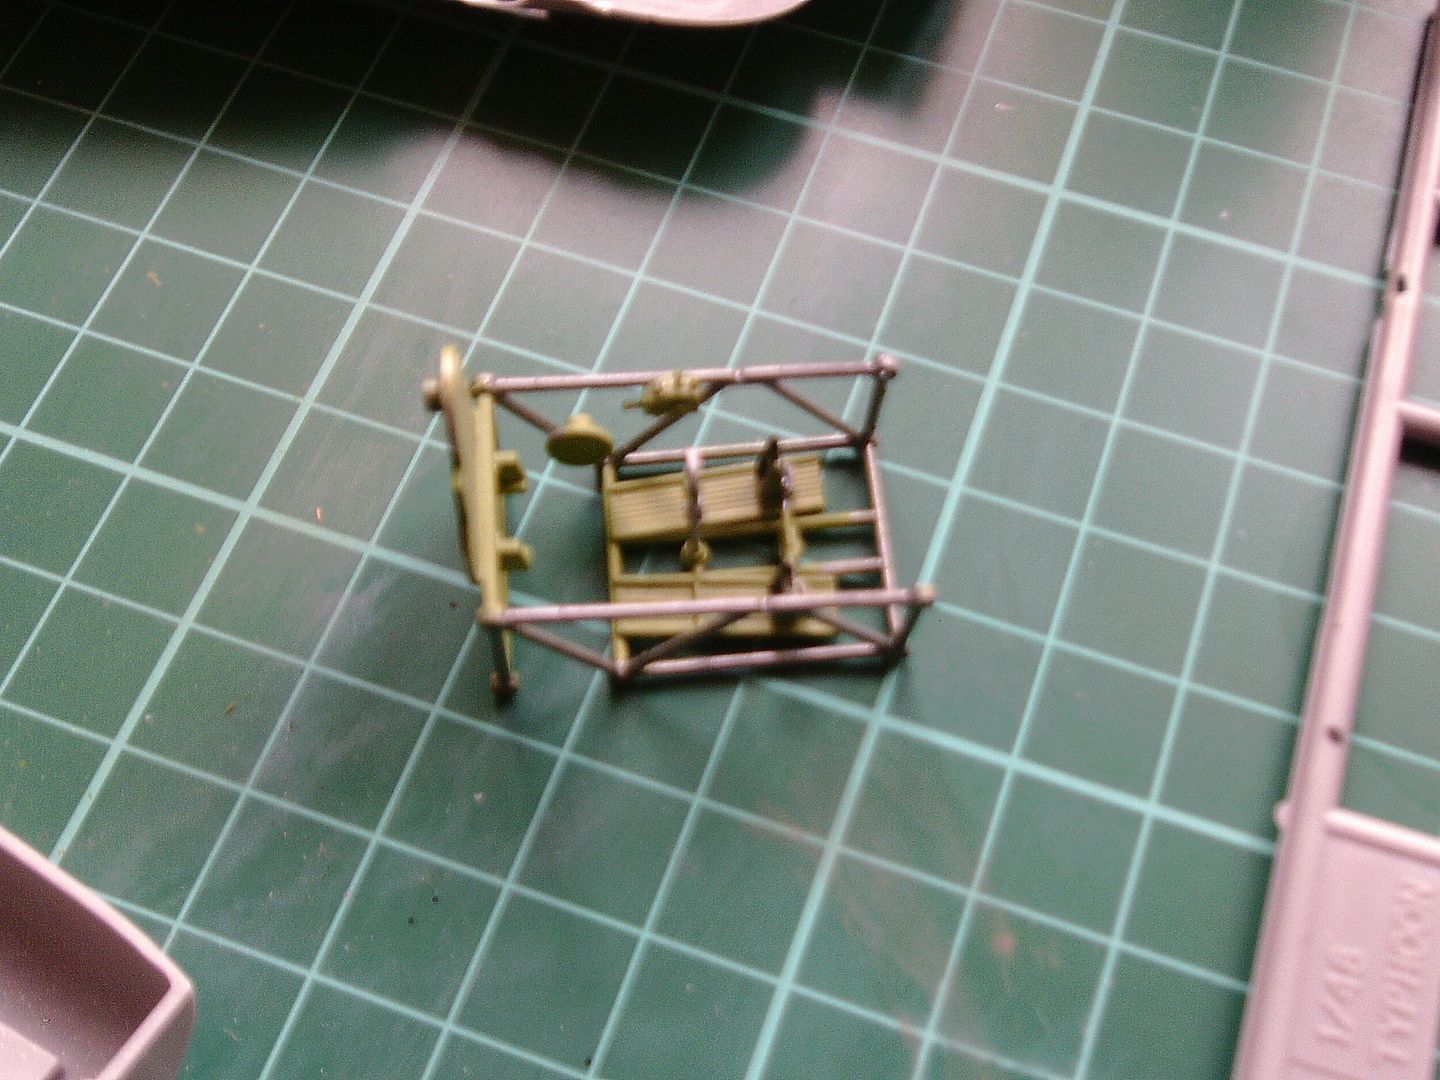
Not a great photo I'm afraid but the tub builds up into a tubular frame just like the real aircraft and detail is pretty good. There is some filler to cover some nasty ejection pin marks on the pilot's armour plate. I hope to be getting some primer on these parts later today. Whilst the Perfect Plastic Putty was out I filled in the gaps on the fuselage inserts. These follow panel lines at the front but not to the rear:
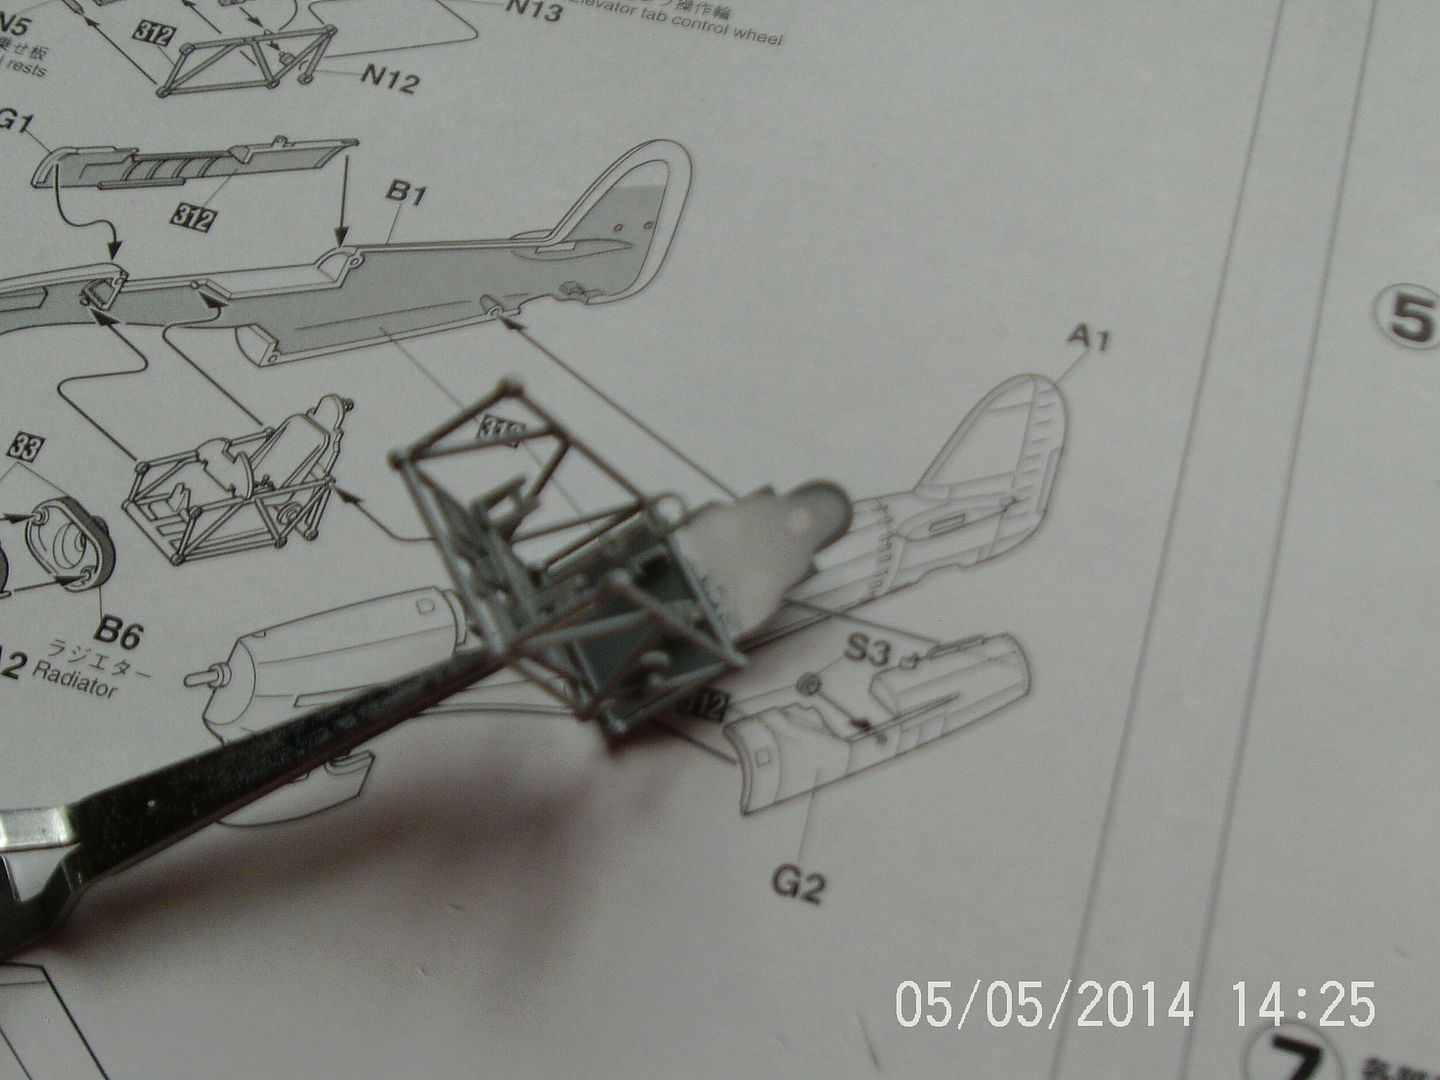
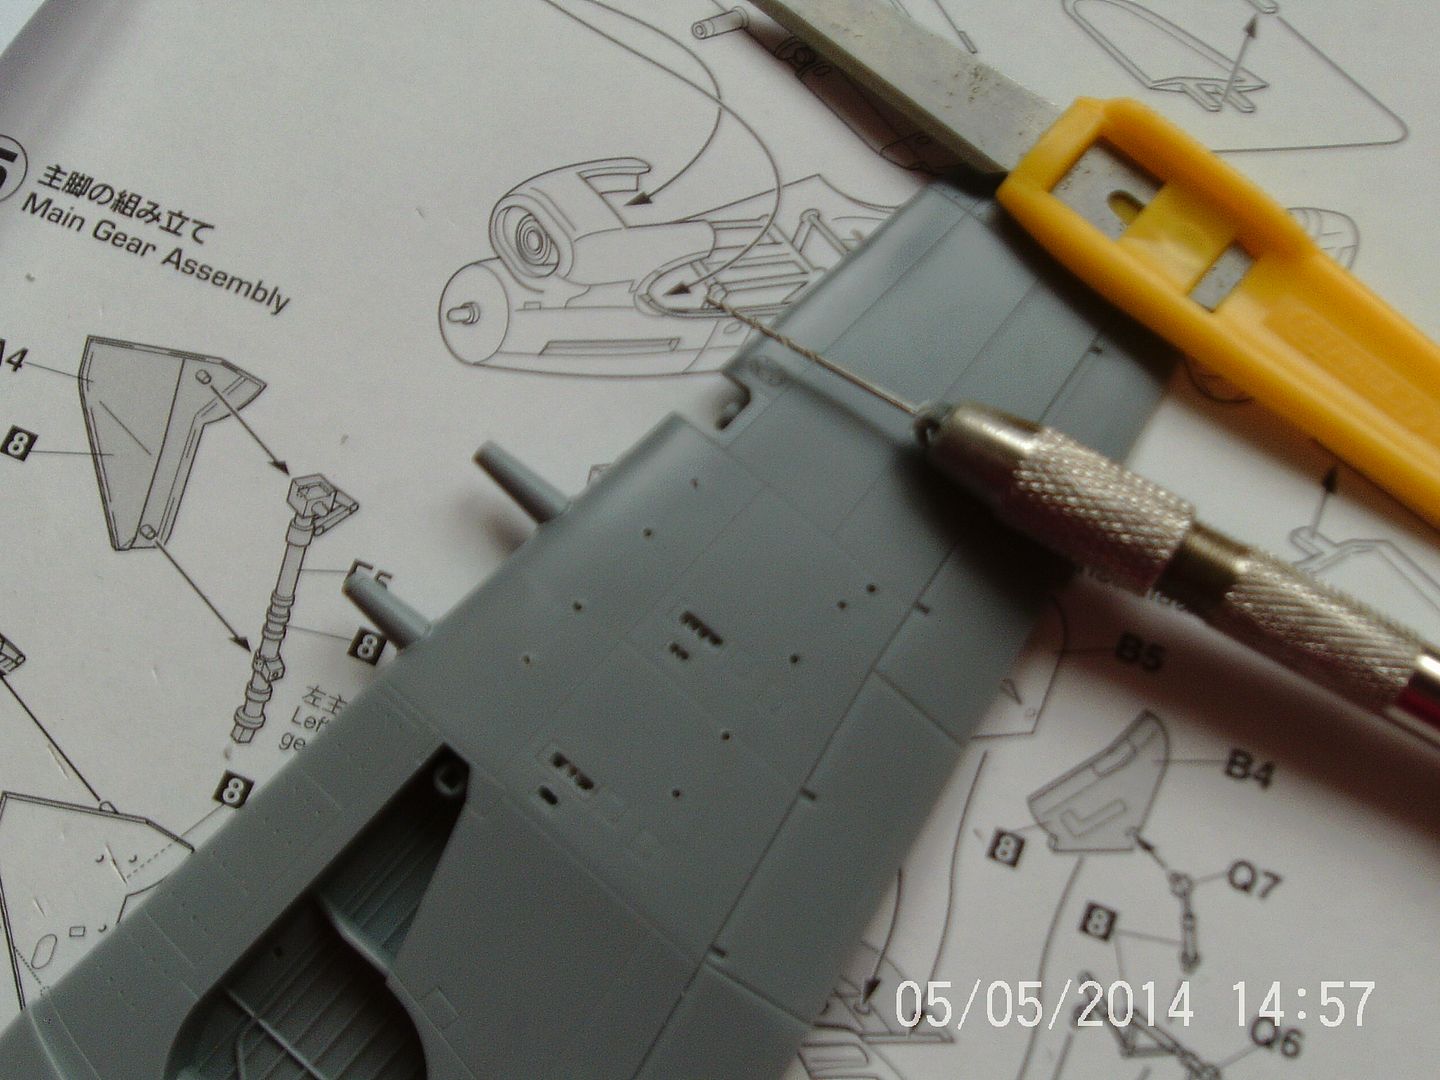
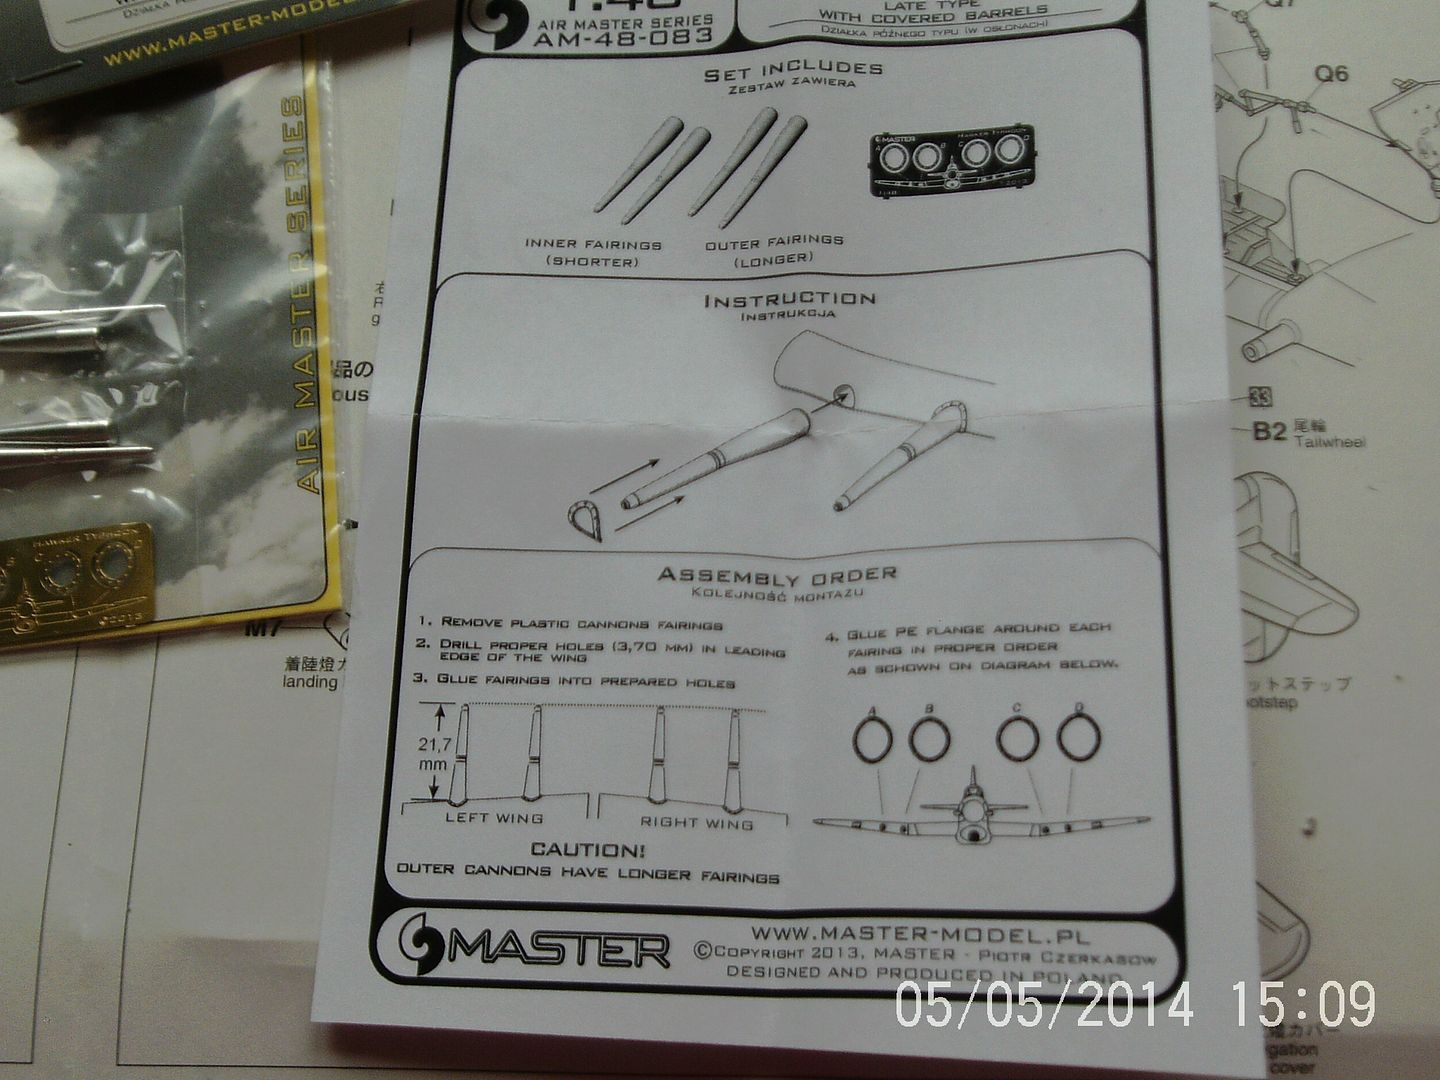
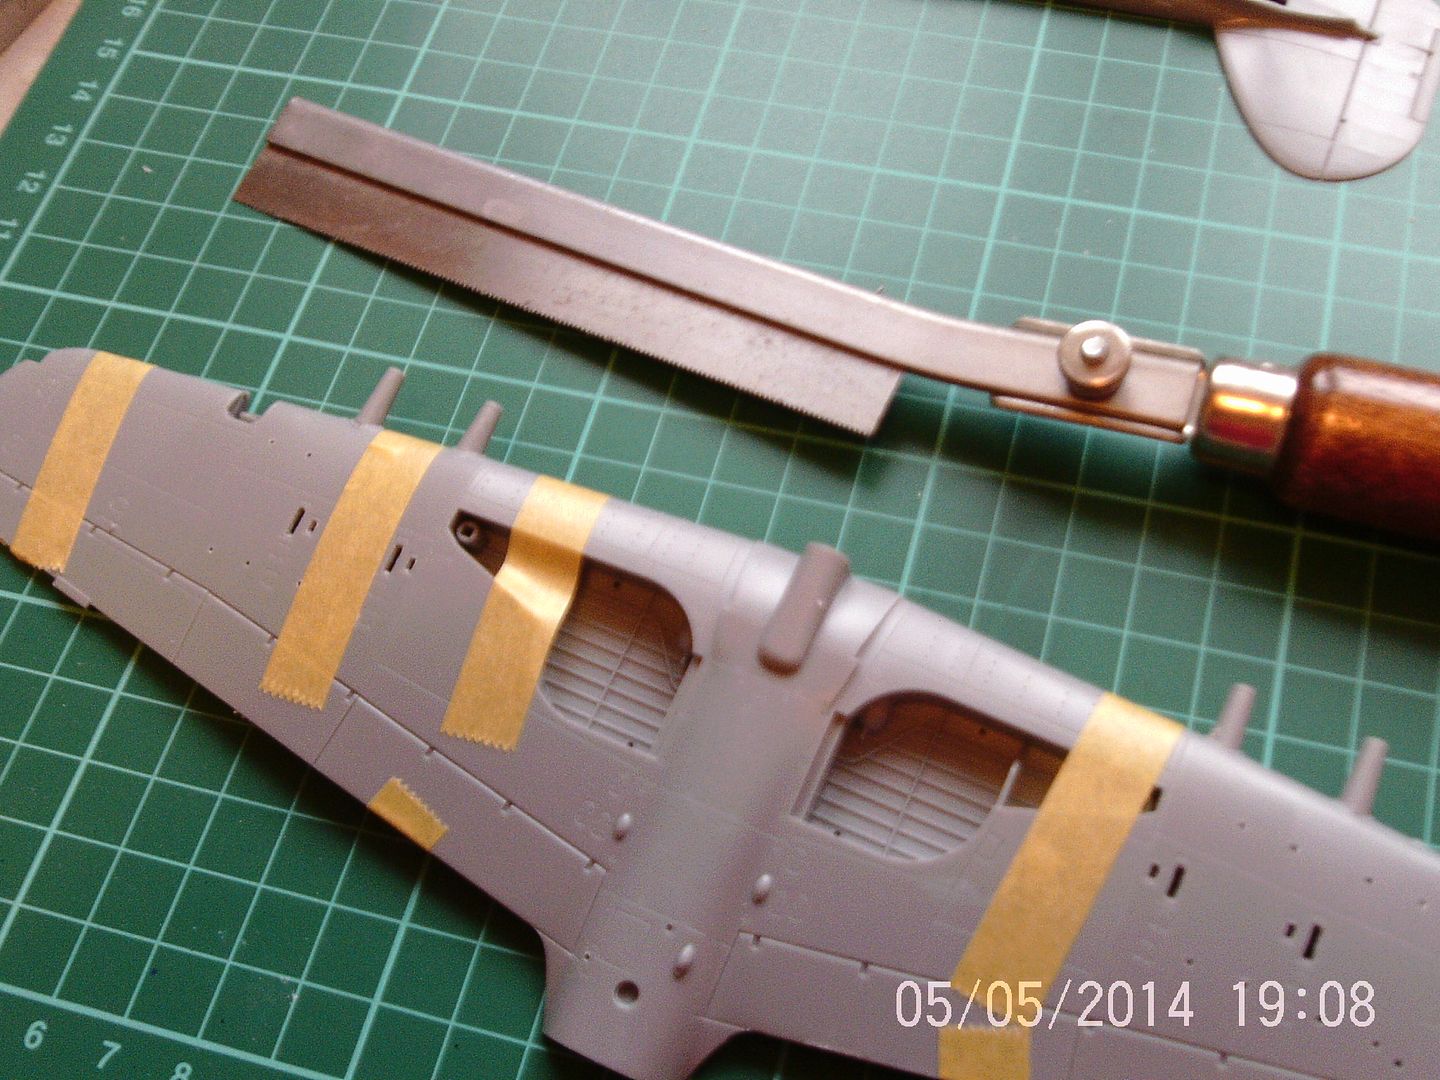
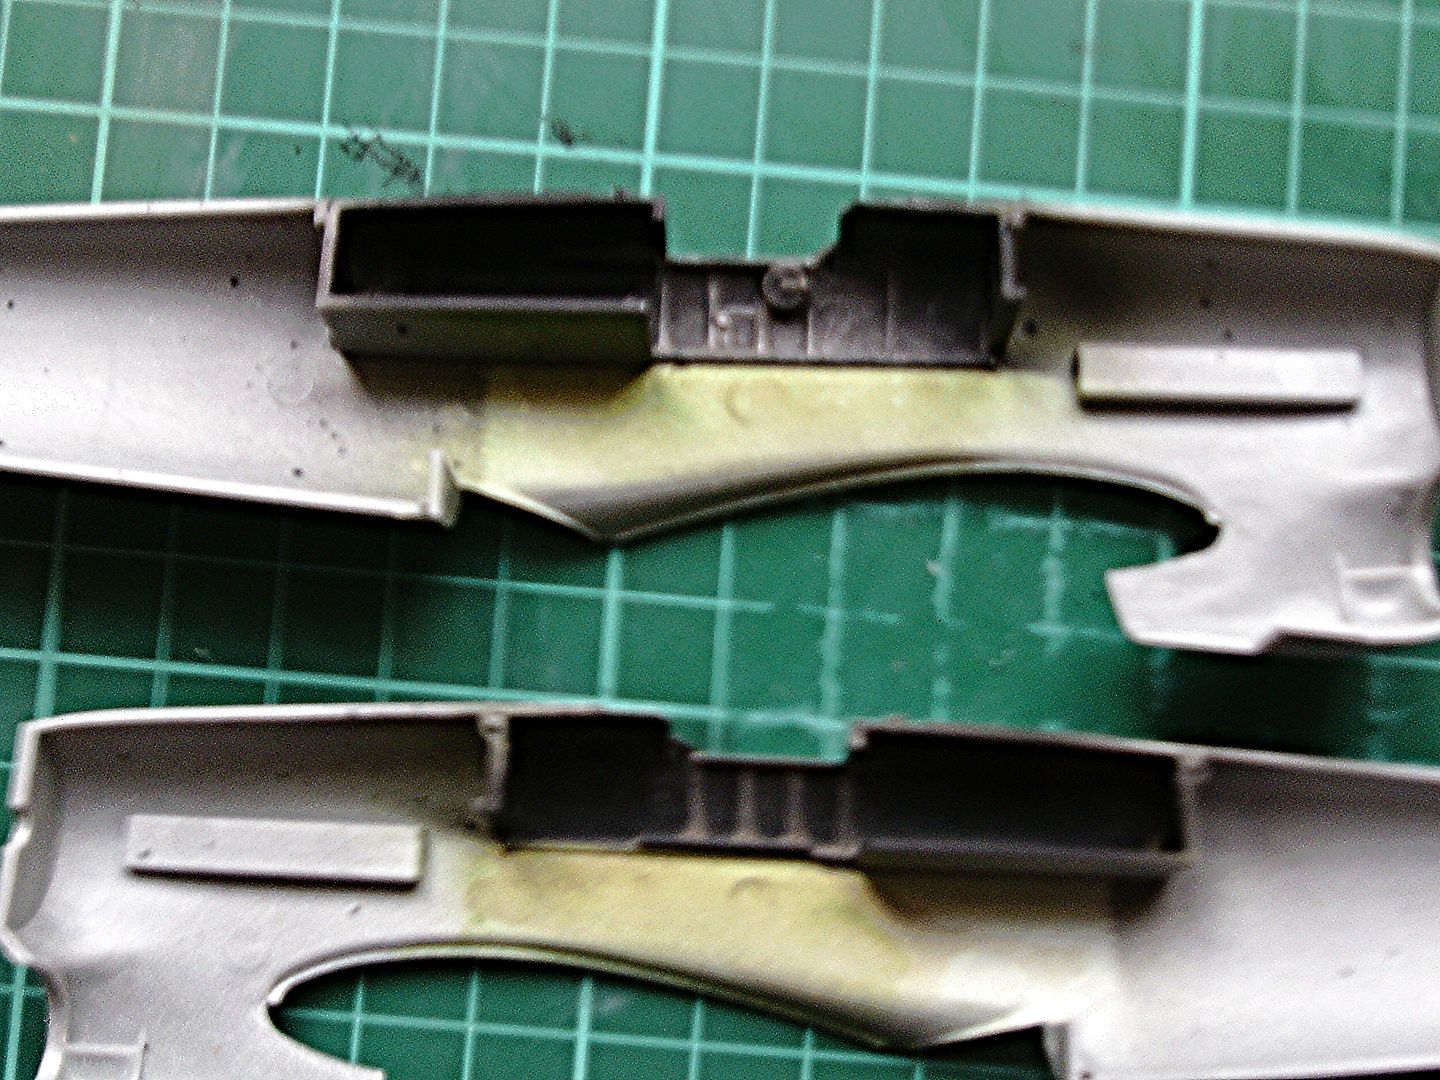
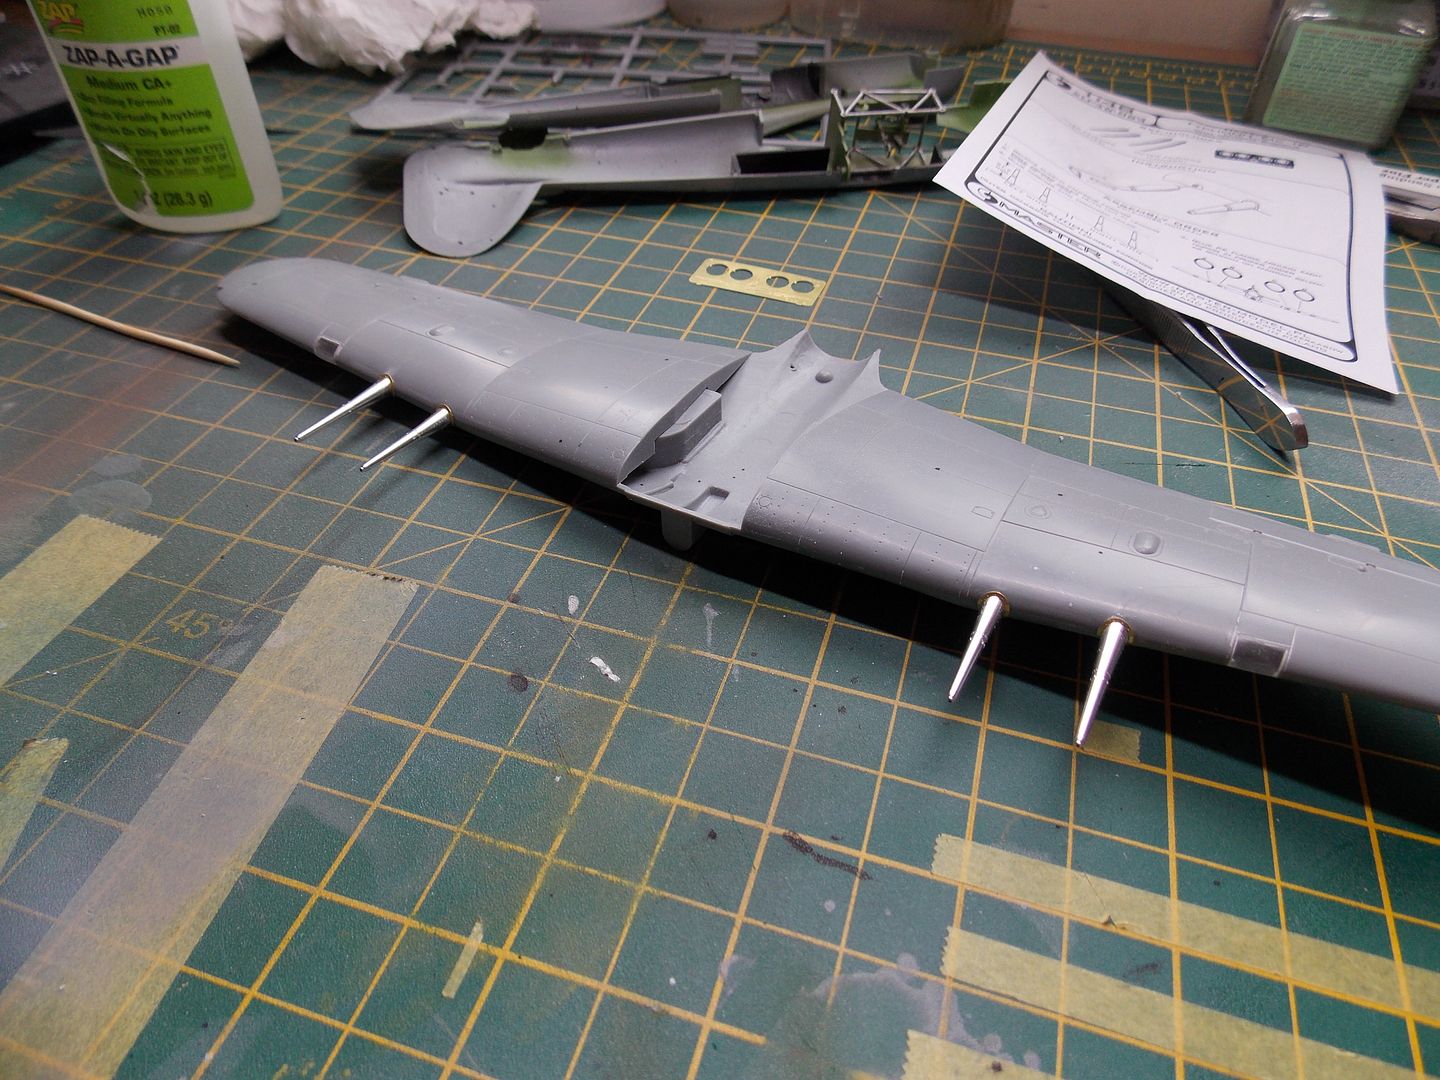
While this was drying I put the wings together. I started by drilling out the holes for the rocket launchers and decided to open up the cartridge ejection chutes for the 20mm cannons:
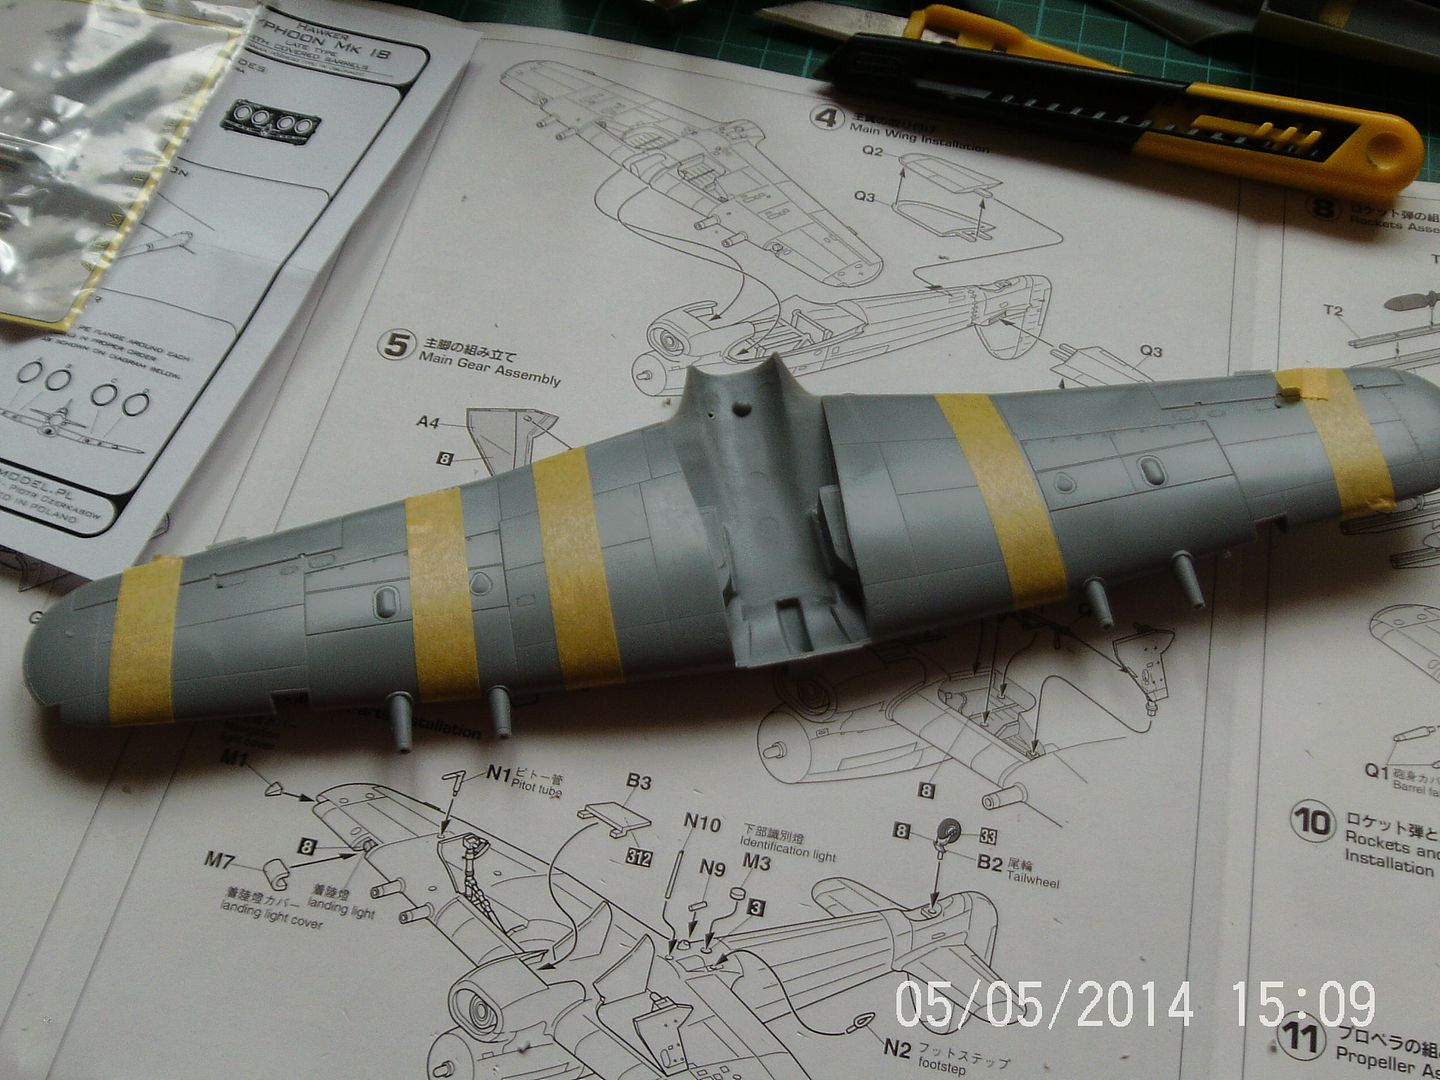
Once the wings are completely dry they will be tidied up at with a sanding stick ready for surgery:
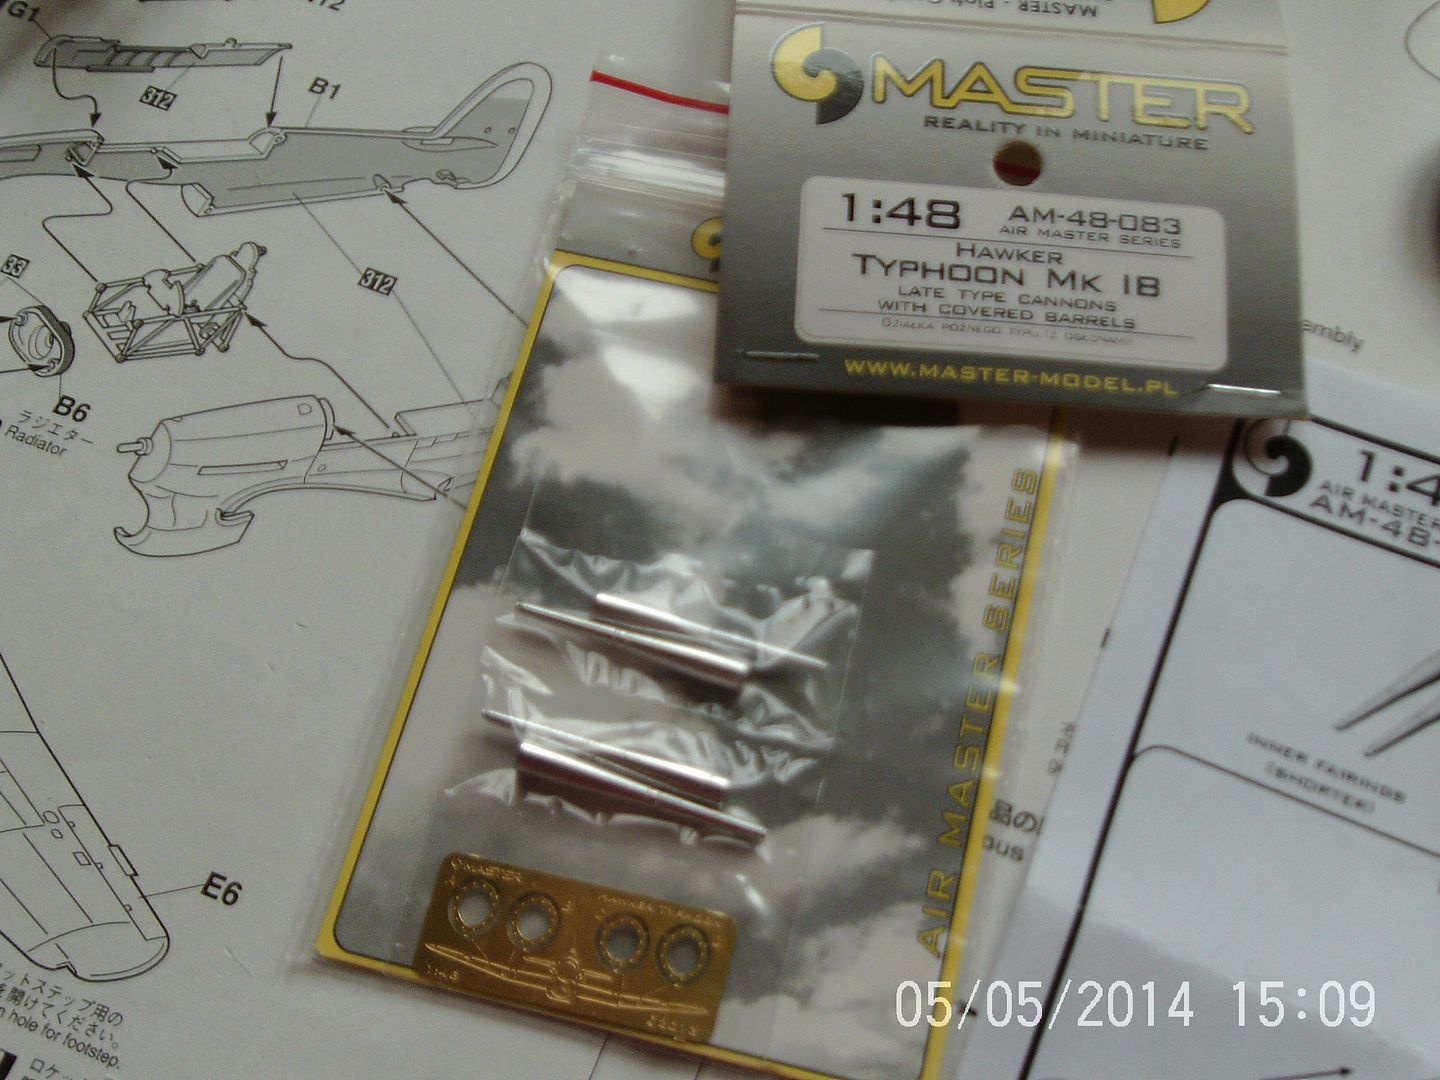
The turned metal barrels look very nice and include strengthening plates which fit on the leading edge:
Thanks for looking. More pics soon and hopefully some paint.
Re: Hasegawa 1/48 Hawker Typhoon Mk Ib Bubbletop.
Posted: Mon May 05, 2014 6:09 pm
by Nige201980
Quick work mate looks a great kit buddy.
Re: Hasegawa 1/48 Hawker Typhoon Mk Ib Bubbletop.
Posted: Mon May 05, 2014 8:32 pm
by Willem
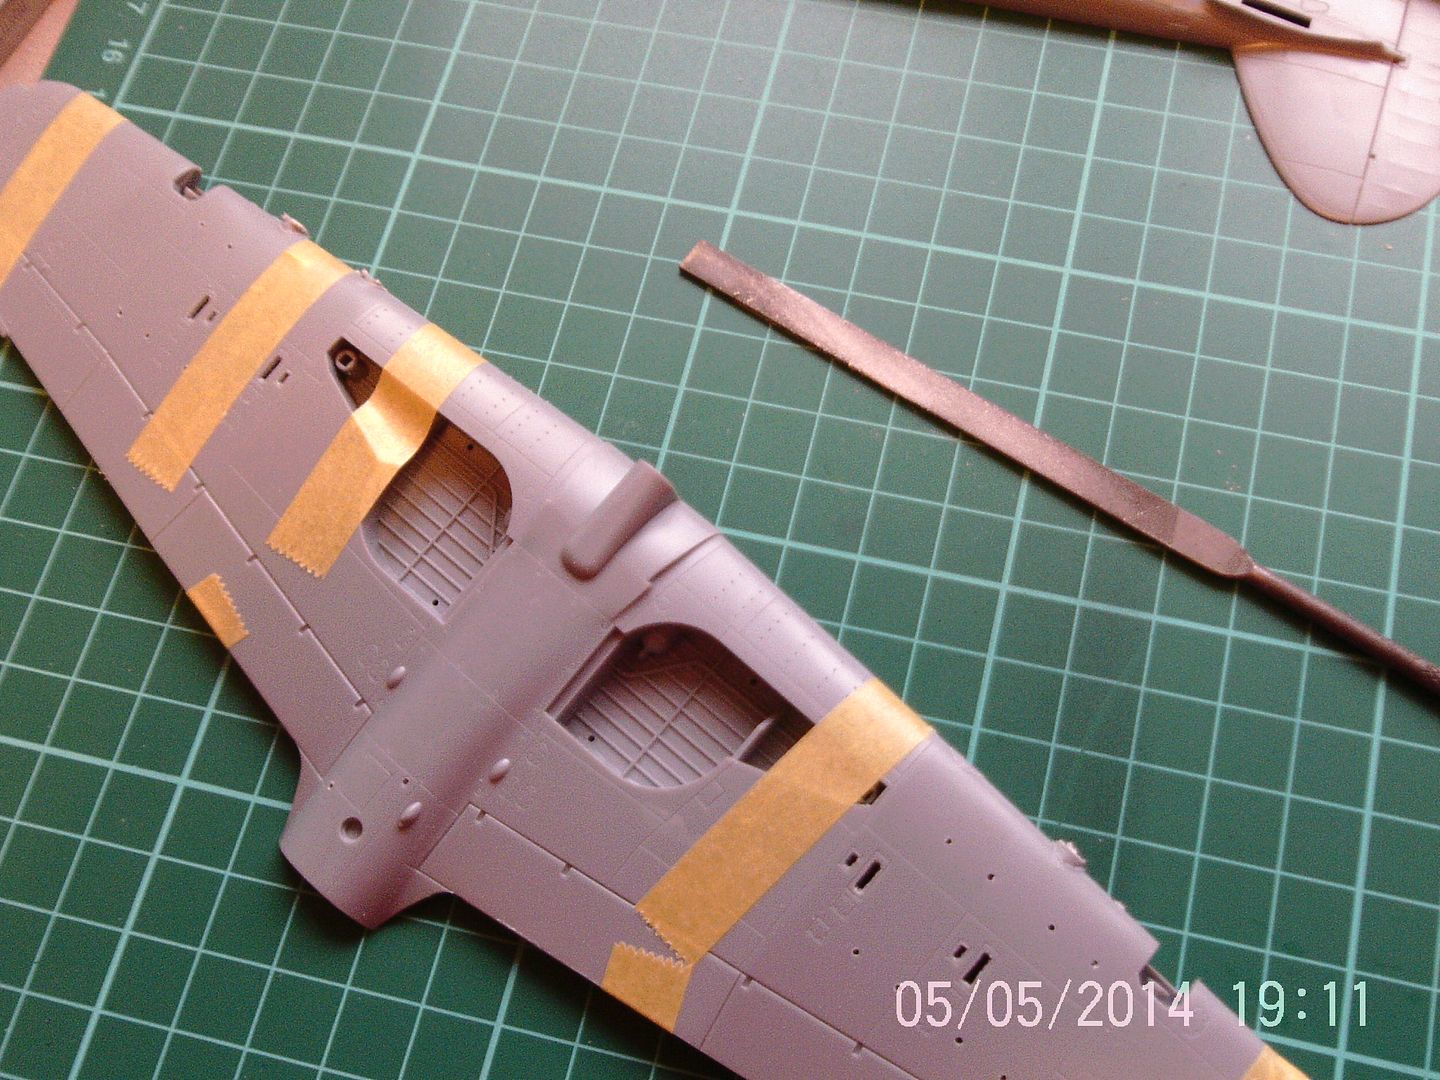
Surgery time! Mwah ha ha....
Off come the cannon stubs, then filed and sanded flush:
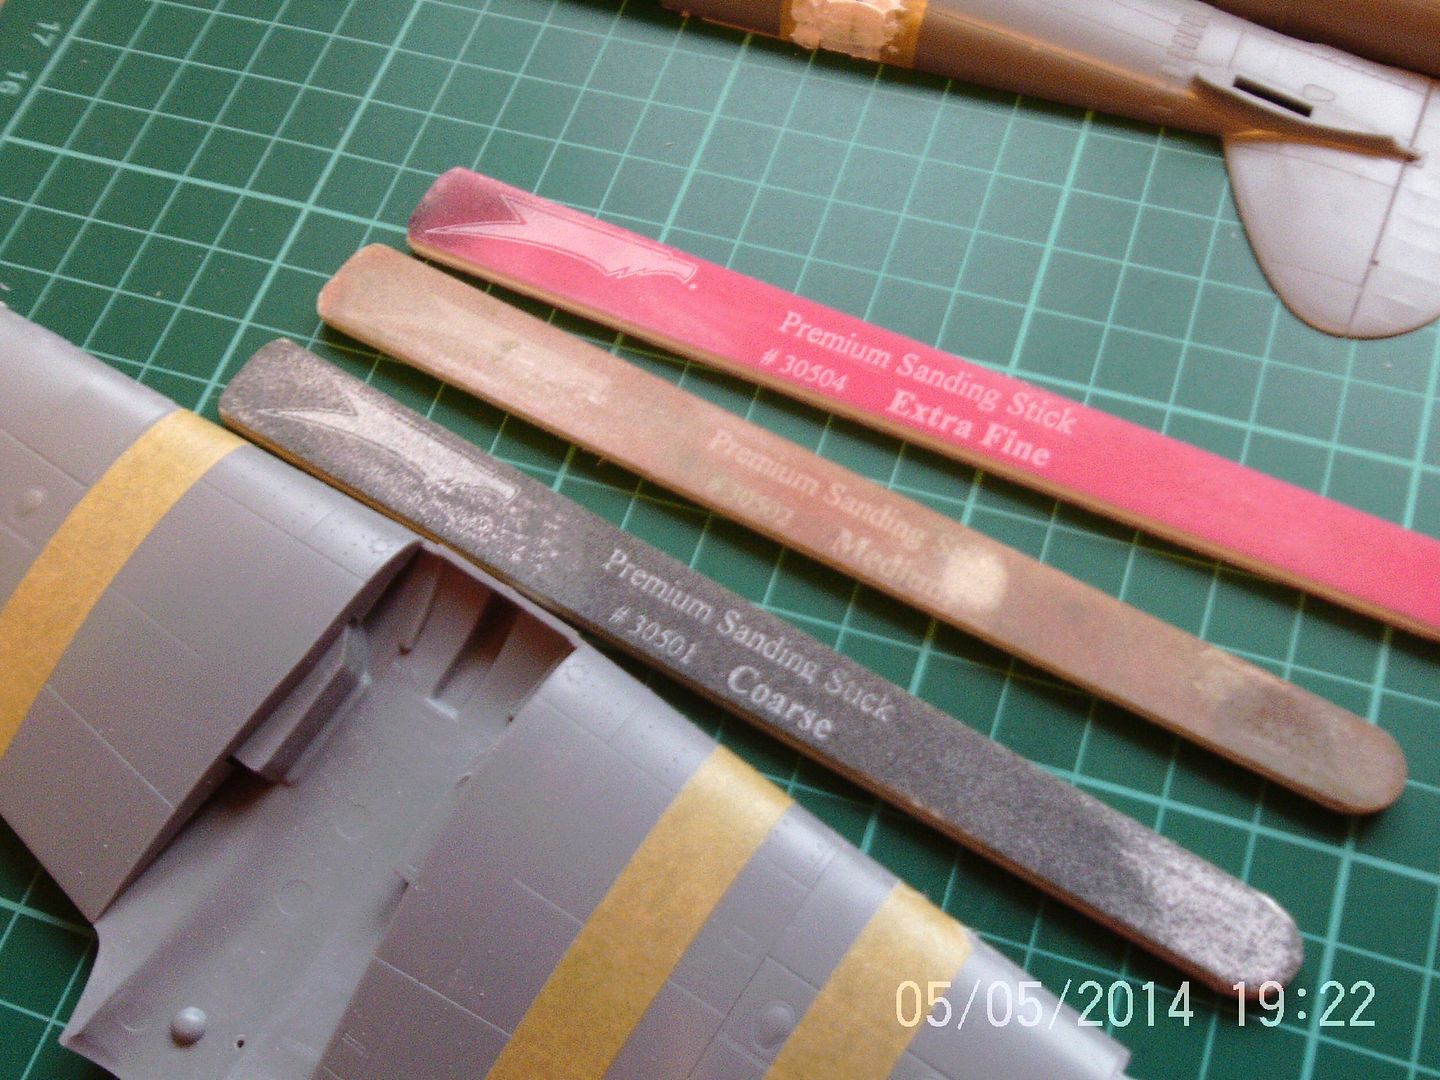
Need to save up for some Ultimate sticks as some of mine have seen better days.
The result, not dead smooth but will be tidied up later:

It was at this point that I realised that, in order to drill holes to take the new cannon fairings I would need some good ref points, all of which I'd just sanded smooth. Doh! Never mind, a bit of careful measuring in store later and luckily I have a set of plans.
Next job was to glue in the landing light covers. I used extra thin but it didn't need to be neat as these will be fillered and blended into the wing. Rocket carrying Typhoons nearly always had their landing light covers skinned over:
I had a quick test fit of the fuselage halves which revealed a gap between the cockpit inserts. To be honest I was expecting this and I'd rather do some filling on these small areas than have to build up layers on the fuselage sides:
Last thing for today was to put some Vallejo primer on the cockpit parts and inside the fuselage:
Thanks for having a look. This build seems to have got me out of a modelling rut and I'm looking forward to getting more done this week.
Re: Hasegawa 1/48 Hawker Typhoon Mk Ib Bubbletop.
Posted: Mon May 05, 2014 8:46 pm
by Willem
Nige201980 wrote:Quick work mate looks a great kit buddy.
Cheers Nige, though quick builder I ain't compared to some of the members on here.
It is a sweet kit though despite the awkward cockpit inserts. I built a car door version a few years ago but it was one of my first models getting back into it. I might keep an eye out for a kit to have another go.

Re: Hasegawa 1/48 Hawker Typhoon Mk Ib Bubbletop.
Posted: Wed May 07, 2014 12:00 am
by rodrant
Hi Will ,
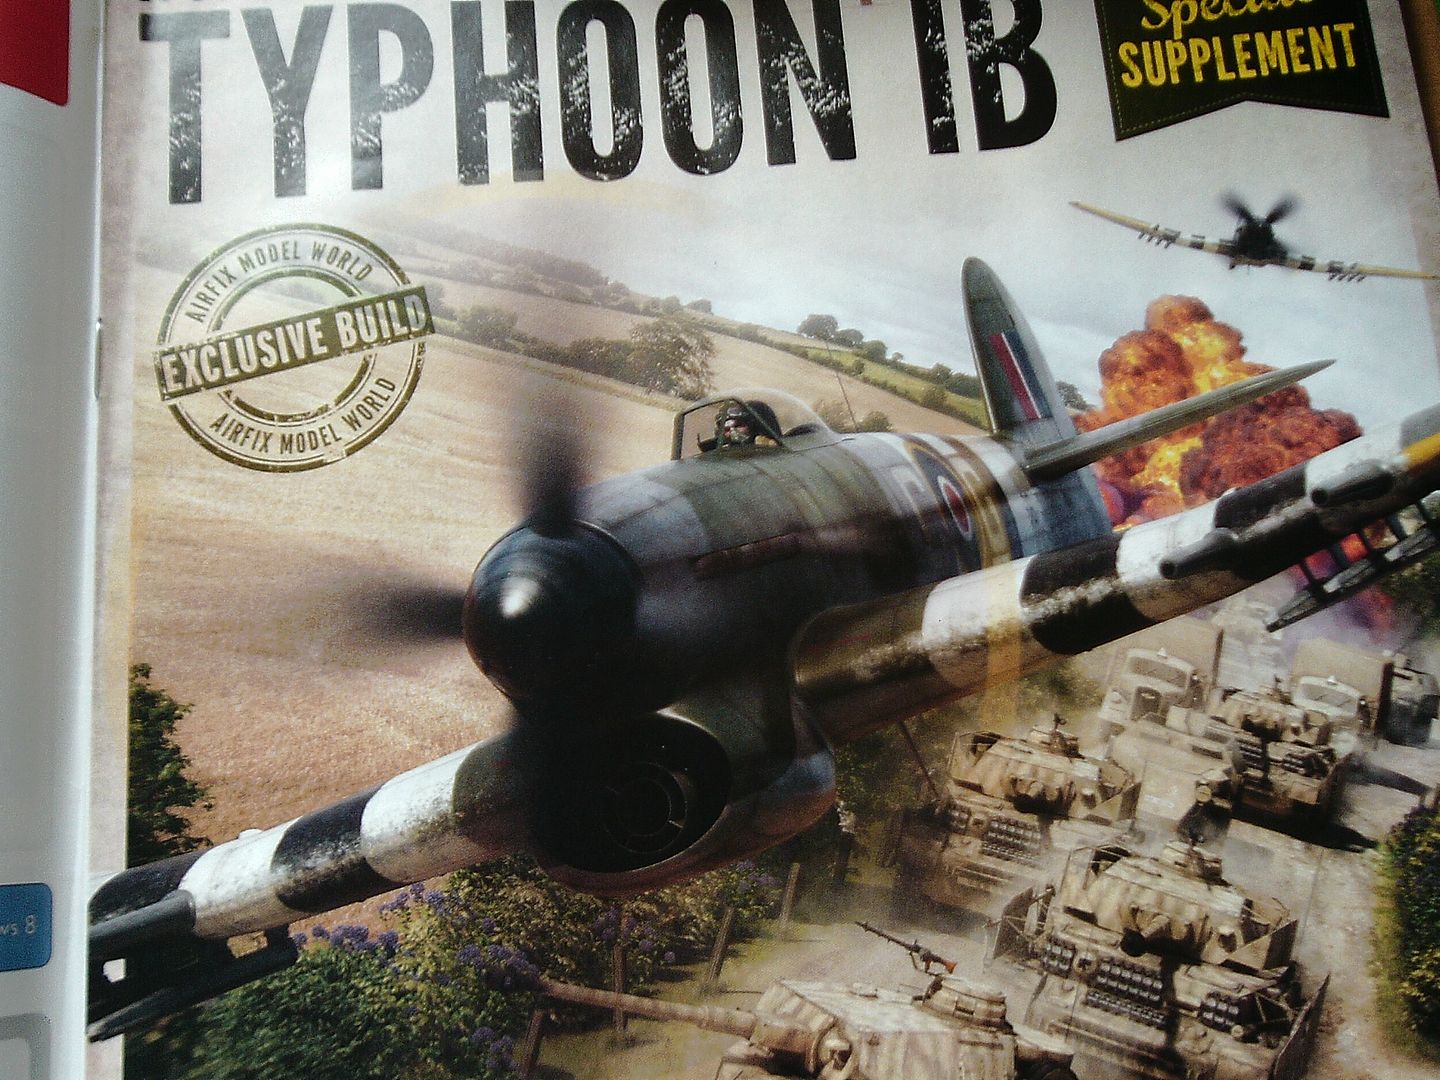
In this month airfix model world magazine they have some special supplement on the hawker Typhoon Mk IB , with a lot of documentation and photos ,the markings used during D-Day , and already a build of Airfix 1/24 kit that should be launched soon , the price mention for the kit is 99£ but what I read of the build is just a must have kit , with a lot of detail, the cockit detail is just amazing
it will give me some wallet problems for sure ...

well your kit is looking good , will follow the build with great interest ,
Re: Hasegawa 1/48 Hawker Typhoon Mk Ib Bubbletop.
Posted: Wed May 07, 2014 12:38 am
by Willem
Hi Antonio
Thanks for the heads up, I'll try and pick up the Airfix magazine tomorrow. Yep, I'd like a bash at the new 1/24 kit myself but it would take me years to do and then nowhere to put it! Thanks for following the build, I managed to get some paint down today, I'll post some more pics tomorrow.
Cheers mate.
Re: Hasegawa 1/48 Hawker Typhoon Mk Ib Bubbletop.
Posted: Wed May 07, 2014 2:18 am
by UKguyInUSA
I will be watching this very carefully, as my next build (awaiting delivery from Hobbylinc.com) is the Hasegawa Hawker Typhoon Mk 1b with the open canopy door. Kit # 09059
I, too, love the Typhoon and the Tempest!
Cheers!
Martin
Re: Hasegawa 1/48 Hawker Typhoon Mk Ib Bubbletop.
Posted: Wed May 07, 2014 6:30 pm
by Willem
Cheers Martin. I wouldn't watch too closely Bud, you might pick up some of my bad habits.
Re: Hasegawa 1/48 Hawker Typhoon Mk Ib Bubbletop.
Posted: Wed May 07, 2014 7:07 pm
by Willem
Not too much to report today. Hopefully I'll get chance to do some more a bit later.
Thanks to rodrant, I picked this up whilst out and about. The latest Airfix mag with a Typhoon supplement. Some useful stuff in here and yes Antonio, I've changed my mind, I want a 1/24 Typhoon! Will have to ditch some work and move to a bigger pad.
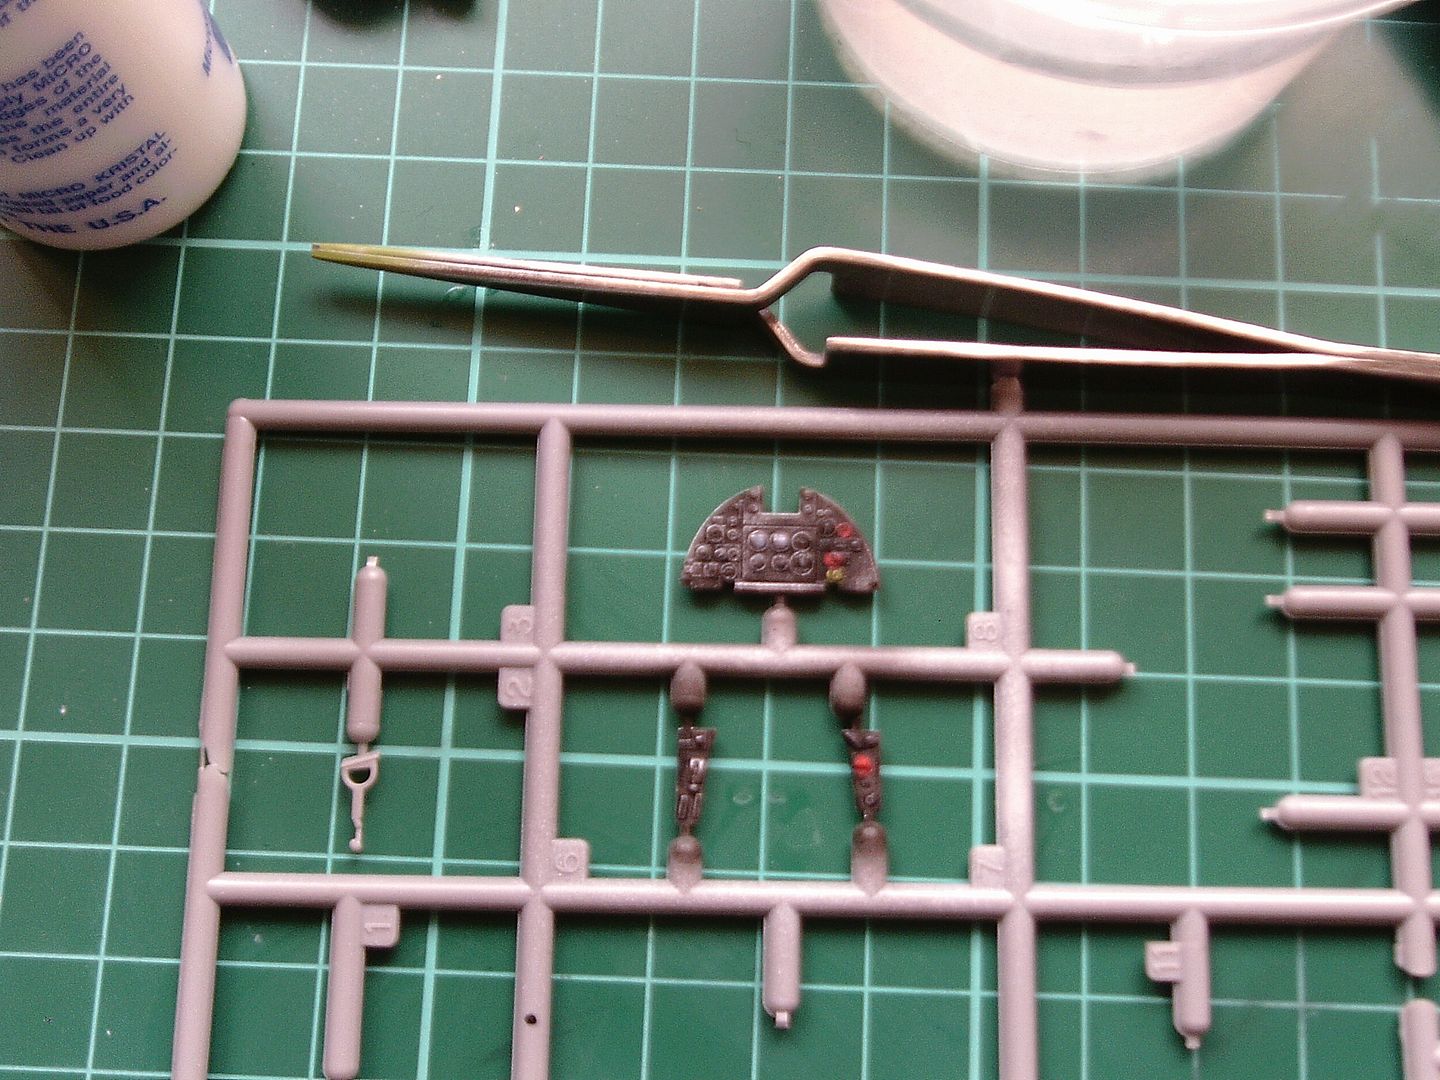
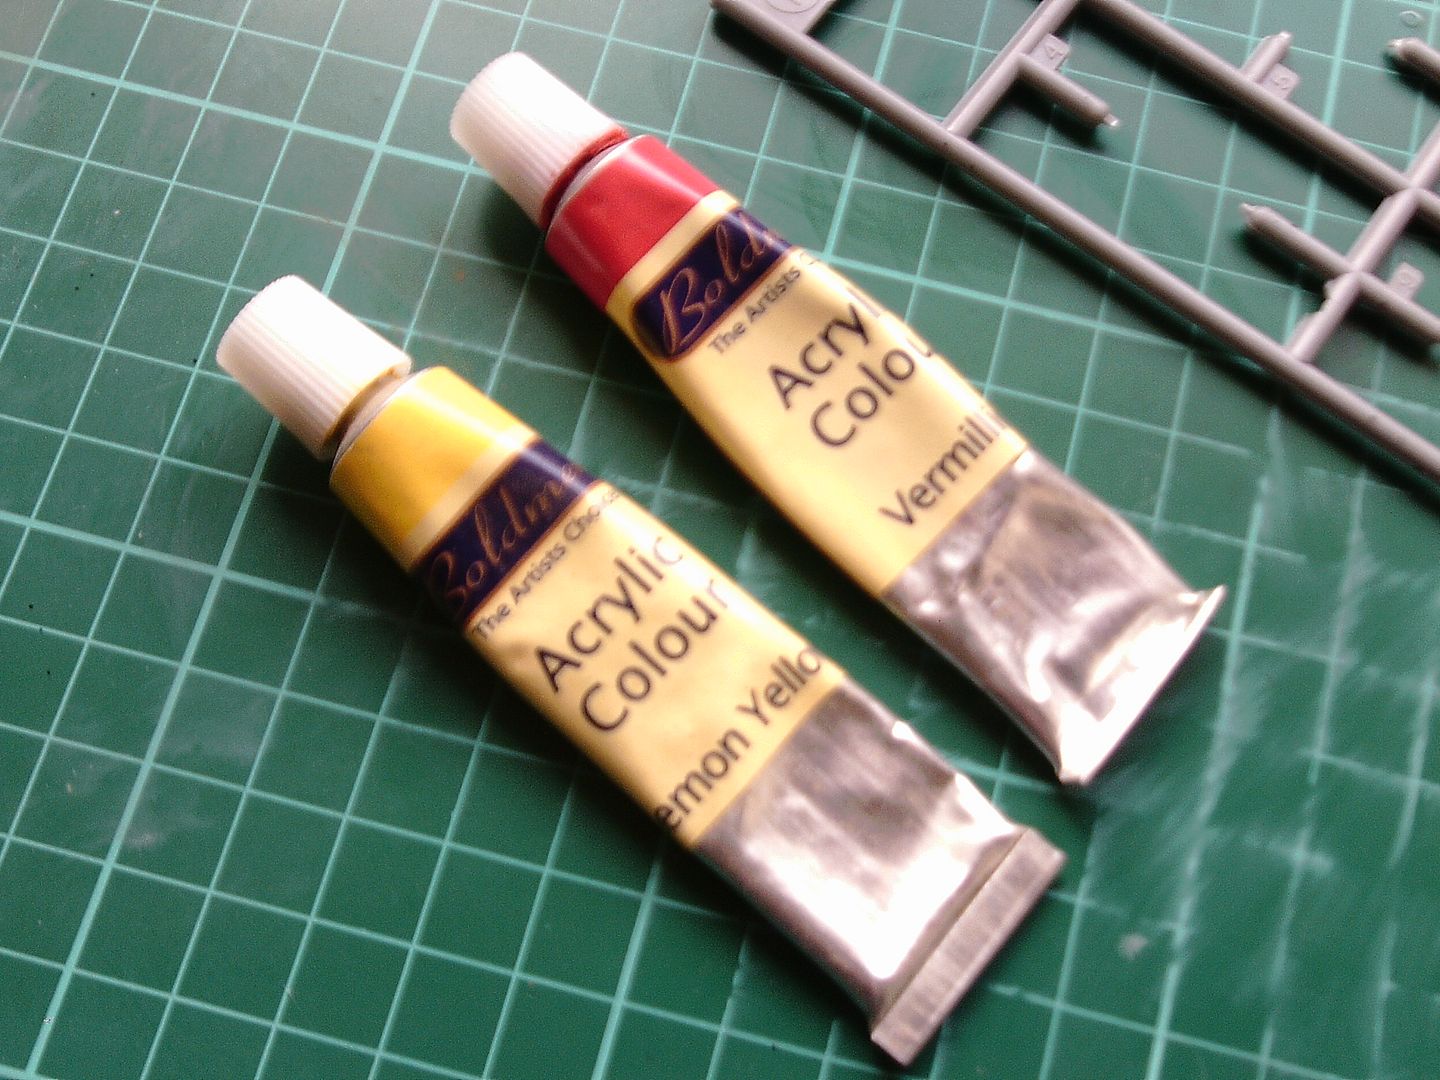
I've done a bit of work on the instrument panel. Sprayed with Tamiya black, dry brushed gunmetal and details picked out with some cheapo acrylics I found in a budget supermarket. The whitish blobs are dots of drying Kristal Klear to represent glass dials.
I now need to visit the optician.
Sprayed the fuselage insides with Vallejo 71.095 pale green and gave it a sand wash (it looks more like cockpit green in real life......honest). Spot the piece I forgot to add before spraying, I think it's supposed to be the trim wheel.
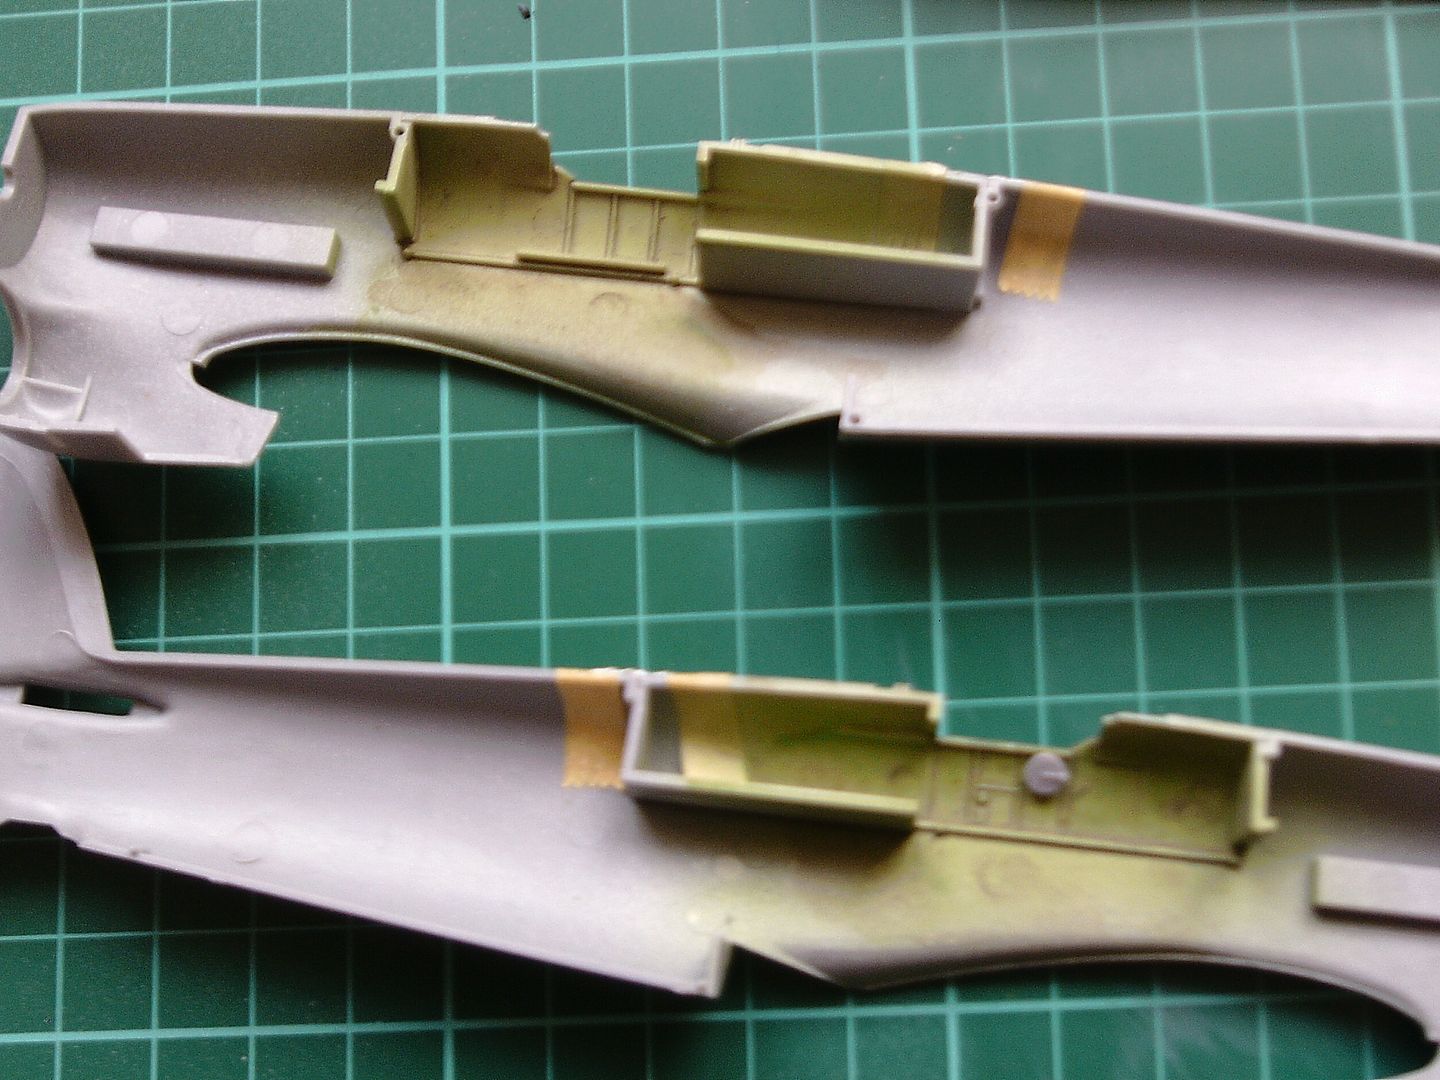
I sprayed the cockpit floor and armour back the same colour and then painted the tubular framing with Humbrol enamel gunmetal. When the enamel dries (next Tuesday by the looks of it) this will get a dark wash and then dry brushed silver.
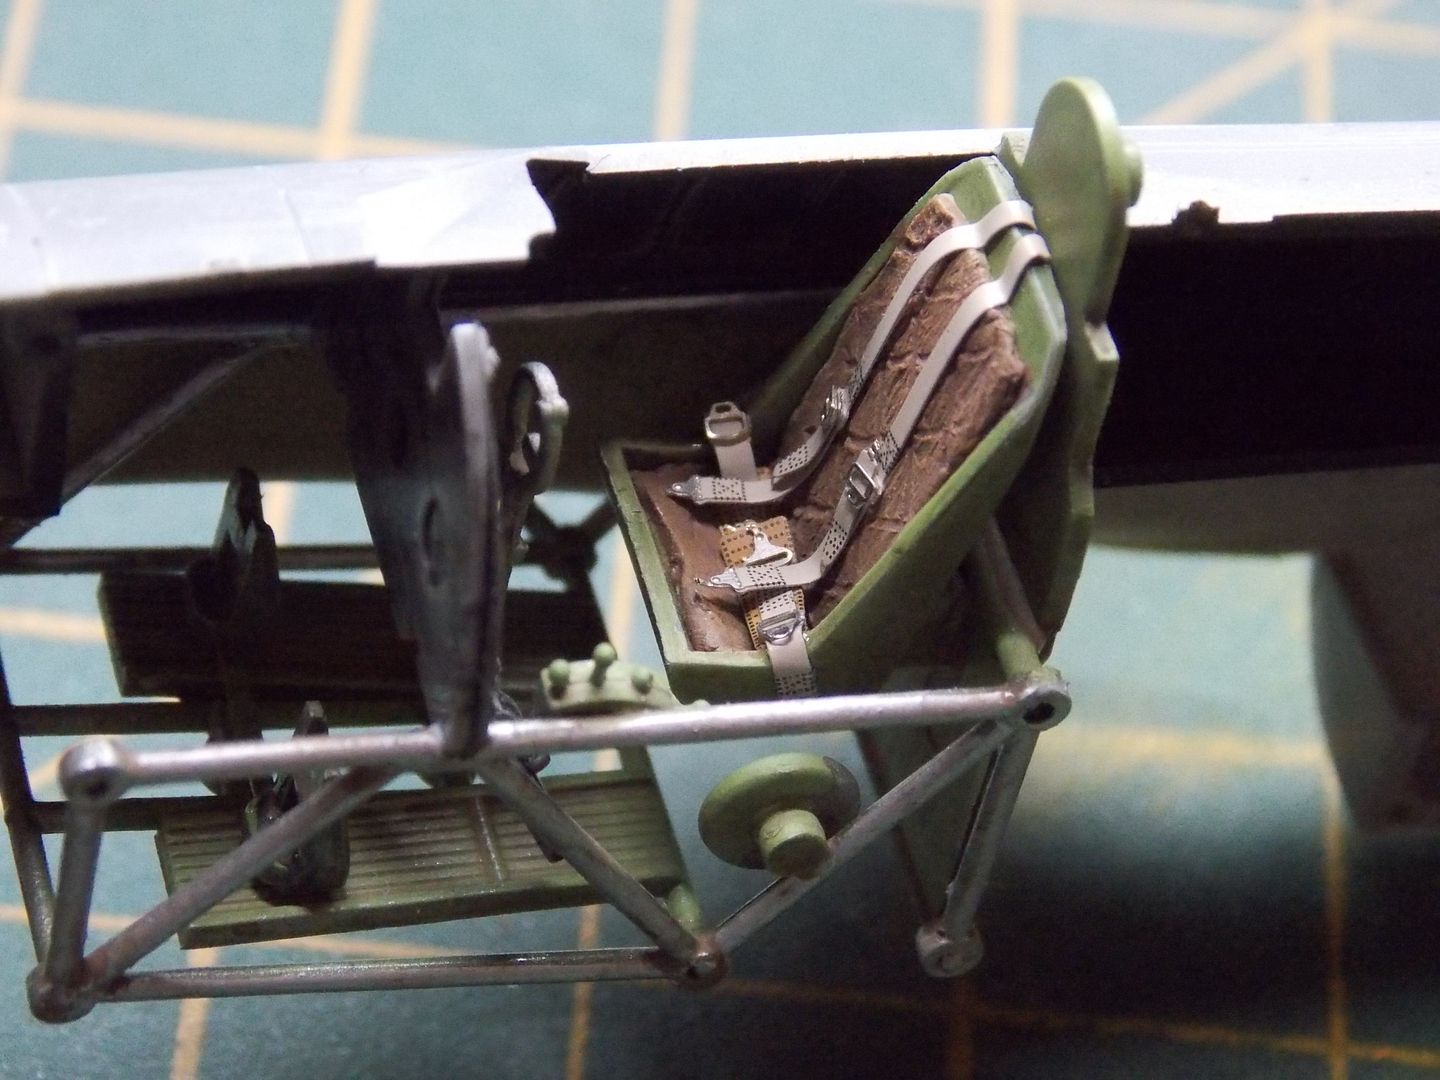
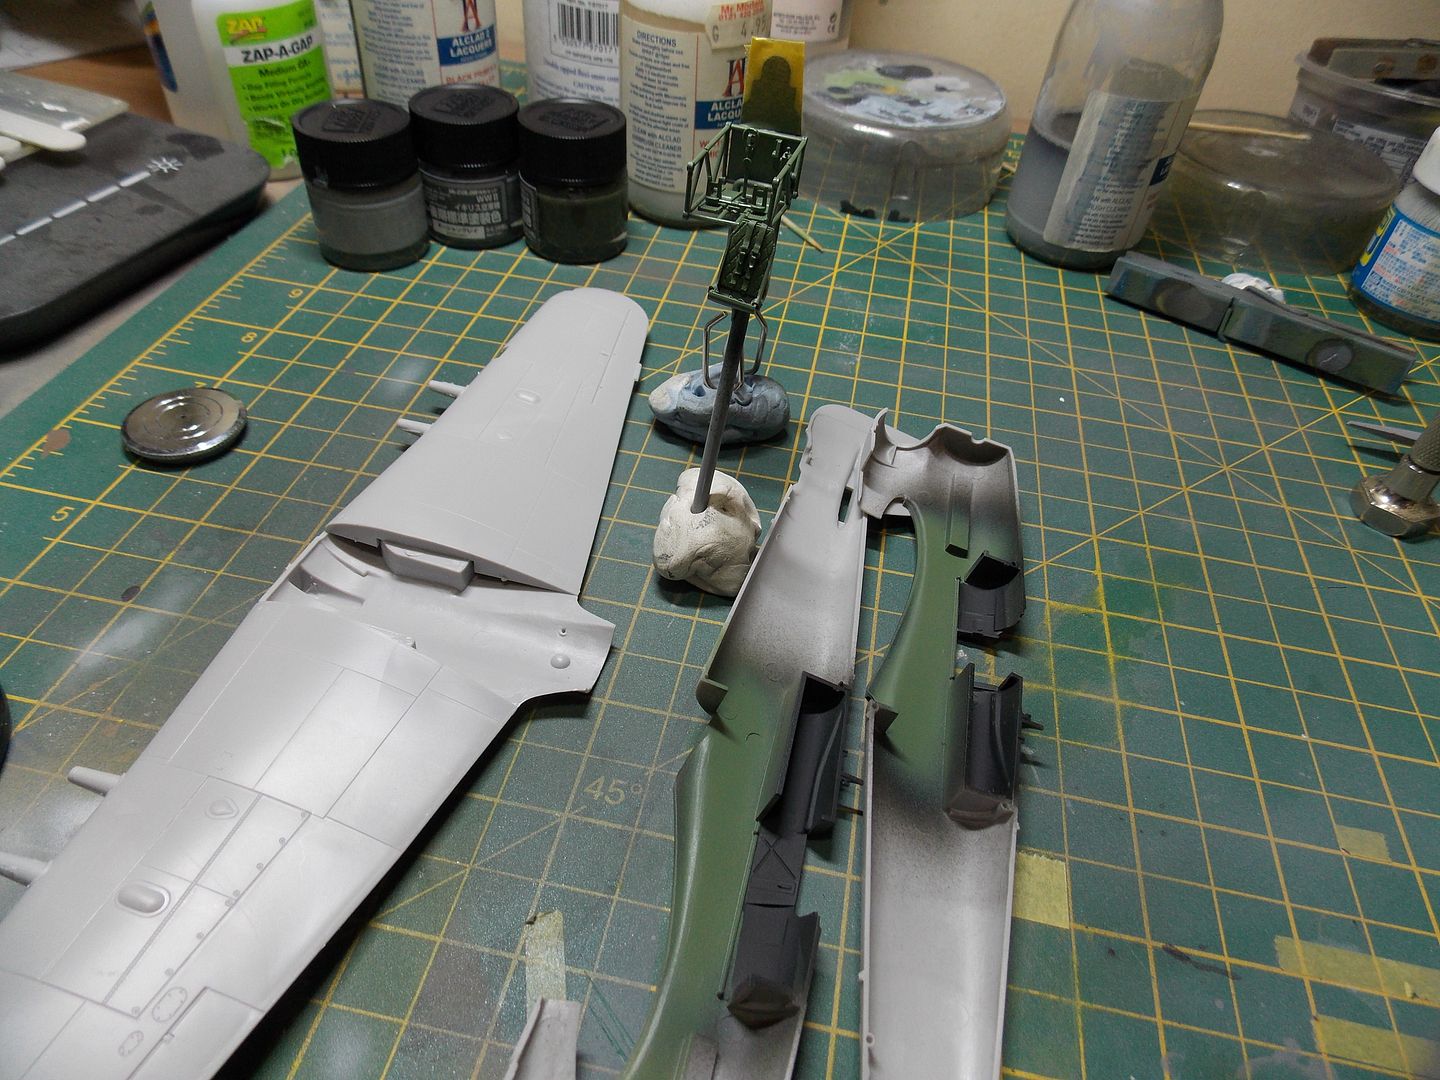
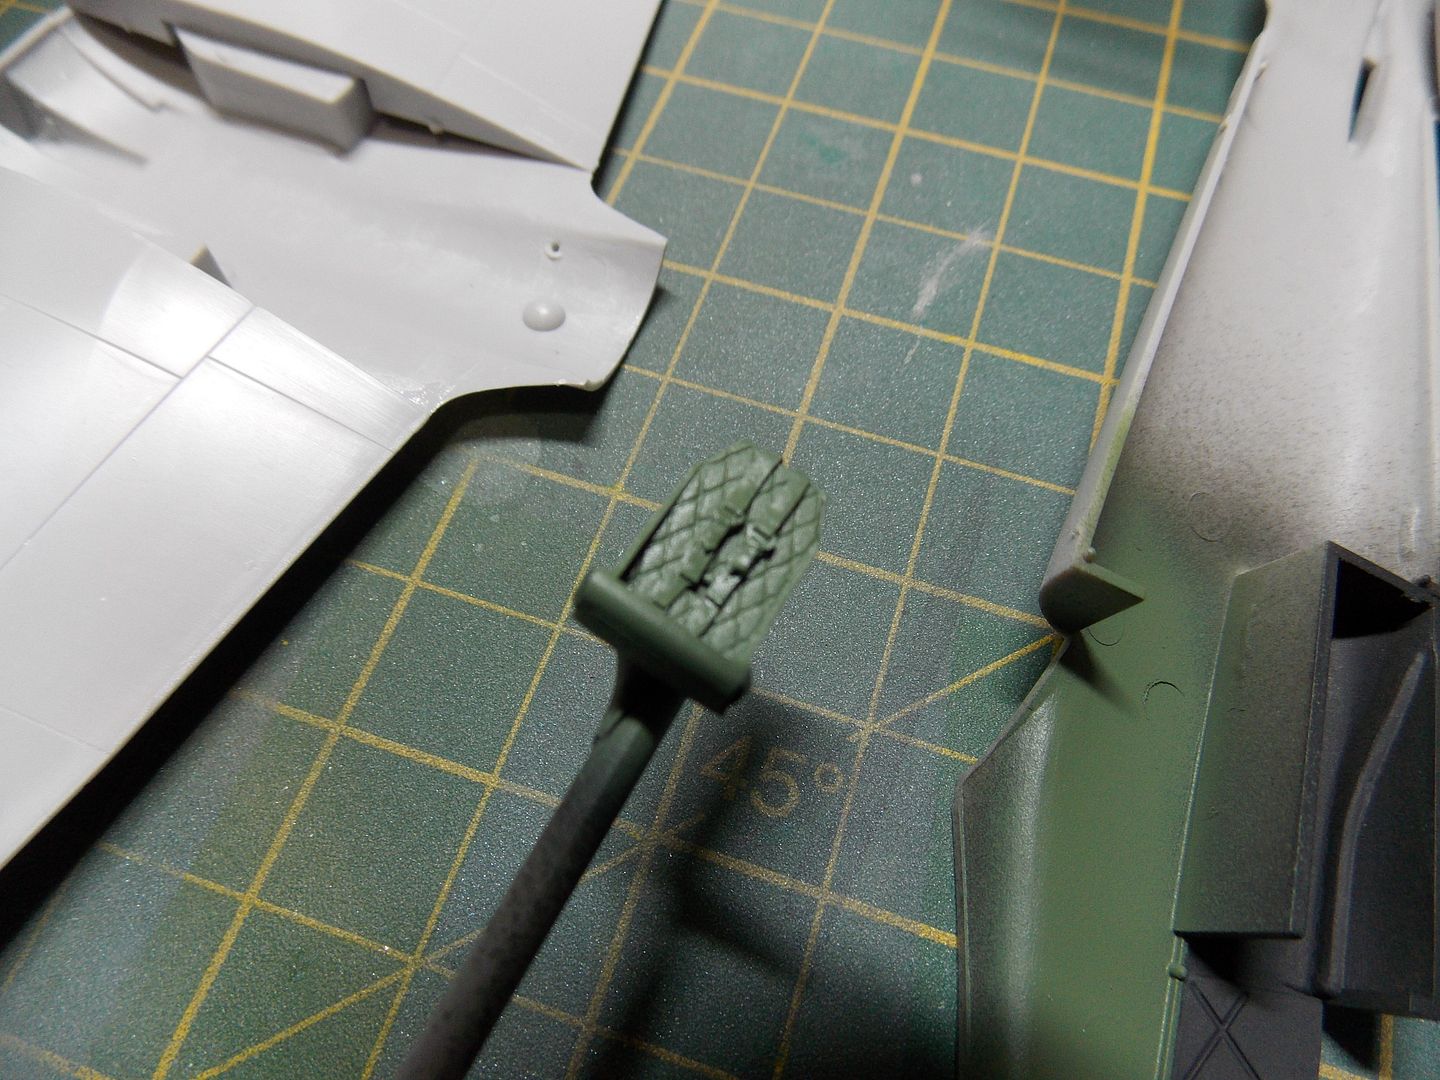
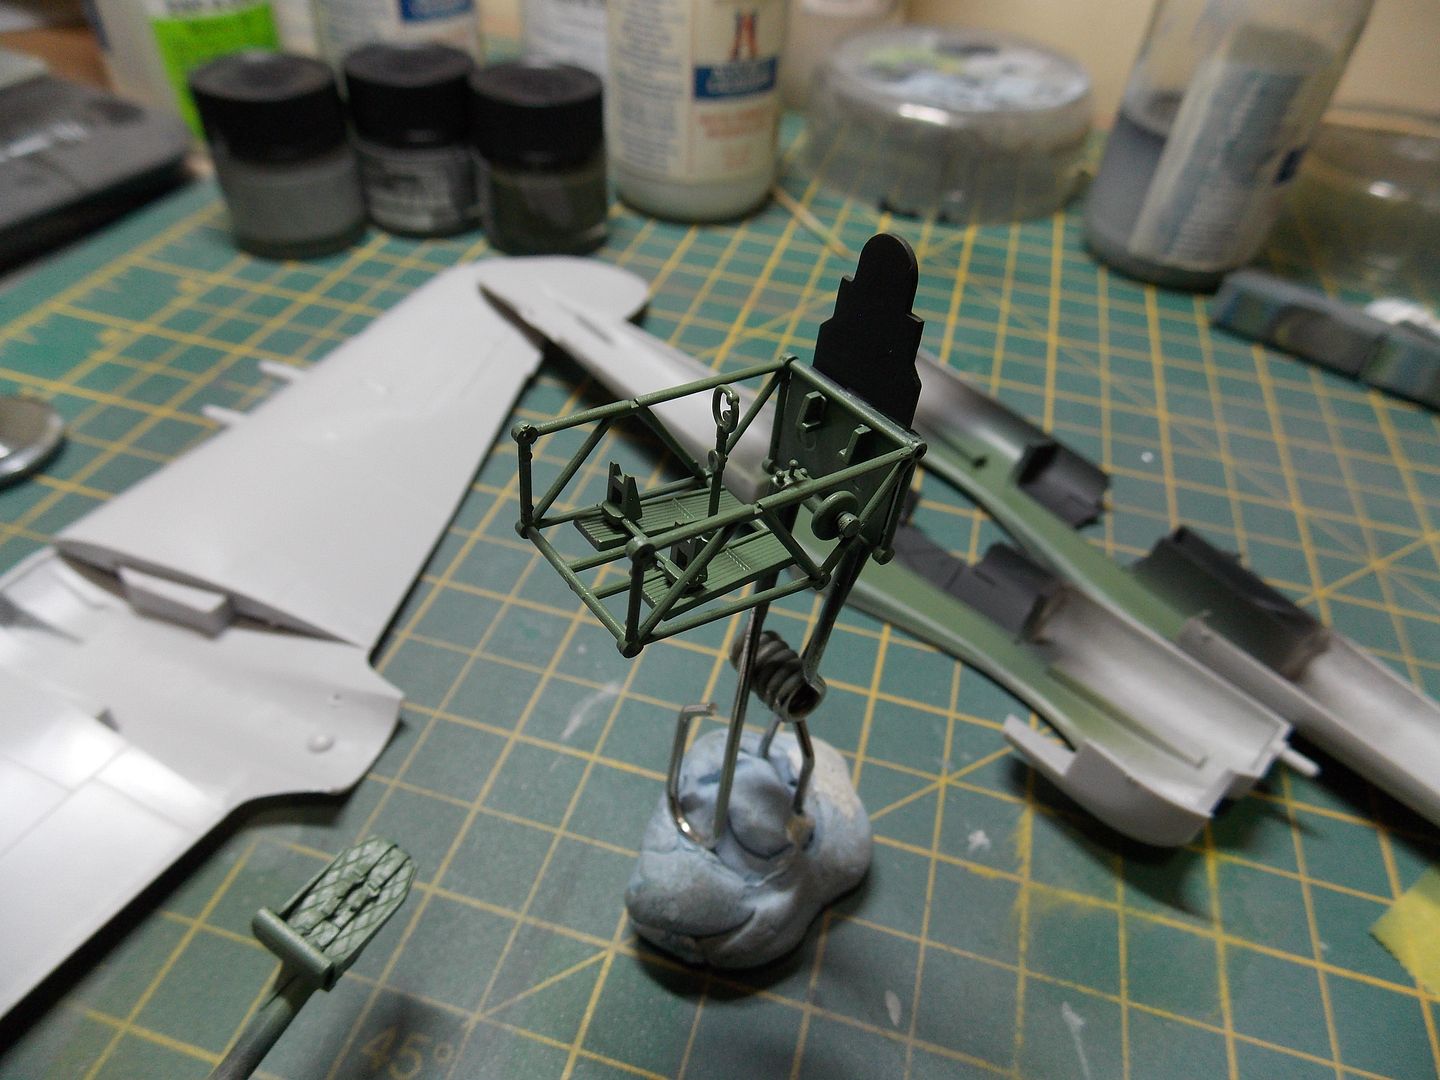
Dug out an old Eduard set of RAF seat belts and then I checked my references for mounting:
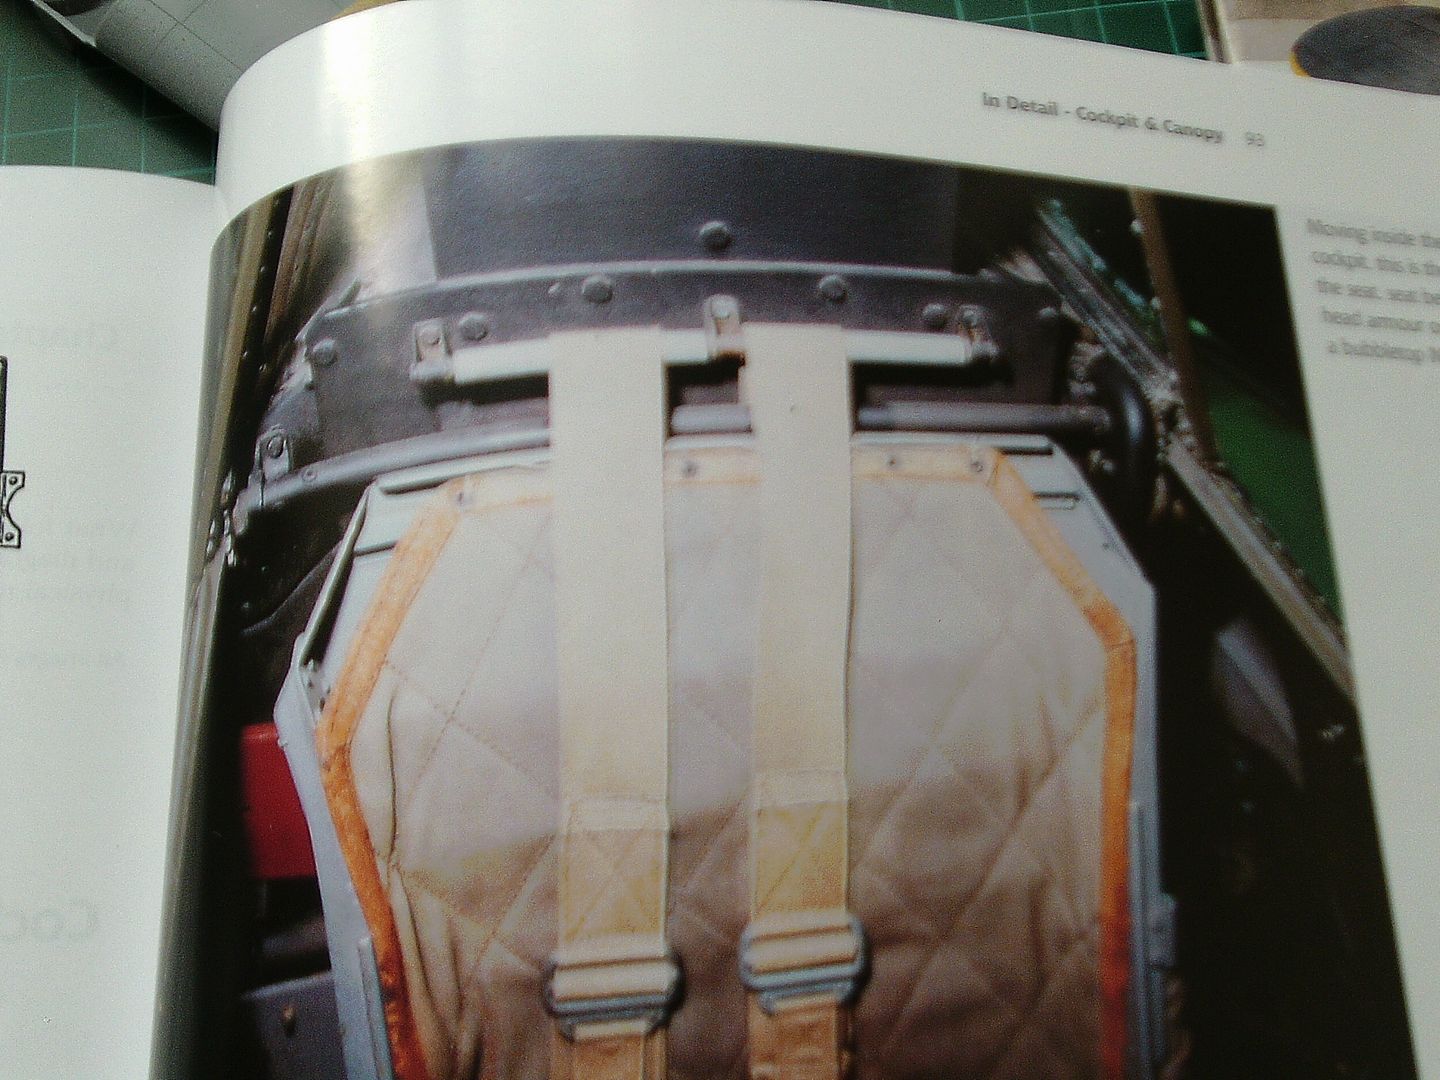
Obviously, the kit has no such mounting so I am now contemplating building the seat belt rails out of thin wire.
That's about it so far. I want to get the metal cannons installed in the wings but this looks like a complex operation and best tackled when I've got some more time.
Thanks for looking (I realise that my camera skills are a work in progress so thanks for your forbearance).
Re: Hasegawa 1/48 Hawker Typhoon Mk Ib Bubbletop.
Posted: Sun May 11, 2014 6:57 pm
by wally
Fantastic work so far. I also have plan to start building the same kit reboxed by Italeri. So I will be watching your progres very closely. Keep up good work.
Hawker Typhoon is crackin good looking aircraft.
Cheers
Re: Hasegawa 1/48 Hawker Typhoon Mk Ib Bubbletop.
Posted: Wed May 14, 2014 9:56 pm
by Willem
Thanks Wally, you are very kind.
Just an update on where this is at.
Wanted to kick on over the weekend but a last minute gig came in so Saturday was a write off then writing reports on Sunday.

Managed to do a bit on Monday and Tuesday evenings but mainly just procrastination (not looking forward to measuring and drilling for replacement cannon).

Still faffing.
I decided, after some dry-fitting, that the resin radiator would mean more fiddling about than the Nelson Riddle String Orchestra (muso joke, sorry) and I don't think it looks that much better than the kit plastic:
I'll save it for the old Monogram kit in the stash when I'm brave enough to attempt a full re scribe.
Talking of re scribing (my favourite) I sanded the filled fuselage inserts then got some dymo tape out. Looks ok from a distance but I'll find out when the fuselage gets primed:

I checked through my references and realised that the cockpit was a kind of two tone job with black on the top and cockpit green below so added a coat of black then dry brushed and a wash:
So there you go. Not really a brick wall but a minor go slow. I like this aircraft and the kit so it will get done but I kind of wish I'd saved it for the D-Day build. Still, more to follow. Any comments or criticism welcome.
Re: Hasegawa 1/48 Hawker Typhoon Mk Ib Bubbletop. A resurrection.
Posted: Wed Jul 27, 2016 4:56 pm
by Willem
As the new title suggests.
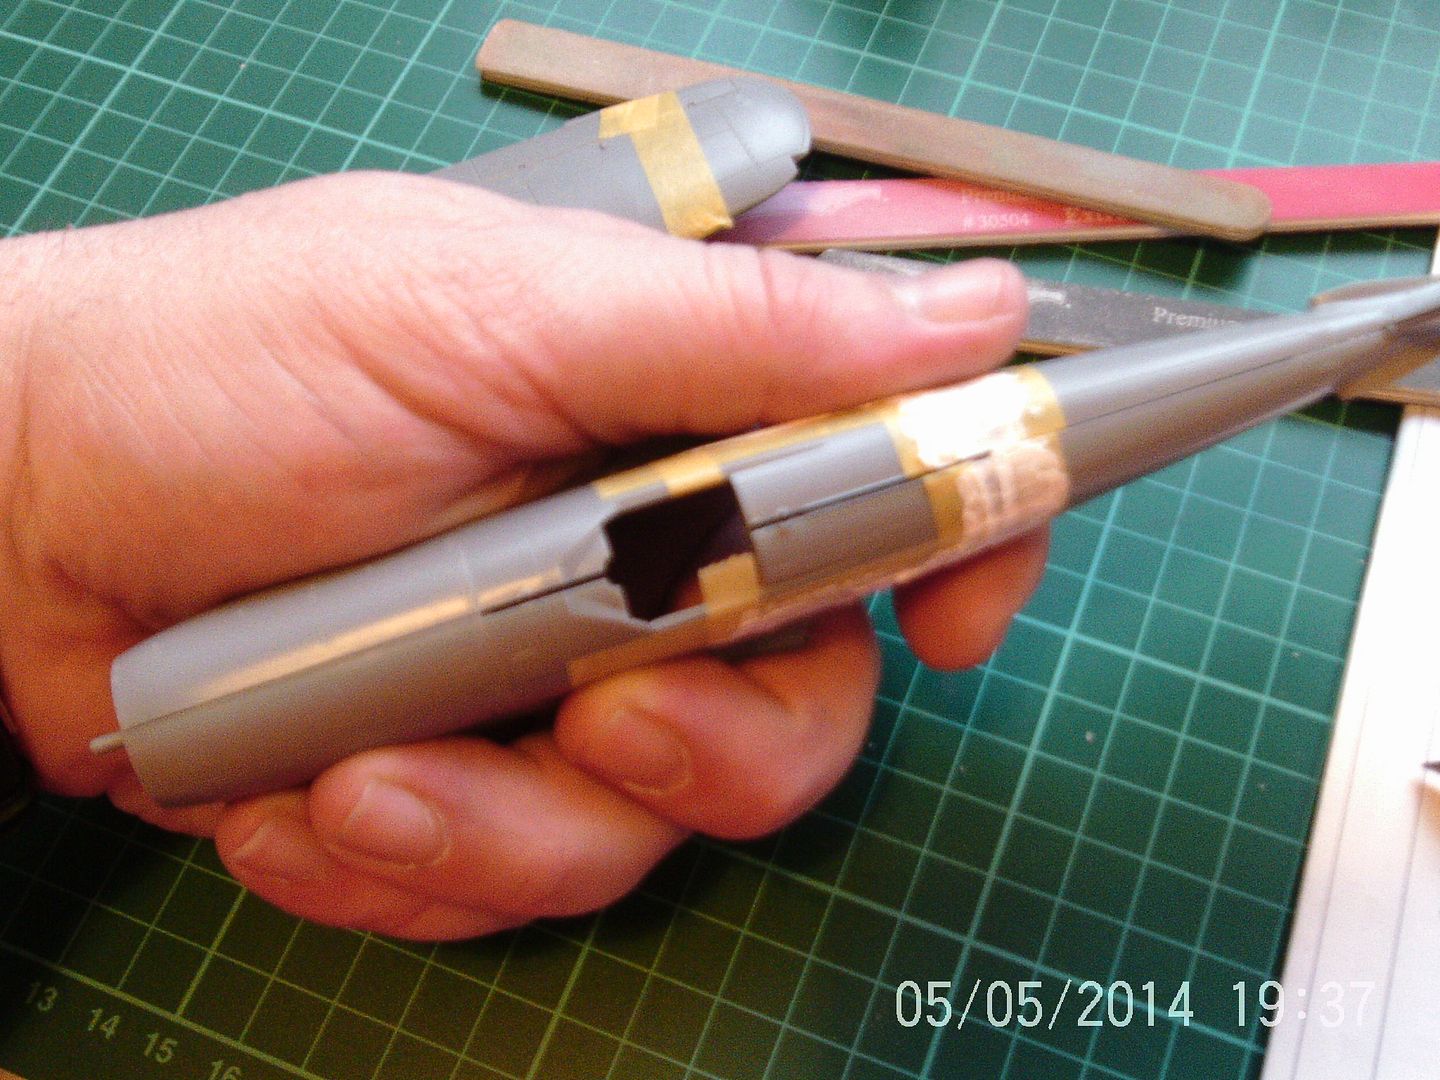
The step that had originally caused a stoppage in this build was the drilling out of holes on the leading edges to take the beautiful turned metal cannon barrels from master. Got this down off the pending shelf and sorted that out now.
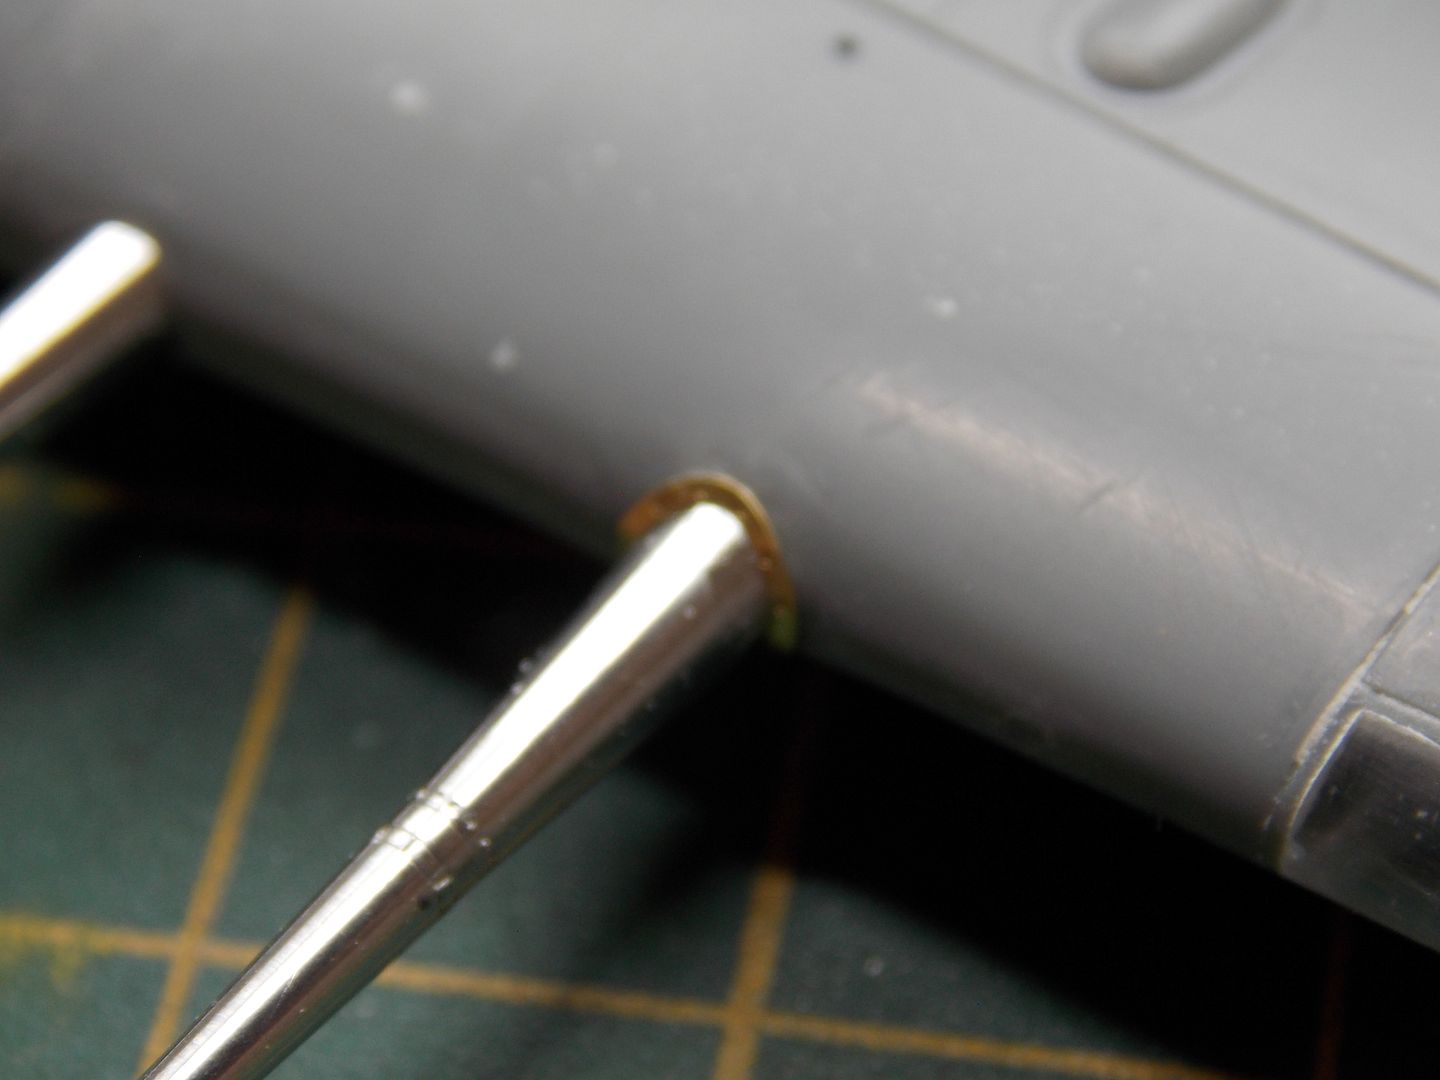
There are brass collars supplied which cover up the untidiness of the drilled holes.
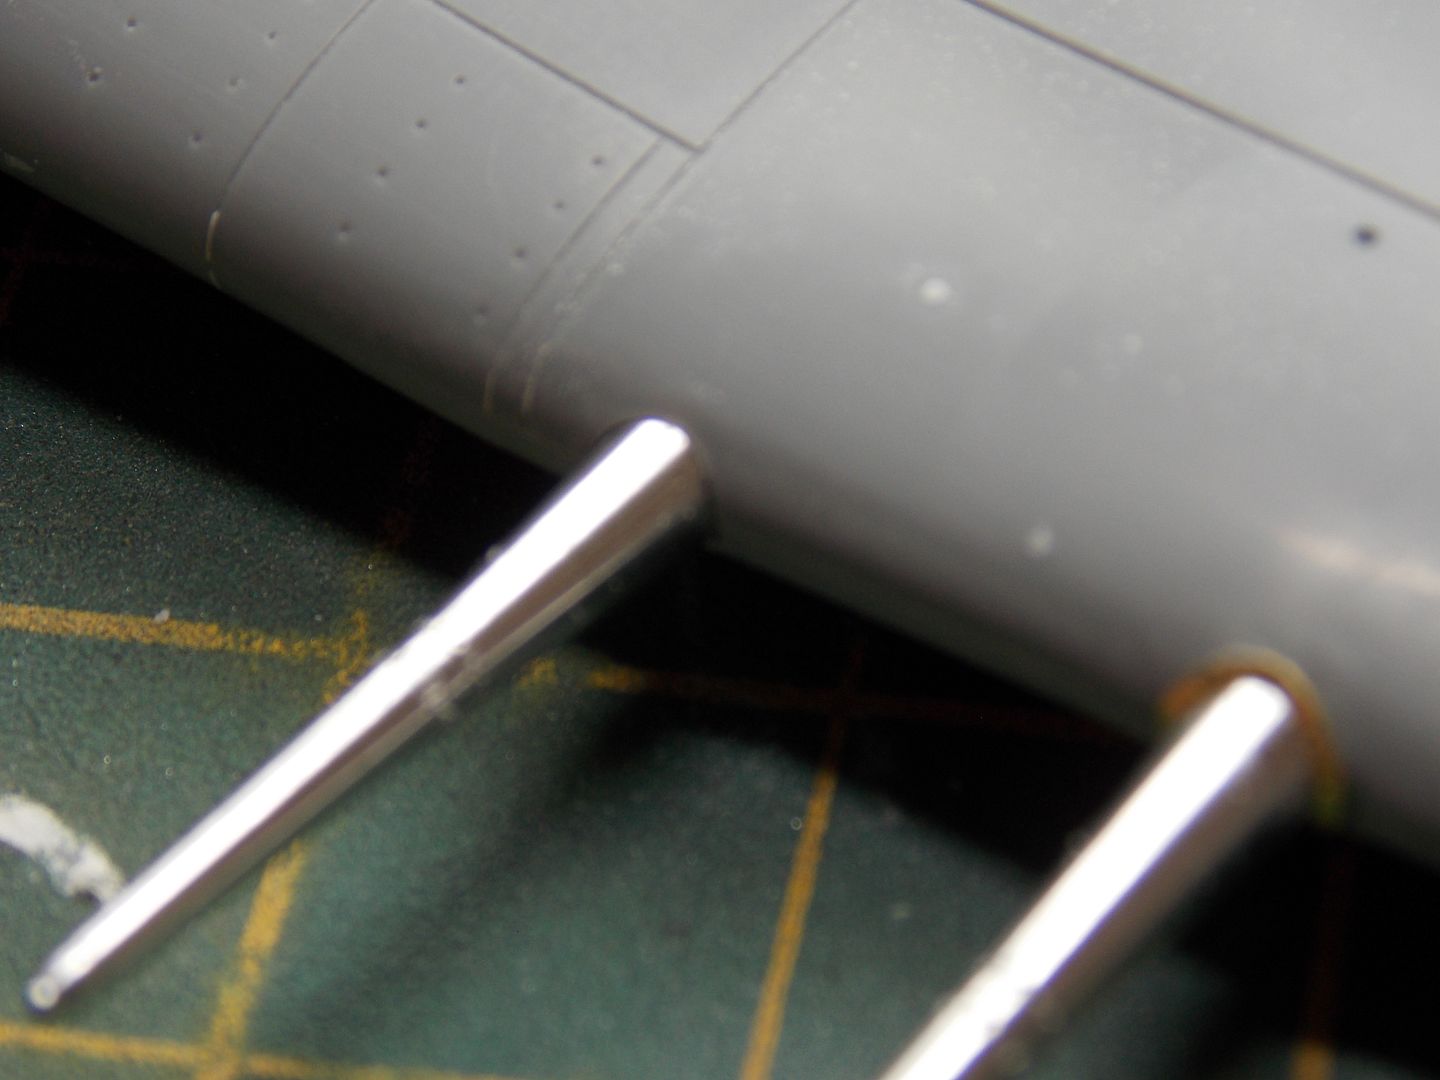
Unfortunately, the camera doesn't want to focus due to the finish on the barrel covers.

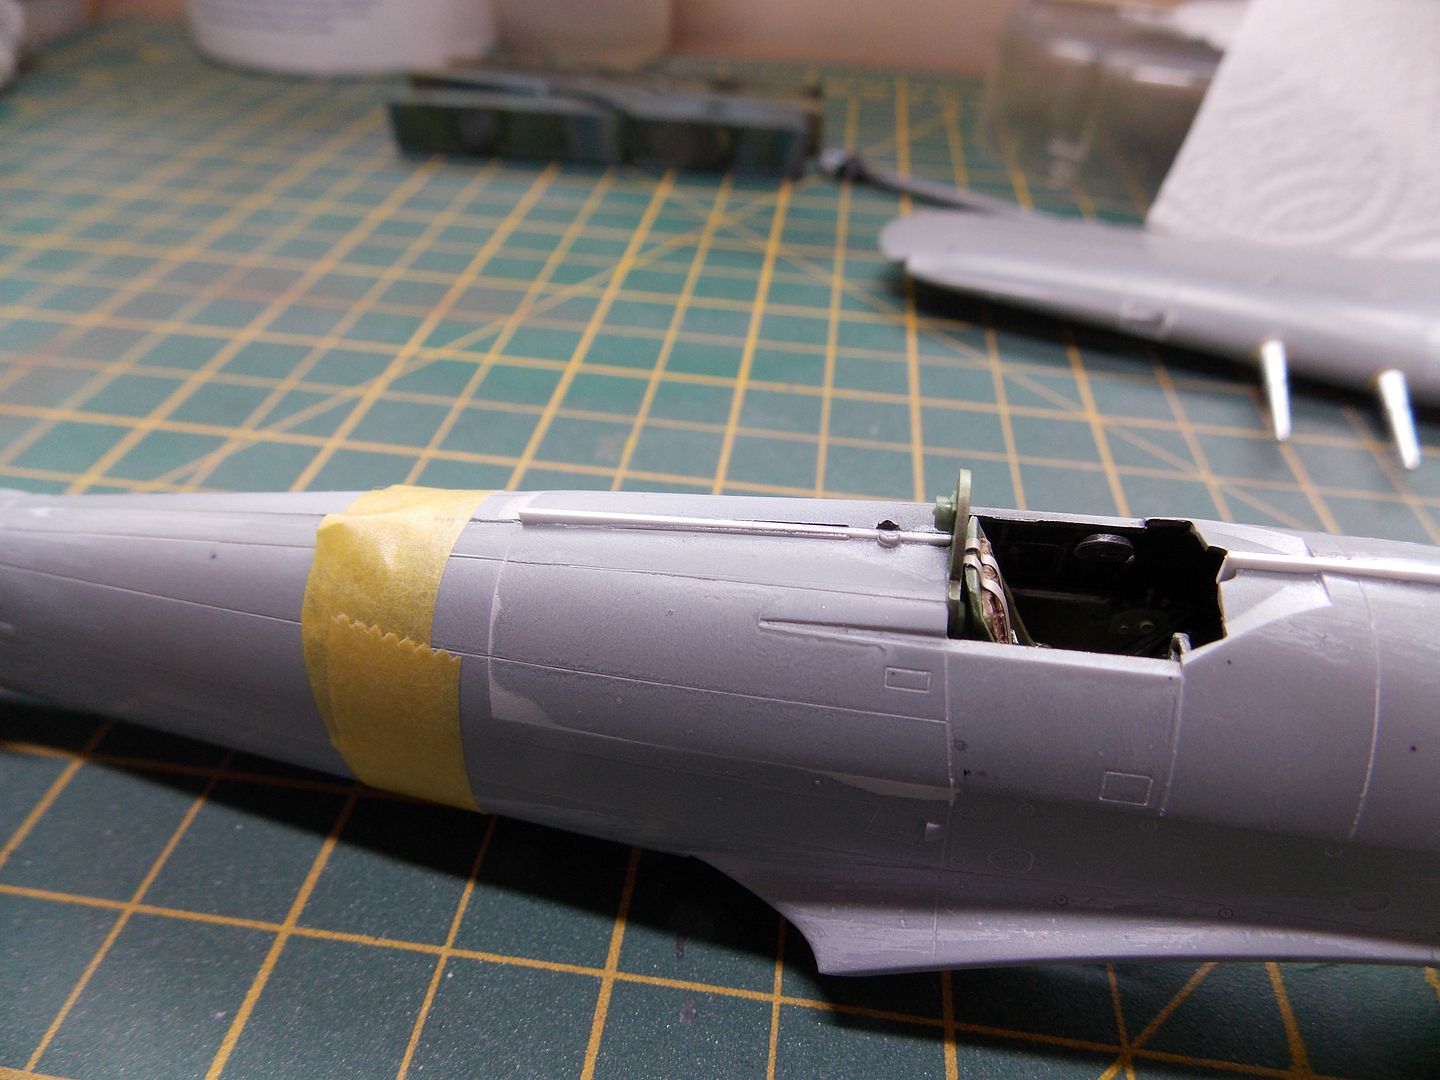
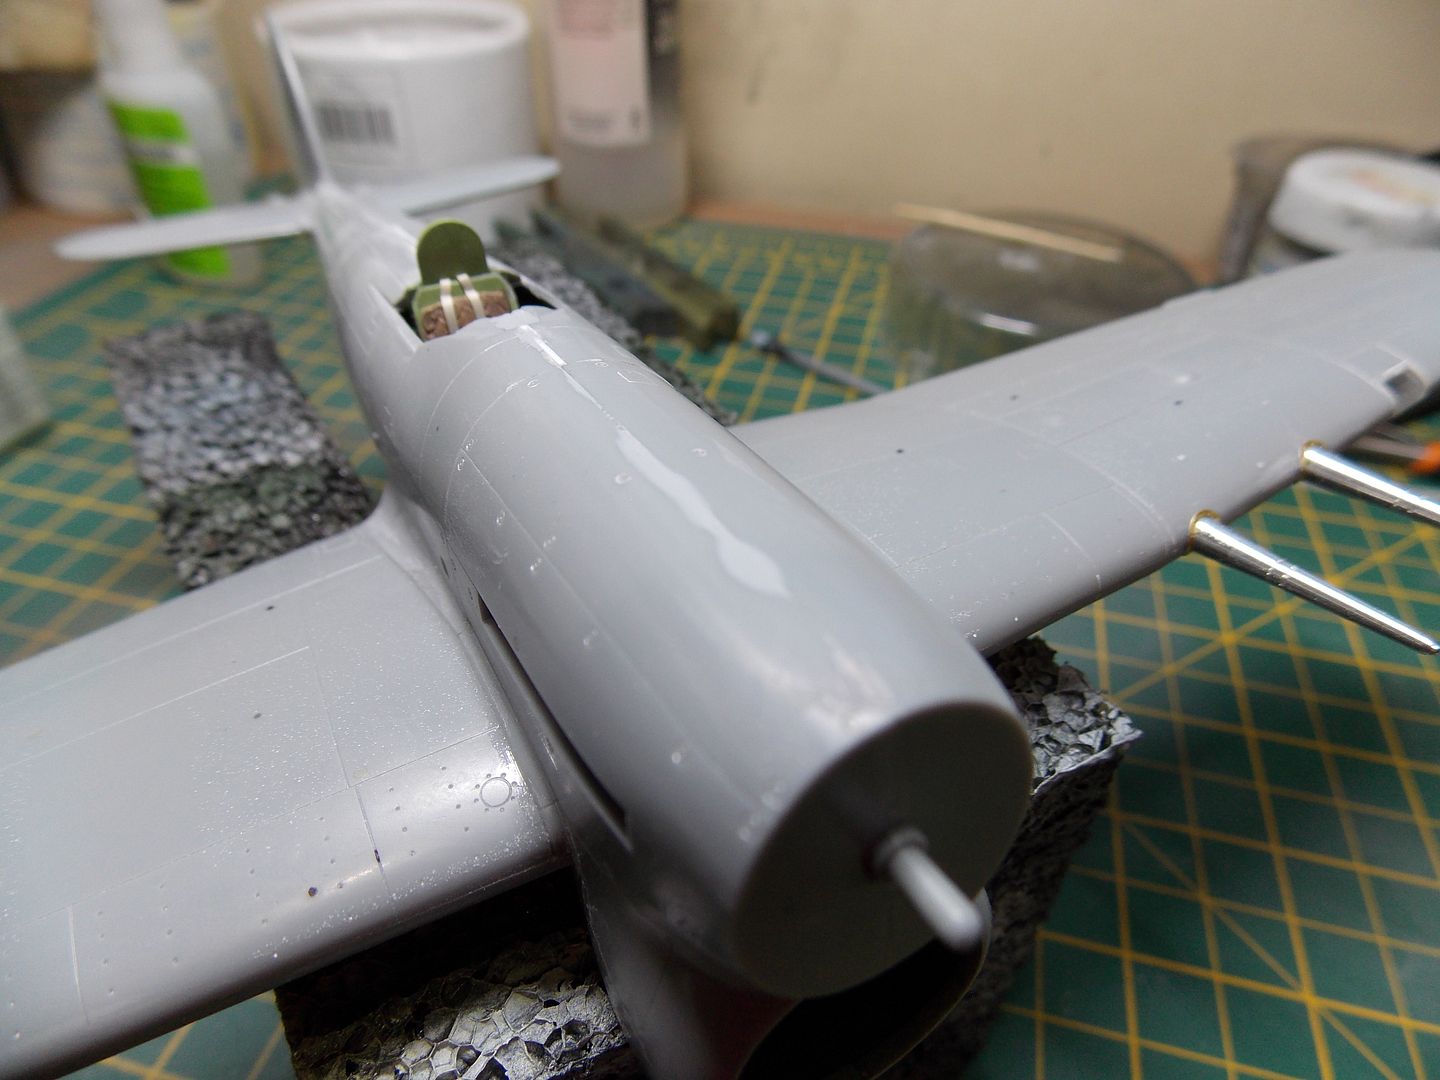
Bodged together a pilot seat cushion out of milliput and added a seat harness.
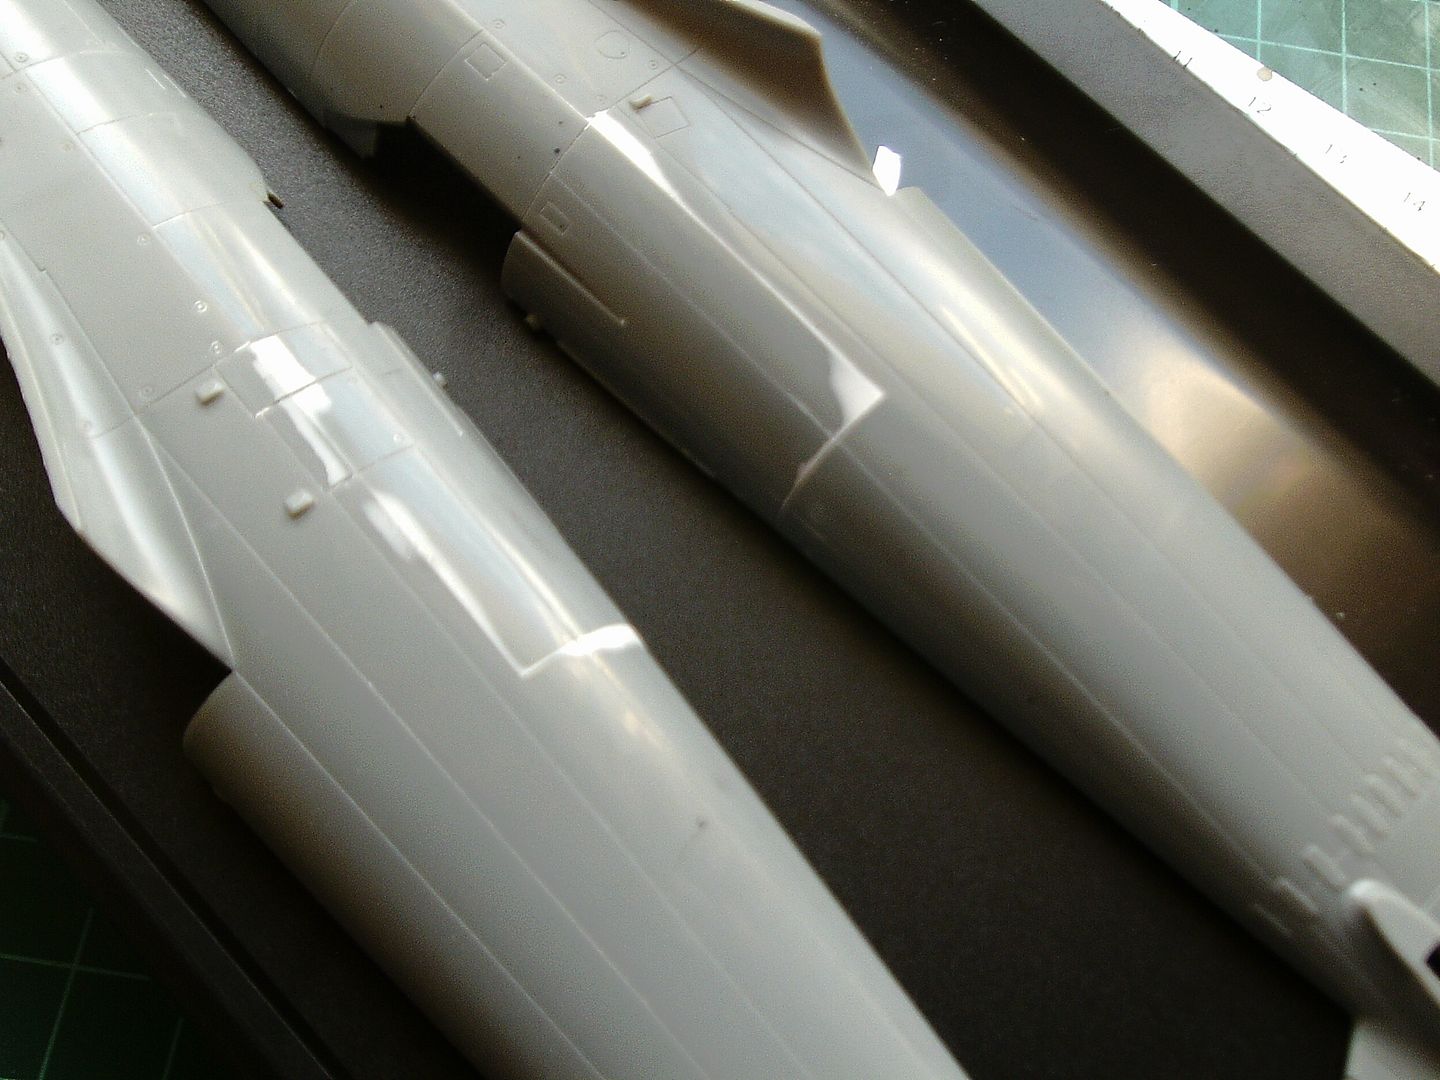
The fuselage halves were joined together and taped up.
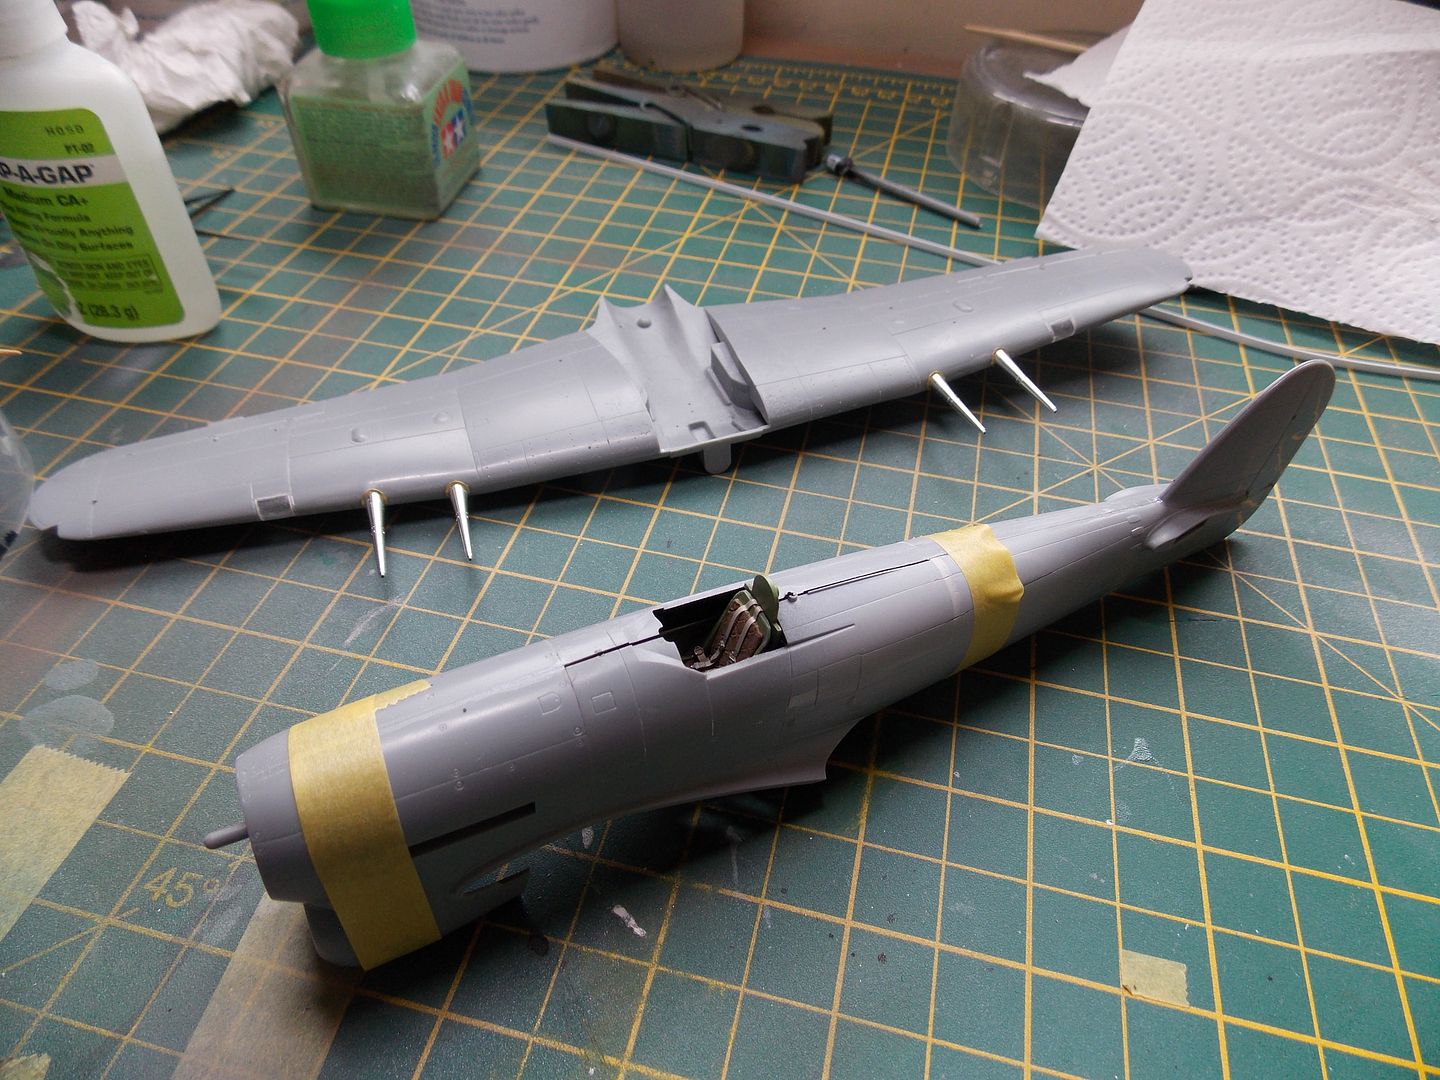
The Achilles heel of this (and several other Hasegawa kits) are the need for cockpit fillets to represent different sub variants of the same aircraft. The P-40 springs to mind. A little extra care and some rescribing is needed but this is still the only real choice for a 1/48 Typhoon.
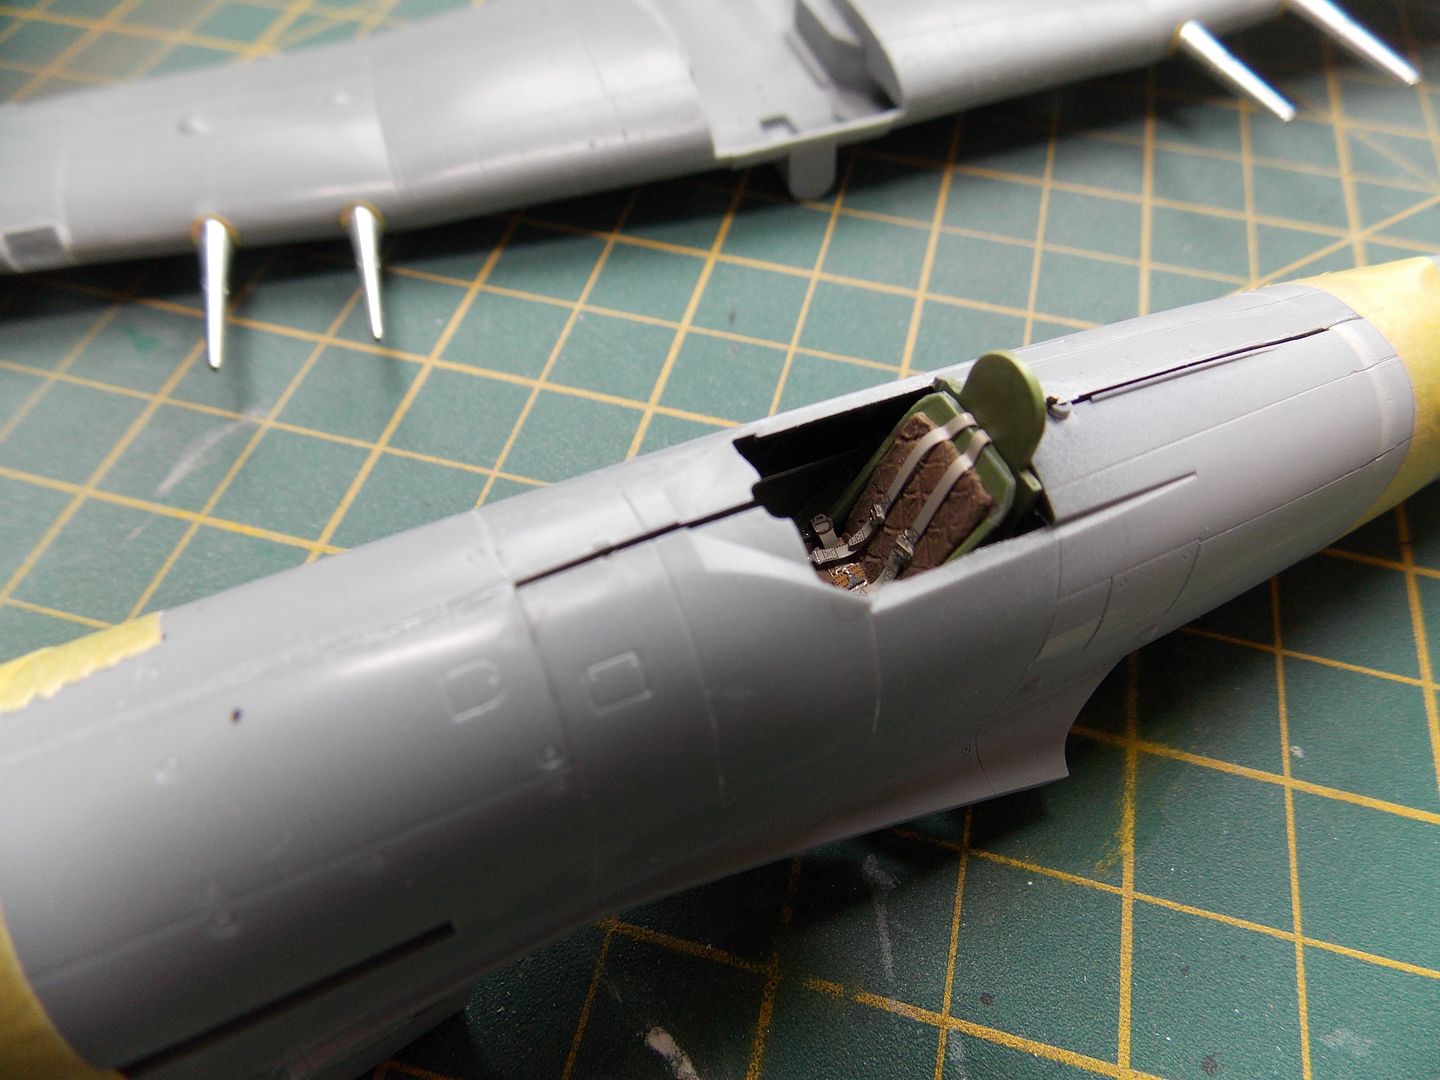
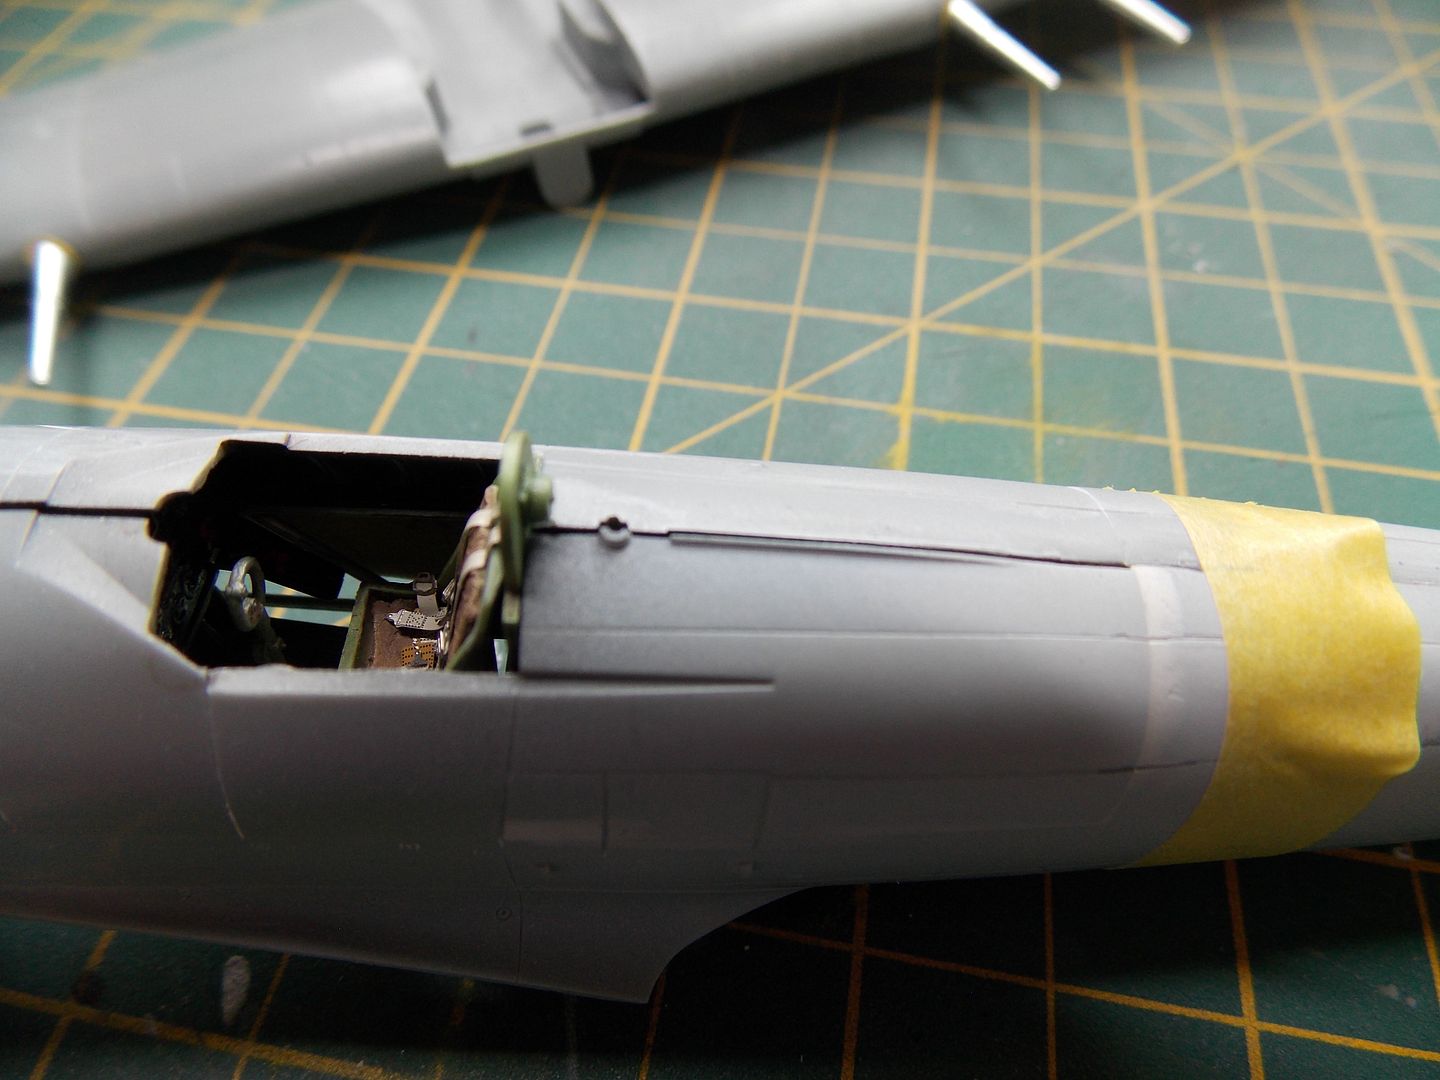
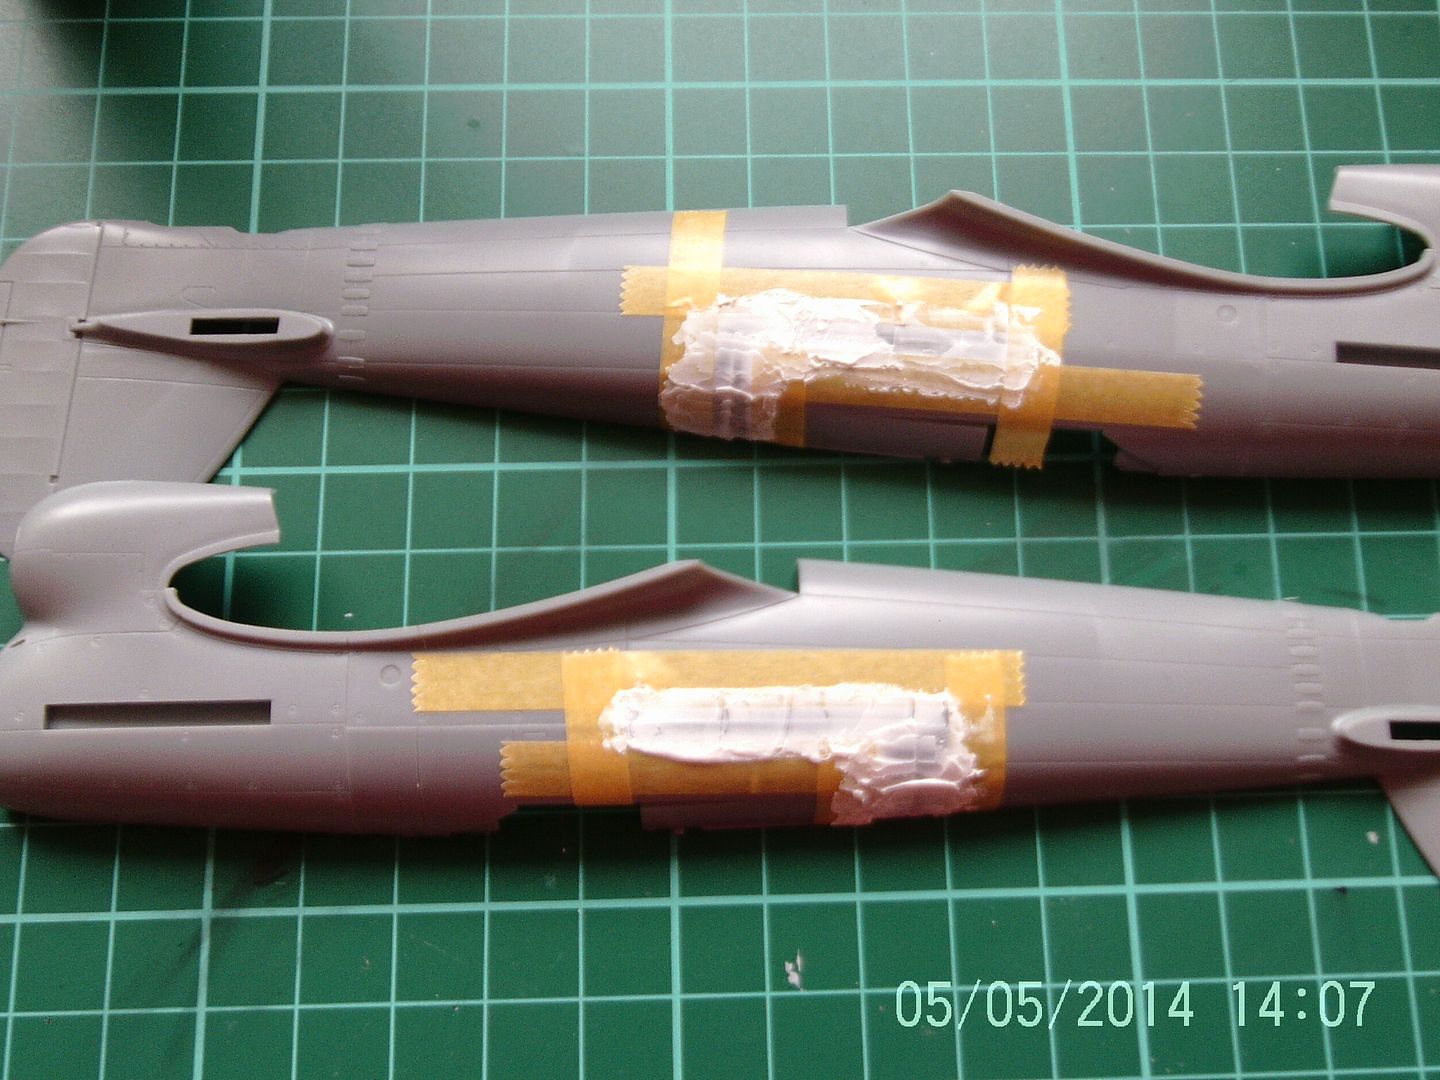
The inserts have left a gap along the aircraft spine which is preferable to not fitting on the flanks. The gaps now filled with strips of evergreen plastic card and ready for sanding.
That's all for now. I can feel the enthusiasm flooding back. The intended markings may change as I have a PE radiator dust filter that would only have been used post D-day as the Typhoon wings operated from very dusty makeshift Normandy airstrips. Luckily I have found a set of decals for an aircraft used in the operations around the Falaise pocket around mid August 1944. On the subject of which, I also found a lovely set of decals for a car door variant in my stash so this may turn into a dual build but we'll see.
Thanks for looking.
Hasegawa 1/48 Hawker Typhoon Mk Ib Bubbletop. A resurrection.
Posted: Thu Jul 28, 2016 10:07 pm
by Willem
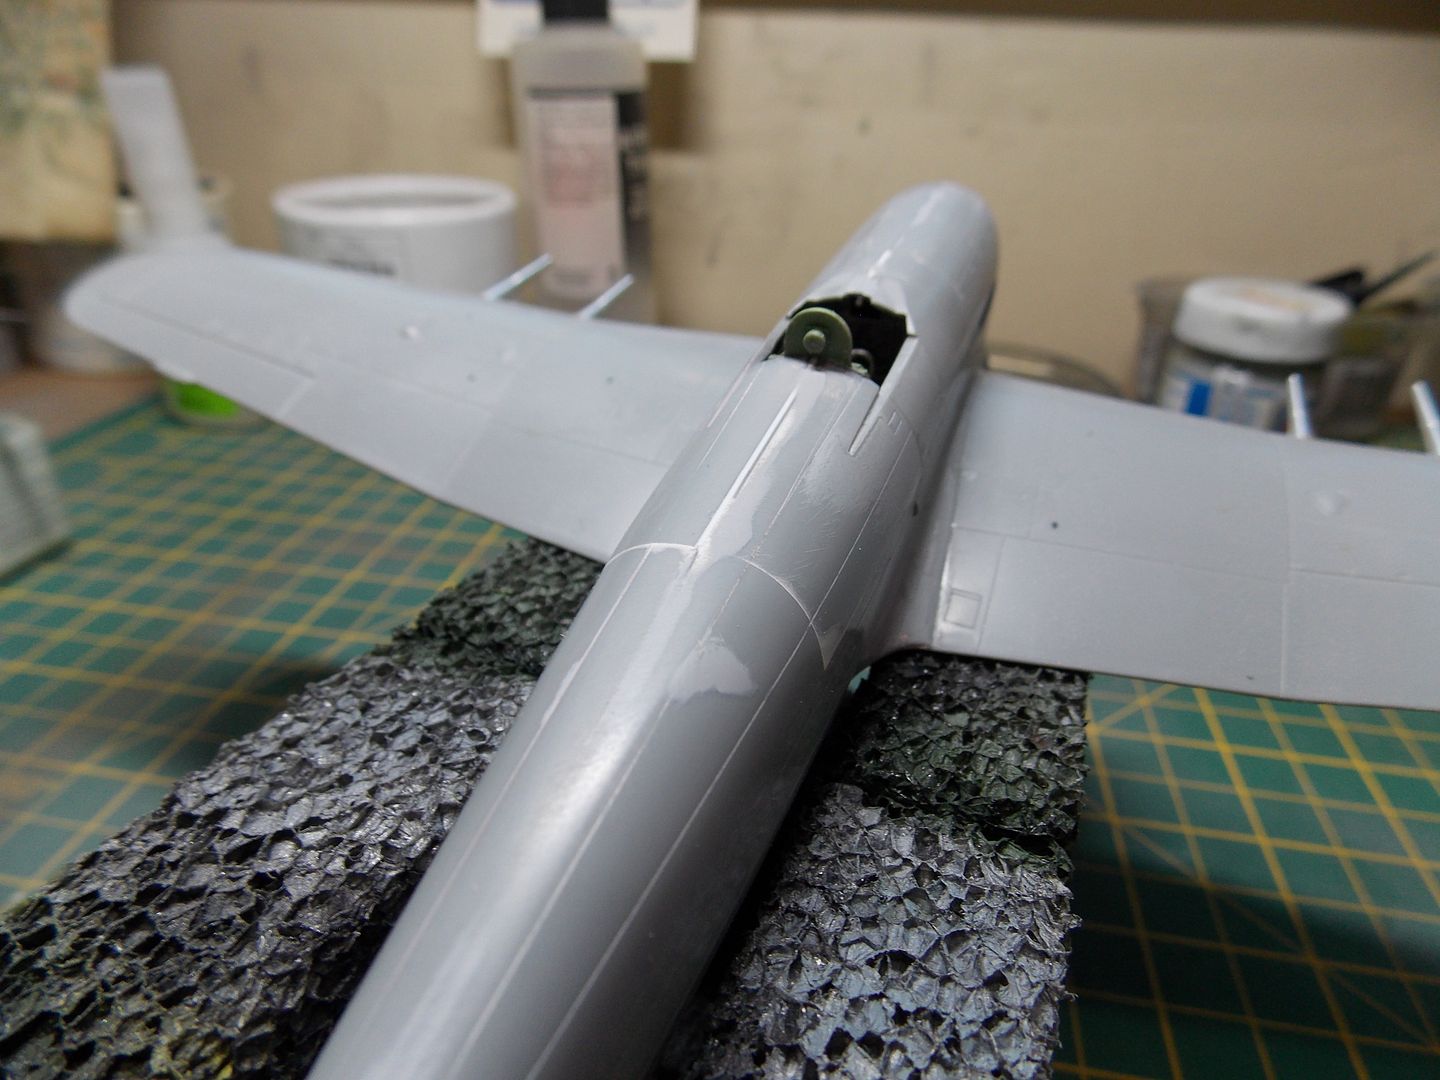
Excuse the unconventional tail arrangement. The tail planes lock together which is a great idea as long as they are square. The tape is just holding the port one at the correct angle while the glue sets.

Wings were fitted last thing yesterday and tape used to hold the correct dihedral and to keep everything square. There was a bit of blending in to do at the wing to rear fuselage join but this is traditional.
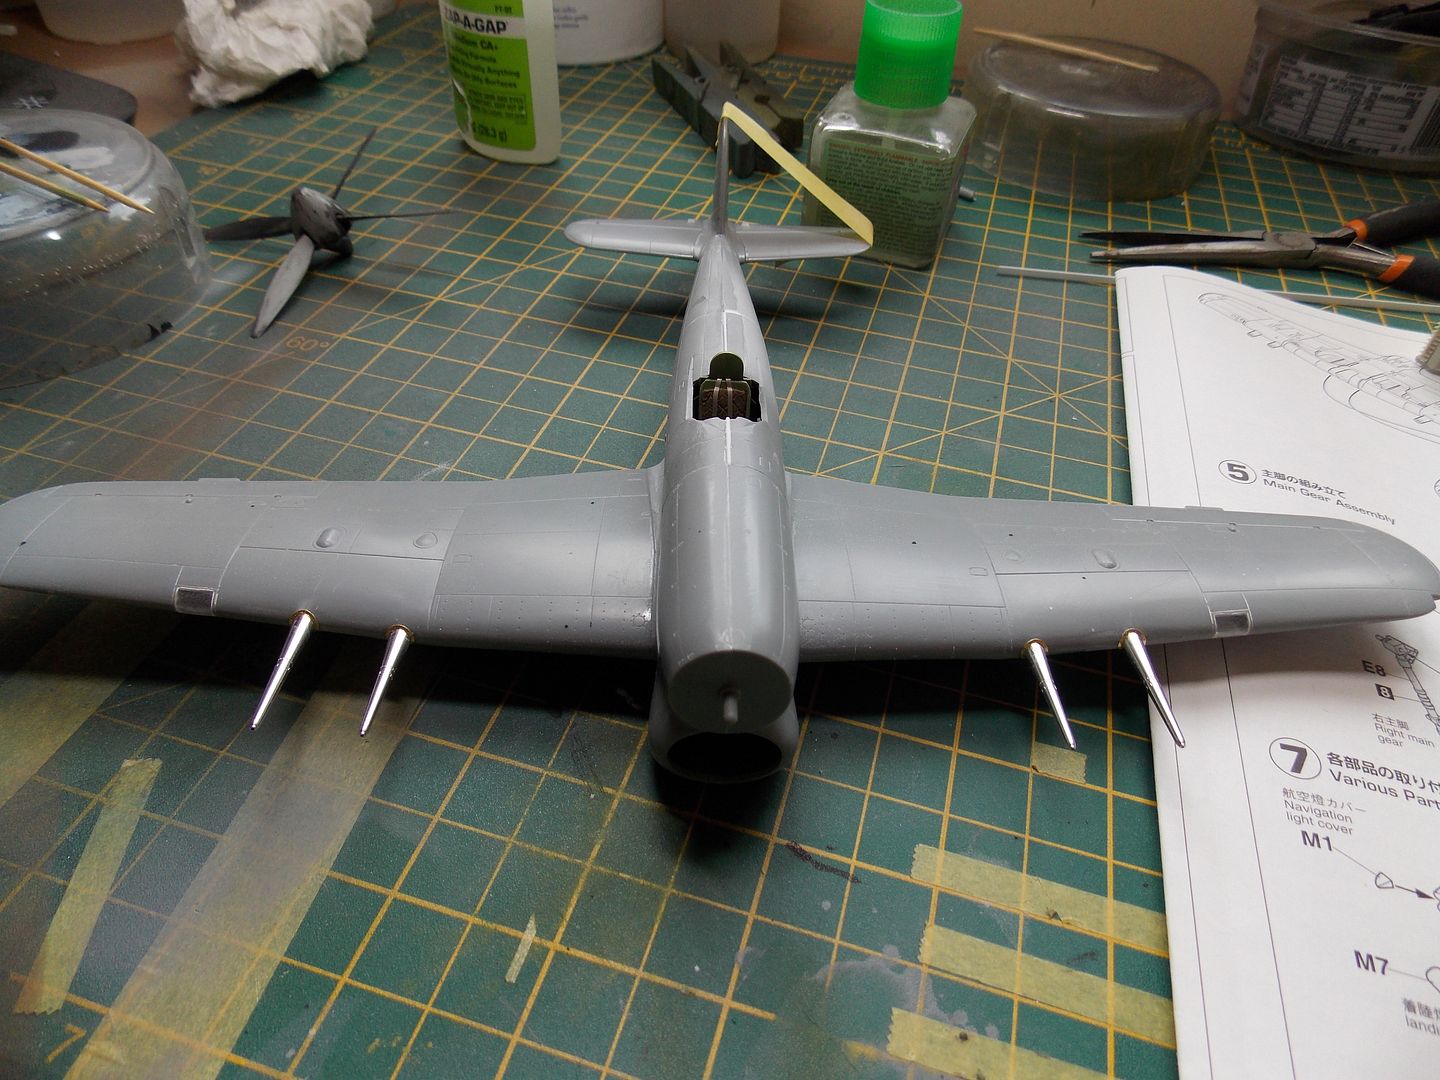
Ready for seam filling and sanding.
Never my favourite part of a build. Whilst the filler was curing I decided to do a bit more research rather than trust to an aftermarket set of decals and it seems that the markings I'd found were the object of several discussions in various corners of the interwebs most of them contradictory. They did consist of red codes and some interesting personal markings so probably too good to be true. I switched the laptop off and hit my books. My absolute priorities are:
1. Rocket armed as I have a beautiful set of aftermarket rockets.
2. In service in Normandy so I can use an aftermarket dust filter.
3. Typhoon not Tempest tail planes as the Typhoon tail planes are all that I have. I did wonder about a four-bladed prop but most of these had the Tempest tail planes fitted. So, the four-blader that I rescued from the spares box will have to return.
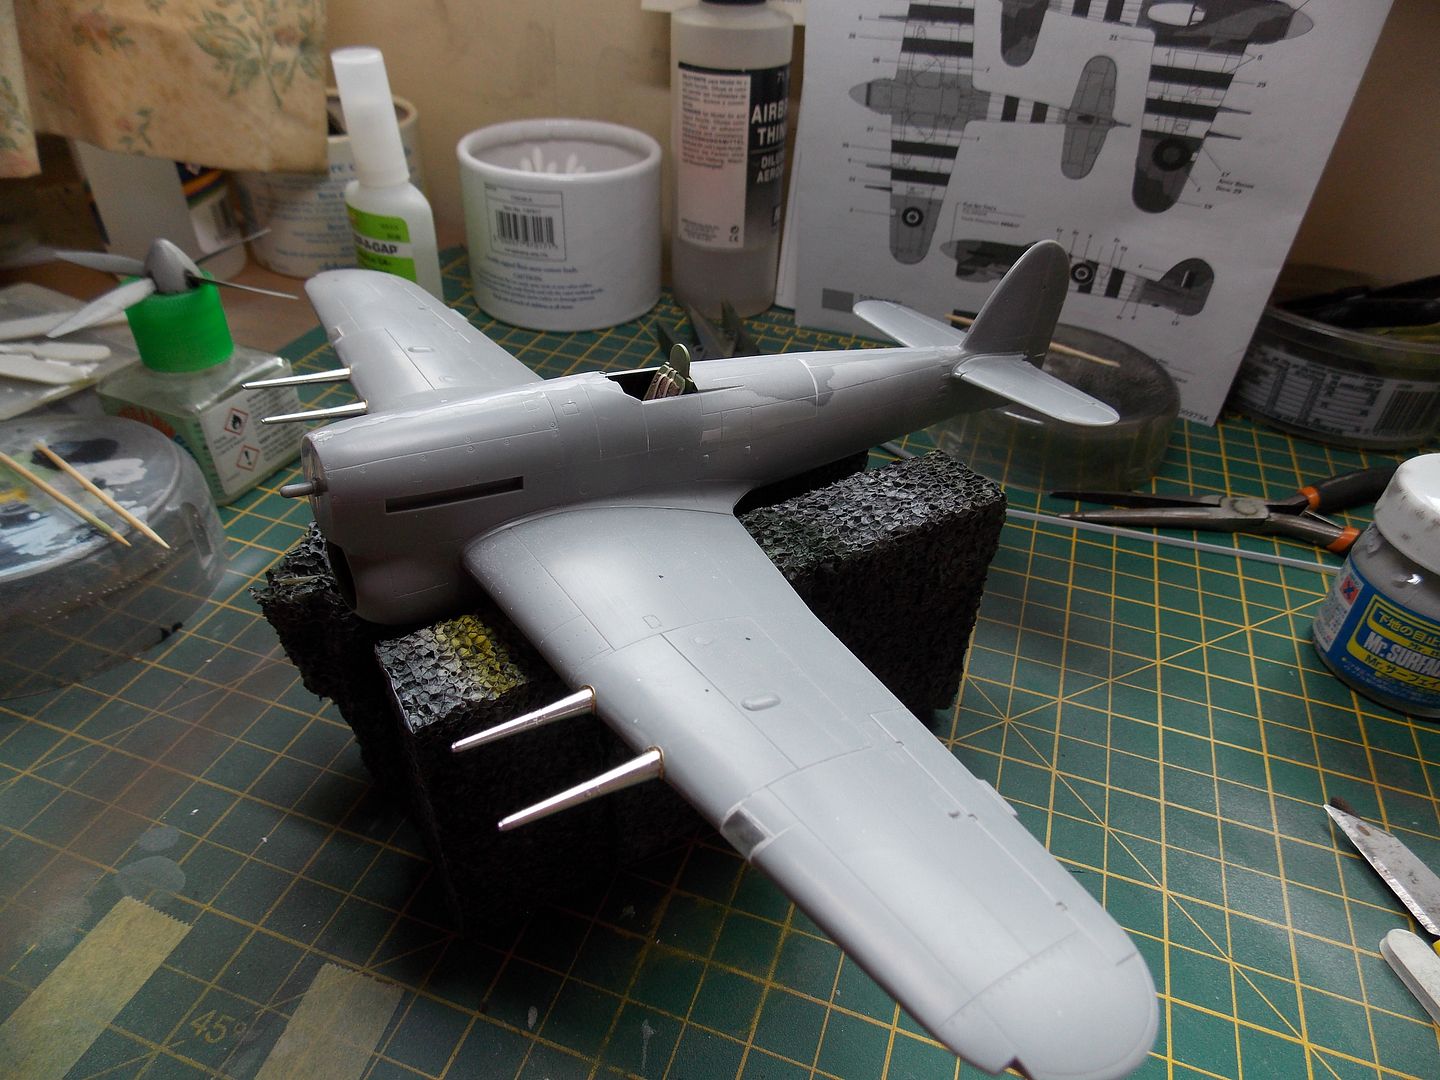
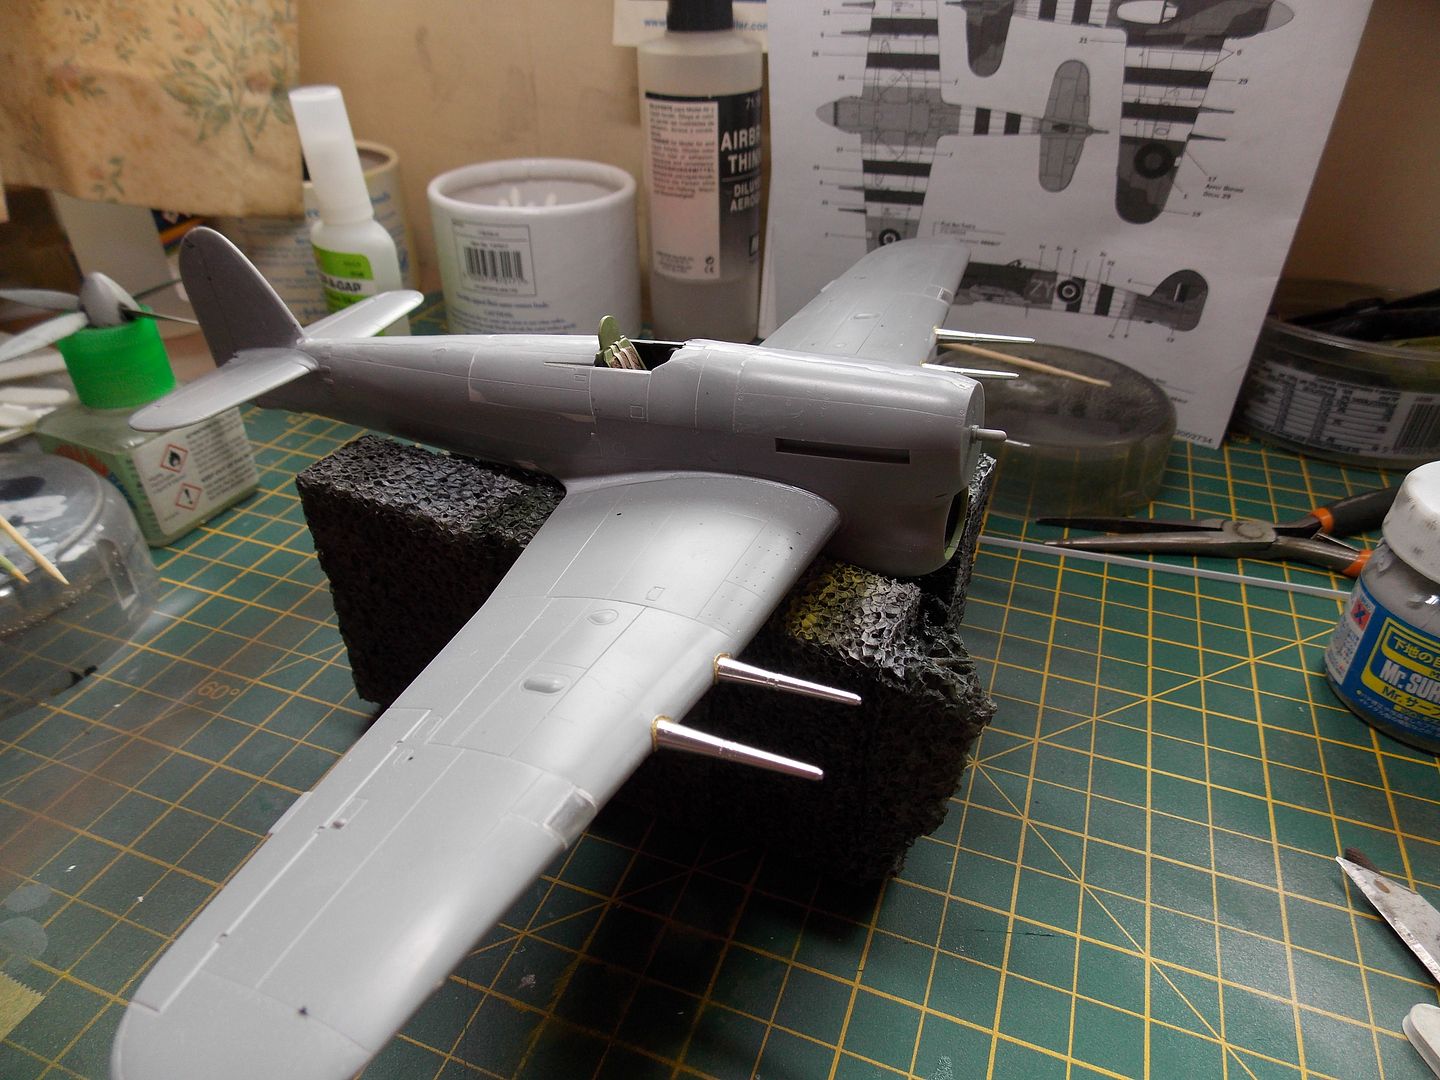
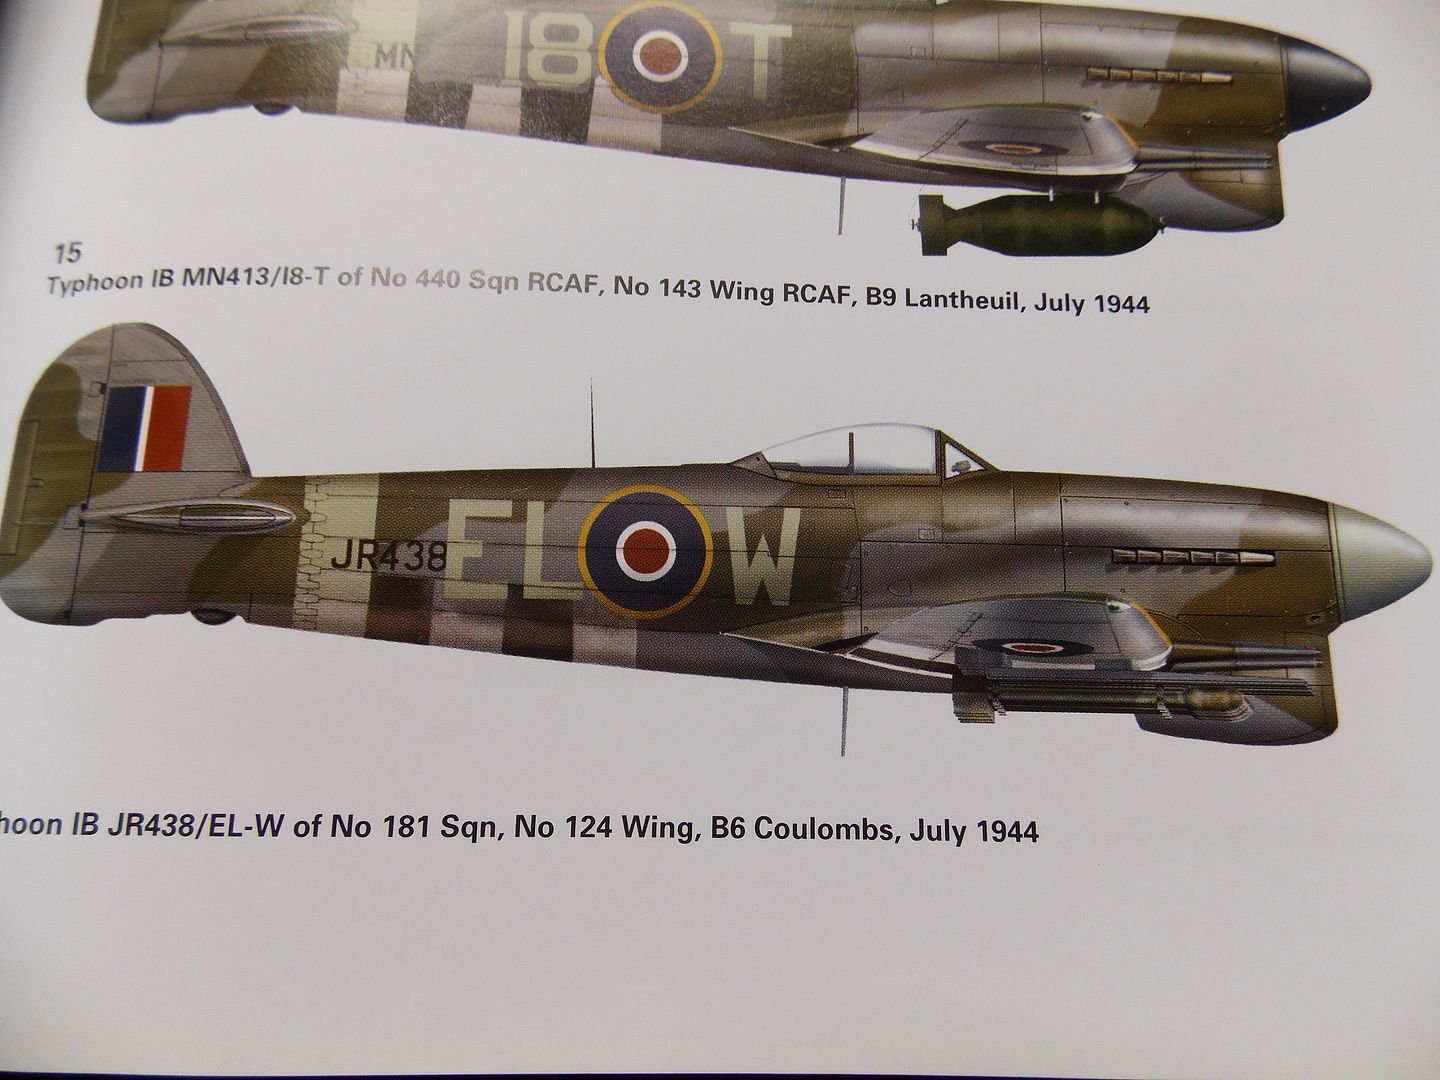
I found this profile and this photo of a 181 sqn. machine which meets my needs. I have a set of sky codes and serials so should be ok. I should be safe with this scheme as it was one of the first Typhoons to be fitted with the bubble hood which makes it positively ancient in Typhoon terms.

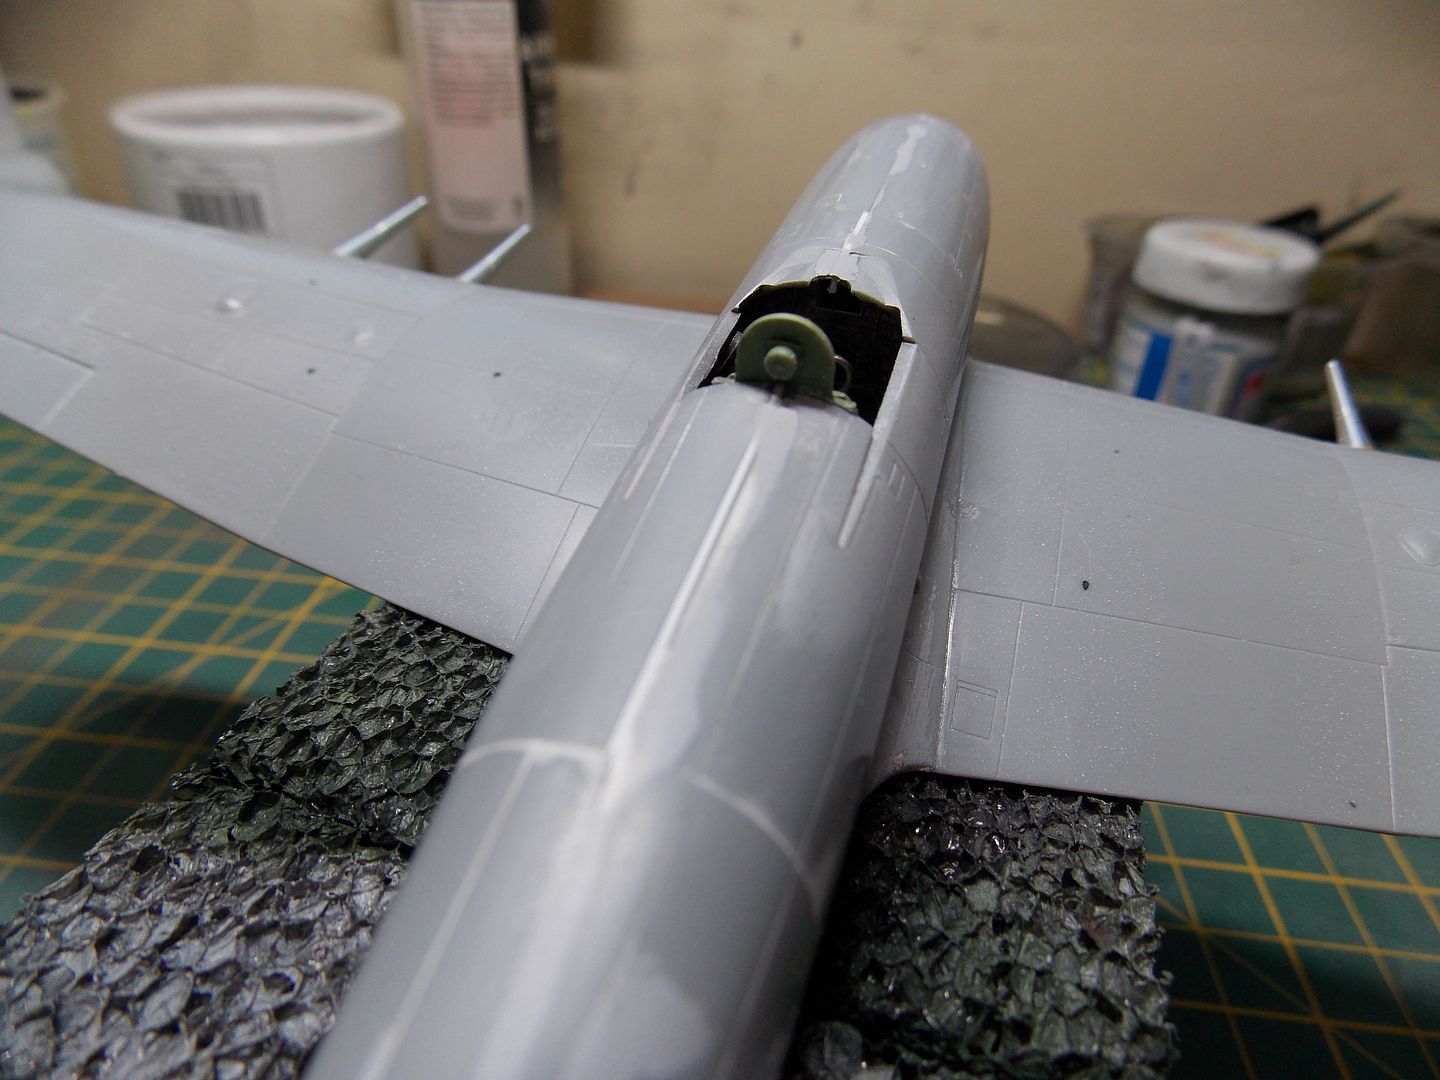
So I have the right scheme and the seams have been sanded and polished. There is some detail that needs to be scratch built for the rear deck as the gap had to be filled and the molded detail sacrificed but that won't be a problem.
Tomorrow will be re scribing and re riveting ready for primer. I hope to get the primer on as I'm working at the weekend and away for a couple of days straight after. I will take some books with me as I have an idea to build a car door Typhoon alongside (kind of) this one.
Hasegawa 1/48 Hawker Typhoon Mk Ib Bubbletop. A resurrection.
Posted: Fri Jul 29, 2016 2:26 pm
by Willem
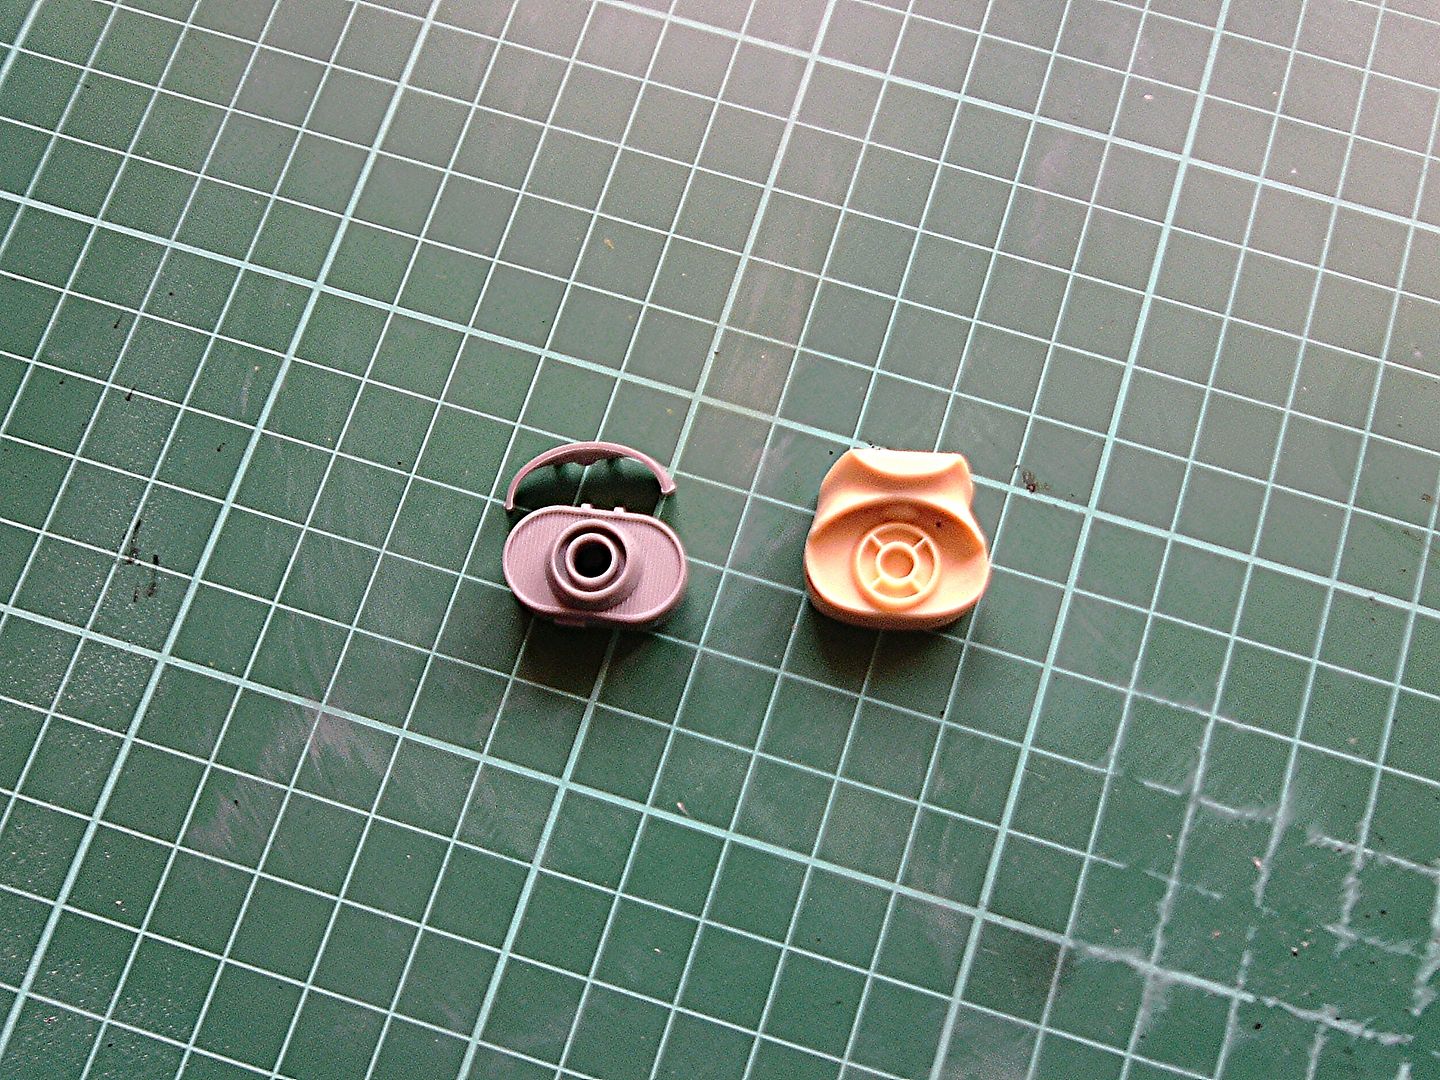
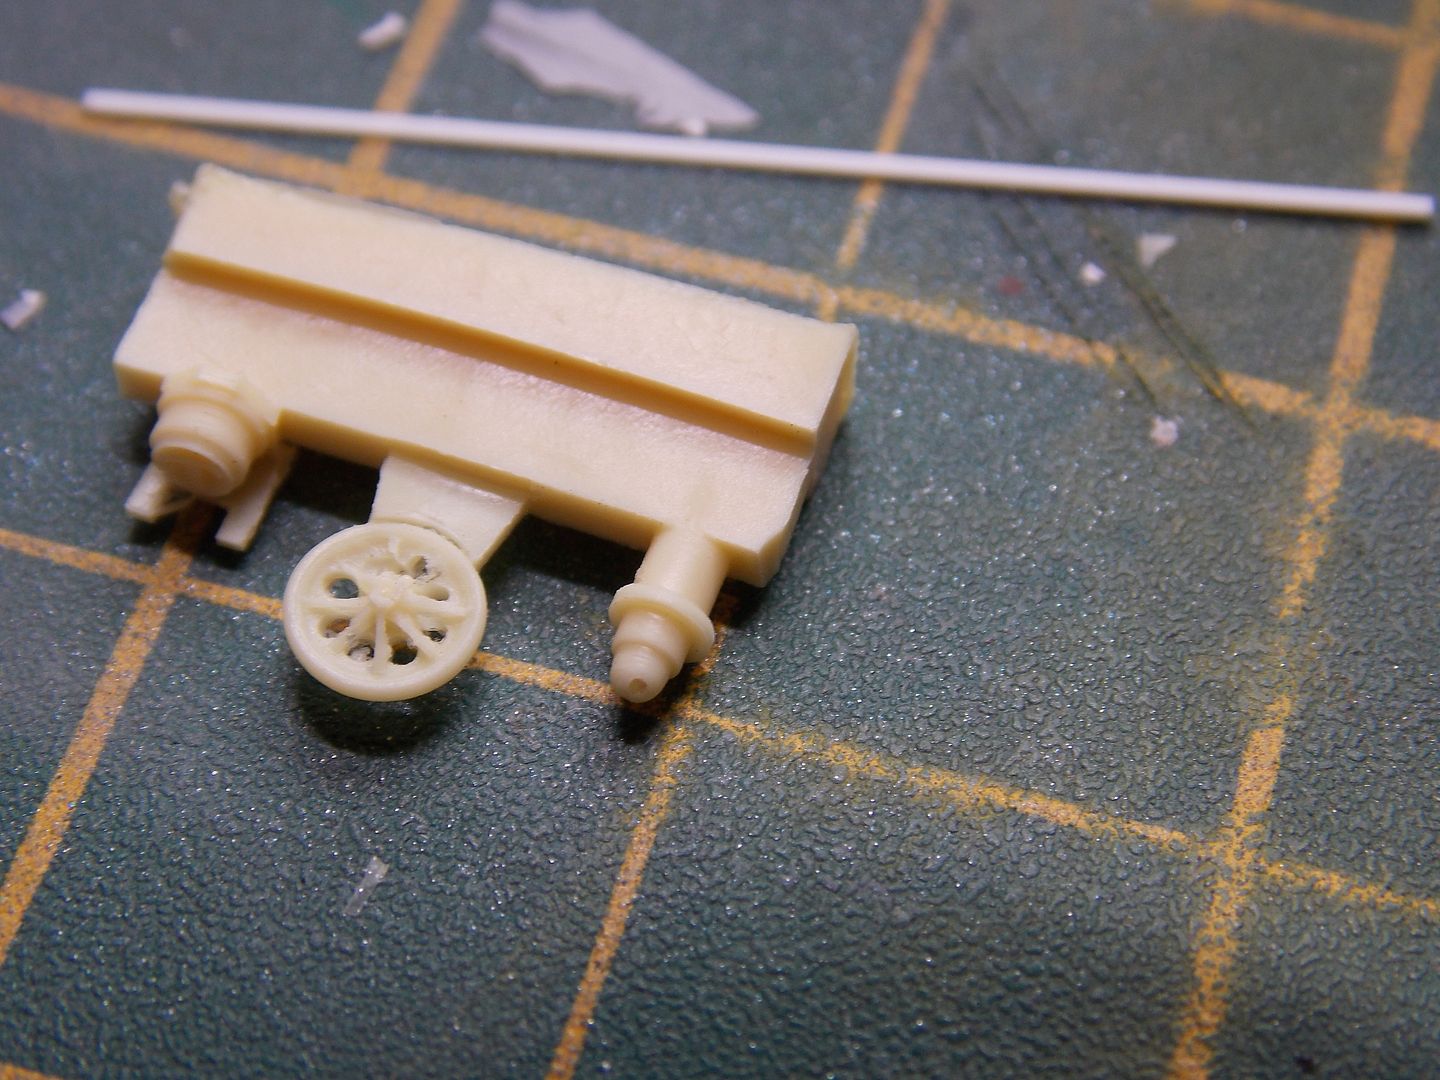
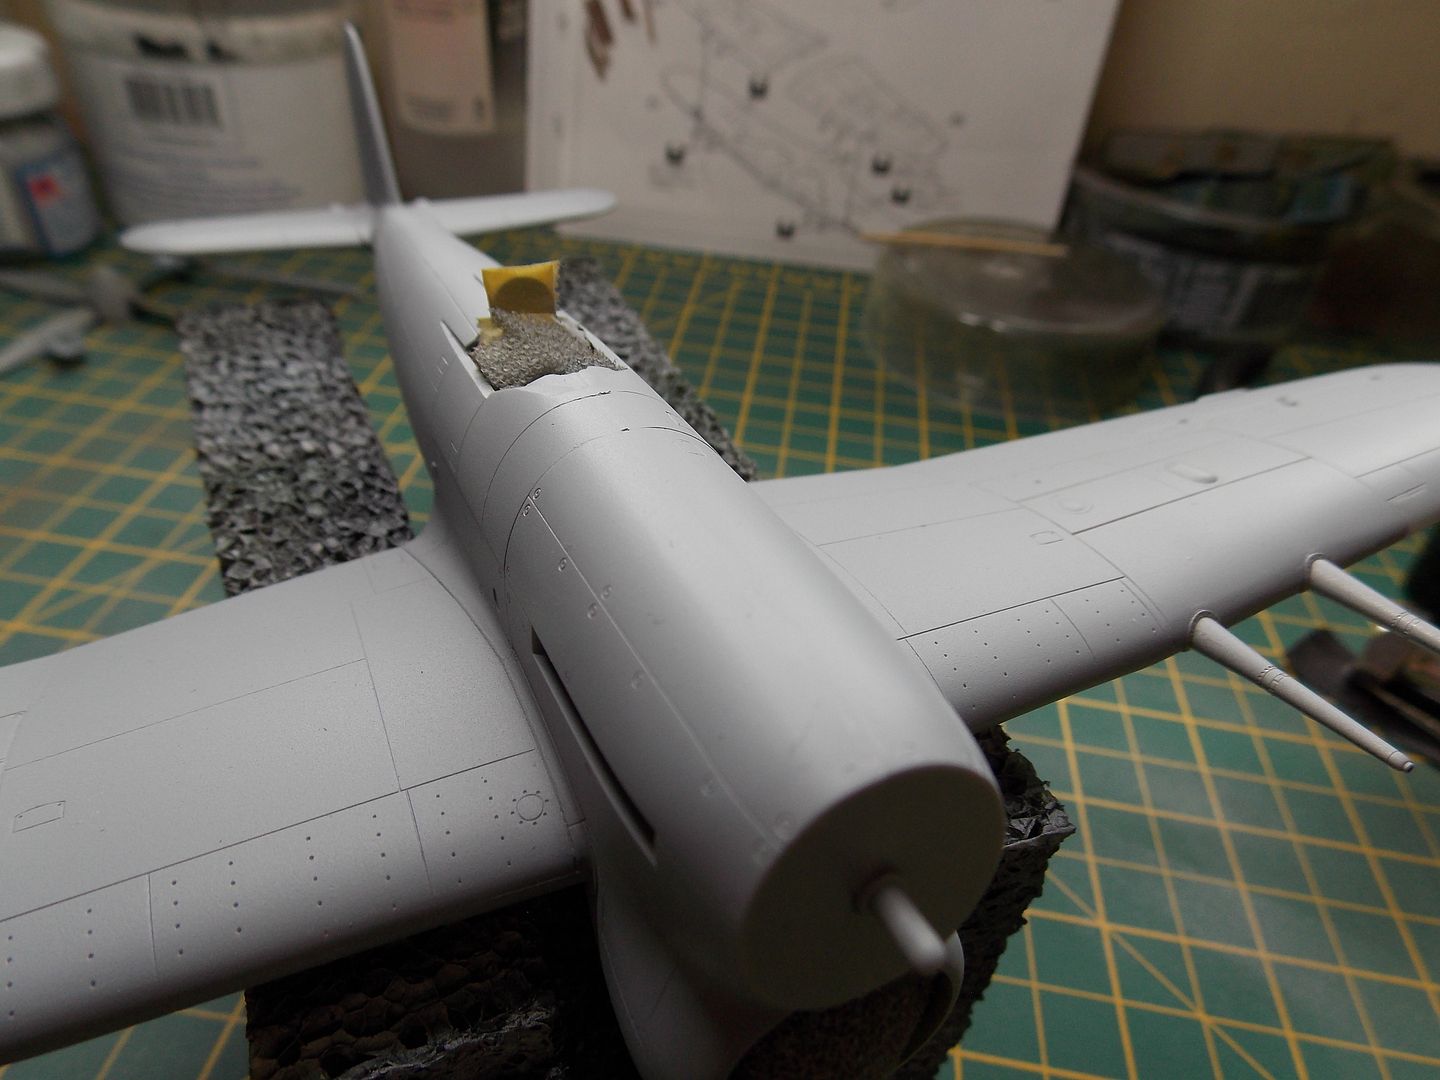
Time to address the sacrificed details behind the pilot seat. I have some old resin Typhoon bits in my spares so time to have a root around.

I need a light and the canopy runner. This should do for the light and a strip of plastic will do for the runner.
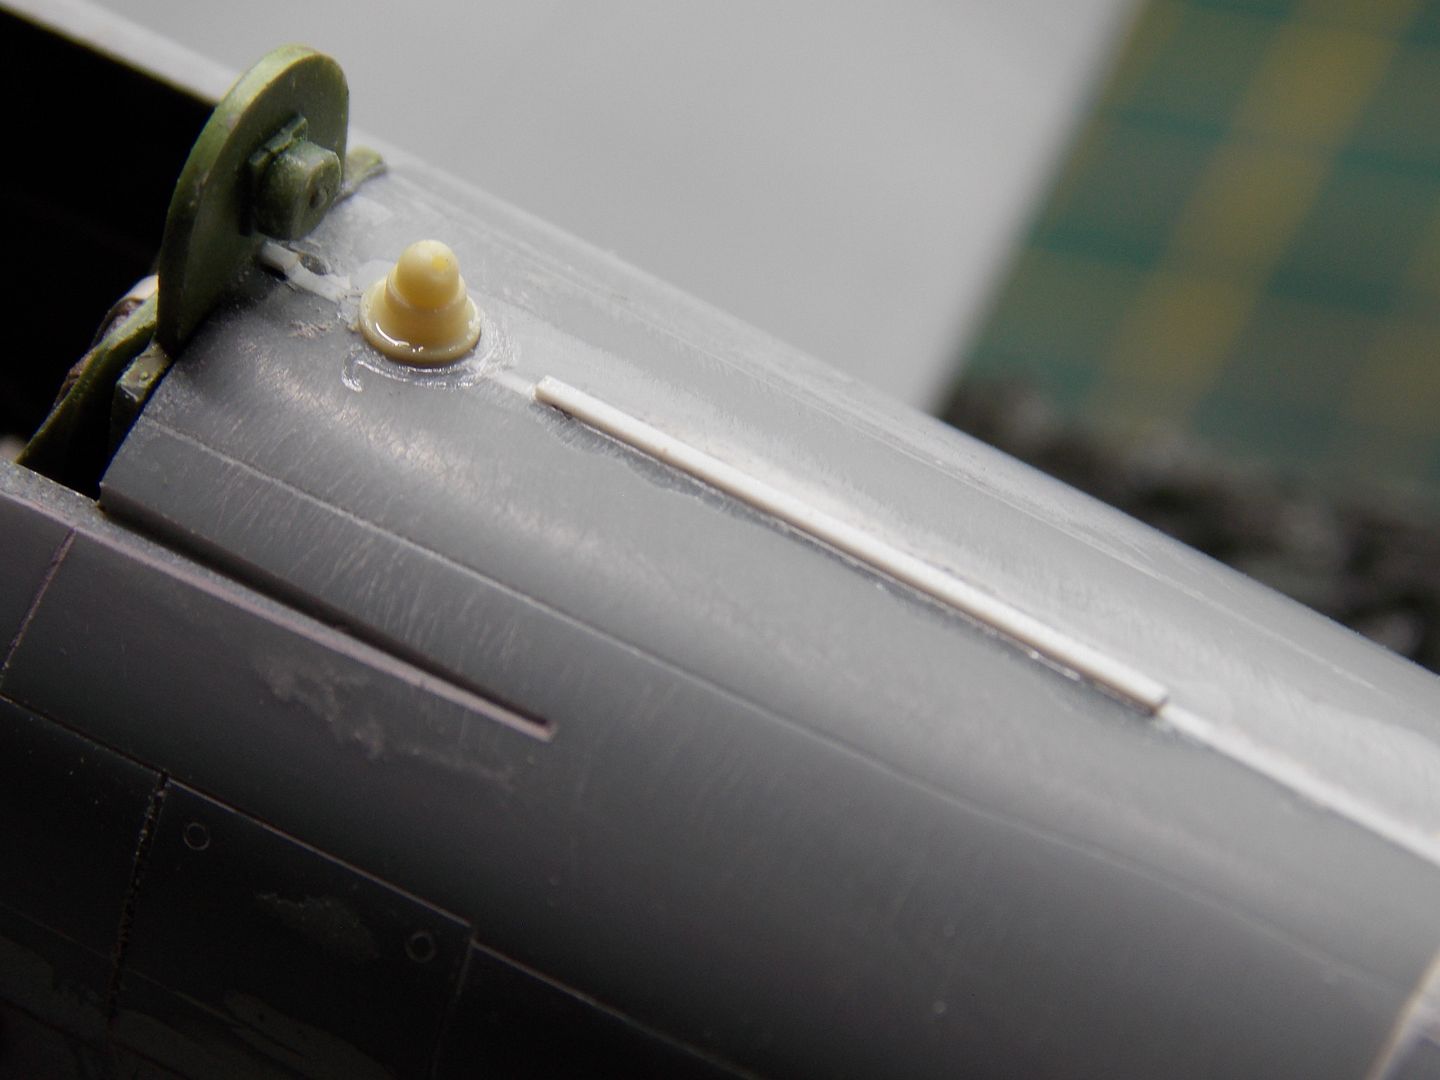
Time to crack on with some re-scribing.

And some masking up ready for an initial coat of primer.
An initial coat is to give me a better idea of seams and scratches that need more work.
Two things are apparent:-
I suck at re-scribing
There is still some work needed around the cockpit insert.

I might get away with the nose.
Just need to prime the underside and then I'm away for four days.
Re: Re: Hasegawa 1/48 Hawker Typhoon Mk Ib Bubbletop. A resurrection.
Posted: Fri Jul 29, 2016 3:52 pm
by Twokidsnosleep
Good to see you pull one off the shelf to finish off
It is a lovely build so far and you are tackling th hurdles well
I will follow along

Re: Re: Hasegawa 1/48 Hawker Typhoon Mk Ib Bubbletop. A resurrection.
Posted: Sat Jul 30, 2016 4:34 pm
by Avgas
I have the Italeri boxing of this kit.
Re: Re: Hasegawa 1/48 Hawker Typhoon Mk Ib Bubbletop. A resurrection.
Posted: Sun Jul 31, 2016 12:32 am
by Willem
Twokidsnosleep wrote:Good to see you pull one off the shelf to finish off
It is a lovely build so far and you are tackling th hurdles well
I will follow along
Avgas wrote: I have the Italeri boxing of this kit.
Cheers lads.
I'm only putting it on here because I seem to have become inordinately enthusiastic about this build (and indeed am planning a series of big Hawkers as I have a car-door Typhoon, Tempest and Sea Fury in the stash and want to build them all to stand alongside each other).
I can bore you lot with it rather than my girlfriend, who listens politely for a few minutes before her eyes glaze over and she shouts 'aubergine' which is this month's safe word.
Re: Two Hawker Typhoons in 1/48 Hasegawa.
Posted: Mon Aug 08, 2016 10:26 pm
by Willem
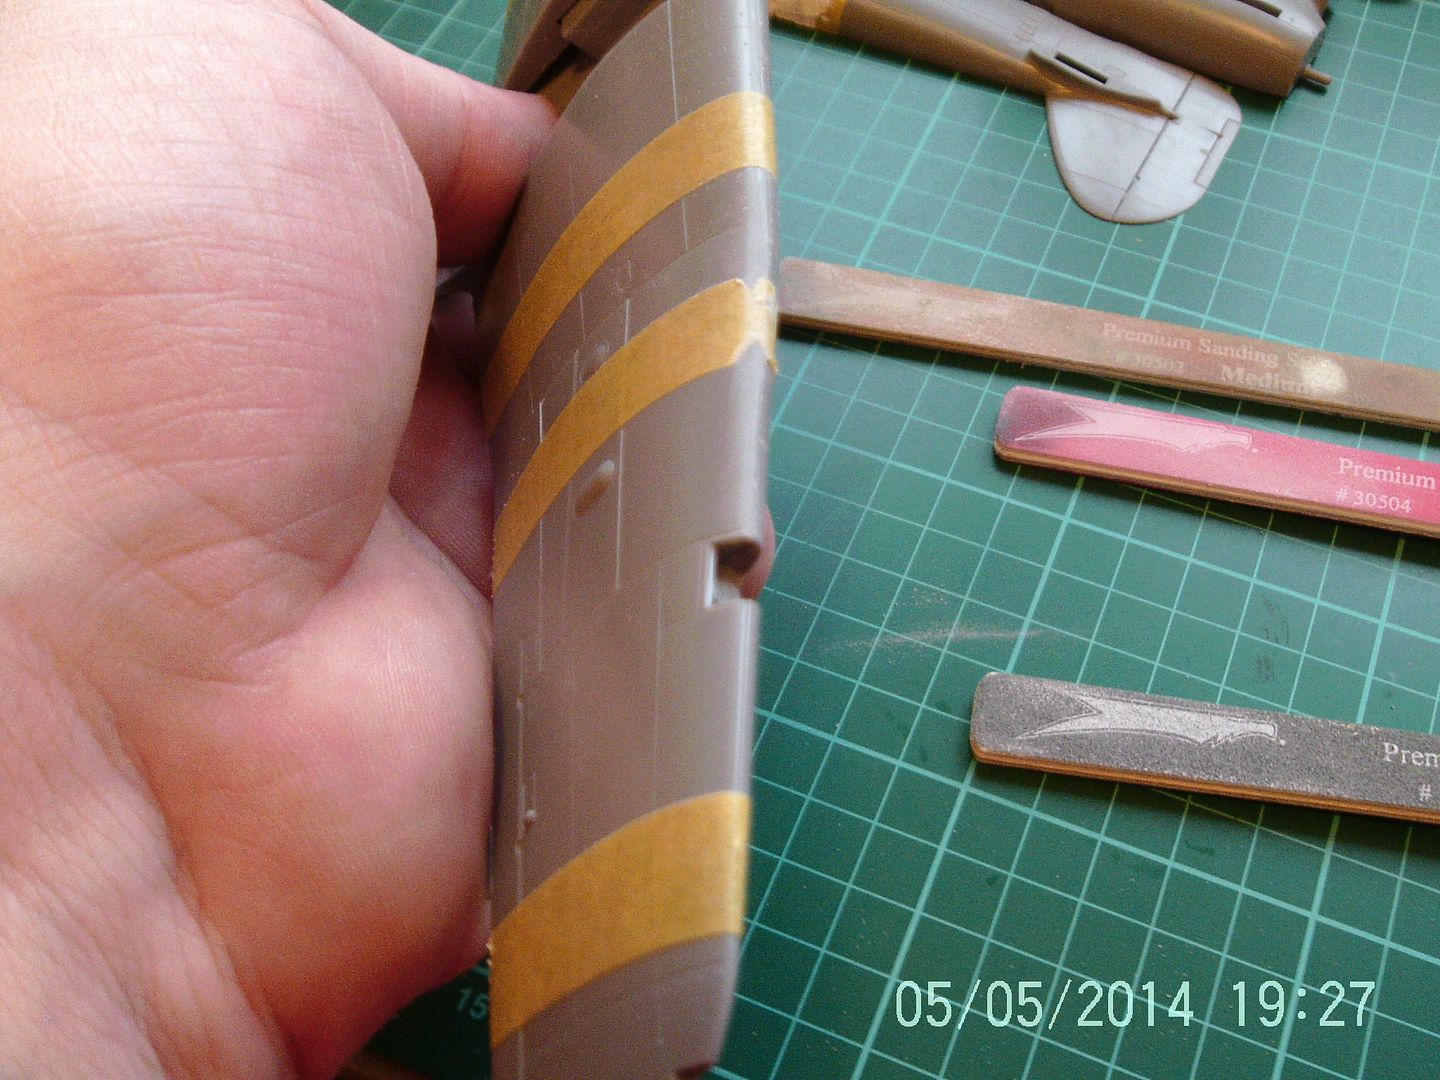
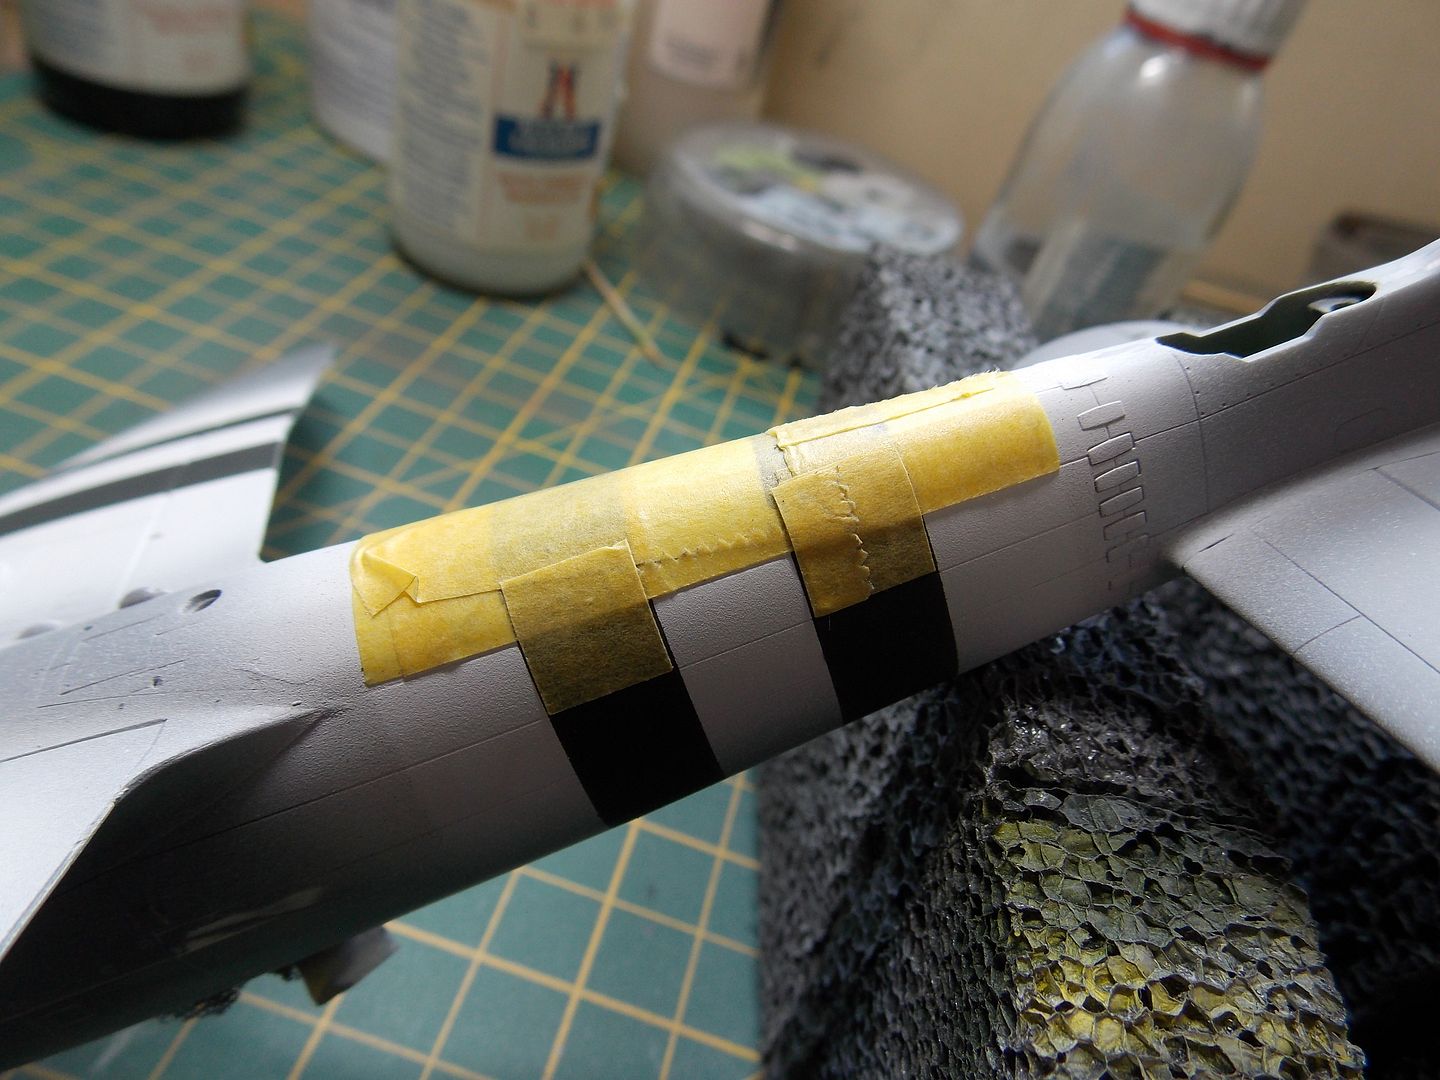
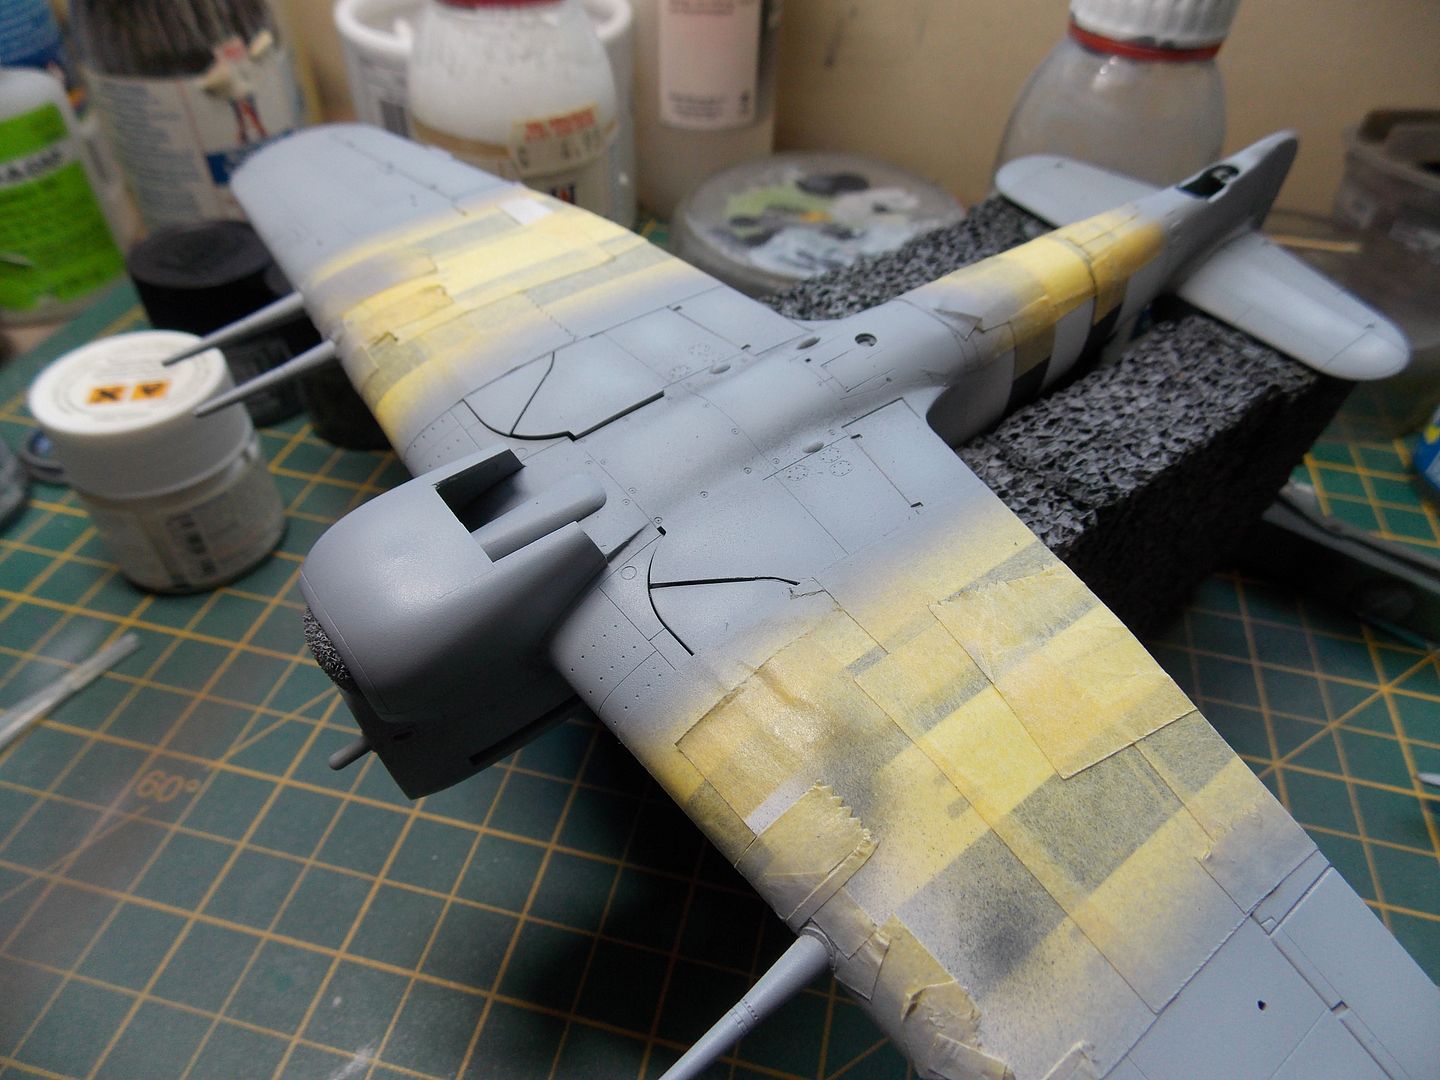
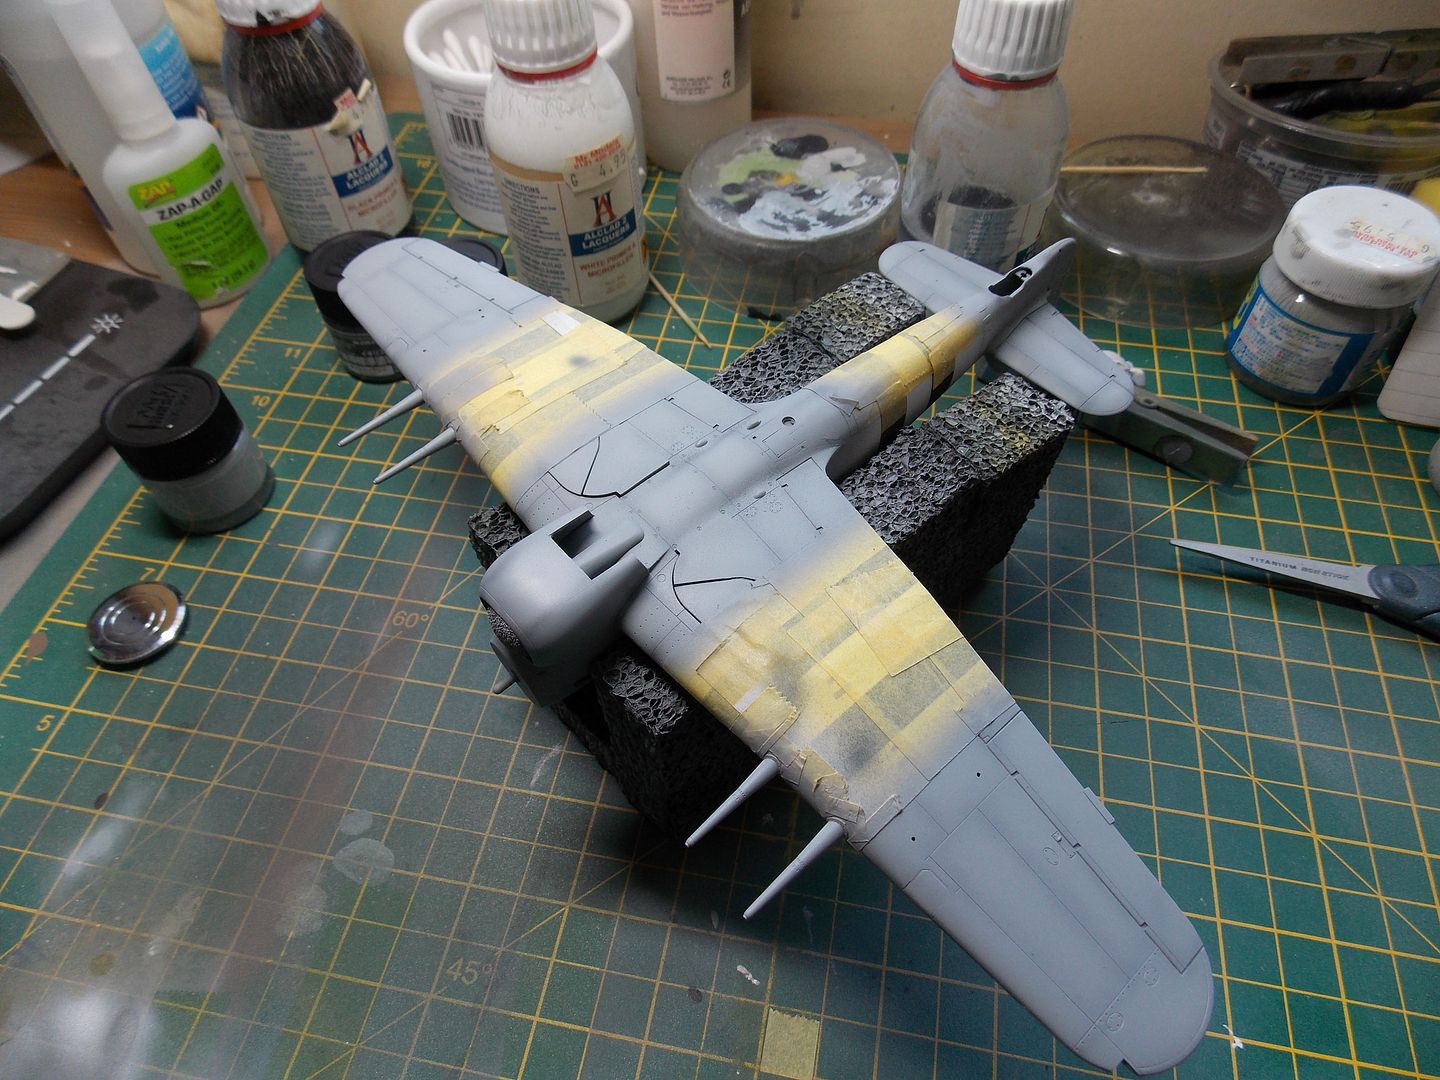
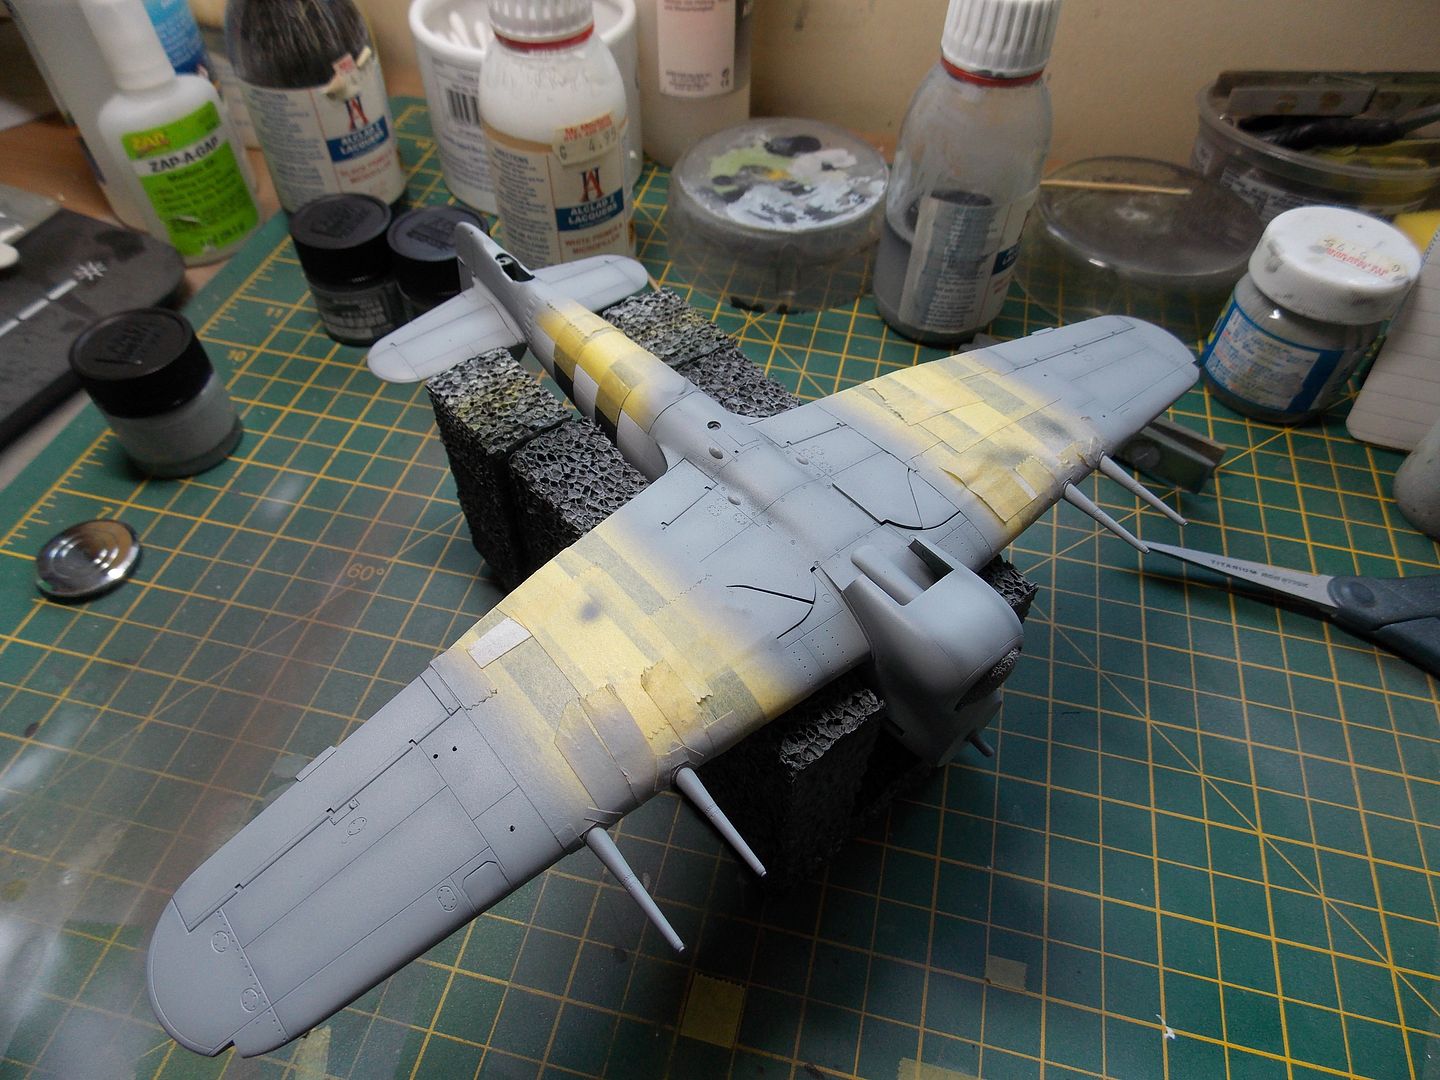
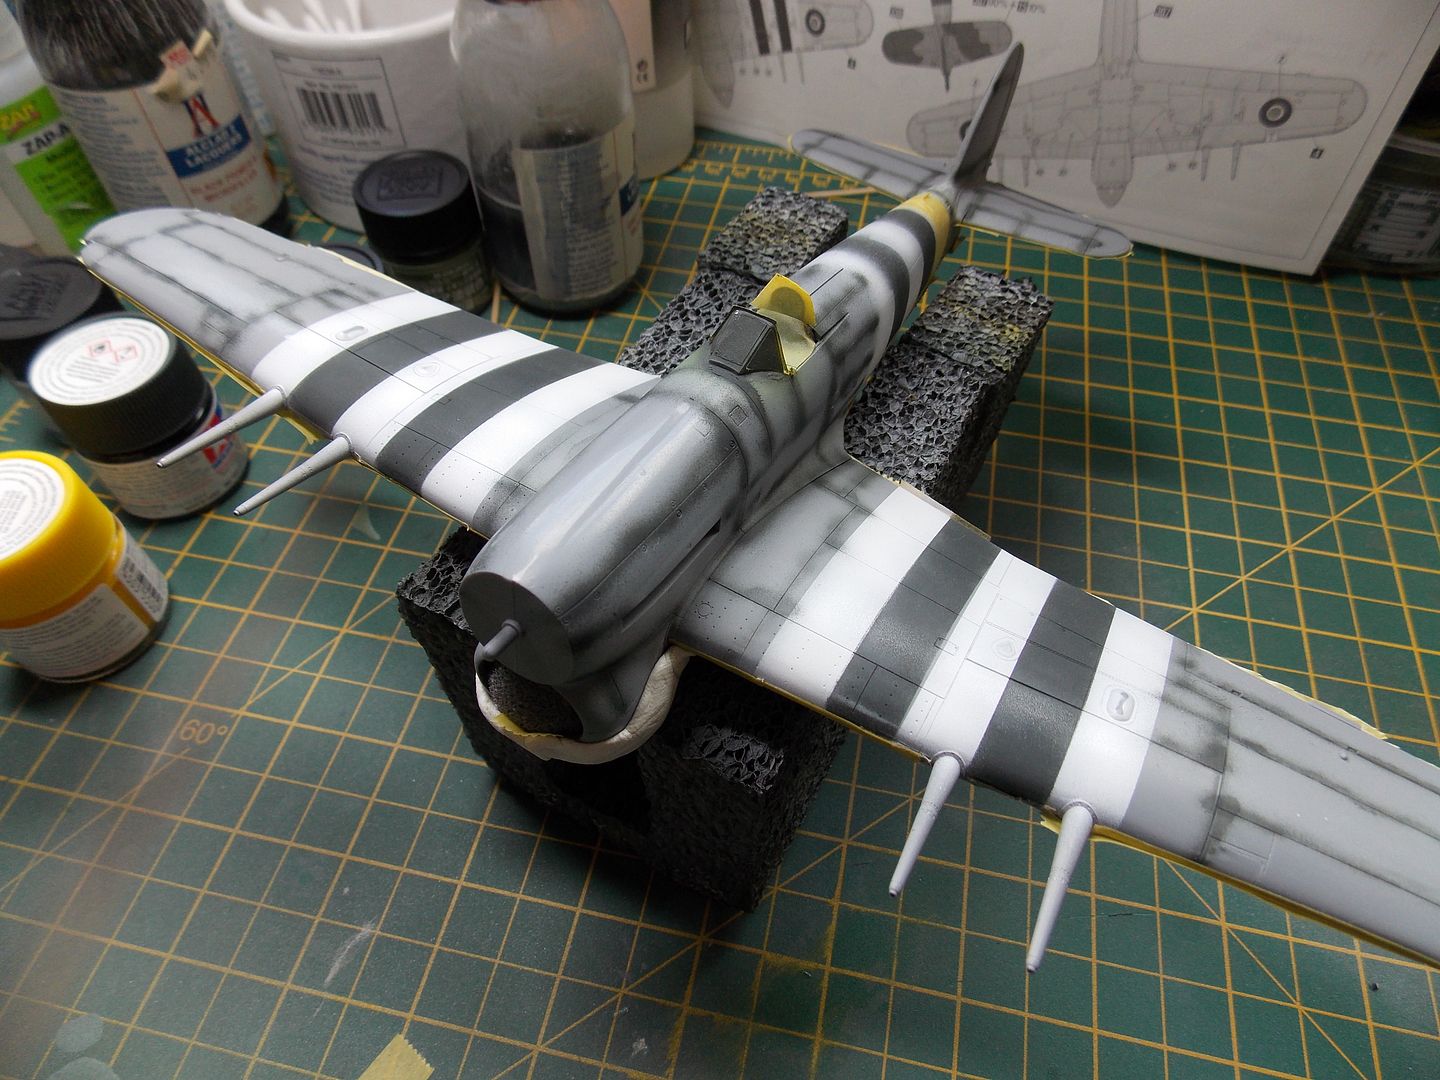
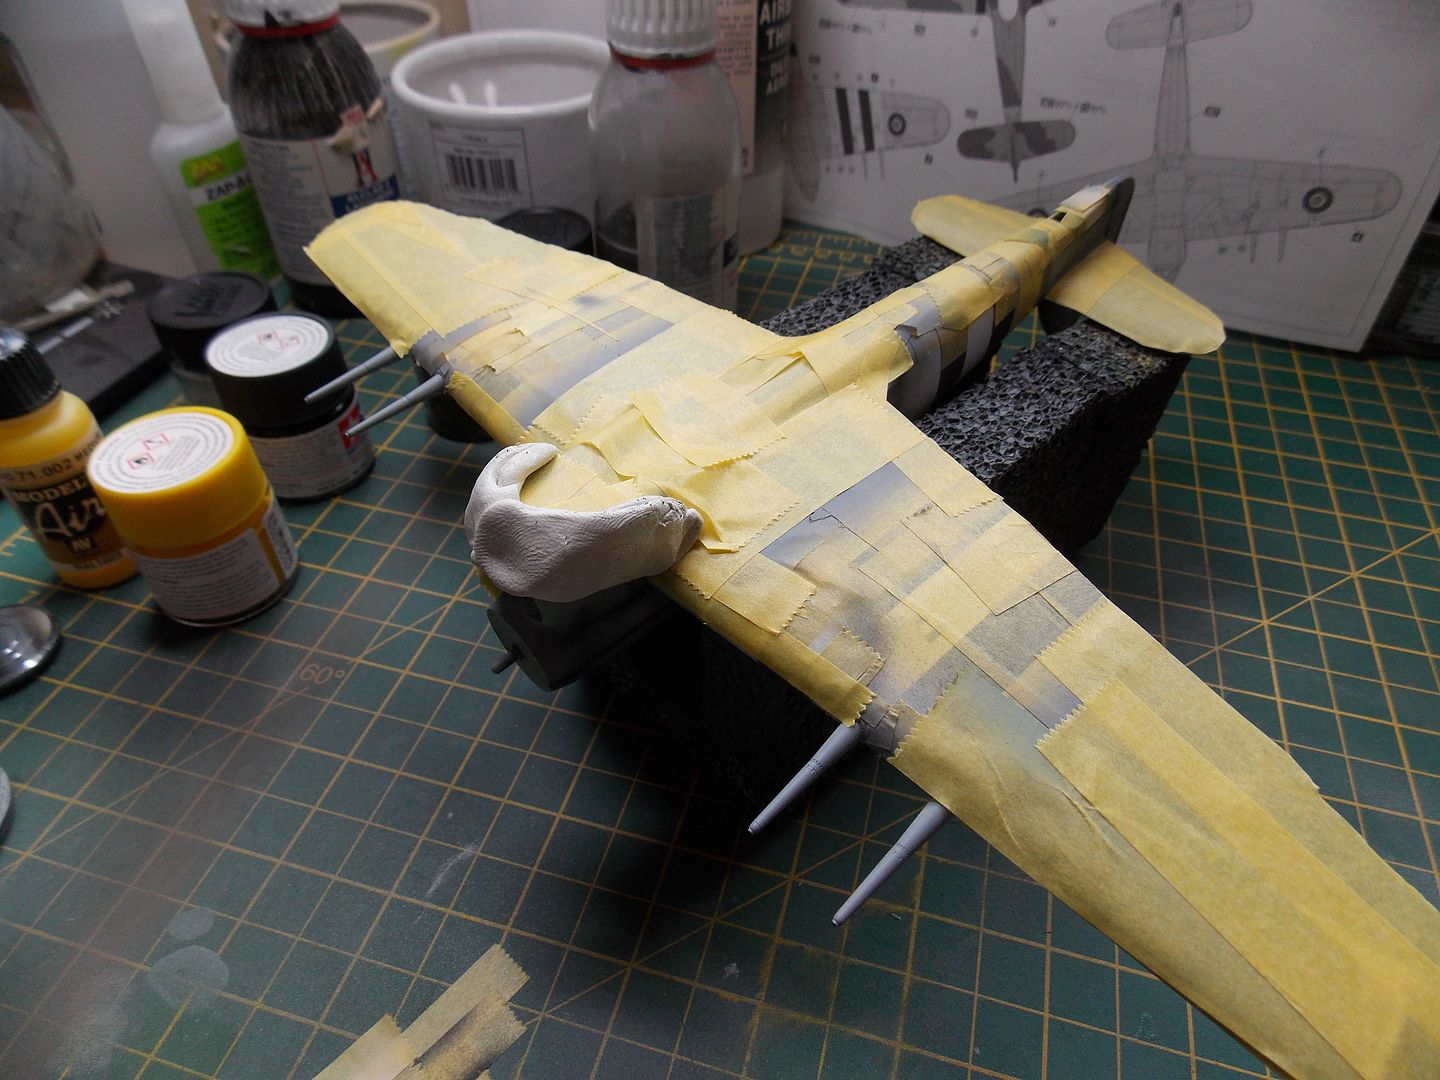
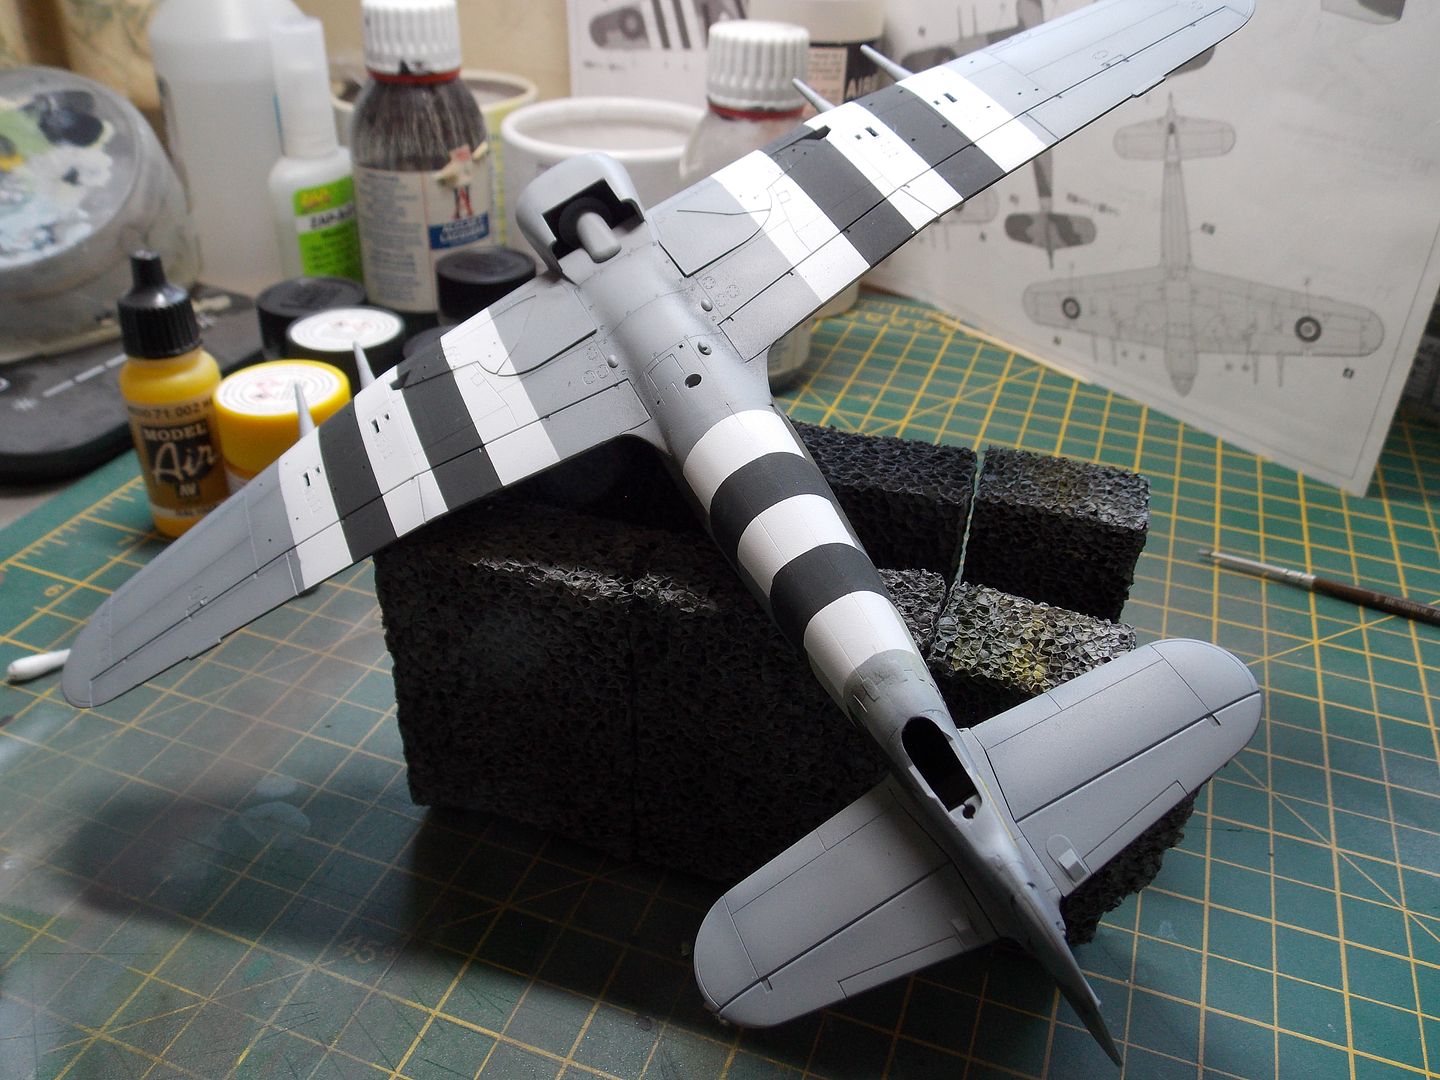
D-day stripes
Sorry it's been a while. As my chosen scheme only carried partial stripes on the fuselage I needed to make sure that the stripes on the upper wing surfaces would have been painted out. Happily I found a photograph taken on the same day as my main reference. Although the aircraft is from a different sqn, it stands to reason that the stripes would be similar.
I started by marking out and masking with Tamiya 10mm tape which I find just about ideal in this scale.
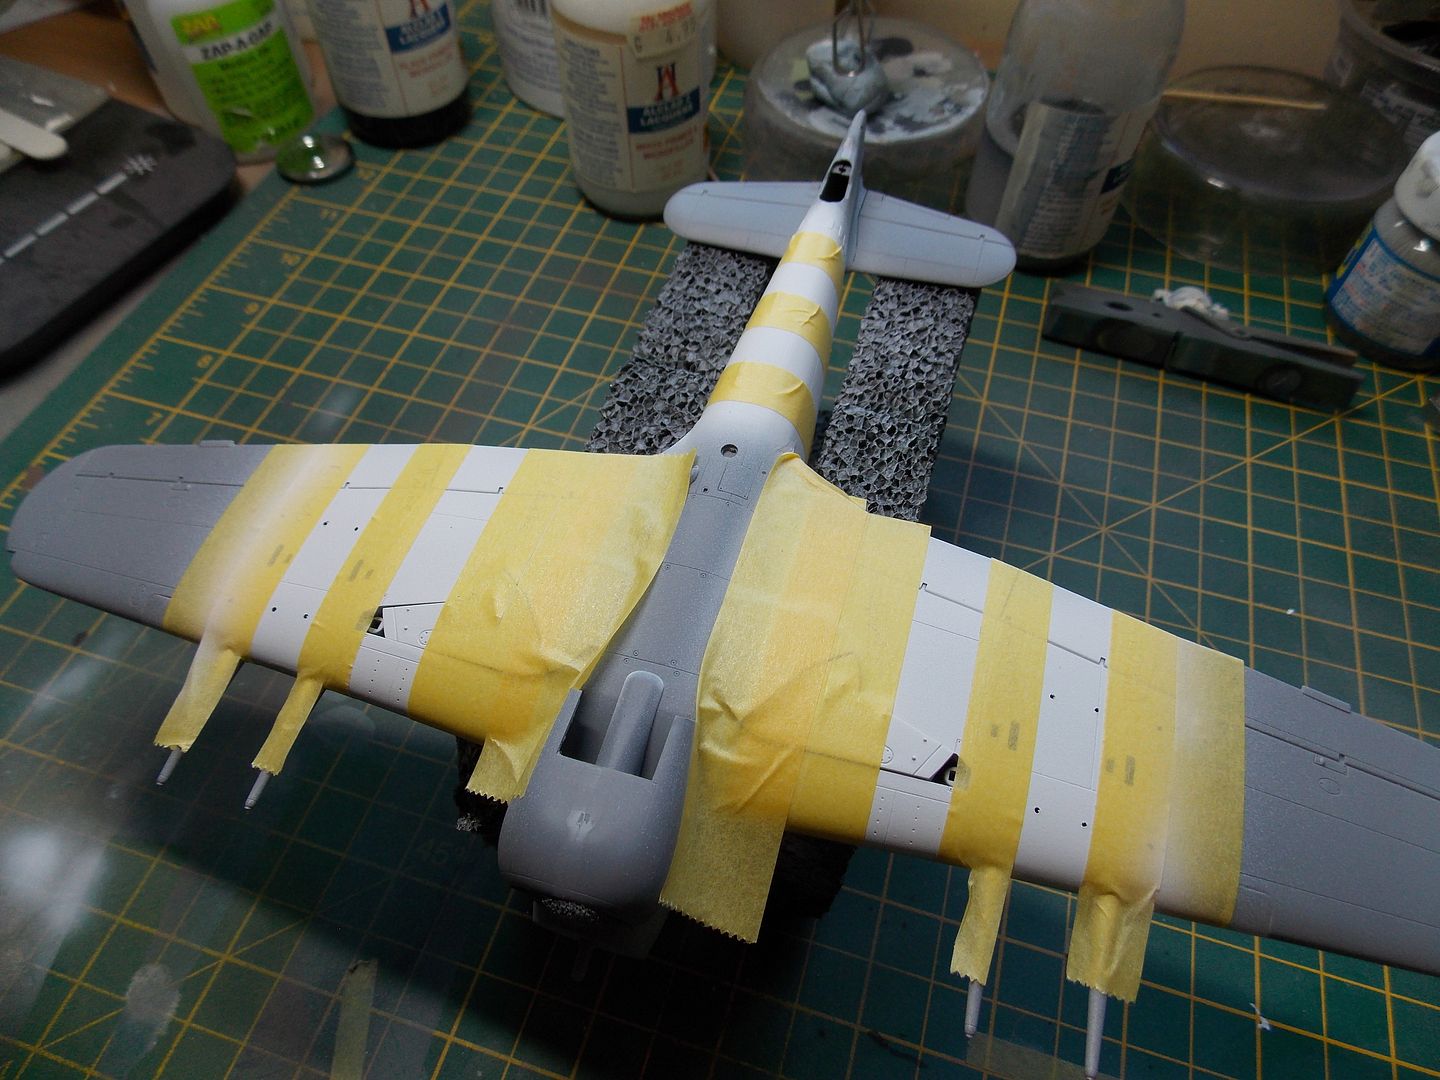
I used Alclad white primer as the base as it is slightly off-white to my eye and Tamiya nato black which has a slightly green tinge.
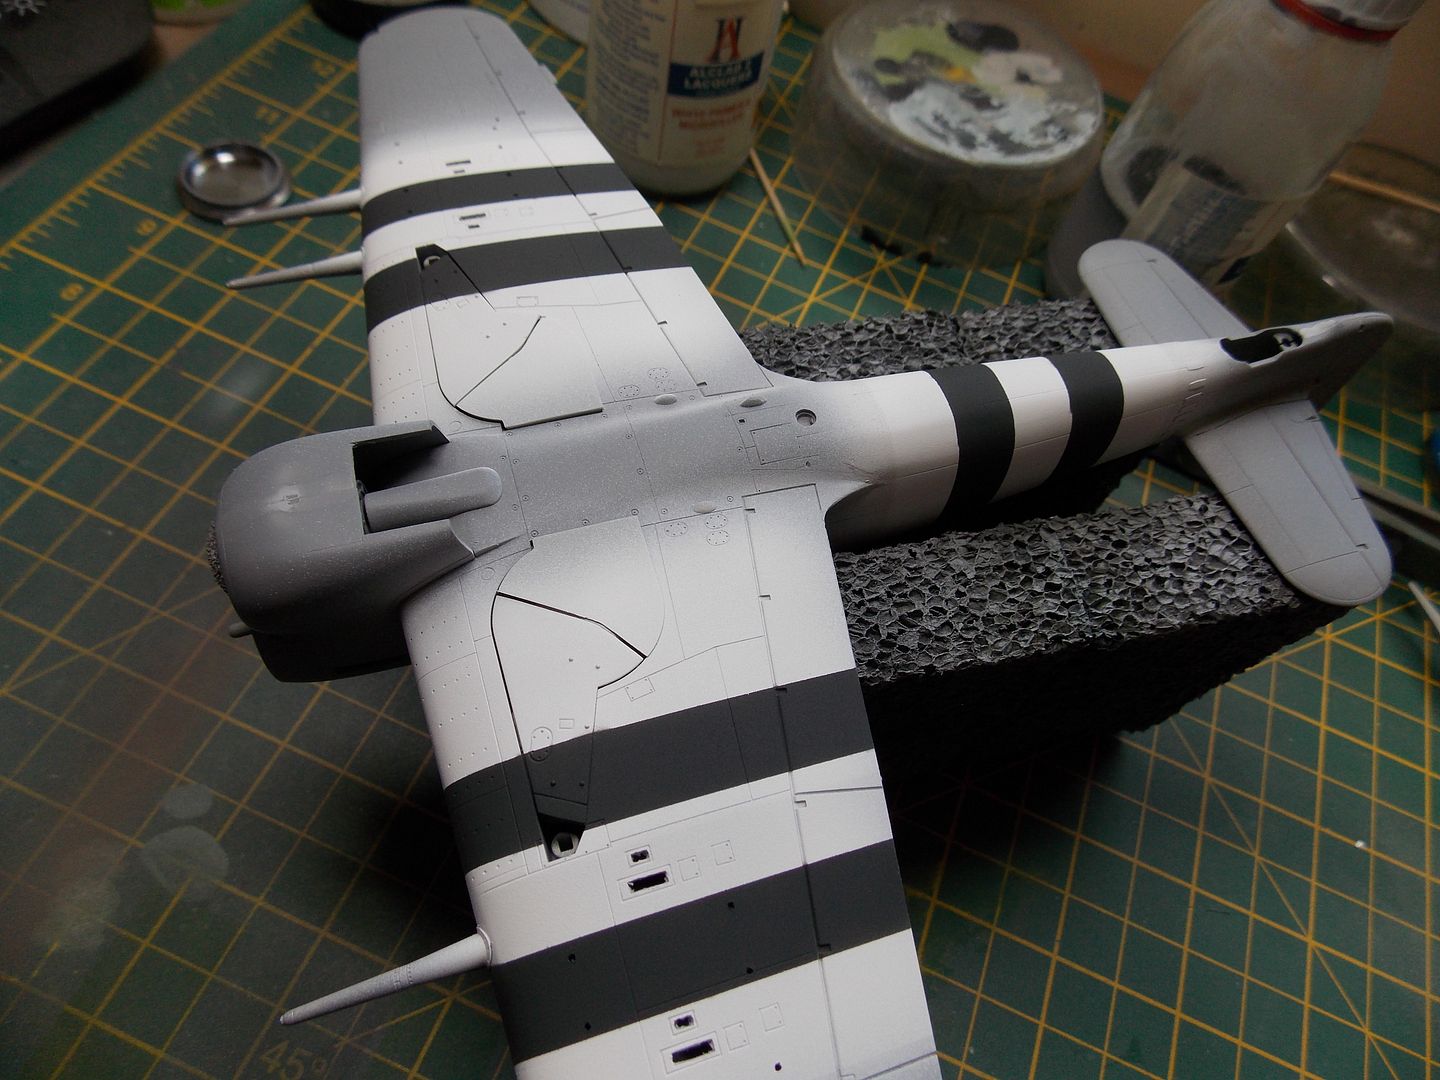
There are areas of slight overspray and I left the odd kink in some bits of tape to try and represent the fact that these stripes were often applied at the sqns just prior to invasion (often by broom!) and as such wouldn't be the neatest job. I continued to spray the nato black up to the top off the fuselage and I hope this will be slightly visible under the top camo to represent hastily painted over markings.
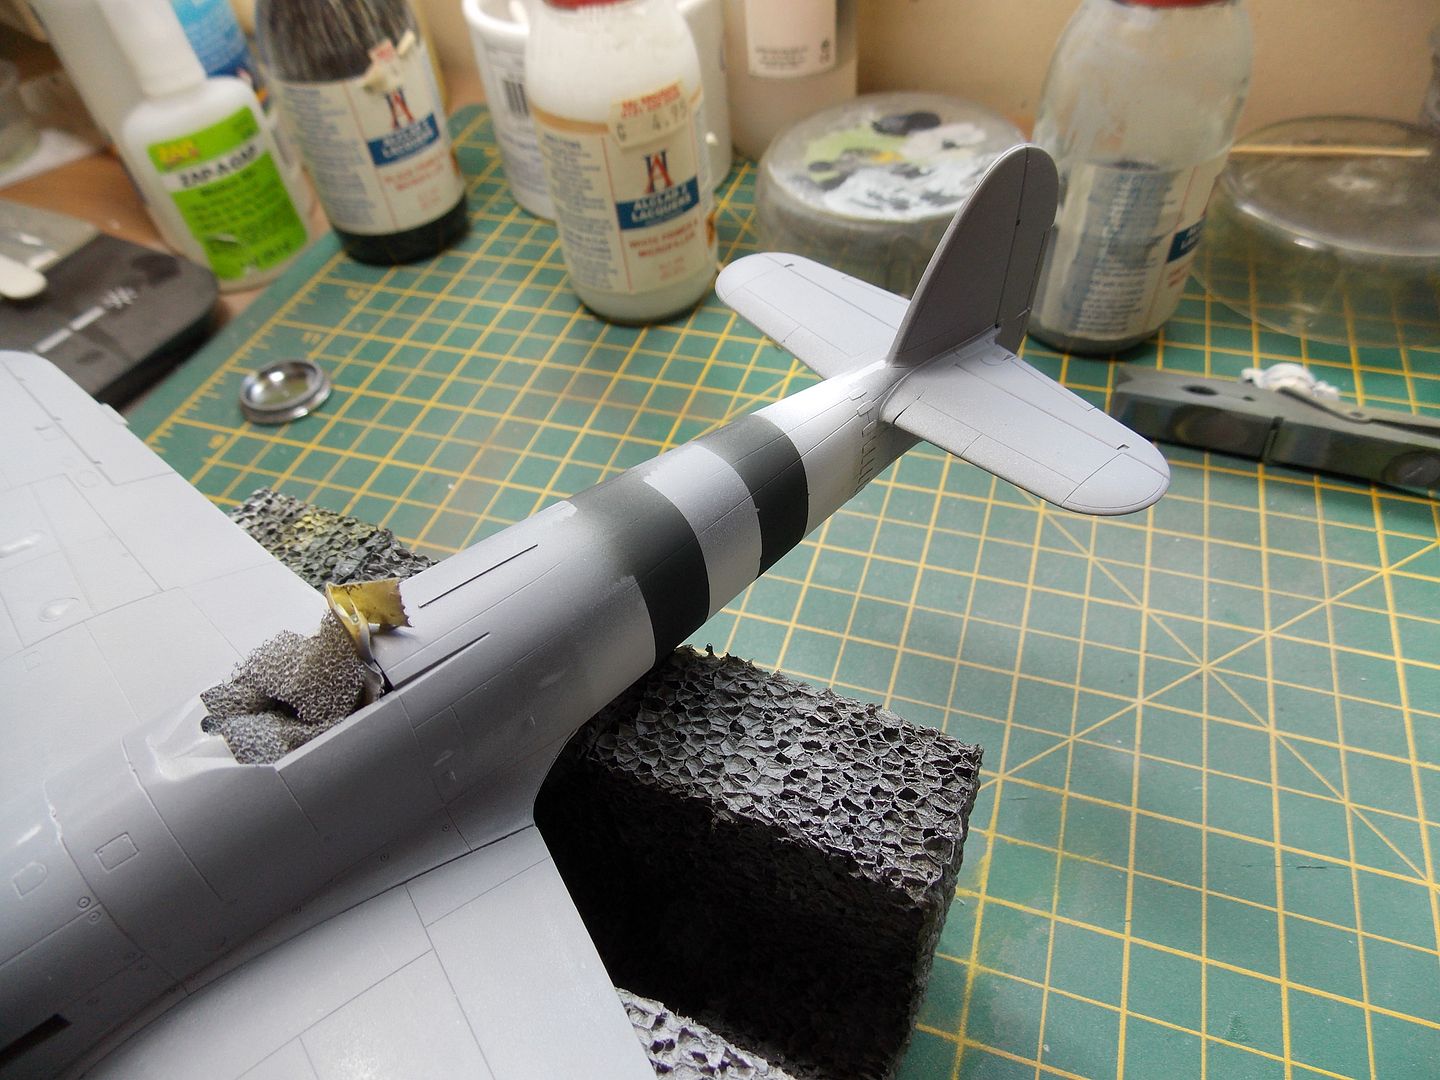
Going over my reference photo and studying the profile in the book it appears that the black stripes extend slightly further up the fuselage than the white so these were masked. I'm thinking of feathering in the top camo to give them a hastily painted over look.
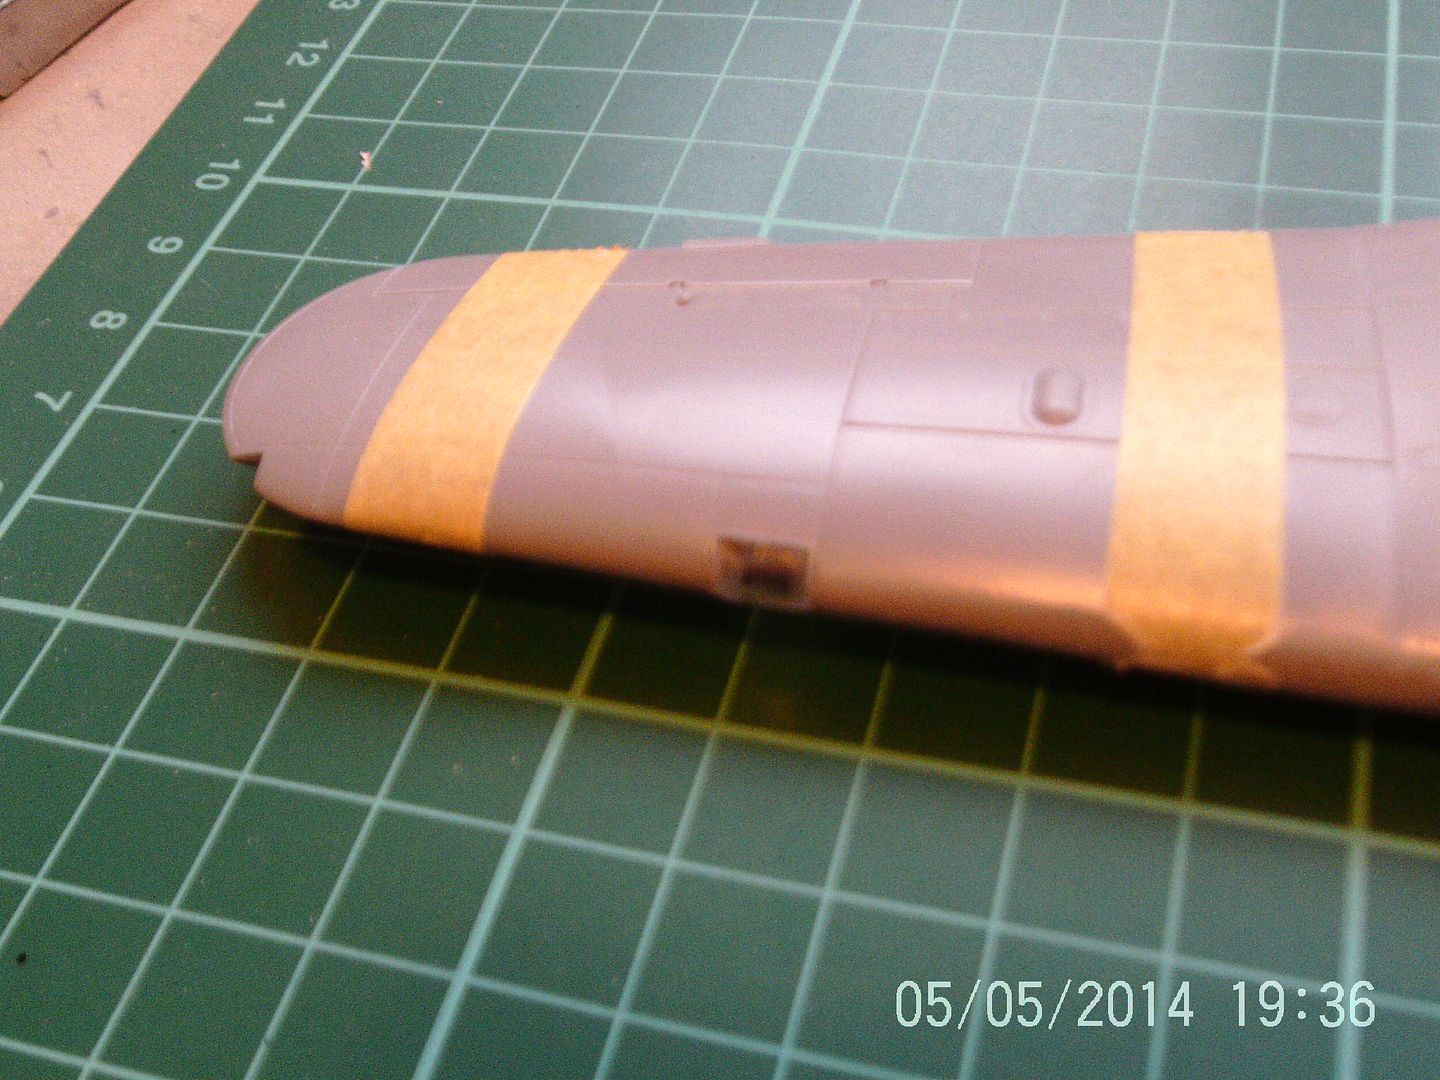
After all that tedious masking the stripes were masked off en bloc to allow the bottom camo to go on.
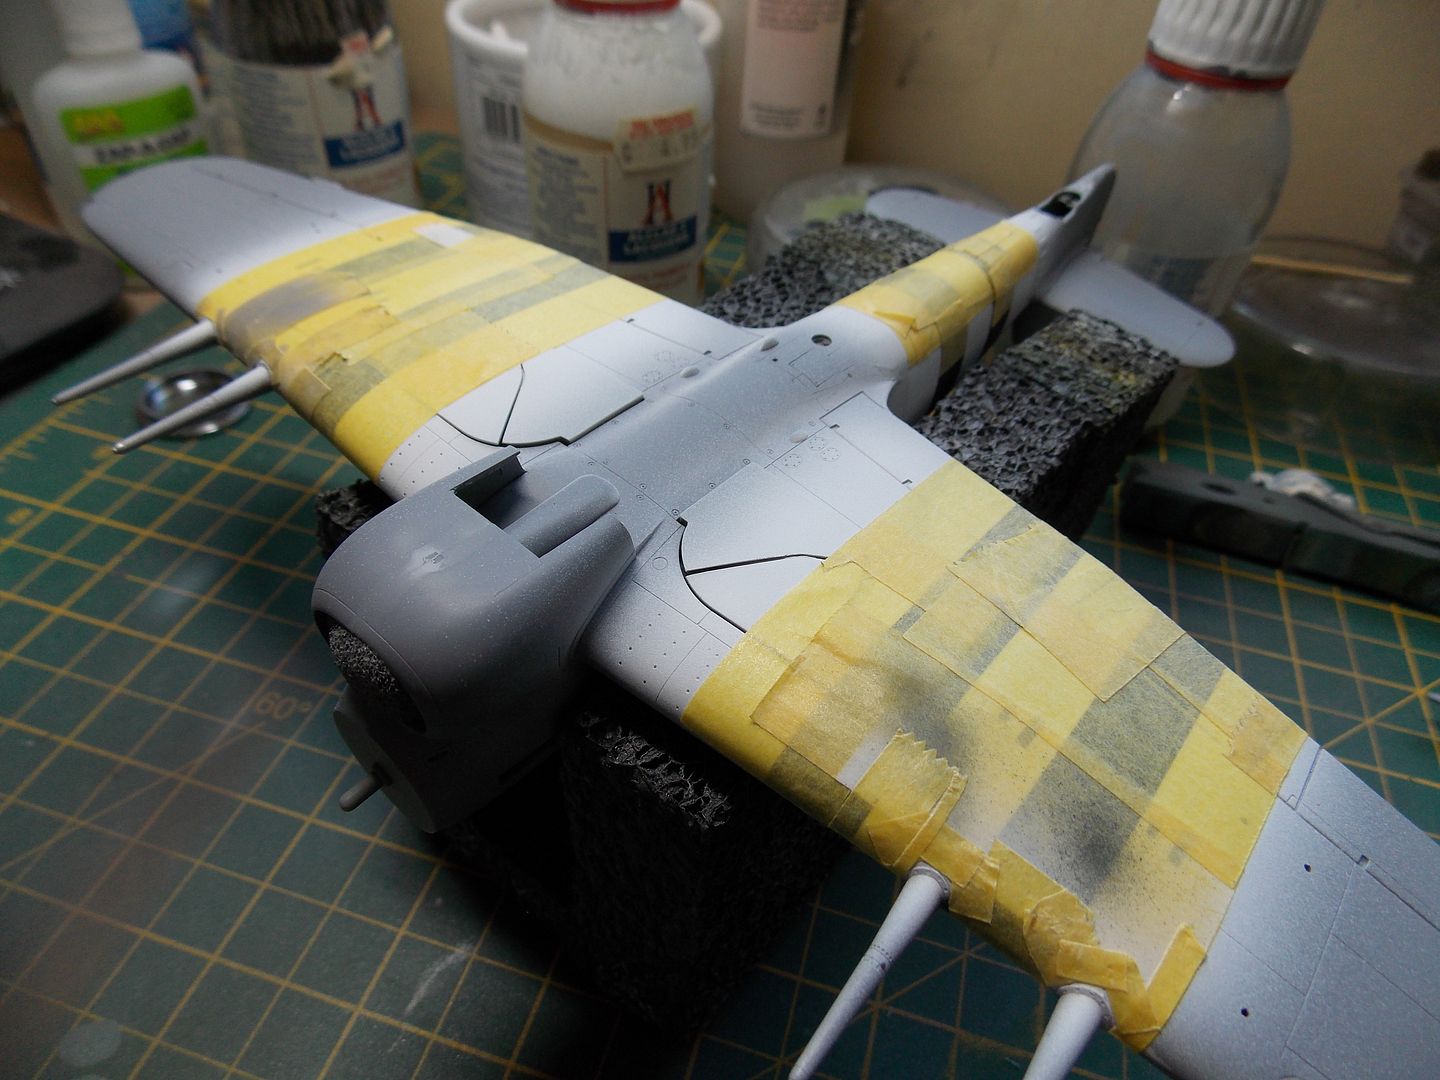
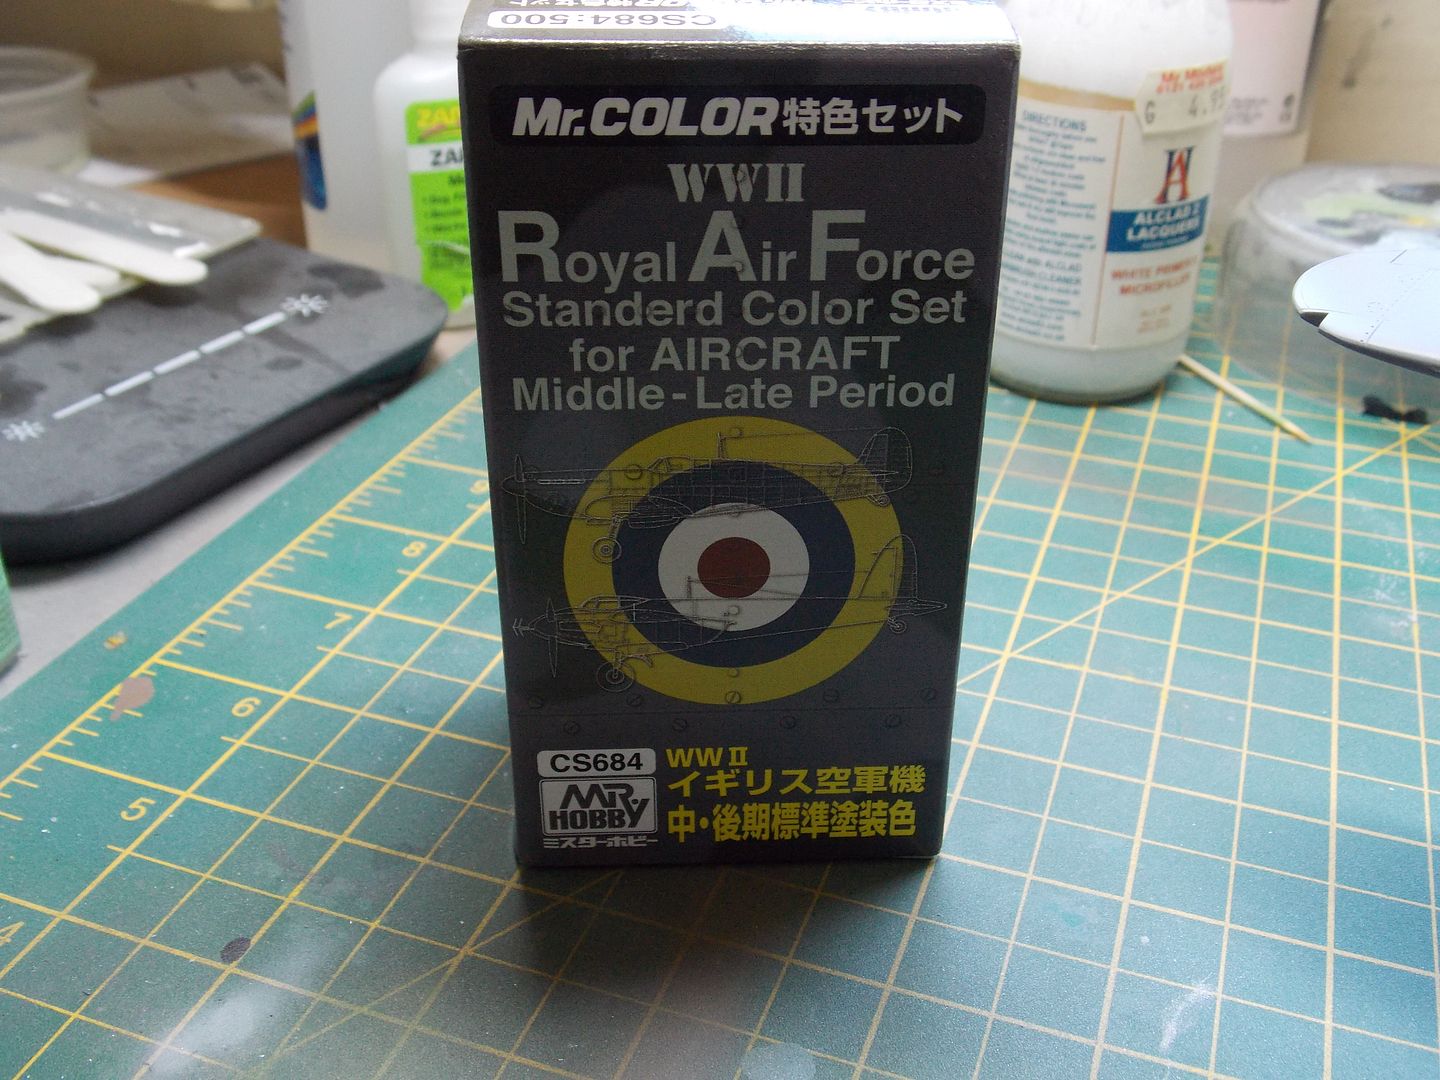
I've become a big fan of Mr Color and Levelling thinner and I thought I'd try this set out for the camo.
The base colour applied.
Panels highlighted with a drop or two of Tamiya white. Looks quite subtle on the photo but a bit more stark in real life.
Then panel lines were sprayed over with a darkened mix of the base before a well-thinned coat of the base colour was sprayed to blend it all in.
Meanwhile, I've made a start on the car door Typhoon with an added aftermarket seat.
Shouldn't take too long for this second aircraft to come together and I've found some lovely decals depicting Roland Beaumont's Typhoon.
More soon.
Re: Two Hawker Typhoons in 1/48 Hasegawa.
Posted: Mon Aug 15, 2016 5:35 pm
by Willem
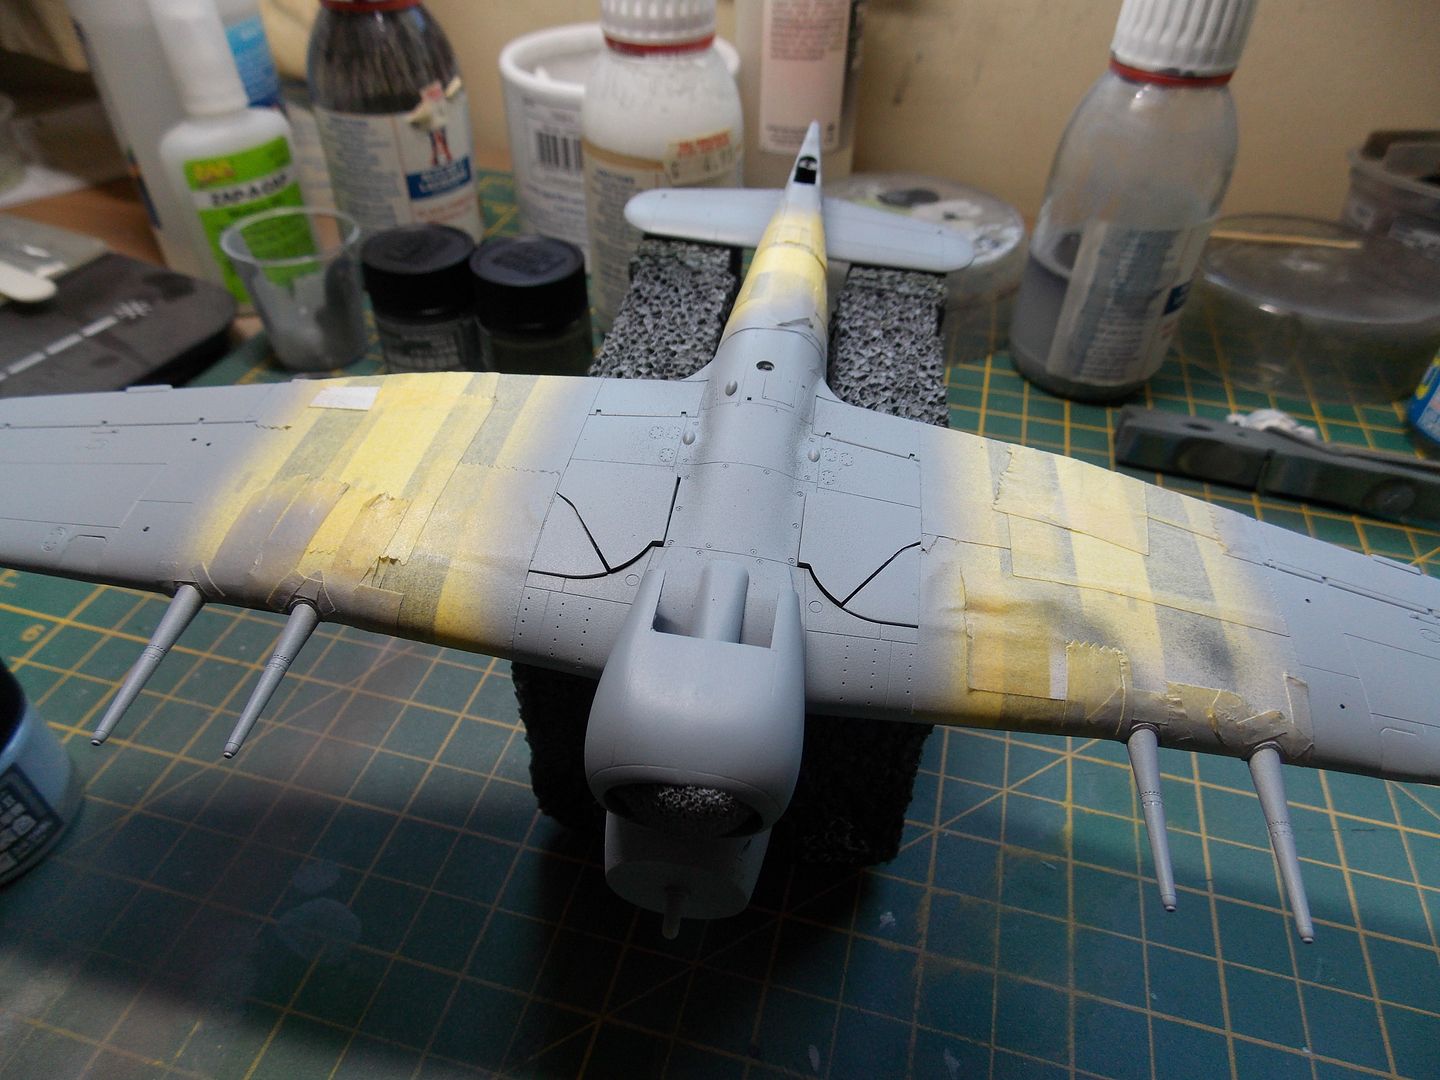
So the plan here is to have the stripes on the upper wing show through slightly. Hence the pre shading on the rest of the top surface. Pre shading is something that I'm not overly neat with and I tend to now avoid but horses for courses.
Lower surfaces completely masked to avoid any over spray.
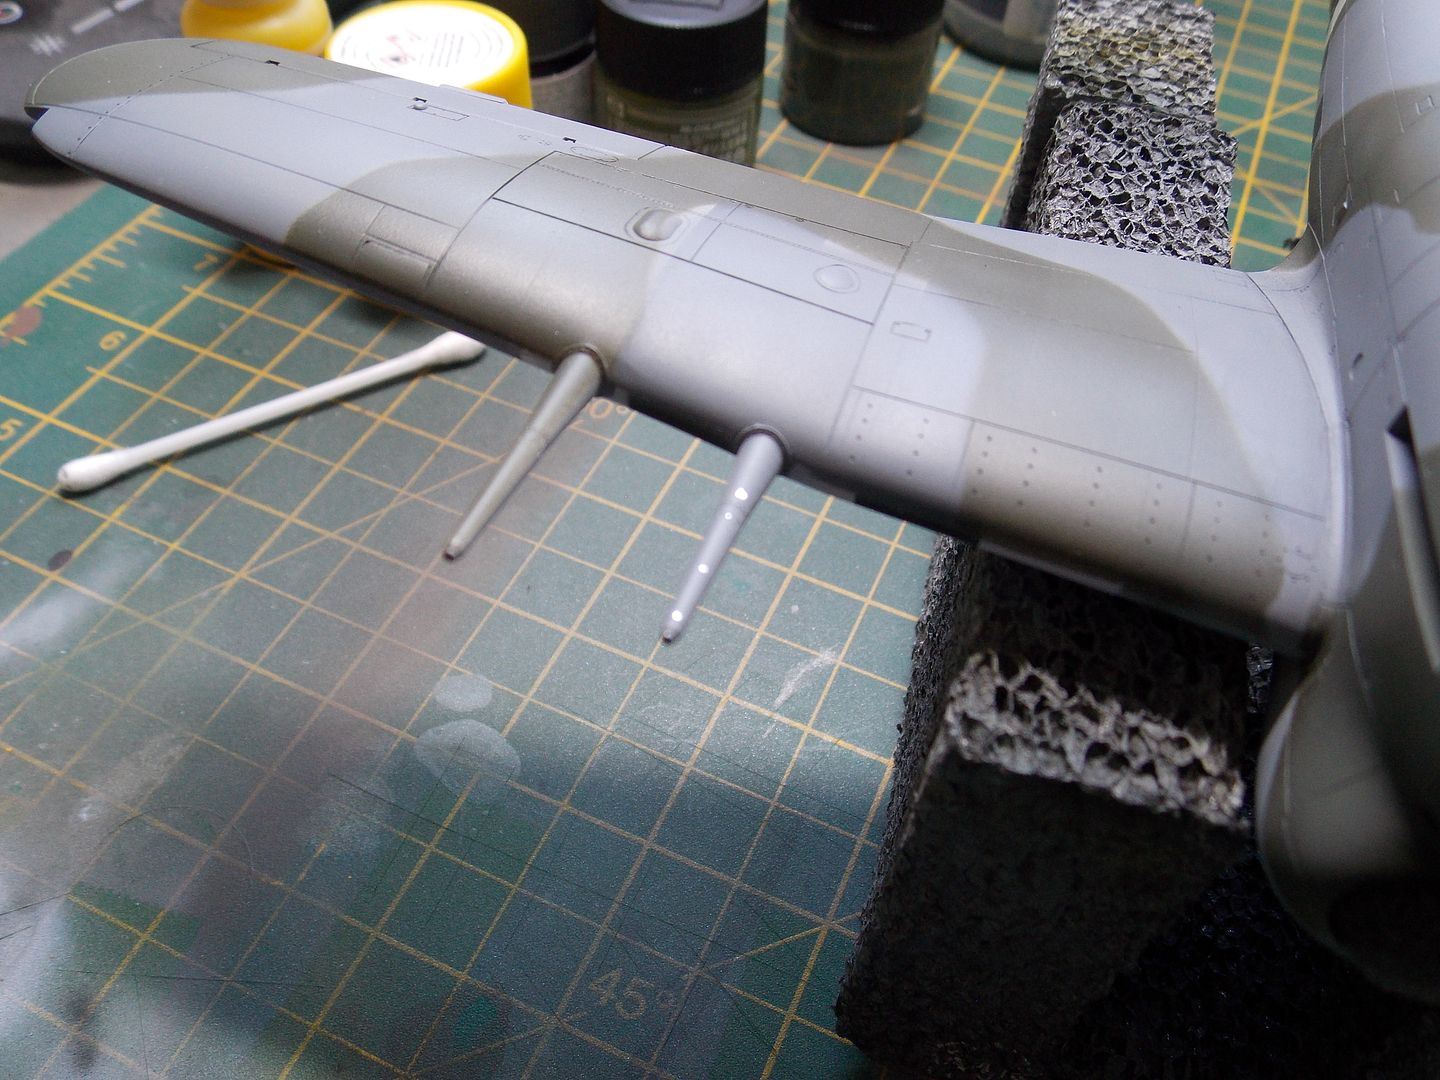
Ocean grey going on. A little bit of post shading done to lighten up the panel centres slightly.
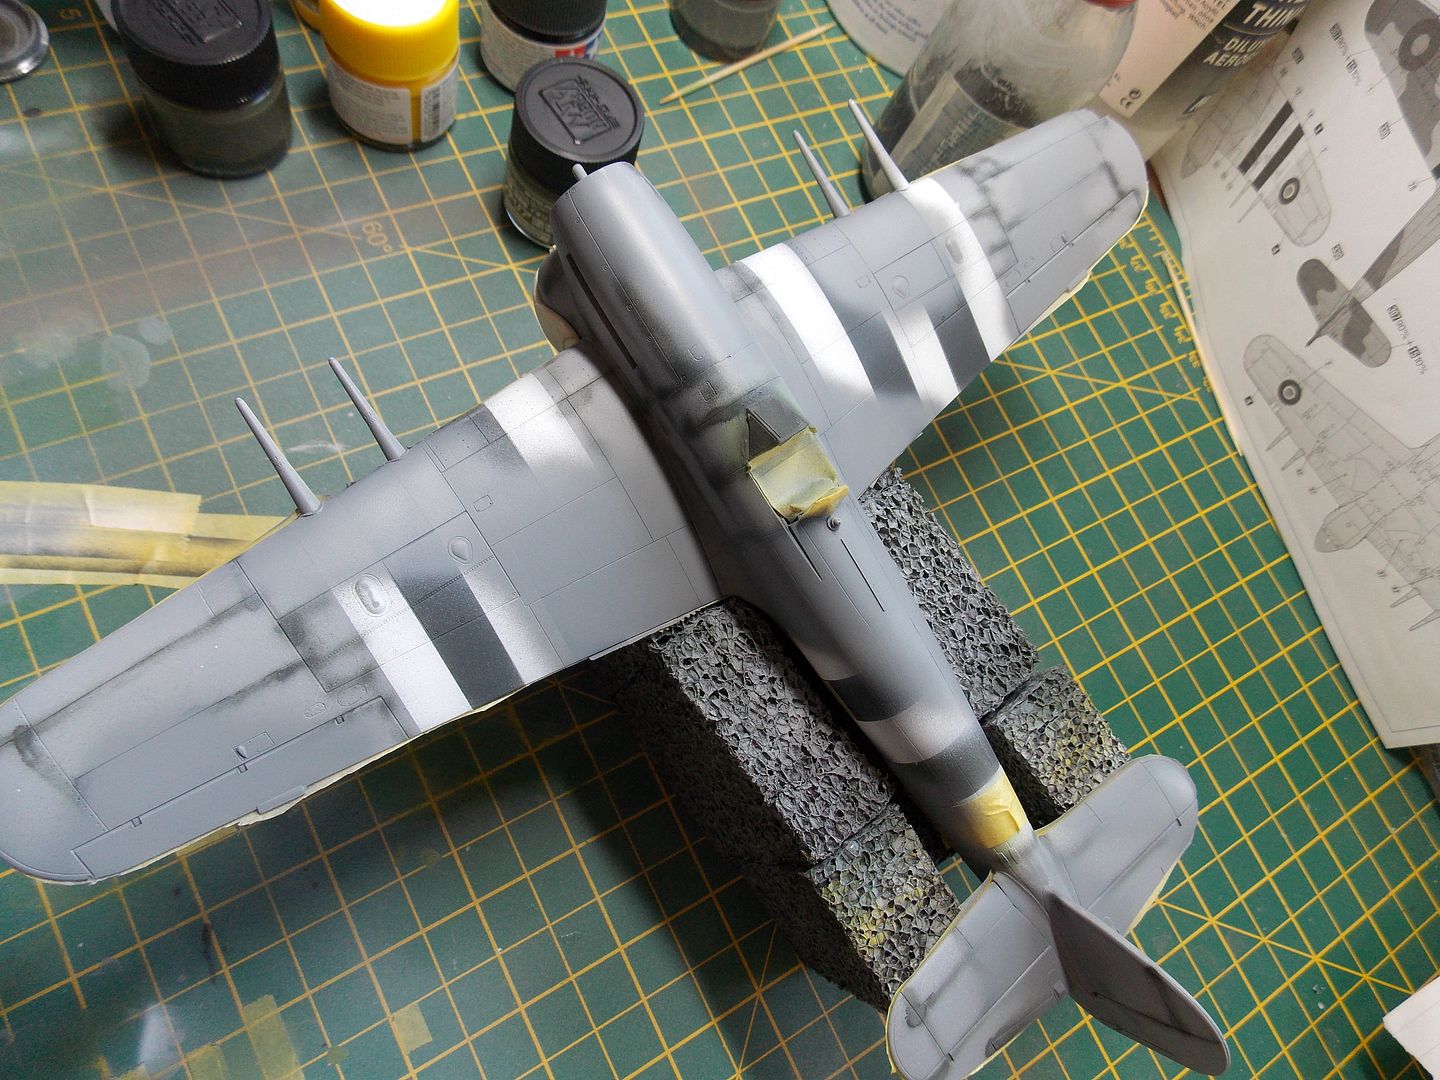
Masked for the green. Got into the zone watching the Olympics to take the edge off the tedium.
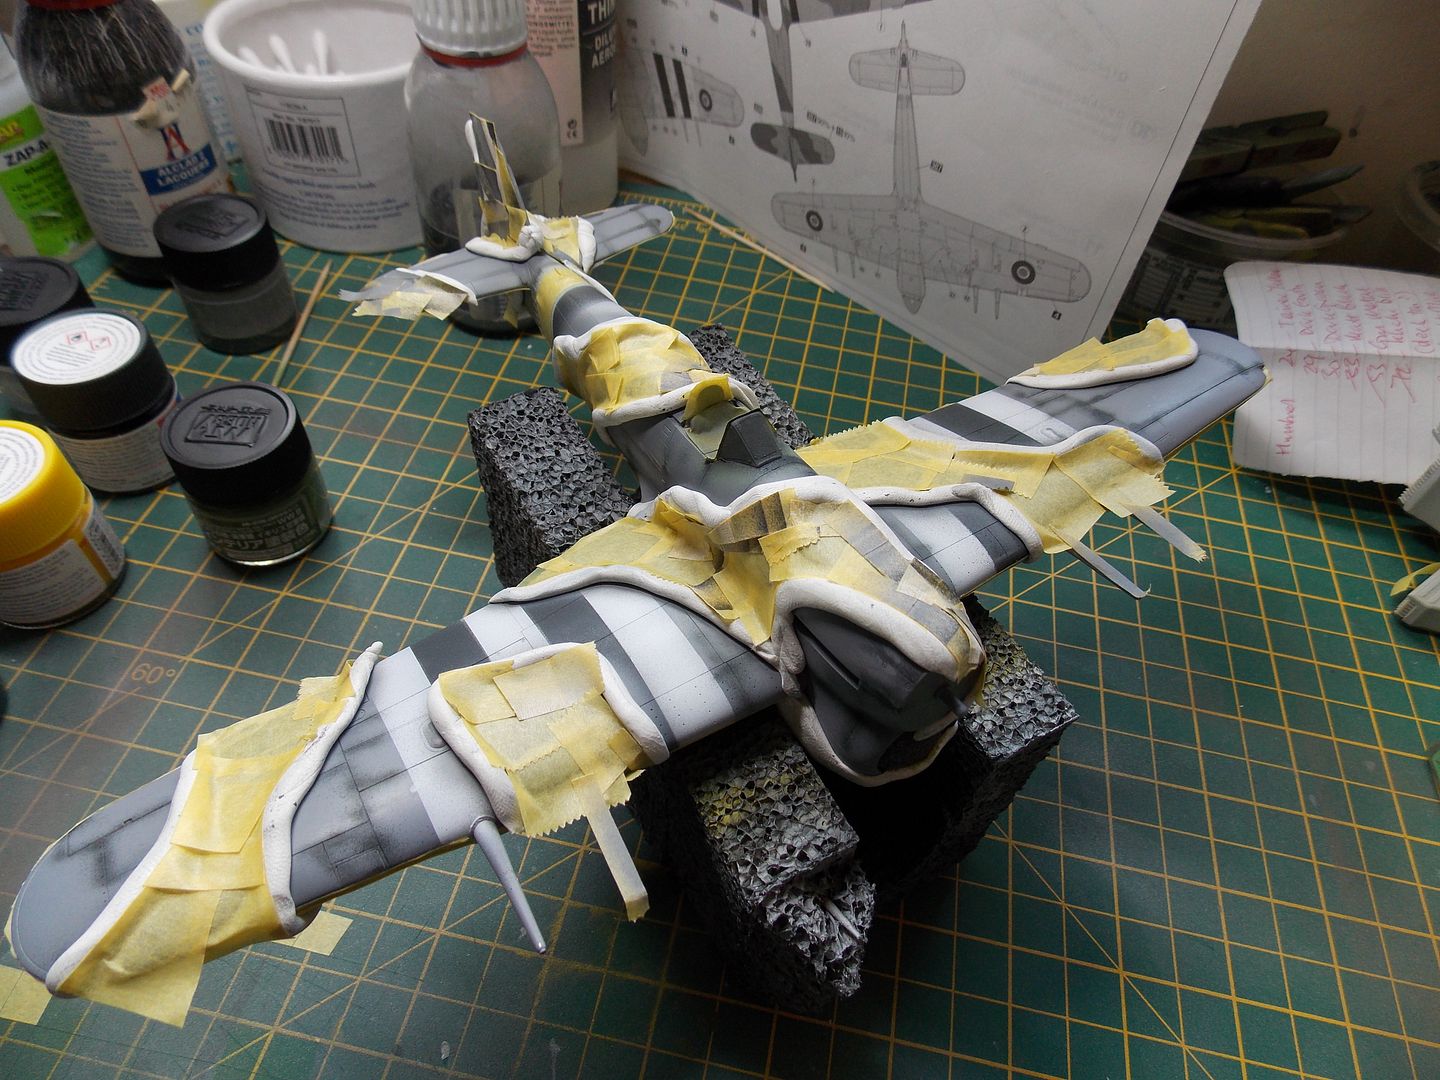
Green on. Again, a little bit lightened in places.
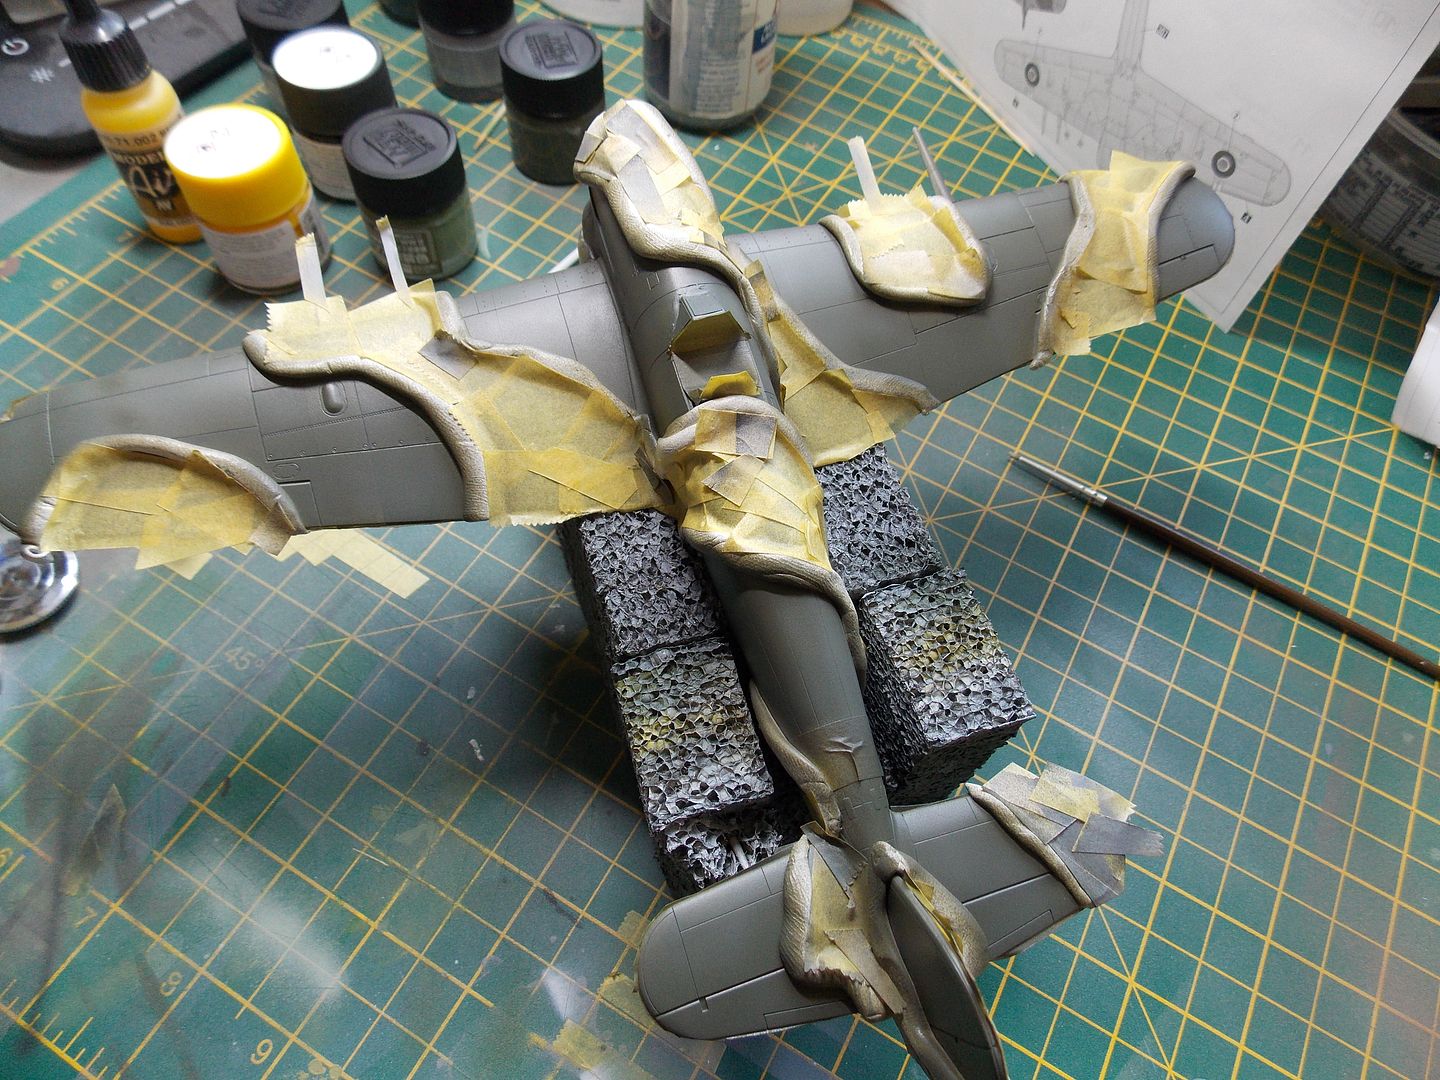
Masking off. Always find it hard to resist ripping it all off straight away but cleaned out the airbrush first and stripped it down. The paints went on very smoothly here and are fairly quick drying. A few areas to touch in but fairly happy.
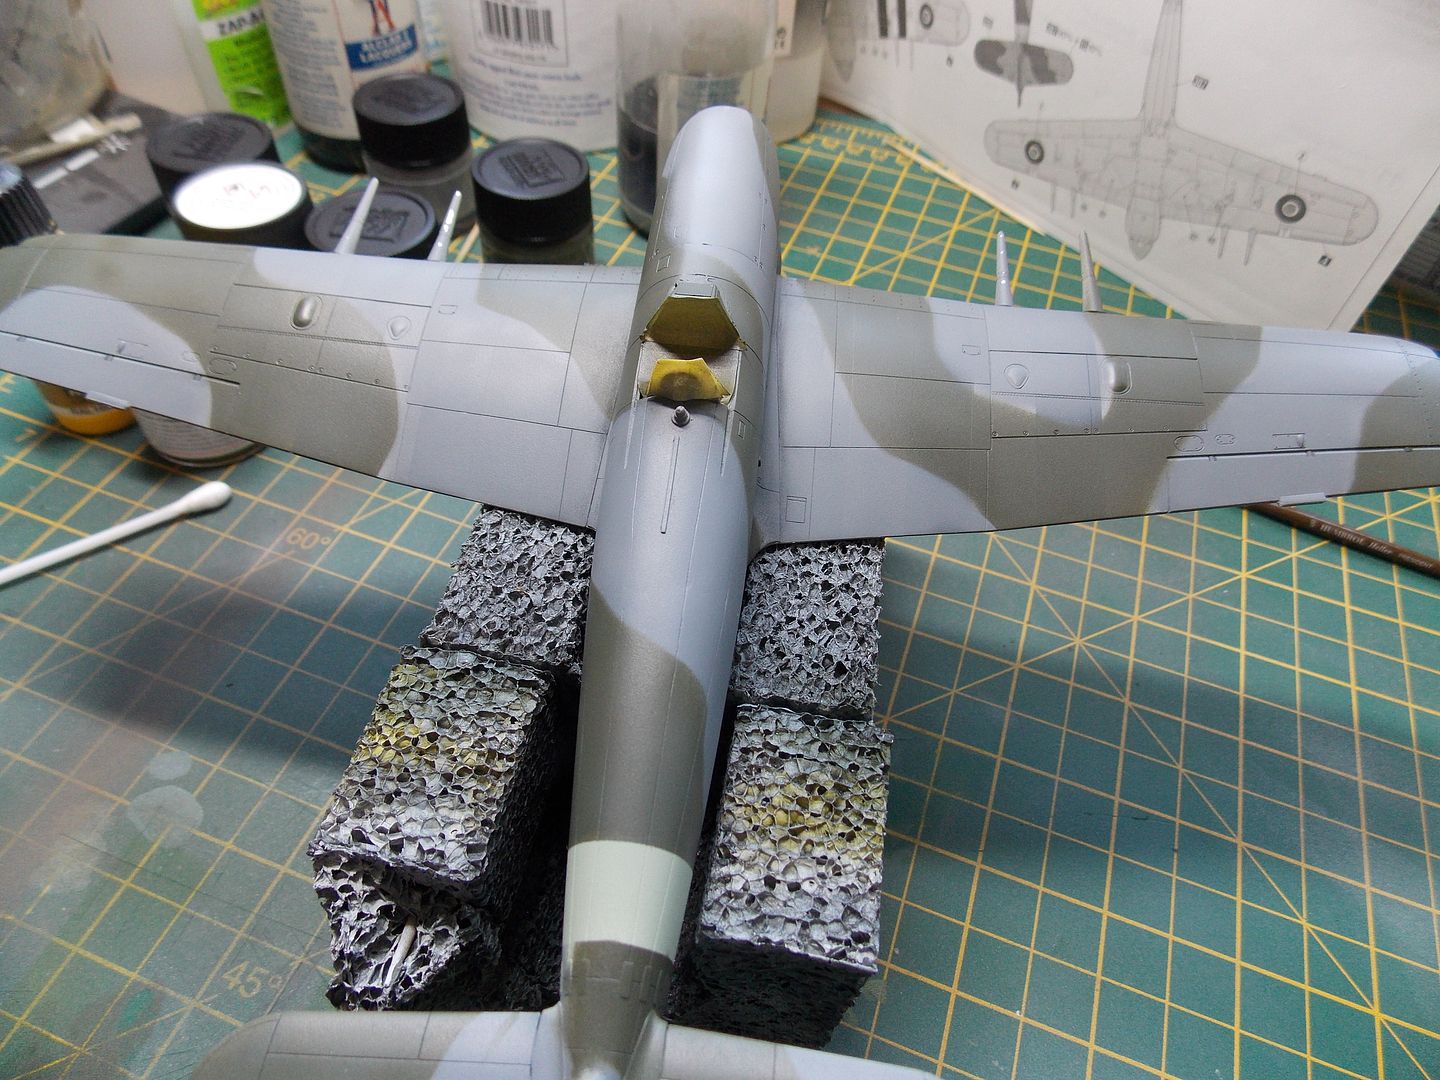
The stripes do just show through although it is hard to spot on the photos.
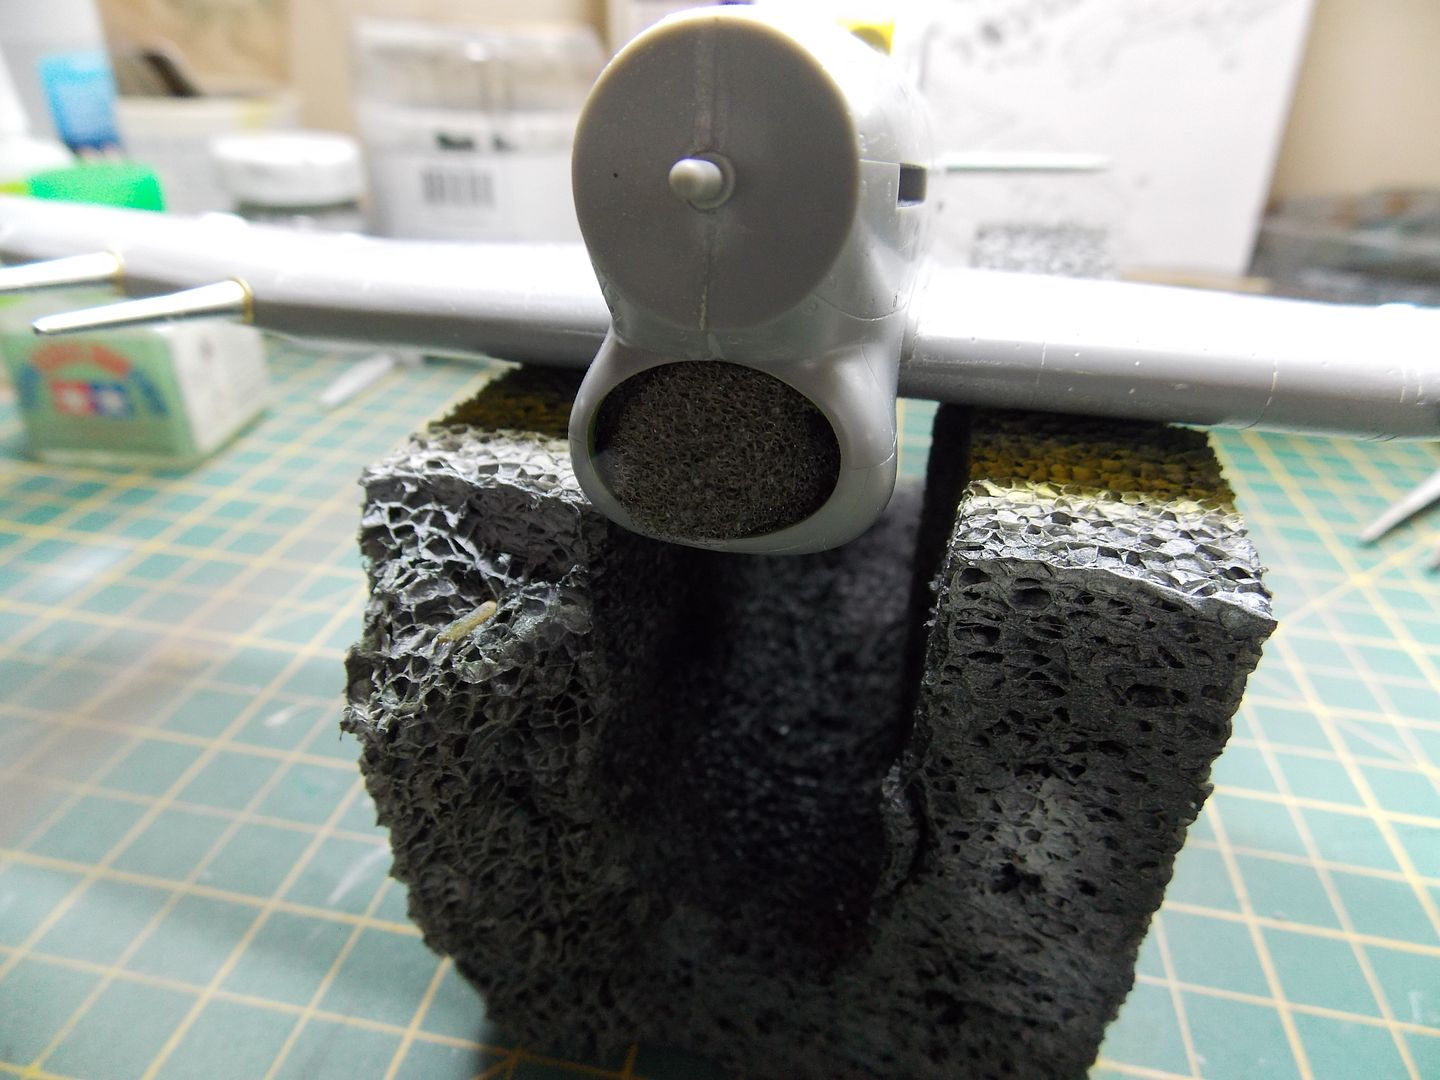
The paint and primer don't like the metal cannon barrels but not too tricky to sort out.
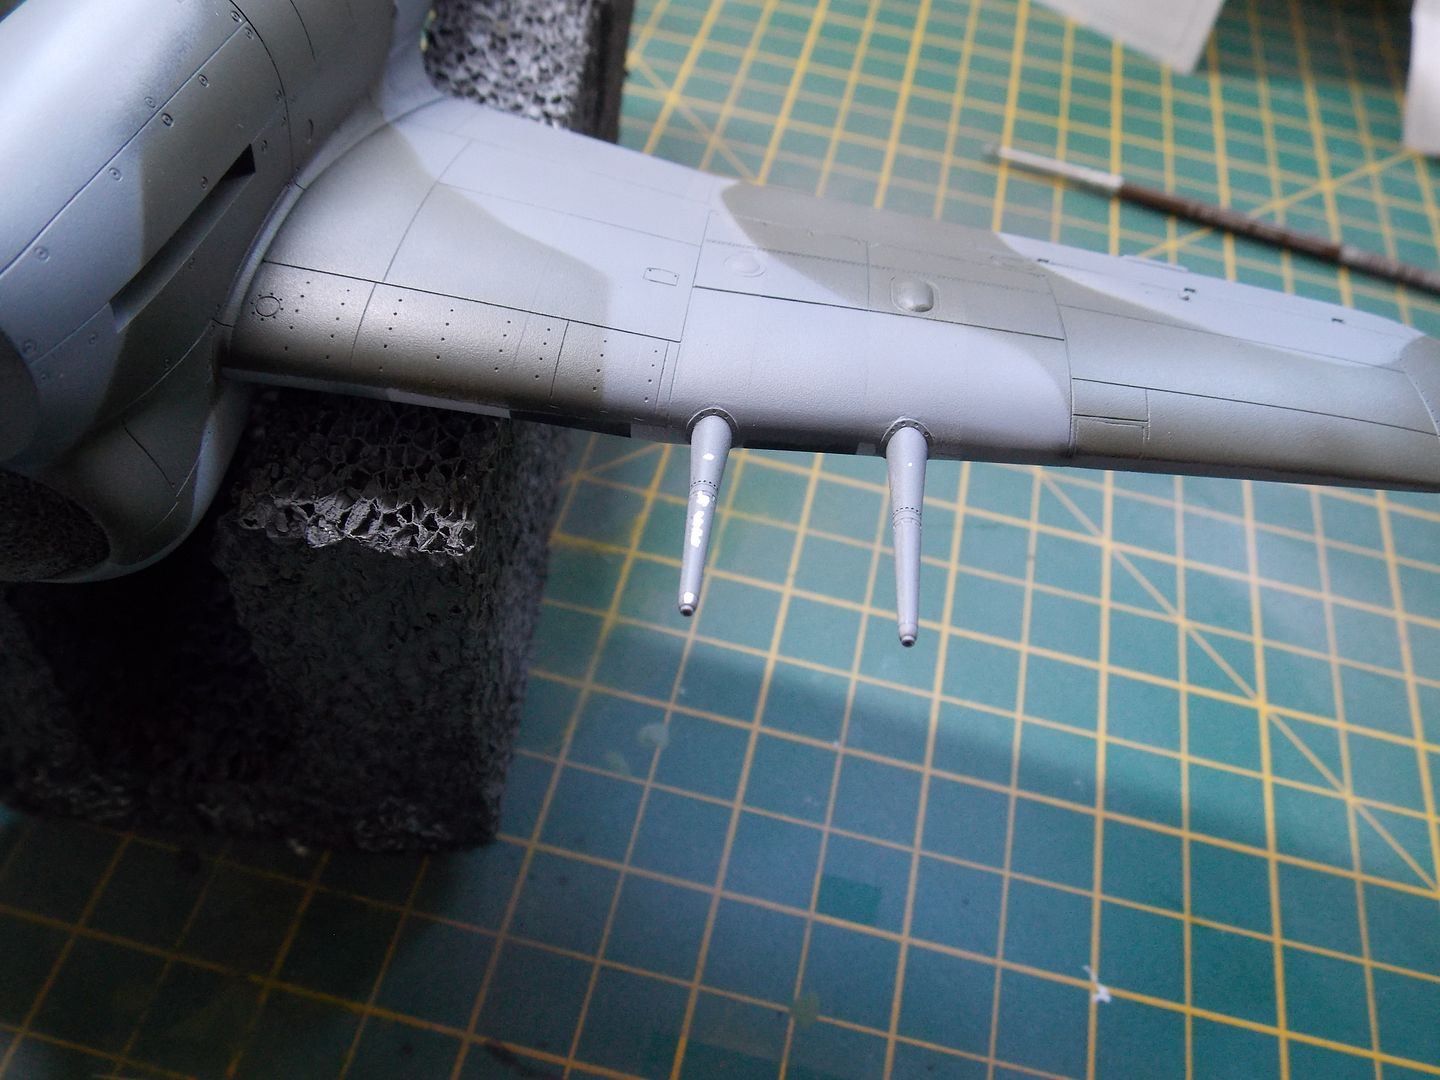

Needs touch ups and the yellow leading edge markings next. Thanks for looking.
Re: Two Hawker Typhoons in 1/48 Hasegawa.
Posted: Fri Aug 19, 2016 3:47 pm
by Willem
Re: Two Hawker Typhoons in 1/48 Hasegawa.
Posted: Sun Aug 21, 2016 5:51 pm
by Willem
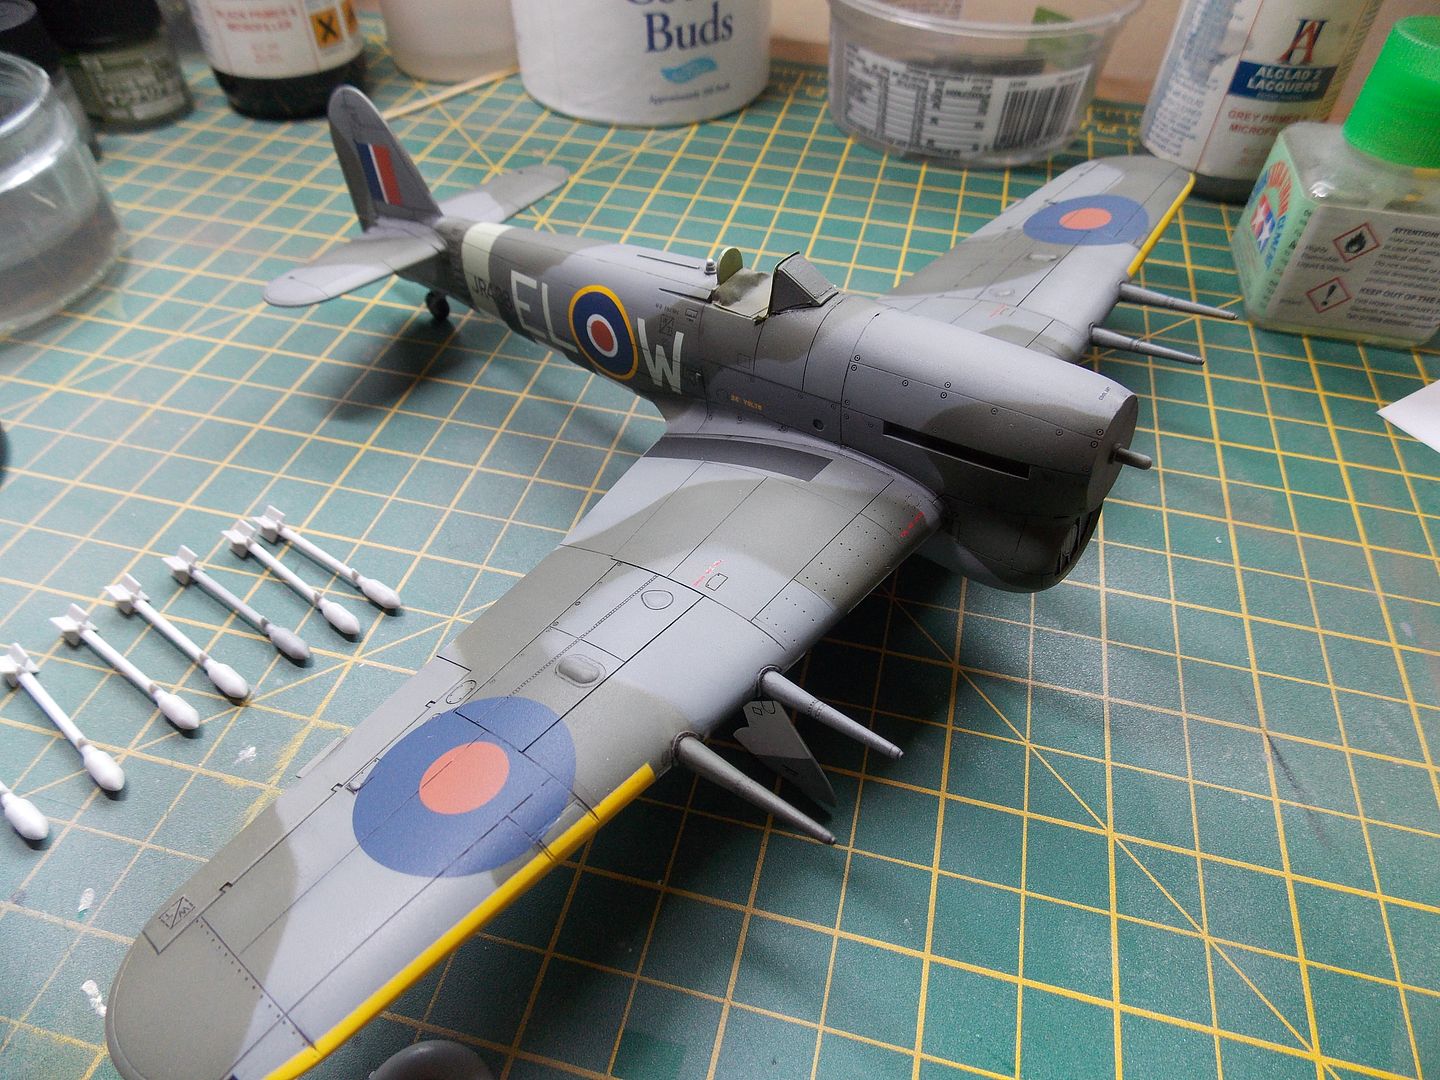
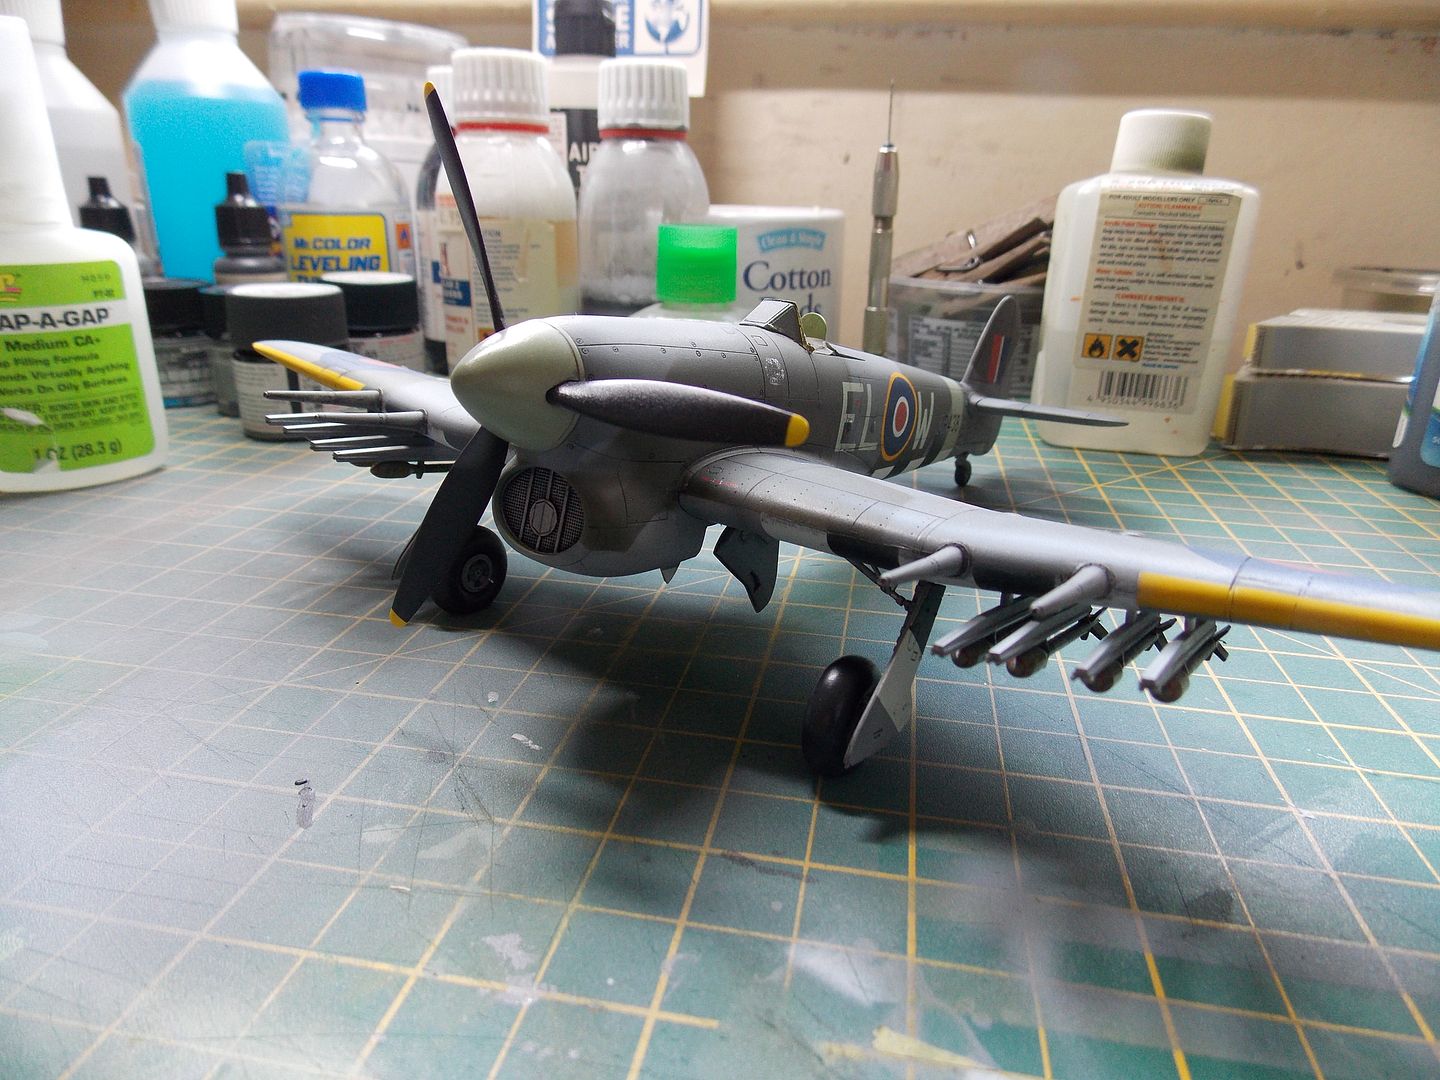
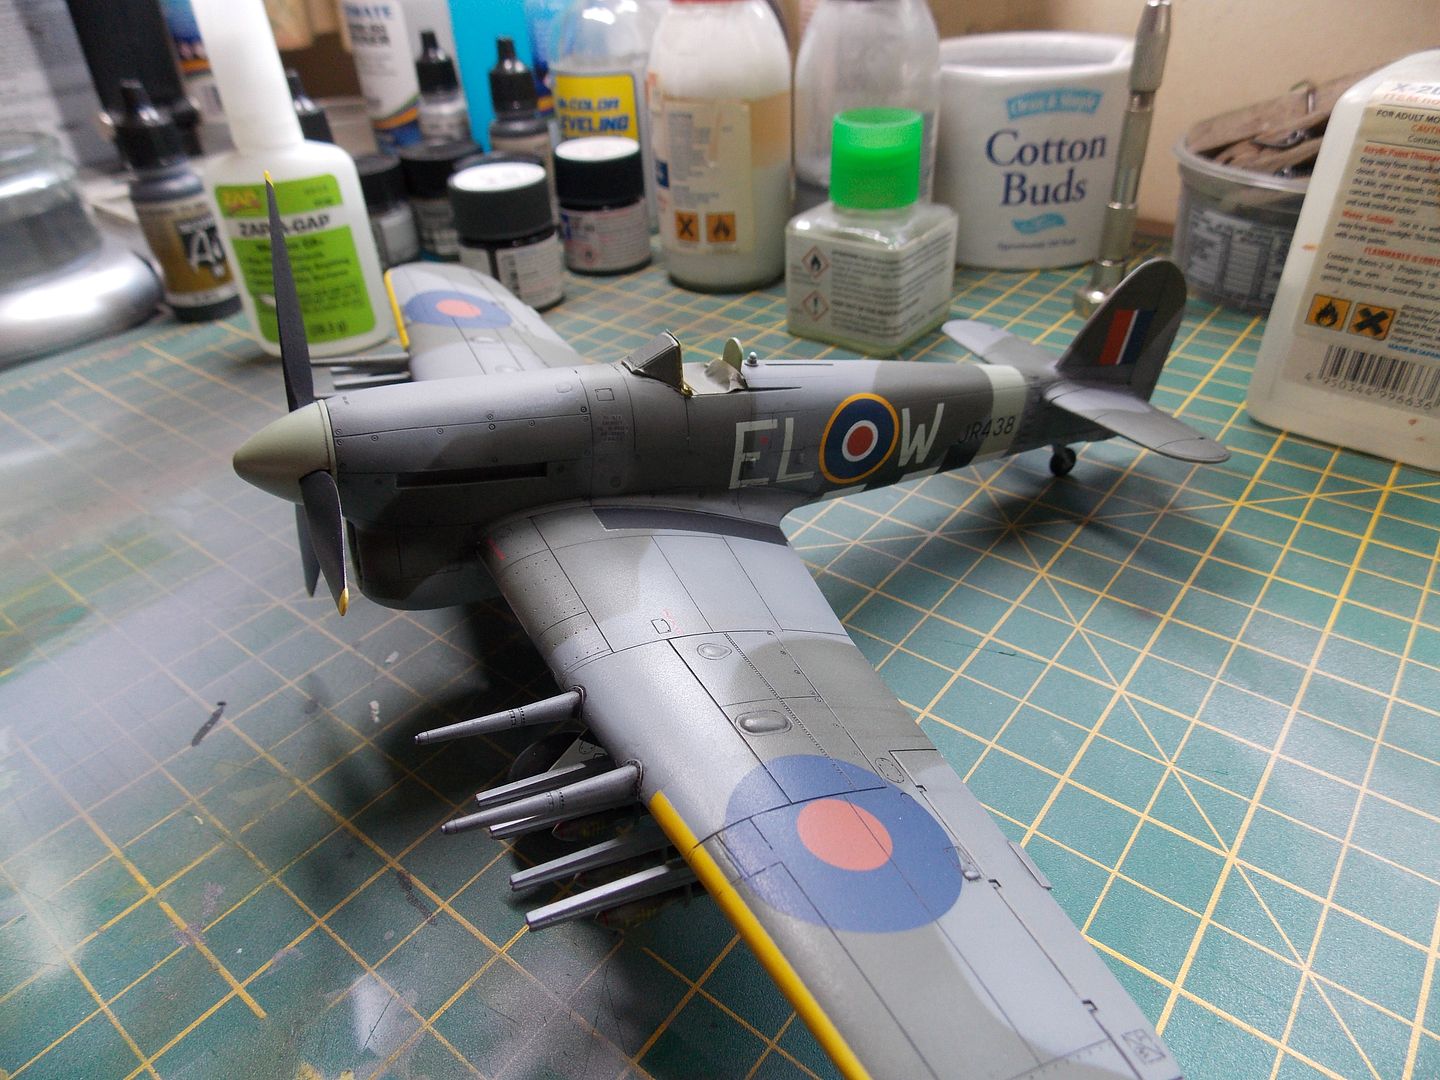
After giving the underside a good couple of coats of Aqua gloss the model was left overnight before decaling began. As the aircraft I want to depict is not covered (as far as I know) by an aftermarket sheet, I have used several sets of decals and just two from the kit.
Roundels and fin flashes are from an Aeromaster "Storms in the Sky" sheet.
Serials and codes are from a couple of Xtradecal sheets covering RAF codes in both sky and night.
Airframe stencils are from an Avia-ology sheet containing complete sets of stencils for two aircraft.


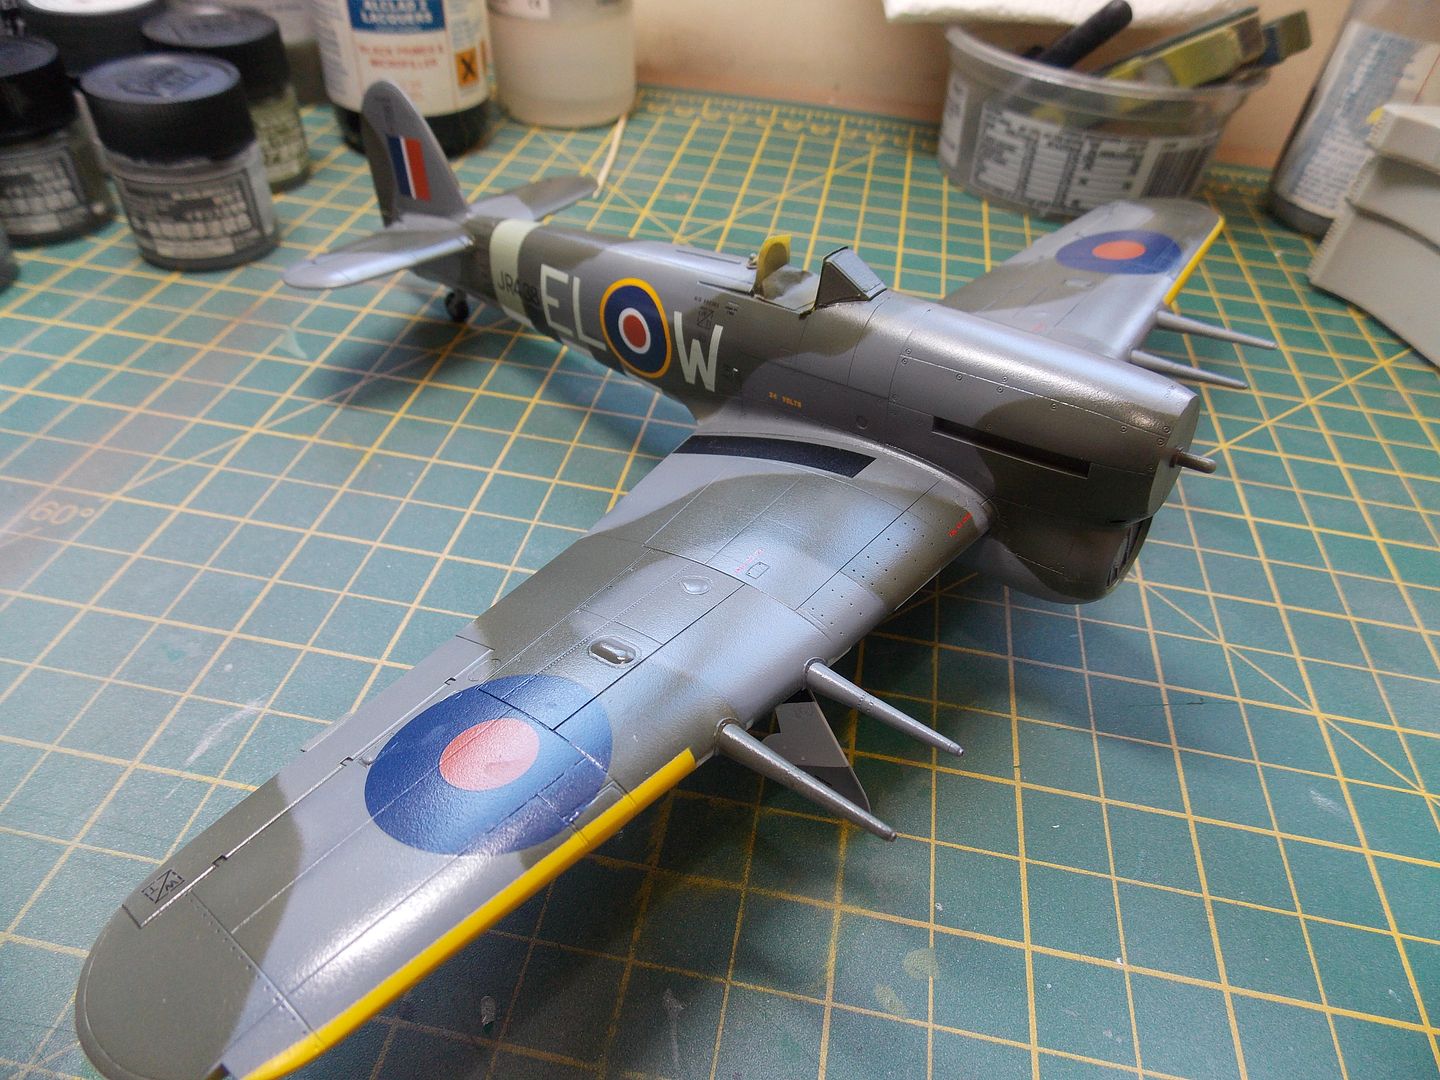
The Xtradecals serials performed the best being quick to come off the backing and settling into the details very quickly. The stencils are good but are a bit too thick for my taste and have silvered here and there. The roundels were ok but took a while to settle down but cooperated once I'd cut along the panels and brushed on some X20A.
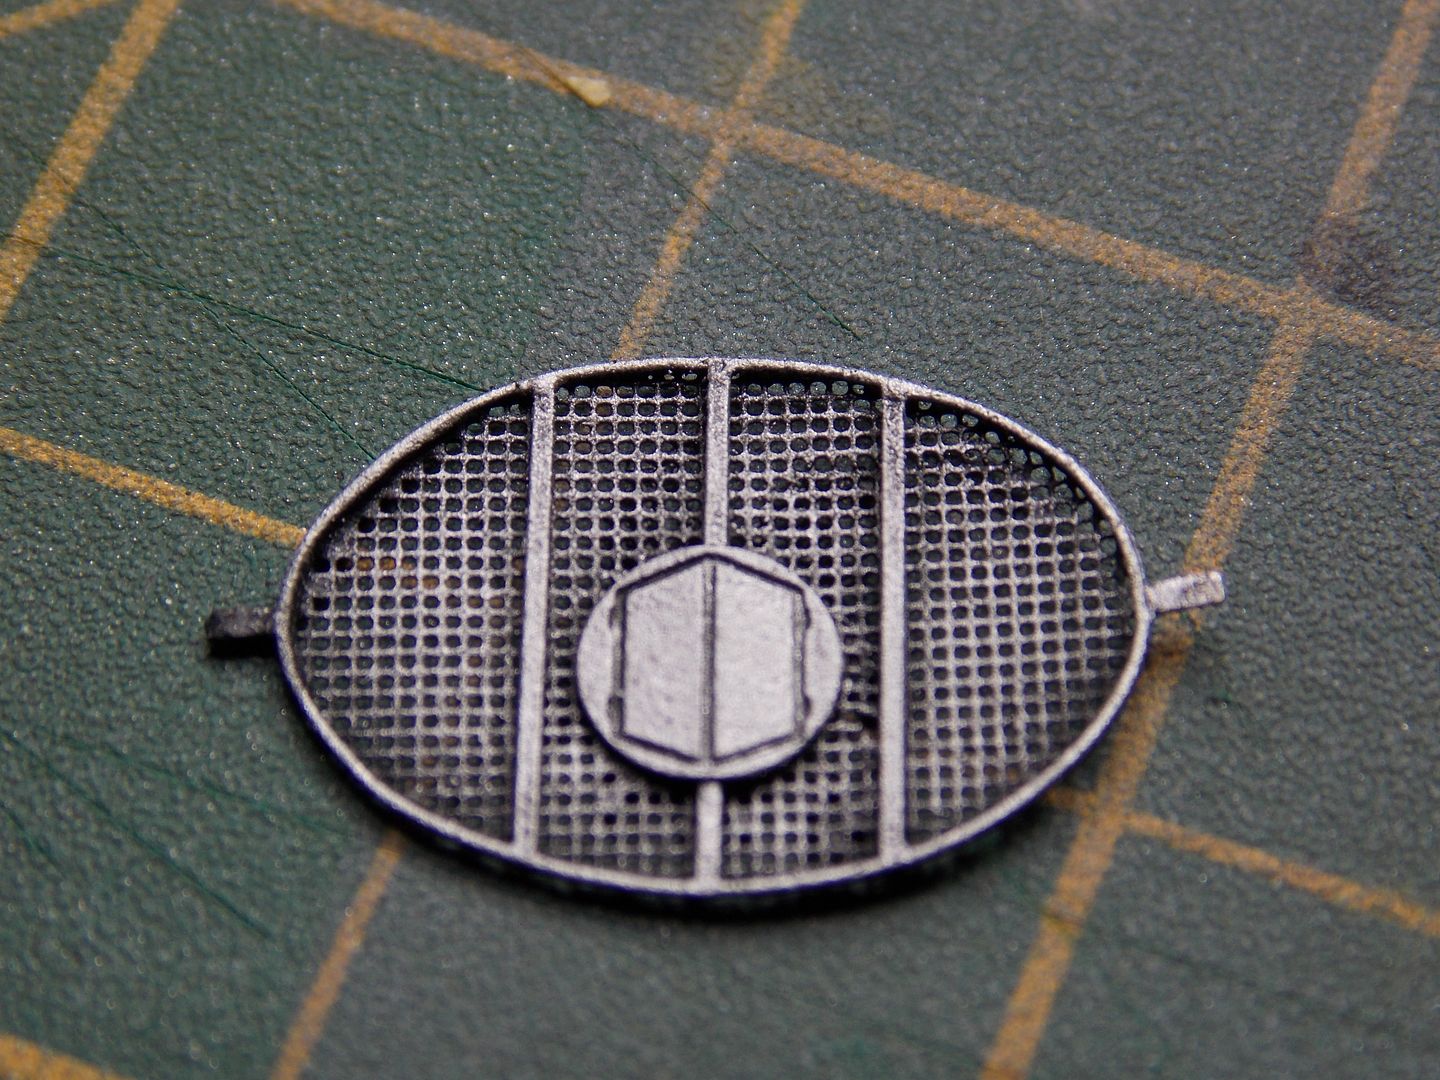
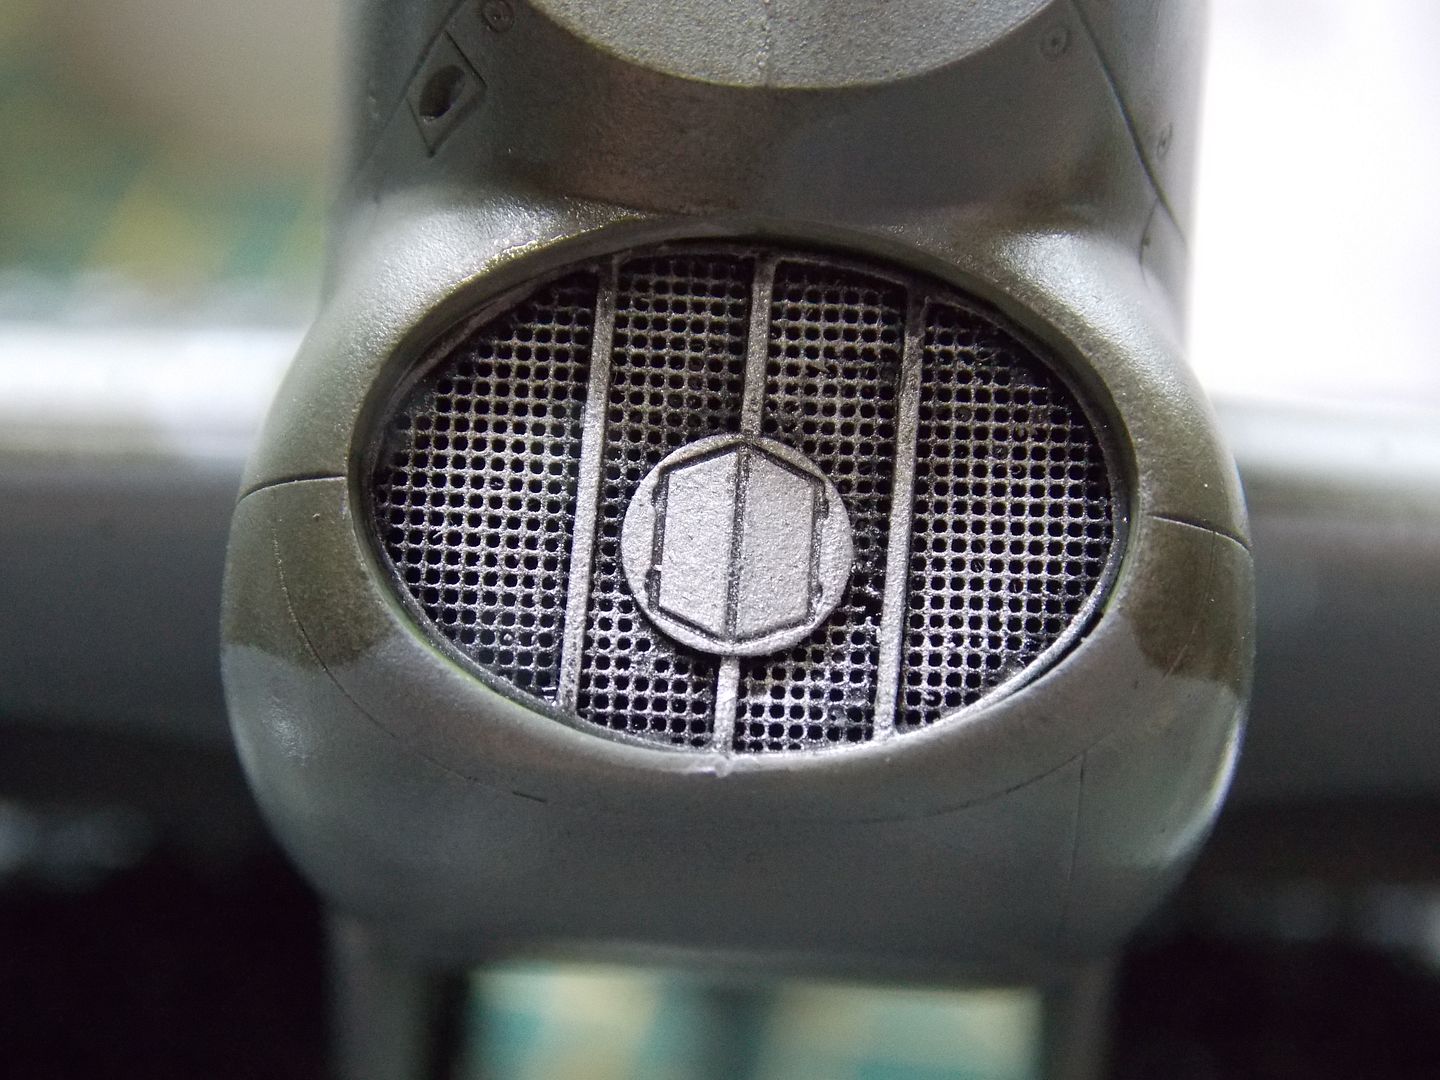
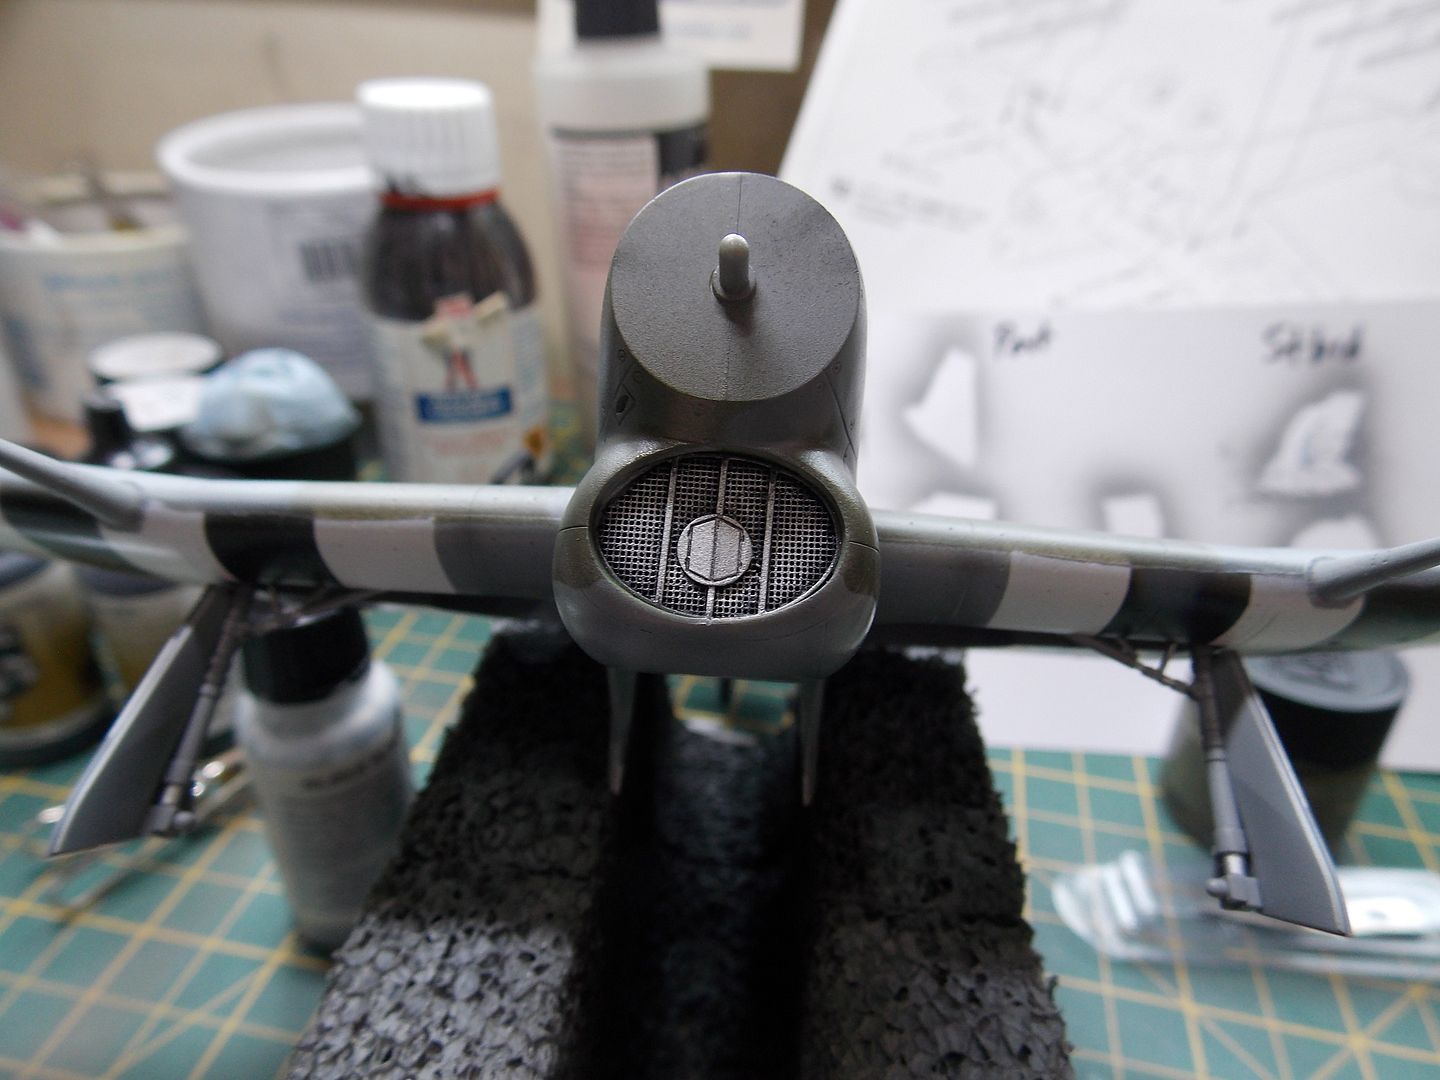
This is the PE grill made by Bren Gun. Post D-Day Typhoon squadrons operating from rough landing grounds started to suffer catastrophic engine failure as the huge air intake scooped up the fine Normandy dust that caused chaos with the Napier sabre engine. Several field mods were applied. One involved a bulbous fairing over the radiator intake but was soon dropped as an engine backfire would result in a piece of hot, blunt metal being shot out across the aerodrome often causing damage to the aircraft propeller in the process. The answer was a mesh cover with a pair of "cuckoo" doors that hinged out.
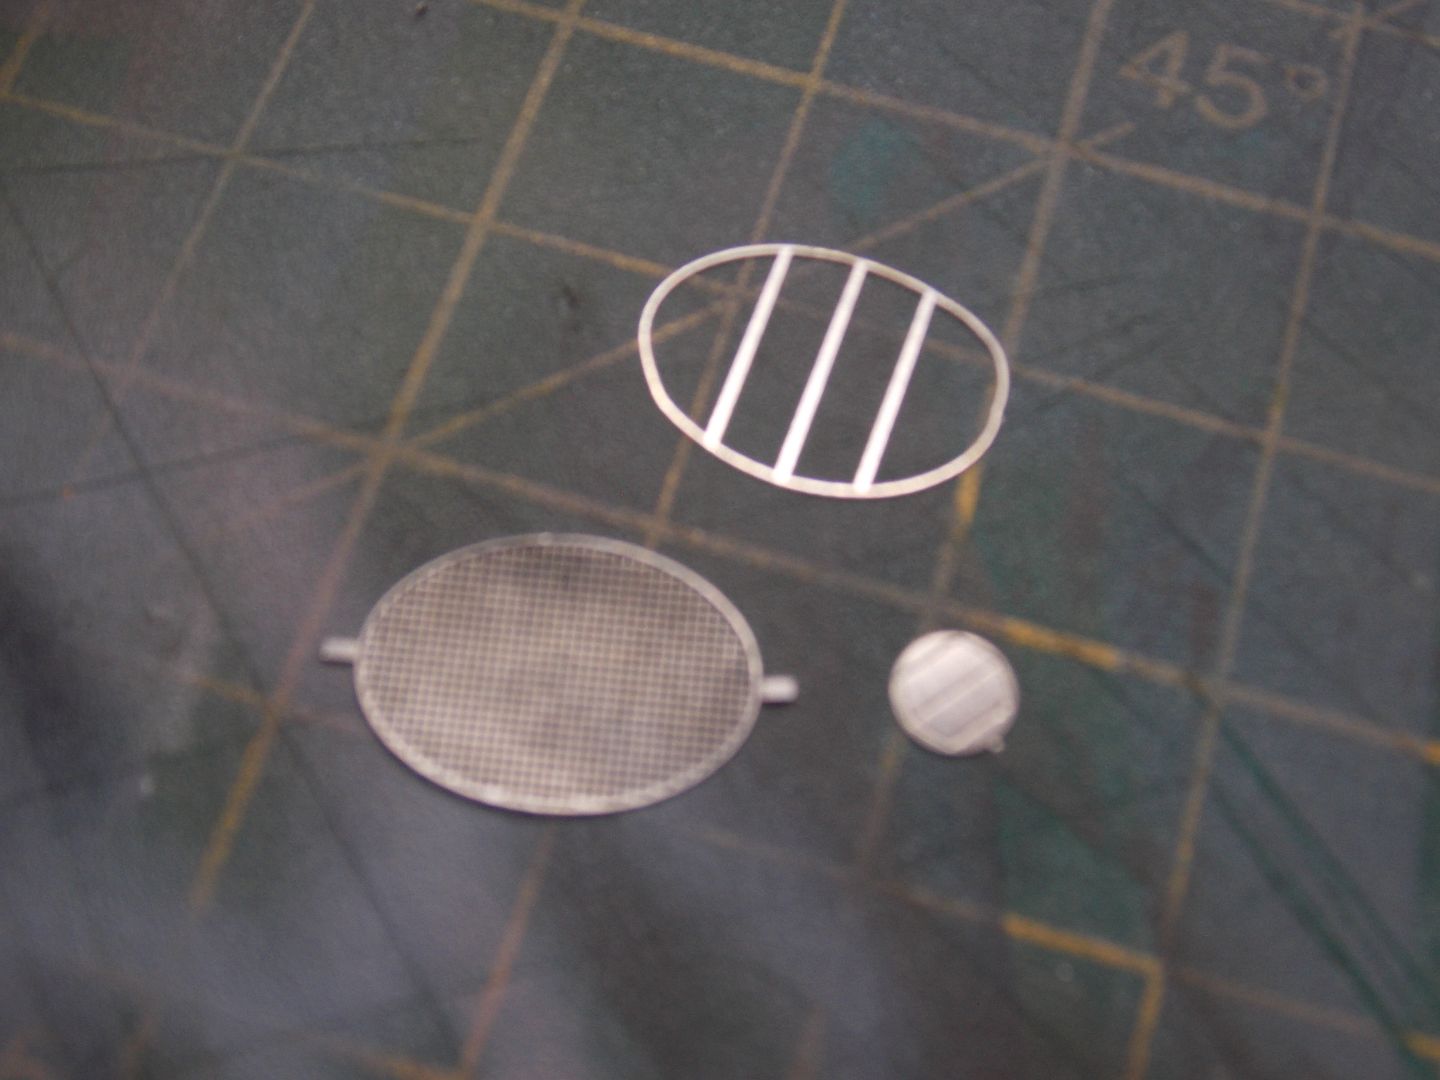
Apologies for the poor photo. This was glued together and primed then dry-brushed. There is some damage to the mesh as I managed to get it stuck to the sheet of glass I was using to glue the parts together and had to be carefully pried away with a sharp blade.
That's all I've got for now as the model has been given another coat of gloss and that will be left to dry overnight.
Re: Two Hawker Typhoons in 1/48 Hasegawa.
Posted: Fri Aug 26, 2016 6:12 pm
by Willem
Another update. "Is it that time already?" I hear you cry.
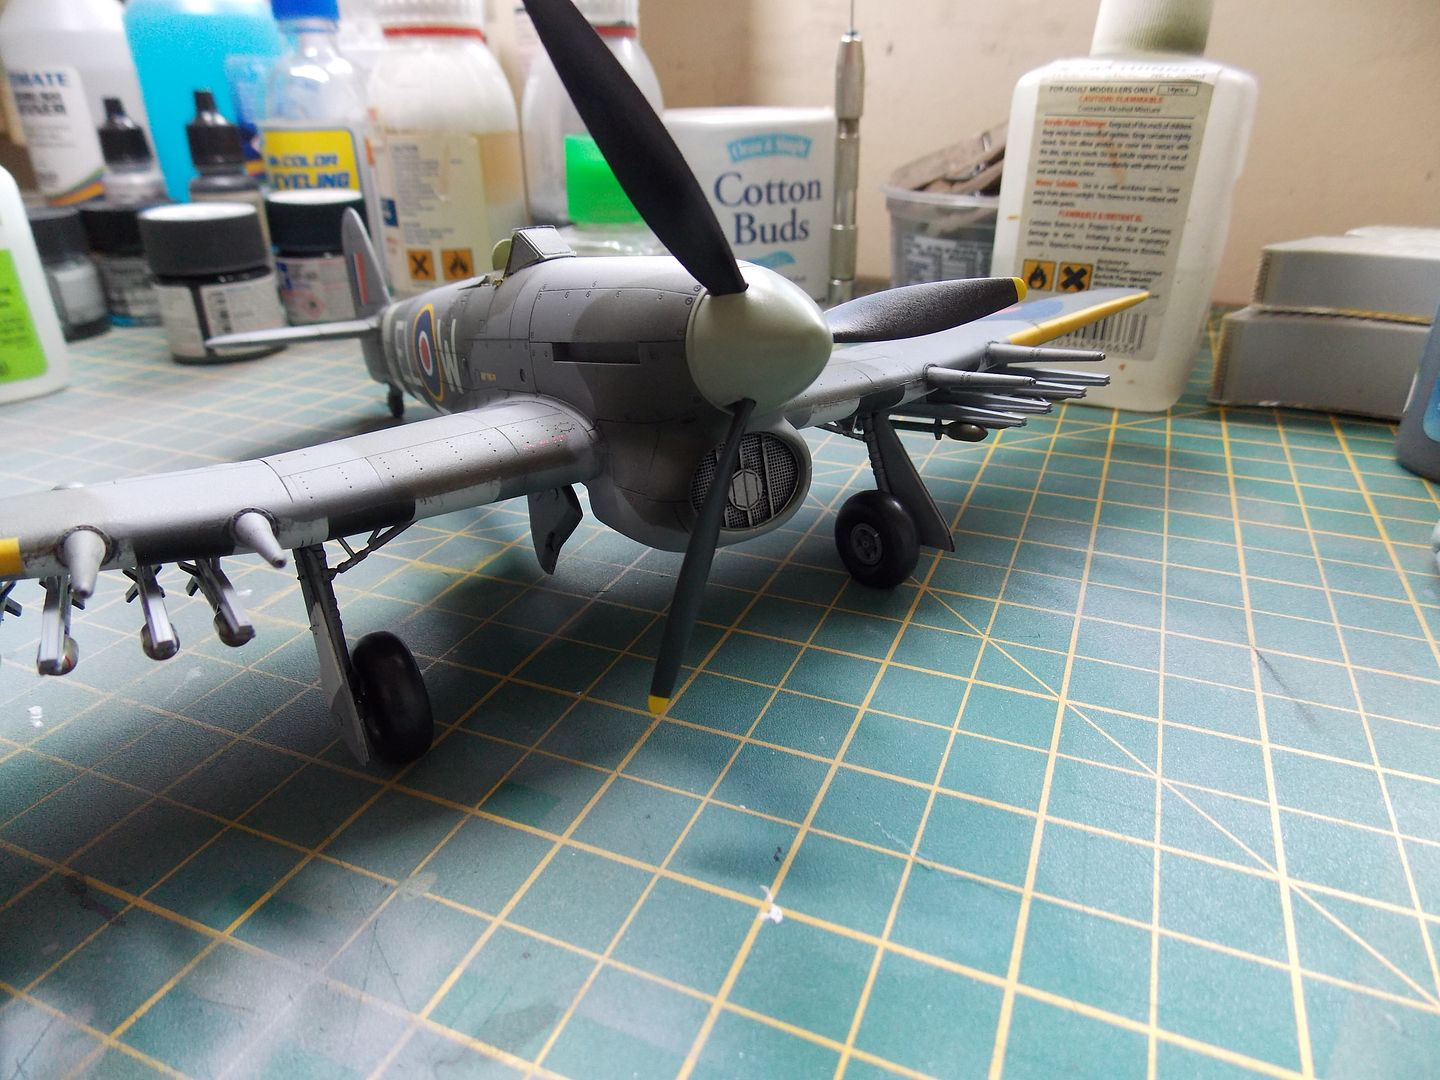
I decided to try some Mig enamel panel line washes and I was pretty pleased with the result. It took longer than an overall clay wash but I felt that I had a bit more control and the effect is a bit more subtle in my opinion. The model then received a couple of coats of Alclad flat.
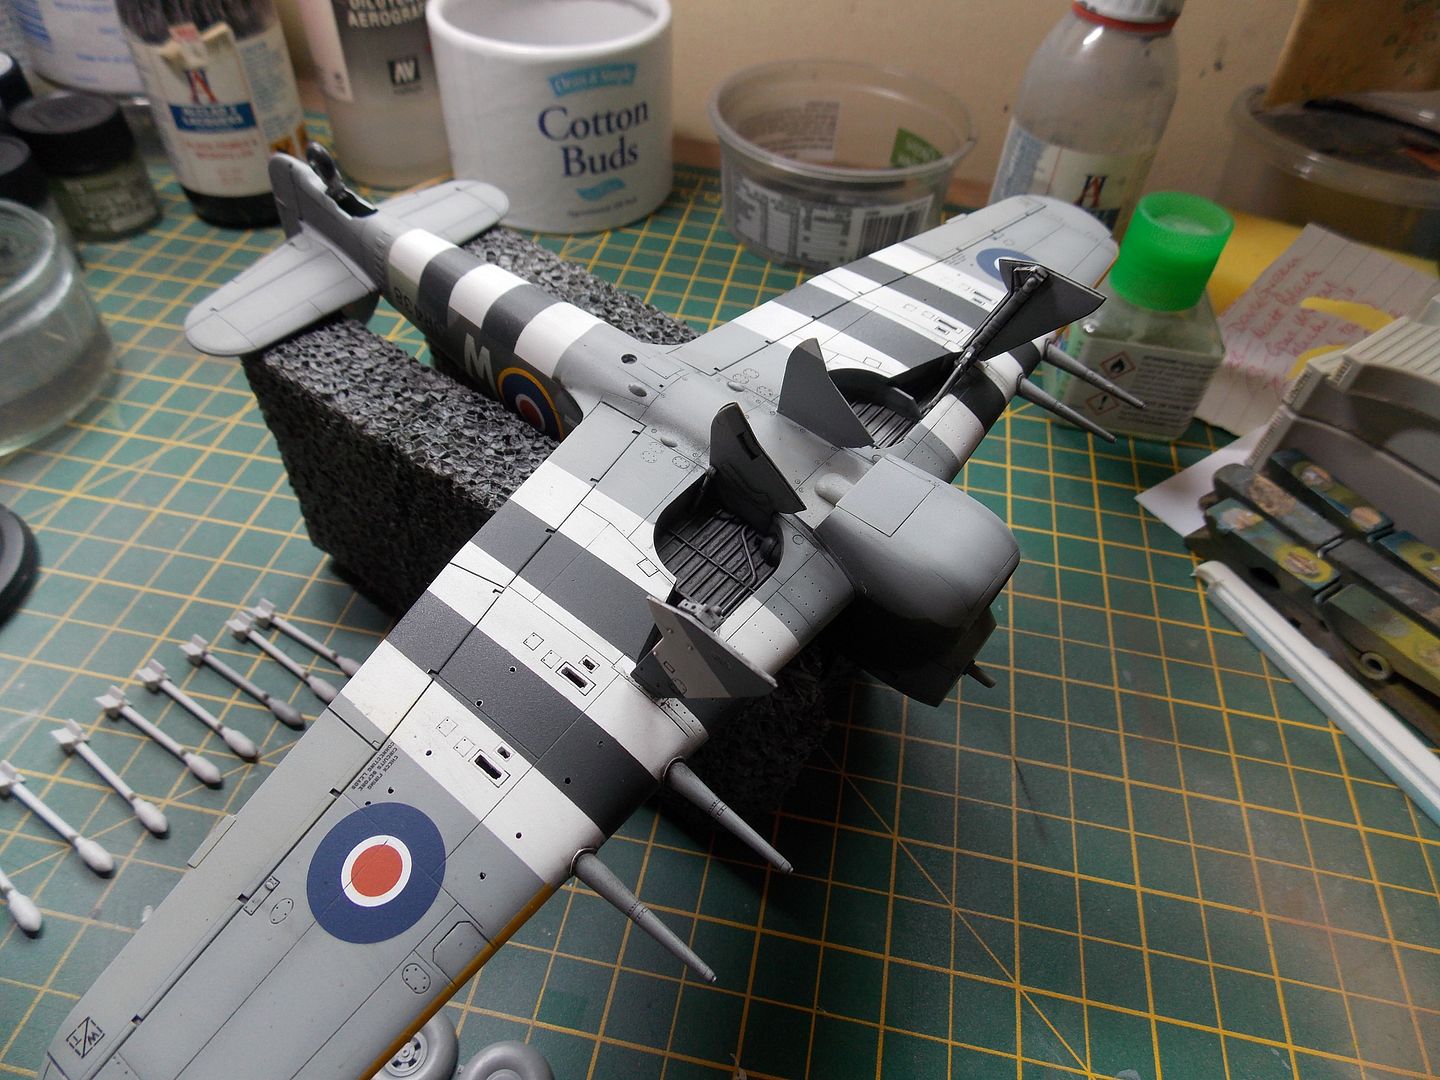
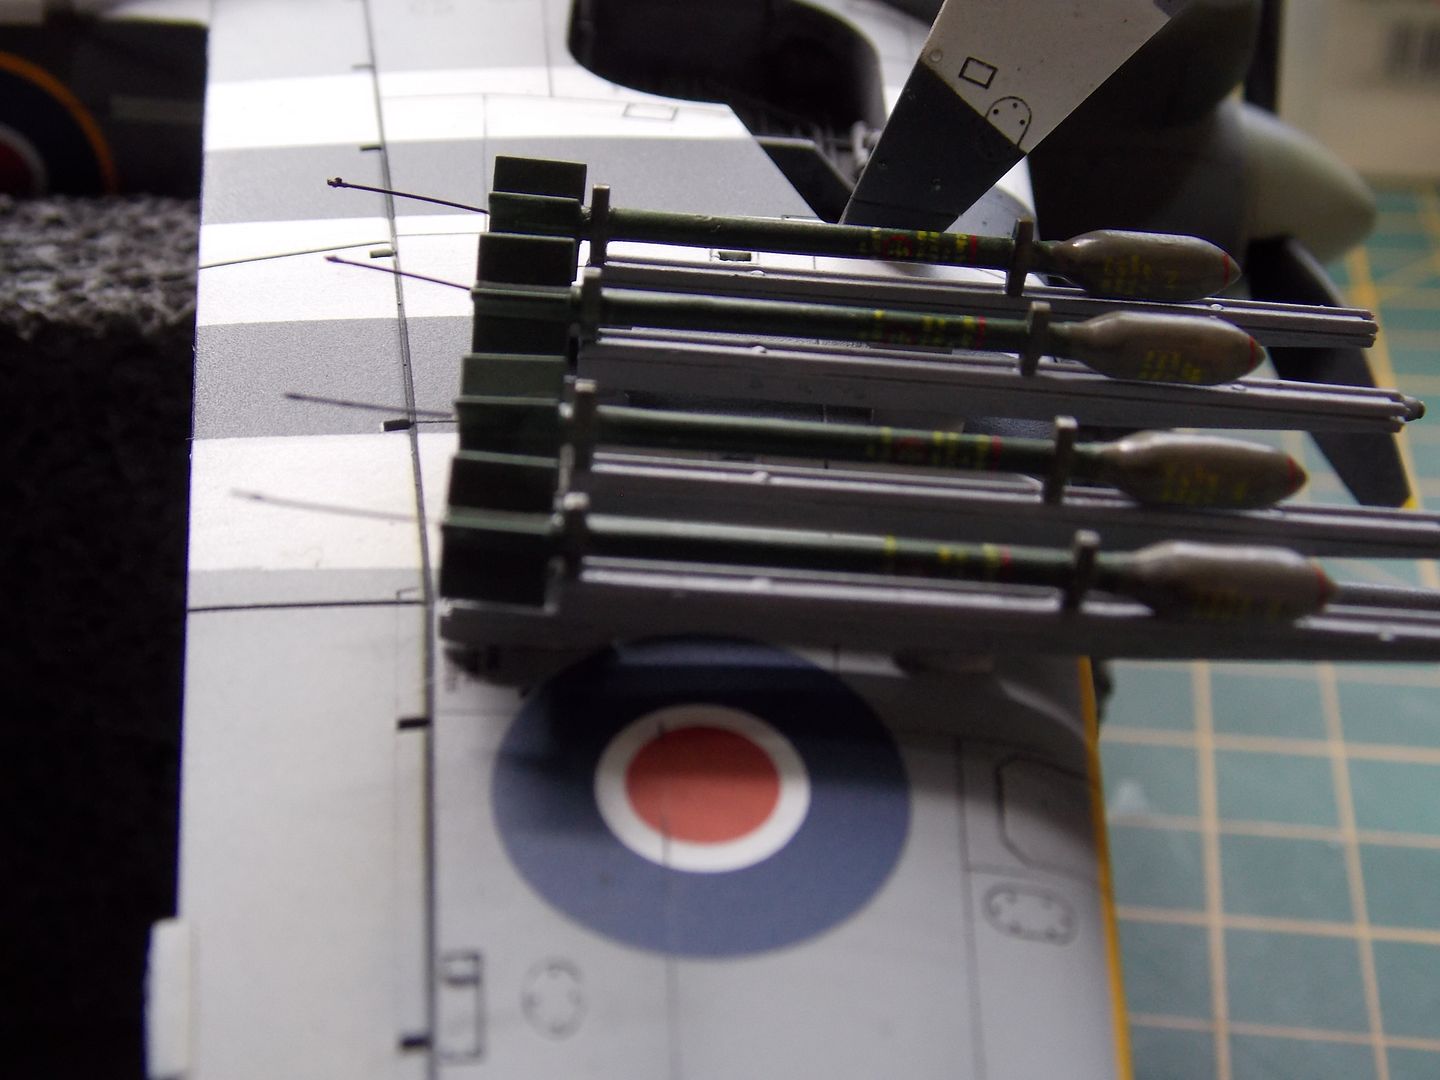
You can see the eight rockets assembled in the background. I had originally bought a resin rocket set from Aires but unfortunately the rails had warped a bit. These will go back into the spares box for use in the future. The set includes a sheet of decals and these fitted fine onto the kit rockets. there are plenty of options so the sheet can still be used in the future. Decalling took a good while but the decals were extremely easy to use given the size.
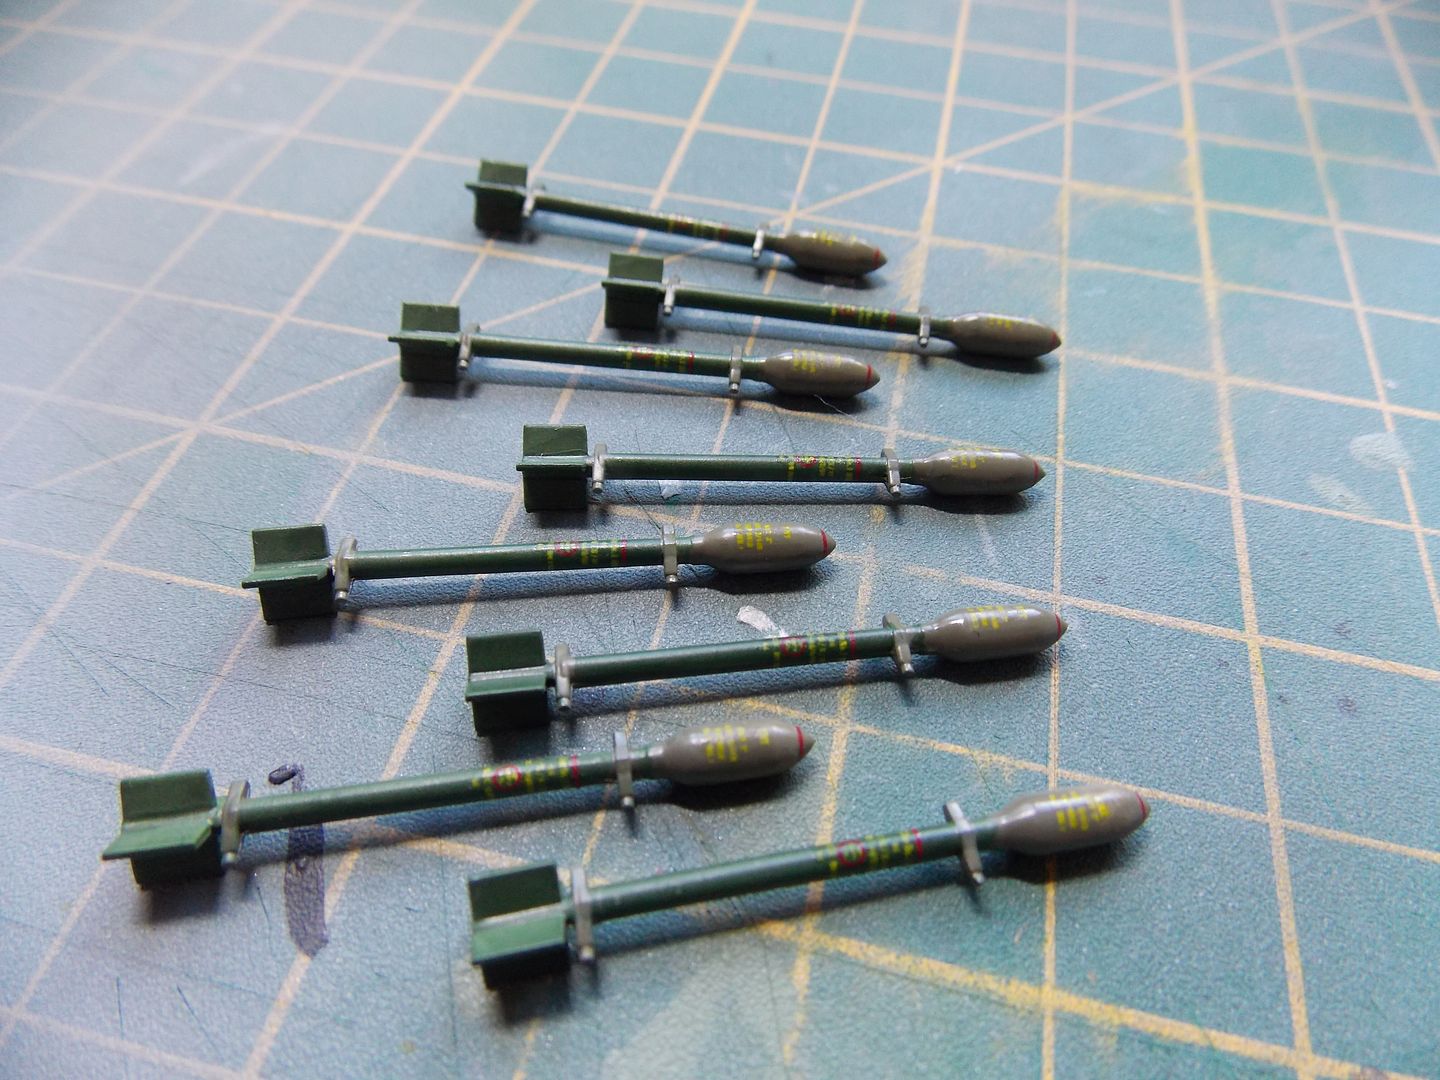
The tricky bit was fitting the ignition wires. I had already drilled holes in the back of each rocket and with some fine fishing wire, ca glue and a pair of tweezers I spent another happy few hours.
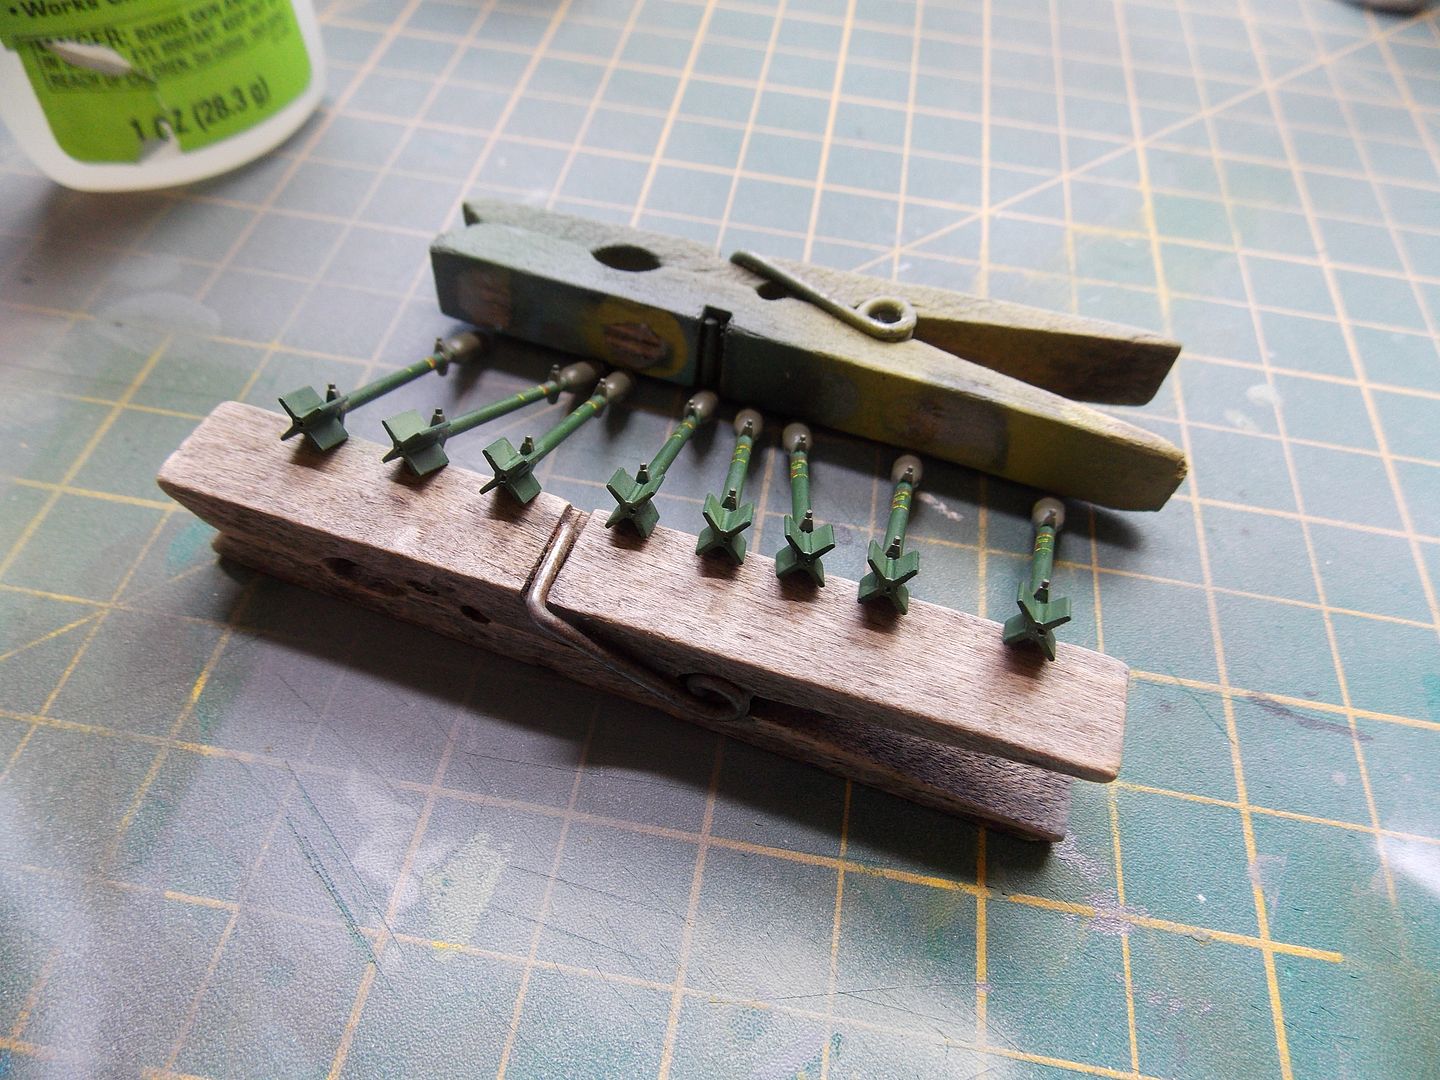
I used a drop of glue on the end of each wire to represent the plugs. The ignition wires were only plugged into the rails at an arming area just before flight to prevent any unpleasant surprises on the airfield. These were then painted black and the rockets were glued onto the rails.
They need a bit more of a realistic droop but I've already had to replace two so I'll see to that in a bit.
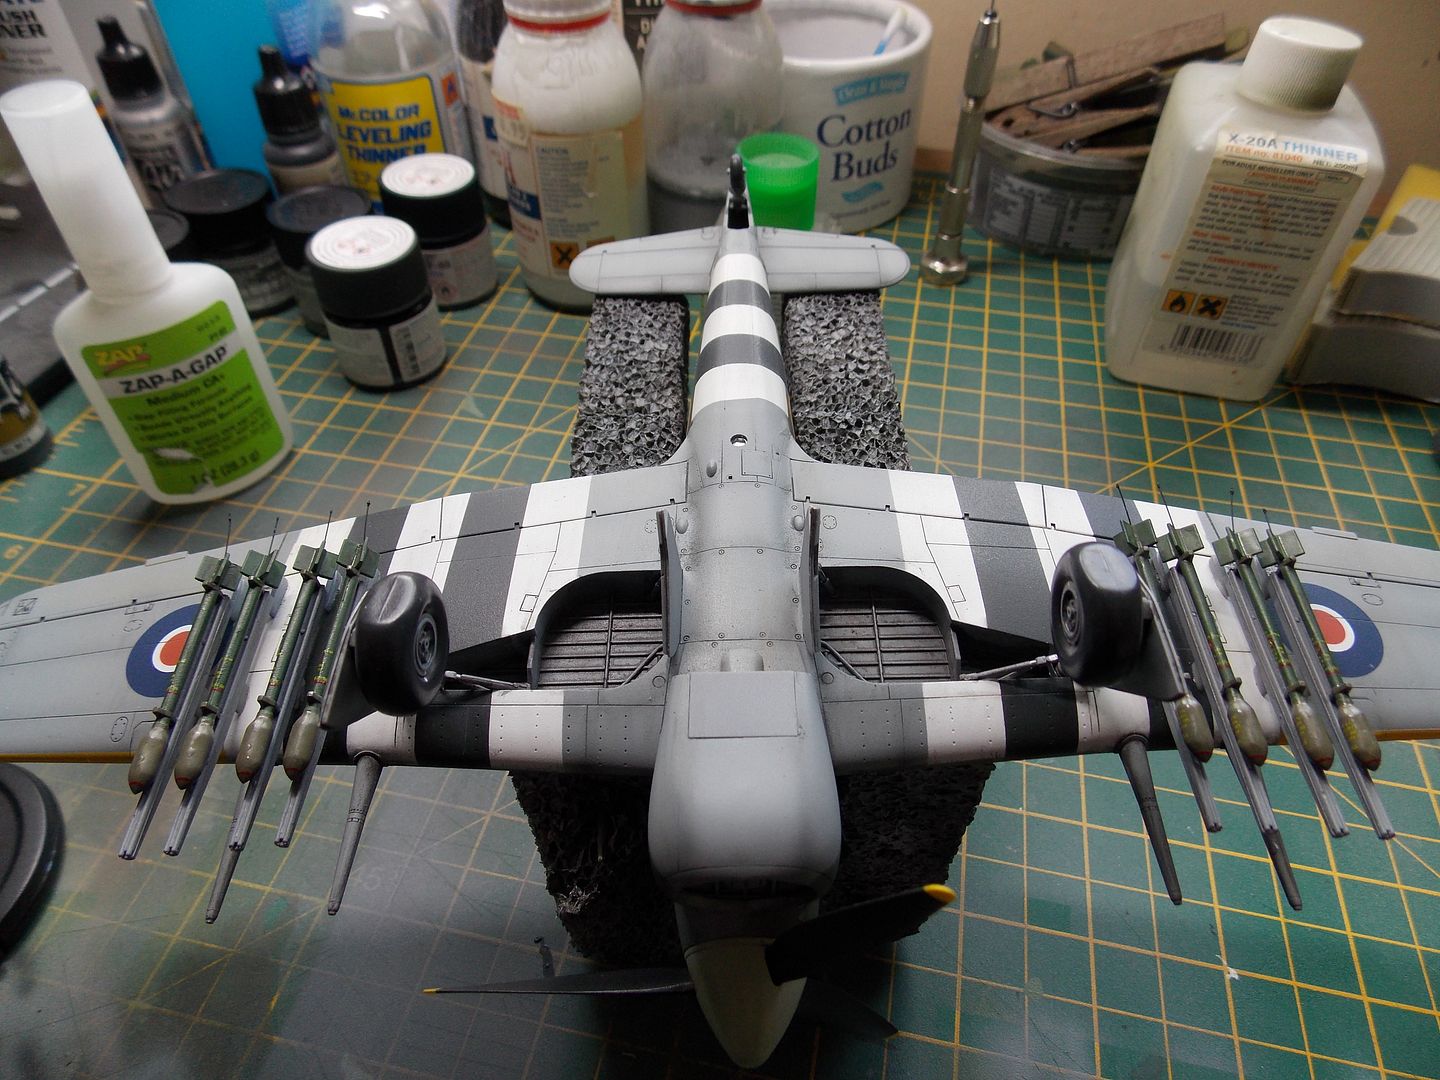
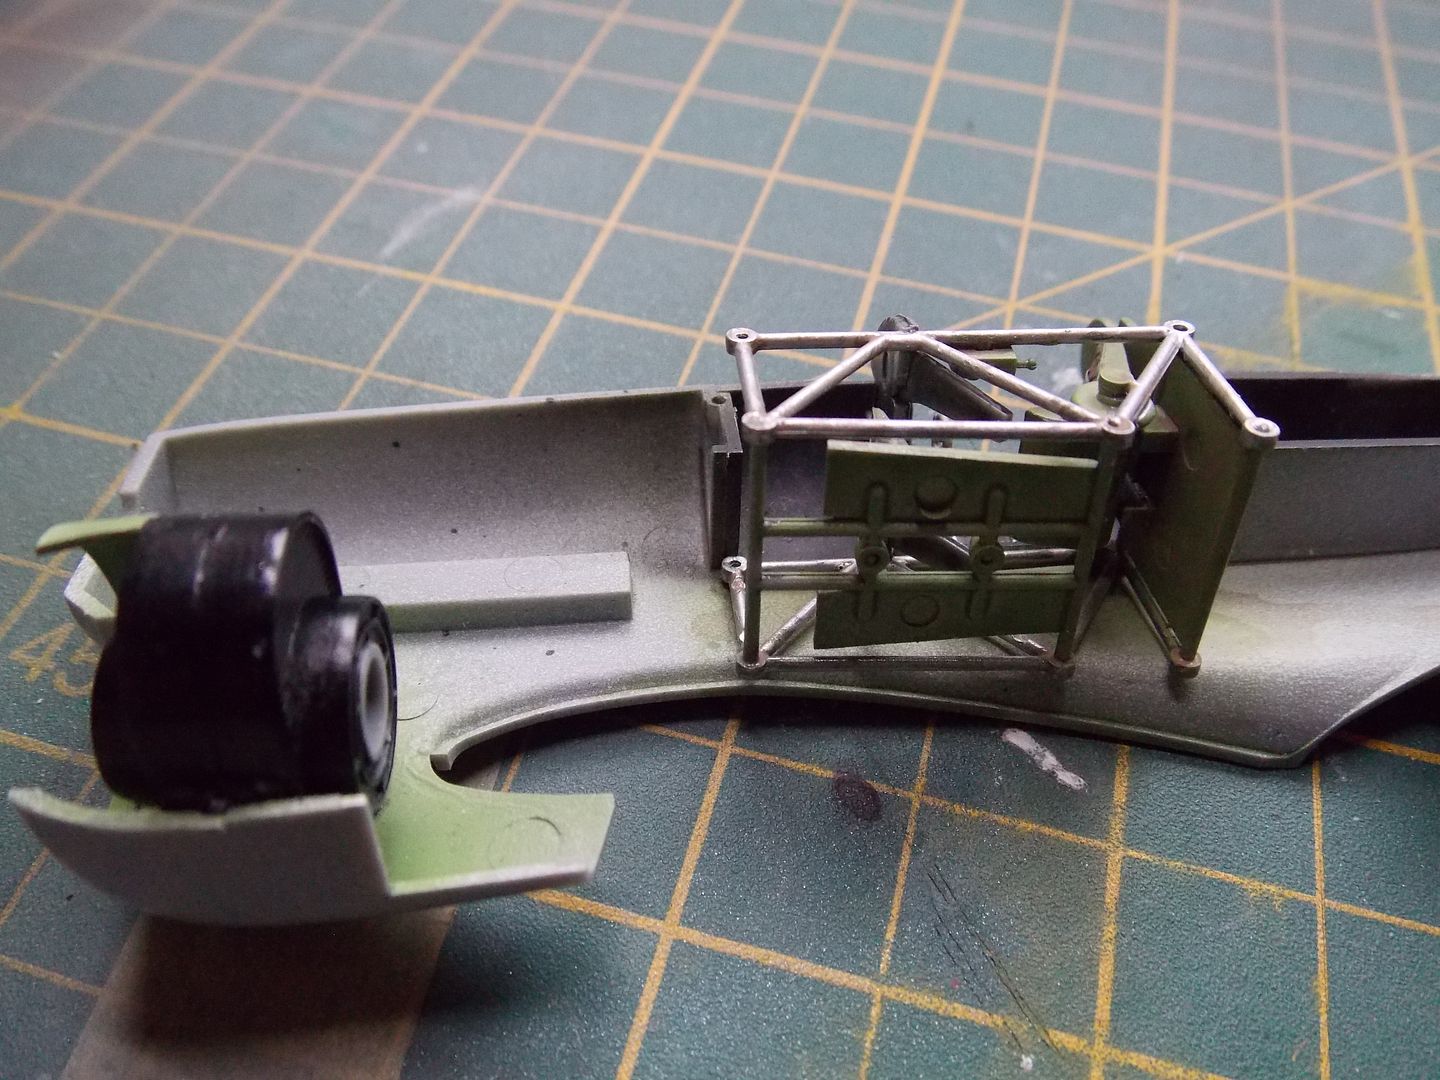
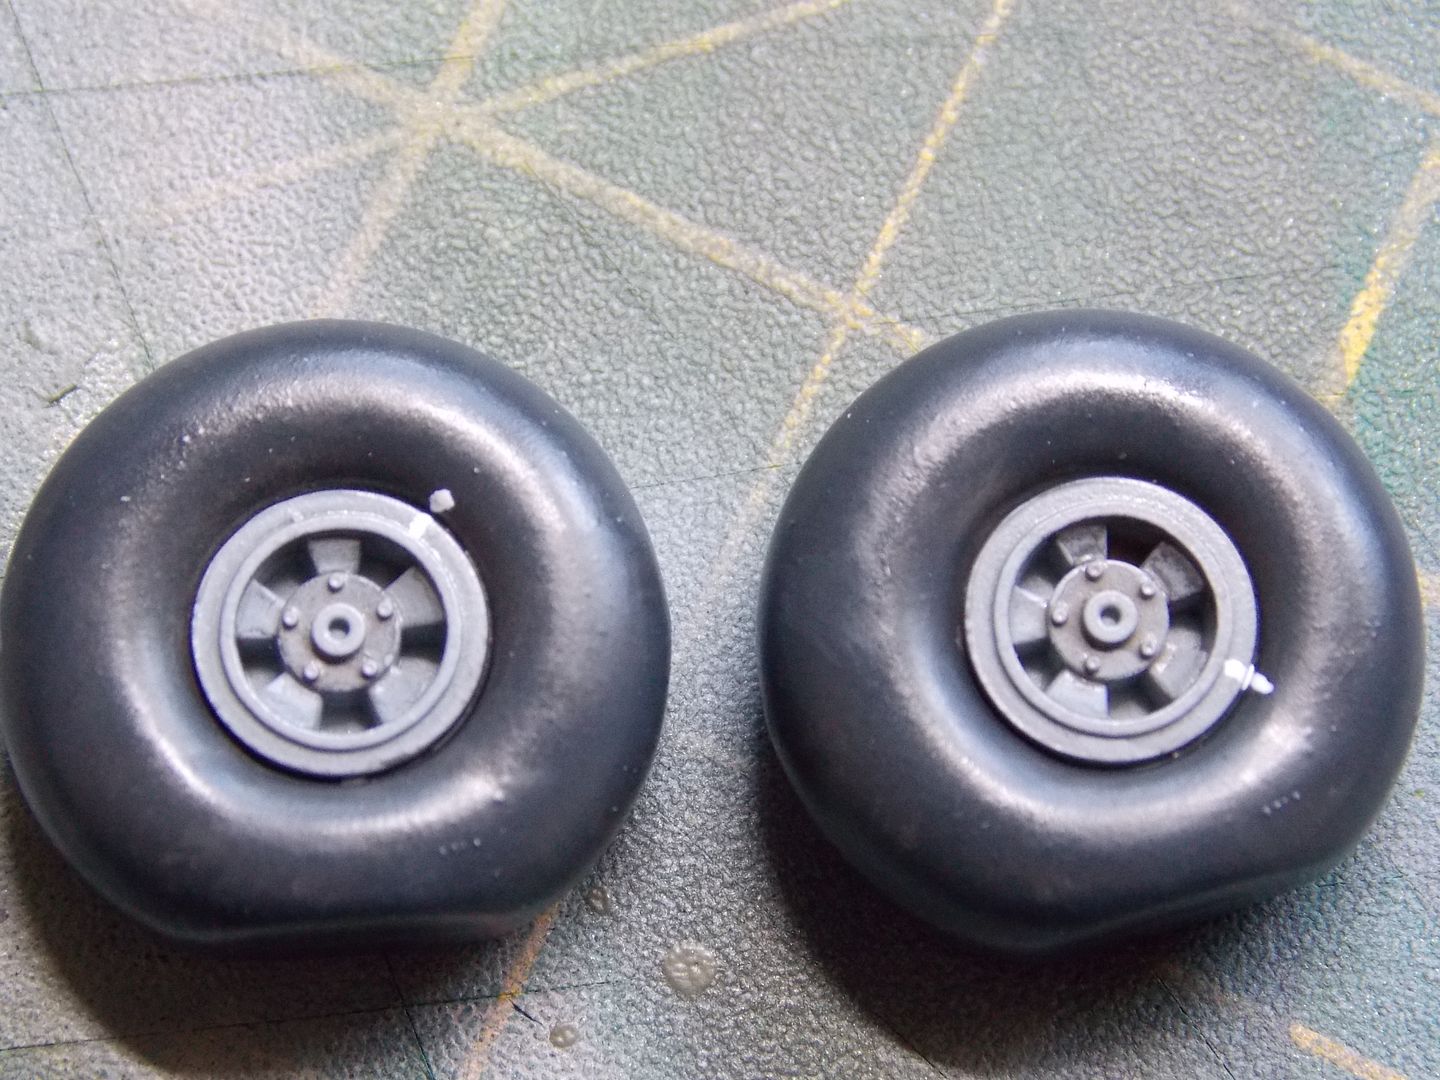
I think I've already mentioned that I had an old resin upgrade set but the resin wheels don't look any better than the kit ones so they'll go back in the spares box.
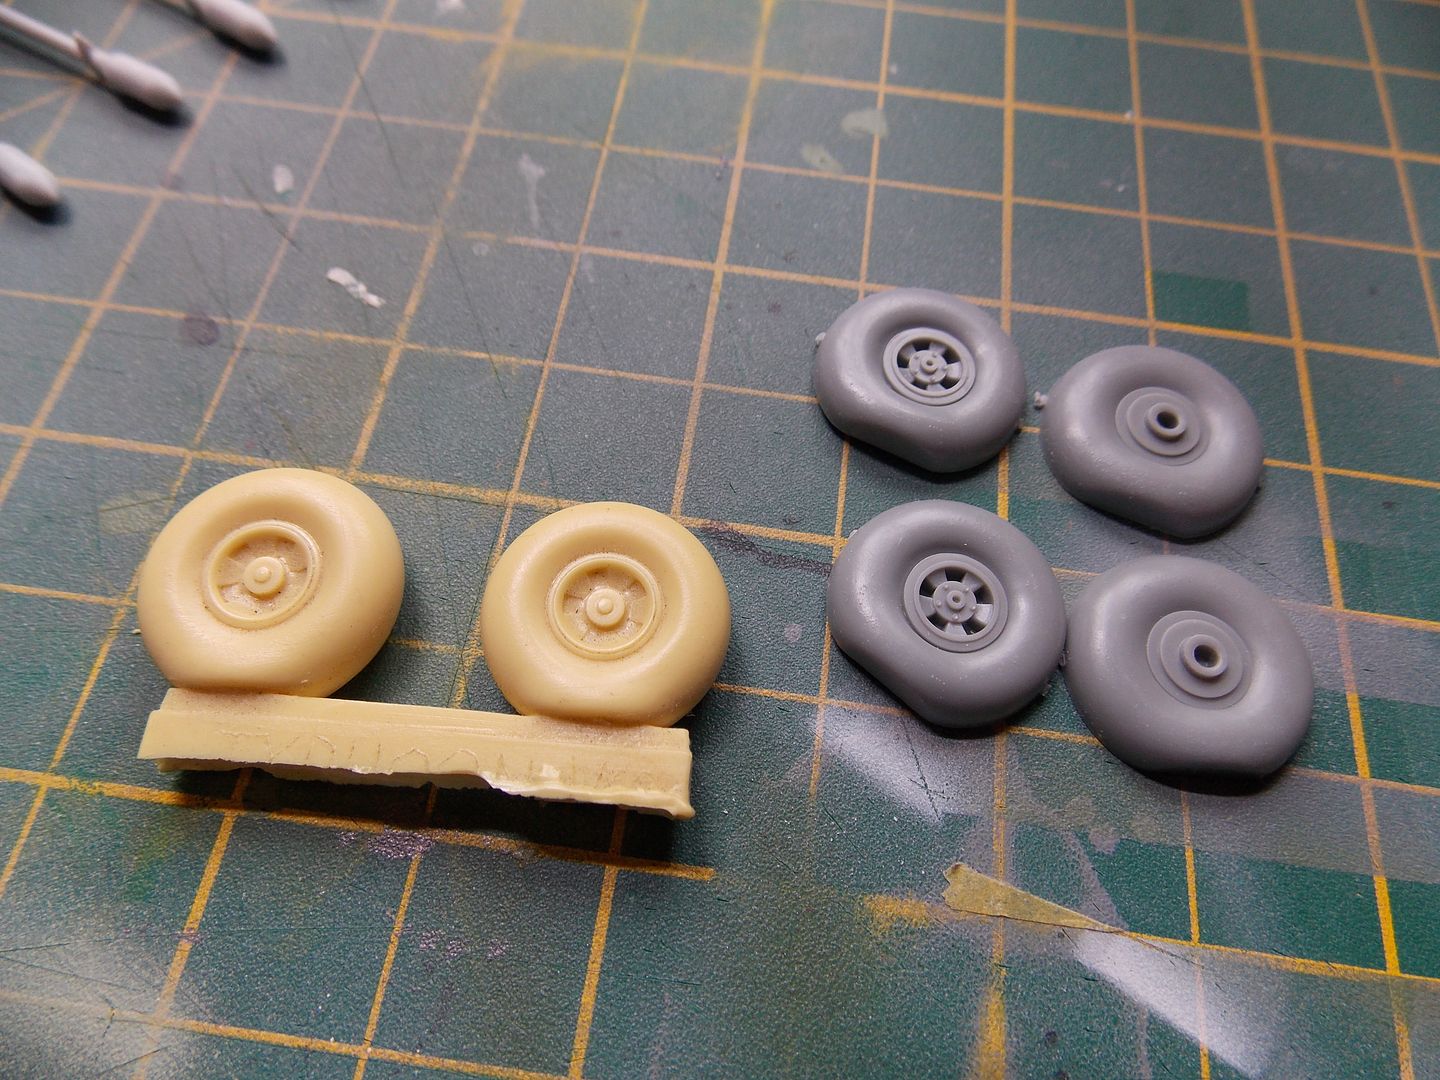
The wheels were painted up, glossed and given an oil wash. I've added a clumsy attempt at anti creep marks.
Wheels, prop and rockets will get a flat coat whilst fixed on the model. Here's where I'm at.
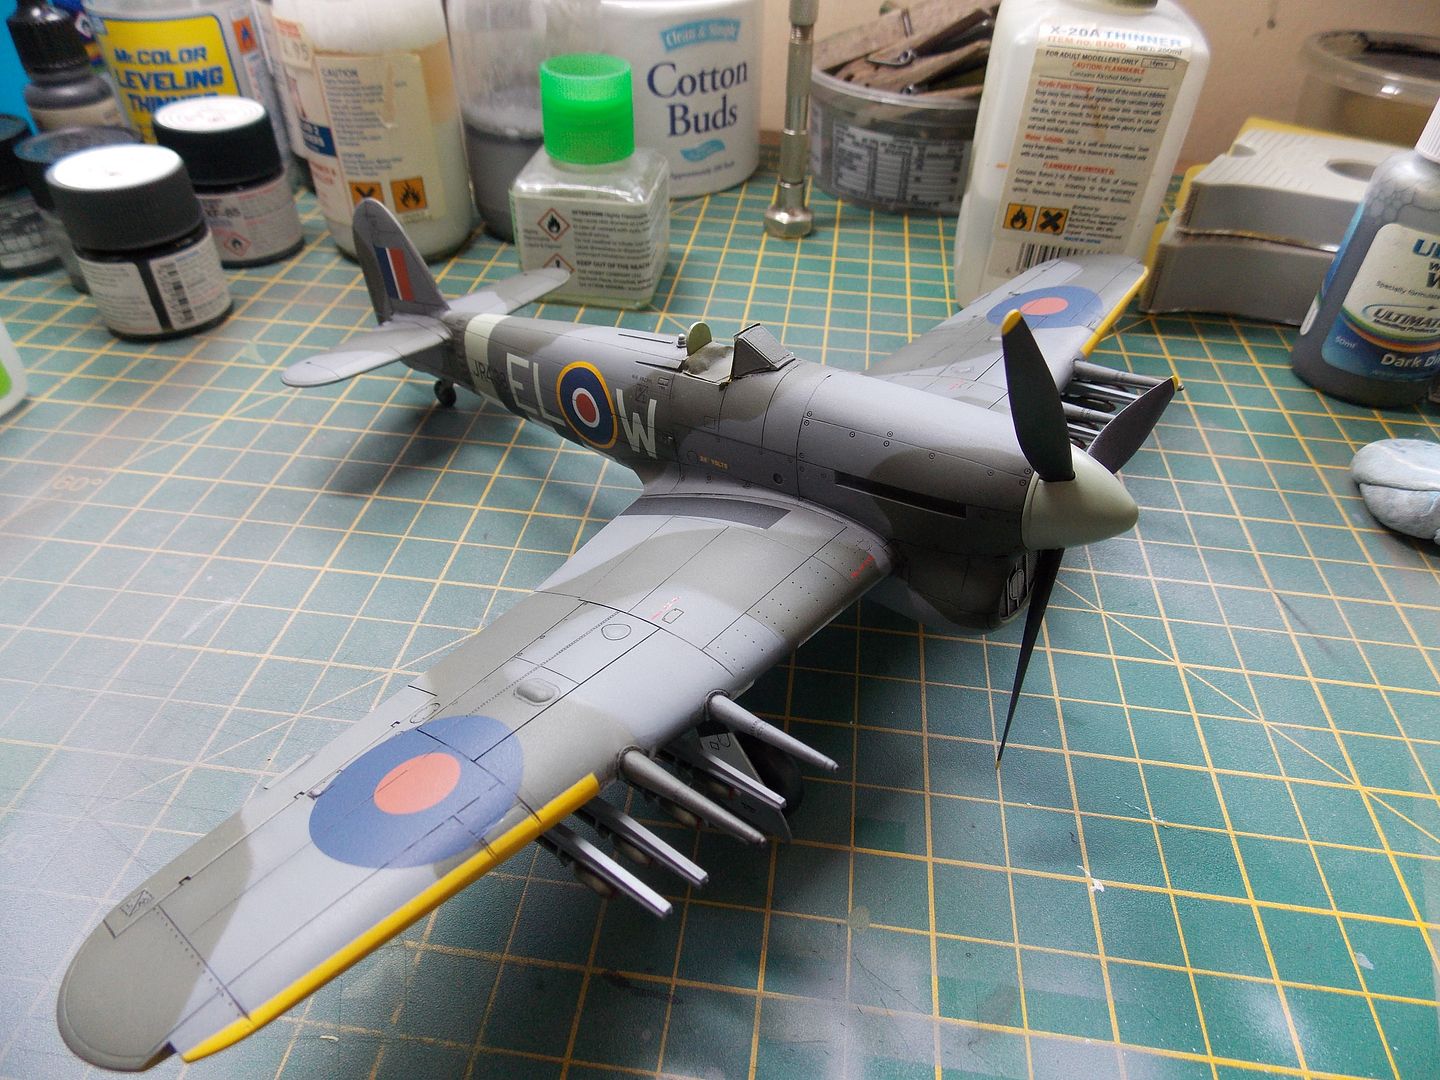
Not much left to do on this Typhoon........but I have some ideas for a base and I've just been paid. Oh dear.
Re: Two Hawker Typhoons in 1/48 Hasegawa.
Posted: Fri Aug 26, 2016 6:51 pm
by Twokidsnosleep
That is really superb, love the rocket details
Coming along very nicely indeed

Re: Two Hawker Typhoons in 1/48 Hasegawa. One down, one to go.
Posted: Fri Aug 26, 2016 7:22 pm
by Willem
Cheers Scott. Thanks for stopping by mate.
I was sat at the bench this morning totting up the months since I started this build.
I took my shoes and socks off but still came short.
Re: Two Hawker Typhoons in 1/48 Hasegawa.
Posted: Tue Aug 30, 2016 10:33 pm
by Willem
Re: Two Hawker Typhoons in 1/48 Hasegawa.
Posted: Tue Aug 30, 2016 11:13 pm
by Twokidsnosleep
I like it a lot

Super job and great rescue from the shelf of doom

Re: Two Hawker Typhoons in 1/48 Hasegawa.
Posted: Sat Nov 26, 2016 5:52 am
by burnie43
so there I was...building this kit and thinking that I should just stick to armour when I saw this post...
The gaps etc ....i thought that it was just me....
What a great post and a very nice build with an excellent paint job......I'm off to get stuck in again, thanks to you.
Superb
Thanks
Mark
Re: Two Hawker Typhoons in 1/48 Hasegawa.
Posted: Sat Nov 26, 2016 8:15 am
by Kevthemodeller
Great detail work mate looking forward to the final reveal

Re: Two Hawker Typhoons in 1/48 Hasegawa.
Posted: Mon Nov 28, 2016 6:53 am
by privatepete
Re: Two Hawker Typhoons in 1/48 Hasegawa.
Posted: Mon Nov 28, 2016 11:30 am
by Willem
Thanks lads.
Mark, really glad you're getting back on with yours mate.
I haven't got round to posting this in the gallery yet as I am thinking of a base with PSP matting and I've also got the car door version sitting around on a shelf somewhere. You can see the finished build in my portfolio and if I was IT savvy I'd attach a link here........
Unfortunately, I'm not.
Thanks again.
Re: Two Hawker Typhoons in 1/48 Hasegawa.
Posted: Mon Nov 28, 2016 8:47 pm
by HIghAltitudeScale
Very nice, you made that into a great example of a Scale Typhoon. Keep posting up your work it will help others succeed in the hobby
Re: Two Hawker Typhoons in 1/48 Hasegawa.
Posted: Wed Feb 15, 2017 4:57 pm
by Topcat
Superb, always loved the black and white under carriage markings.
Re: Two Hawker Typhoons in 1/48 Hasegawa.
Posted: Wed Feb 15, 2017 10:00 pm
by Mylightweight
A wonderful looking bird if I may say so, one of my favourite aircraft, I must get around to building one, one day

Re: Two Hawker Typhoons in 1/48 Hasegawa.
Posted: Fri Feb 17, 2017 1:30 am
by strawnobi
Nicely done! I really enjoyed reading through this. With all the models I've built over the years, I've never done a typhoon surprisingly. Outstanding work!! I was particularly impressed with your surface prep. Putty work seemed to go quite well for you (pun intended). All of that effort pays off in the end though. It's the simple things that catch a lot of modeler's off guard in a build. But a little putty and sand paper saves a lot of headaches down the road. Camo scheme is awesome!! All around top notch!!! love it!!


