Page 1 of 2
1/35 M4A3E8 Sherman Easy Eight
Posted: Fri Sep 02, 2016 8:29 pm
by TommyKillander
Hey Guys!
I bought this kit in the beginning of this year just for this GB, so I'm curious to start building it. I've read a couple of reviews and it seems like a very nice kit to build. The sprues look absolutely amazing with lots of detail and a beautiful cast texture

Boxart:
 20160902_205854
 by
Tommy Killander, on Flickr
Sprues and stuff:
 20160902_210358
 by
Tommy Killander, on Flickr
 20160902_210652
 by
Tommy Killander, on Flickr
 20160902_210847
 by
Tommy Killander, on Flickr
Note: the sprue in the center with the wheels are x2
Background info leaflet and Instruction Manual:
 20160902_211102
 by
Tommy Killander, on Flickr
Stay tuned for Background Information...

Tommy
Re: 1/35 M4A3E8 Sherman Easy Eight
Posted: Fri Sep 02, 2016 10:22 pm
by wavelet
Great kit indeed. I have it in my stash. Looking forward to your build.
Re: 1/35 M4A3E8 Sherman Easy Eight
Posted: Fri Sep 02, 2016 11:21 pm
by TommyKillander
wavelet wrote:Great kit indeed. I have it in my stash. Looking forward to your build.
Thanks buddy!
For the record: To deal with any uncertainty about the status of this kit I decided to add a picture of the running-gear sprues, just to confirm that they are both in untouched state. I missed one of them in my previous picture, so here goes...
 20160902_213843
 by
Tommy Killander, on Flickr
Now with that technicality out of the way, let's focus on the subject and the build...
Background
The M4 Sherman, officially Medium Tank, M4, was the most numerous battle tank used by the United States and some of the other Western Allies in World War II. The M4 Sherman proved to be reliable, relatively cheap to produce and available in great numbers. Thousands were distributed through the Lend-Lease program to the British Commonwealth and Soviet Union. The tank was named by the British for the American Civil War General William Tecumseh Sherman.
The M4 Sherman evolved from the interim M3 Medium Tank, which had its main armament in a side sponson mount. The M4 retained much of the previous mechanical design but put the main 75 mm gun in a fully traversing turret. One feature, a one-axis gyrostabilizer, was not precise enough to allow firing when moving but did help keep the reticle on target, so that when the tank did stop to fire, the gun would be aimed in roughly the right direction.
The designers stressed mechanical reliability, ease of production and maintenance, durability, standardization of parts and ammunition in a limited number of variants, and moderate size and weight. These factors, combined with the Sherman's then-superior armor and armament, outclassed German light and medium tanks of 1939–42. The M4 went on to be produced in large numbers. It spearheaded many offensives by the Western Allies after 1942.
The relative ease of production allowed huge numbers of the M4 to be manufactured, and significant investment in tank recovery and repair units allowed disabled vehicles to be repaired and returned to service. These factors combined to give the Americans numerical superiority in most battles, and many infantry divisions were provided with M4s and tank destroyers. A M4A3E8 variant was introduced, with improved suspension and a high-velocity 76 mm gun as used on the tank destroyers.

The complete designation of the tank variant is M4A3E8(76)W HVSS (Easy Eight) - Upgraded with widetrack Horizontal Volute Spring Suspension (HVSS), fitted with the 76mm High Velocity cannon and a Wet ammunition rack. The tank variant was nicknamed "Easy Eight" for two reasons; the designation E (for Experimental) and the HVSS suspension that gave the tankers a smooth ride.
Armament
The 3" (76.2 mm) high velocity gun where derived from the M10 Wolverine and gave the M4A3E8 a penetration of 88mm on 30 degree angled armour @ 914 meters range.
It also had a 7.62mm M1919A4 hull machine gun and a 12.7mm M2 machine gun mounted on top of the turret.
Specifications
Length: 7.54 m
Width: 2.99 m
Height: 2.97 m
Weight (fully loaded): 33.6 tons
Crew: 5
Engine: Ford GAA 4-stroke V8 gasoline engine (500 hp)
Max speed: 41.8 km/h
Range: 161 km
Tommy
Re: 1/35 M4A3E8 Sherman Easy Eight
Posted: Sun Sep 04, 2016 2:26 am
by Navcom
Nice choice! Probably the best AFV kit Tamiya makes. Just did this one a couple months back and it was a joy. Looking forward to seeing what you do with it! Get ready to have some fun!
Re: 1/35 M4A3E8 Sherman Easy Eight
Posted: Sun Sep 04, 2016 9:21 am
by TommyKillander
Navcom wrote:Nice choice! Probably the best AFV kit Tamiya makes. Just did this one a couple months back and it was a joy. Looking forward to seeing what you do with it! Get ready to have some fun!
Thanks Jeff!

I think this will be a very relaxed build - that's the whole point with this GB, I guess. OOB, no extras, just enjoy building a kit that goes together really well.
Tommy
Re: 1/35 M4A3E8 Sherman Easy Eight
Posted: Wed Sep 07, 2016 4:53 am
by ladip63
Nice tank Tommy. I want to build my first tank, people said Tamiya so I'm glad you are doing the Sherman. That is the one I want to get. So I'll be following very closely to your build.

Re: 1/35 M4A3E8 Sherman Easy Eight
Posted: Wed Sep 07, 2016 5:00 am
by DarksideHobbies
Looks like a fun one! Enjoy!
Re: 1/35 M4A3E8 Sherman Easy Eight
Posted: Wed Sep 07, 2016 8:15 pm
by TommyKillander
ladip63 wrote:Nice tank Tommy. I want to build my first tank, people said Tamiya so I'm glad you are doing the Sherman. That is the one I want to get. So I'll be following very closely to your build.
Thanks! I hope I can make the kit justice.
DarksideHobbies wrote:Looks like a fun one! Enjoy!
Thank you, sofar this kit have been a real pleasure to work with!
Okey... I've been fully busy with work and family stuff for a couple of days and I have really been itching to start the build. But I got home from work early today so I could spend an hour at the bench. I spent most of the weekend at the Art In Miniature model show in Gothenburg, where I had 7 models in the competition. It was the National Championship so there where lots of really great looking models and I really got inspired
I must say that I really love Tamiya kits; they are engineered to make the build painless. For example look where they have placed the ejection pins - they will be covered by the transmission-housing or will be covered by the fenders and the running gear.
Most manufacturers would place the pins centered on the part, which means that they would end up in between the return rollers - where they would be visible and a pain to get rid of.
 20160907_184641
 by
Tommy Killander, on Flickr
Another example why I love Tamiya is that they try to make it possible to glue from the inside, which makes it easy to avoid smearing glue and mess up the external surfaces.
 20160907_185117
 by
Tommy Killander, on Flickr
Todays work; steps 1 and 2 completed on the lower hull
 20160907_204633
 by
Tommy Killander, on Flickr
Cheers
Tommy
Re: 1/35 M4A3E8 Sherman Easy Eight
Posted: Wed Sep 07, 2016 9:23 pm
by OliveDrab
Whoo Hoo, This one will be fun to follow!

Re: 1/35 M4A3E8 Sherman Easy Eight
Posted: Sat Sep 10, 2016 10:51 pm
by TommyKillander
OliveDrab wrote:Whoo Hoo, This one will be fun to follow!
Thanks buddy, you are most welcome !
Short update, I had some time earlier today to build while watching the "At the Bench" stream.
What can I say; the details and surfaces are fantastic on this kit.
 20160910_213541
 by
Tommy Killander, on Flickr
...and the fit makes it feel almost like cheating

 20160910_222218
 by
Tommy Killander, on Flickr
Tommy
Re: 1/35 M4A3E8 Sherman Easy Eight
Posted: Sun Sep 11, 2016 9:34 pm
by TommyKillander
I had the opportunity to spend some quality-time with this kit earlier today:
 20160911_115850
 by
Tommy Killander, on Flickr
There is a small gap between the transmission housing and the "row of bolts" that meets the upper hull; I would like to preserve the crisp details, so I will not simply drench the parts in TET
I will fix that later when I start working on the upper hull.
 20160911_202213
 by
Tommy Killander, on Flickr
The rear of the tank has a workable deflector, which is a cool detail.
I will paint and weather the exhaustpipes separately and I hope that I can fit them later on after the tank have been painted.
 20160911_202226
 by
Tommy Killander, on Flickr
Next up are the wheels and HVSS bogies. I will paint and weather those parts separately of course...
Tommy
Re: 1/35 M4A3E8 Sherman Easy Eight
Posted: Sun Sep 11, 2016 11:34 pm
by demarcation
I built it last year and it's a fantastic kit!! Looking forward to follow your build!

Re: 1/35 M4A3E8 Sherman Easy Eight
Posted: Thu Sep 15, 2016 8:07 pm
by TommyKillander
demarcation wrote:I built it last year and it's a fantastic kit!! Looking forward to follow your build!
Awesome! Yeah it's a really nice kit.
Today I started on the different wheels and got most of them done.
...except for the roadwheels - 24 of them in total, placed into 6 bogies

 20160915_195635
 by
Tommy Killander, on Flickr
All of them had a lot of moulding artefacts (flash and sinkmarks) so they had to be sanded into the right shape one by one
 20160915_200122
 by
Tommy Killander, on Flickr
More than half of the running gear done - only 18 road-wheels left. I had to stop for today.
 20160915_204857
 by
Tommy Killander, on Flickr
Atleast the build is progressing, I hope I get some more time this weekend at the bench

Tommy
Re: 1/35 M4A3E8 Sherman Easy Eight
Posted: Tue Sep 20, 2016 8:27 pm
by TommyKillander
Hey Guys!
The build is progressing, perhaps a bit slow, but it's moving forward.
I got some benchtime yesterday and completed the wheels.
Tamiya has left a quite big offset between the wheel-halfes, luckily there ar quite a lot material to work with, so it's possible to fix it without any filler.
 20160919_203657
 by
Tommy Killander, on Flickr
The injection port and marks can be sanded using a coarse sander, I found my CMK sander with a semiflexable core to be perfect for this. Then it's time to use UMPs soft grey sander to remove the transverse marks and finally Ultimate buffing stick to finalise the surface treatment.
 20160919_213337
 by
Tommy Killander, on Flickr
All wheels completed and put on sticks ready for primer.
Tommy
Re: 1/35 M4A3E8 Sherman Easy Eight
Posted: Thu Sep 22, 2016 7:22 pm
by TommyKillander
More stuff done with tha running gear:
The bogies and the suspension is made up of four details. The dampers are hollow on one side to reduce the risk of sinkmarks, since a massive lump of plastic like that will shrink when it cools down in the tooling.
I'm not super-impressed with this solution - but I guess at the end of the day it won't be seen unless you really know what to look for

 20160922_135539
 by
Tommy Killander, on Flickr
But the details looks awesome - no doubt about that.
 20160922_135612
 by
Tommy Killander, on Flickr
 20160922_184152
 by
Tommy Killander, on Flickr
Tommy
Re: 1/35 M4A3E8 Sherman Easy Eight
Posted: Fri Sep 23, 2016 9:04 pm
by patrickroos
Very nice looking kit...great work so far!
Re: 1/35 M4A3E8 Sherman Easy Eight
Posted: Fri Sep 23, 2016 9:41 pm
by privatepete
Hi Tommy this is a great kit to build,built it at the beginning of the year good luck, great start.
Re: 1/35 M4A3E8 Sherman Easy Eight
Posted: Sat Sep 24, 2016 8:03 am
by TommyKillander
patrickroos wrote:Very nice looking kit...great work so far!
Thanks buddy!
privatepete wrote:Hi Tommy this is a great kit to build,built it at the beginning of the year good luck, great start.
Thank you privatepete!
I bought this kit in the beginning of this year and my first thought about it when I opened the box in the store to check the sprues was; "I'm gonna buy this kit and build it in the Tamiya GB".
Okey... done some work on the upper hull aswell:
Wonderful cast texture with some embossed markings
 20160923_103741
 by
Tommy Killander, on Flickr
Assembly of the sideskirts
 20160923_112434
 by
Tommy Killander, on Flickr
Drilled a couple of holes for transport-lugs on the front sides
 20160923_114455
 by
Tommy Killander, on Flickr
Added the gun barrel travel lock, engine deck, sideskirts and driver and co-driver hatches
 20160923_155631
 by
Tommy Killander, on Flickr
Tommy
Re: 1/35 M4A3E8 Sherman Easy Eight
Posted: Sun Sep 25, 2016 5:47 pm
by TommyKillander
What's wrong with this picture ?
 20160925_174256
 by
Tommy Killander, on Flickr

The engine deck is glued in the wrong way!


This build has apparently been too comfortable sofar, that I had fallen asleep completely when reading the instructions

So... how to fix this
I tried to bend at the seams and one side came loose, but the rest was set like a rock...
Tamiya Extra Thin came to the rescue - I used the capillary properties to dissolve the plastic in the joint by applying some TET and with a firm grip bend the plastic apart while the glue finds it way in the seam that are opening up. There's no turning back once started, so I was quite nervous doing this...

 20160925_175007
 by
Tommy Killander, on Flickr
Phew... it's OK start breathing now and turn on the heartbeat again...
The parts needs to dry up before I start cleaning it up, so I will leave them for a day or two. A quick check and the outer sides and edges seems OK, so I should be able to fix this without any visible flaws on the outside.
Meanwhile in Mickey Mouse-land we move over to something else - let's glue together stuff that can't be assembled the wrong way

 20160925_164627
 by
Tommy Killander, on Flickr
Tommy
Re: 1/35 M4A3E8 Sherman Easy Eight
Posted: Sun Sep 25, 2016 6:04 pm
by privatepete
Hi Tommy l think you owe the TET god a big thank you.You are a lucky boy spotting it in the first place, and never say can't be assembled the wrong way, there always back to front and upside down
good luck with the rest of the build
Pete.
Re: 1/35 M4A3E8 Sherman Easy Eight
Posted: Sun Sep 25, 2016 7:20 pm
by TommyKillander
privatepete wrote:Hi Tommy l think you owe the TET god a big thank you.You are a lucky boy spotting it in the first place, and never say can't be assembled the wrong way, there always back to front and upside down
good luck with the rest of the build
Pete.
Thanks Pete!
Yeah, from now on I'll pay more attention to the instructions, promise

Tommy
Re: 1/35 M4A3E8 Sherman Easy Eight
Posted: Sun Sep 25, 2016 8:13 pm
by patrickroos
Re: 1/35 M4A3E8 Sherman Easy Eight
Posted: Sun Sep 25, 2016 8:25 pm
by TommyKillander
Thanks Patrick
- Yeah, that was a close one...
TET = Tamiya Extra Thin
Tommy
Re: 1/35 M4A3E8 Sherman Easy Eight
Posted: Sun Sep 25, 2016 8:32 pm
by patrickroos
Ah...ok
Well If You don't ask You don't...
Re: 1/35 M4A3E8 Sherman Easy Eight
Posted: Tue Sep 27, 2016 10:03 pm
by papatika
Wow! Do you know these cooking shows on TV? You watch them and want to cook / eat it right away.
I have now the same feeling. I want to build this kit! Maybe by replacing the tracks...
As much I know, it is a retooled kit, based on an Italeri one. I, hmm..., dislike Italeri tracks, they are just too stiff for my taste. But I also red it somewhere, that Taminya uses a more softer material for those old Italeri kits. What do you think? How they feel?
Re: 1/35 M4A3E8 Sherman Easy Eight
Posted: Fri Sep 30, 2016 7:42 pm
by TommyKillander
papatika wrote:Wow! Do you know these cooking shows on TV? You watch them and want to cook / eat it right away.
I have now the same feeling. I want to build this kit! Maybe by replacing the tracks...
As much I know, it is a retooled kit, based on an Italeri one. I, hmm..., dislike Italeri tracks, they are just too stiff for my taste. But I also red it somewhere, that Taminya uses a more softer material for those old Italeri kits. What do you think? How they feel?
Thanks papatika !
I know that feeling - it's the "Tamiya-feeling"
I'm sure that this is more or less a new tooled kit, atleast according to Tamiyas marketing and scalemates:
https://www.scalemates.com/kits/959297- ... easy-eight
I also checked the sprues and they seem to be from 2015:
 20160930_202359
 by
Tommy Killander, on Flickr
The tracks are OK, not detailed or pliable like Dragon DS-tracks, but they are OK compared to many other kits I have seen.
OK.. build is progressing; I have also cleaned up and glued the engine deck the right position:
 20160928_194035
 by
Tommy Killander, on Flickr
There are a couple of tiny marks on the side of the hull where it meets the deck, but I'm happy with the result anyway - things could have ended up much worse than this.
Tommy
Re: 1/35 M4A3E8 Sherman Easy Eight
Posted: Sat Oct 01, 2016 8:26 pm
by TommyKillander
Hey Guys,
I've been working with detail-parts on the upper hull today. There are one a couple of more bits left to fit on the hull, but I will stop for tonight.
 20161001_211539
 by
Tommy Killander, on Flickr
Instead it's time for some beer - cheers guys!
Tommy
Re: 1/35 M4A3E8 Sherman Easy Eight
Posted: Sun Oct 02, 2016 7:46 pm
by TommyKillander
Hey guys!
Got some more work done on the upper hull today.
Some Tamiya X-11 in the lamphousings of the headlights and fitted the glass and glued it with CA-glue.
 20161002_184411
 by
Tommy Killander, on Flickr
....and I put a small roundel of Tamiya masking tape.
 20161002_184741
 by
Tommy Killander, on Flickr
Some "fences" for the headlights fitted. I think they are a little bit to thick for the scale, but I'm not going to do any modification of this kit.
 20161002_185436
 by
Tommy Killander, on Flickr
...and the upper hull is finished.
 20161002_190222
 by
Tommy Killander, on Flickr
I have been been indecisive about if I should paint the tools separately or not, but finally I decided to glue them on now and detail paint them afterwards.
Next stop will be the turret assembly
Tommy
Re: 1/35 M4A3E8 Sherman Easy Eight
Posted: Fri Oct 14, 2016 9:00 pm
by TommyKillander
Wohoo - TGIF!
I haven't been able to spend much time at the bench lately, but did some work today so here goes...
I started to assemble the turret today - no drama at all


 20161014_205106
 by
Tommy Killander, on Flickr
The surface texture is beautiful - even has something that looks like paint/rust flakings

 20161014_205119
 by
Tommy Killander, on Flickr
Tommy
Re: 1/35 M4A3E8 Sherman Easy Eight
Posted: Mon Oct 31, 2016 9:32 pm
by TommyKillander
Finally back at the bench!
O'boy, I've been missing this kit for a long time.
Next step is to assemble the turret and add the commanders cupola with the individual clear parts.
 20161031_193339
 by
Tommy Killander, on Flickr
To be honest - I can't get my head around the instructions and the paintguide for the periscope glasses, to me it looks like I should coat the sides and outside with XF-1 and leave the inside unpainted

Nevermind, let's do it my way; first I coat the inside with a thin layer of X-25 Clear Green.
 20161031_205054
 by
Tommy Killander, on Flickr
Then I cover that with XF-69 Nato Black
 20161031_205537
 by
Tommy Killander, on Flickr
This will give a dark glass with a green tint
 20161031_210609
 by
Tommy Killander, on Flickr
And look at those cute little glasses for the crew!
 20161031_193922
 by
Tommy Killander, on Flickr
Cheers
Tommy
Re: 1/35 M4A3E8 Sherman Easy Eight
Posted: Sun Nov 06, 2016 8:39 pm
by TommyKillander
Hey guys,
It's time to conclude the building part, so I can start to paint this bad boy:
More details, most of them will be individually painted and assembled afterwards.
 20161103_212405
 by
Tommy Killander, on Flickr
 20161106_142457
 by
Tommy Killander, on Flickr
But the two halfes of the turret didn't go together nicely

 20161103_212503
 by
Tommy Killander, on Flickr
Filler and sanding will destroy all that nice texture....
...but I have a plan!
I use dissolved sprue to fill the seam, using a cocktail-stick as a tool
 20161103_220715
 by
Tommy Killander, on Flickr
Leaving it to cure for 3-4 days, so it's rock-hard
 20161106_145016
 by
Tommy Killander, on Flickr
Then I carefully work down the filled seam with a sanding stick
 20161106_153112
 by
Tommy Killander, on Flickr
After that I sponge-stipple the area randomly with Tamiya Extra Thin
 20161106_153750
 by
Tommy Killander, on Flickr
... and there you go! I'm happy with that
 20161106_154542
 by
Tommy Killander, on Flickr
All small bits and bobs added to the turret
 20161106_191643
 by
Tommy Killander, on Flickr
Everything is now assembled and ready for paint!

Tommy
Re: 1/35 M4A3E8 Sherman Easy Eight
Posted: Mon Nov 07, 2016 10:51 pm
by papatika
Great job on that seam line! Similar result can be achieved with Tamiya Putty + Extra Thin + sponge in case you don't have liquid sprue by mistake...

I'm not a big Sherman-fan or -expert, but as far know that seam really existed on the E8. It was more or less visible depending on where and when was the turret manufactured.
Re: 1/35 M4A3E8 Sherman Easy Eight
Posted: Tue Nov 08, 2016 8:55 am
by TommyKillander
papatika wrote:Great job on that seam line! Similar result can be achieved with Tamiya Putty + Extra Thin + sponge in case you don't have liquid sprue by mistake...
I'm not a big Sherman-fan or -expert, but as far know that seam really existed on the E8. It was more or less visible depending on where and when was the turret manufactured.
Thanks papatika!
I'm not an expert on Shermans either, but after looking around for reference pictures I found a couple of shots that looked good, so I decided to go for that... But you are probably right, the final look was probably defined by which foundry that made the cast and the workmanship that they considered to be the standard.
On the picture below the seam seems to be filled (welded?) and worked with powertool
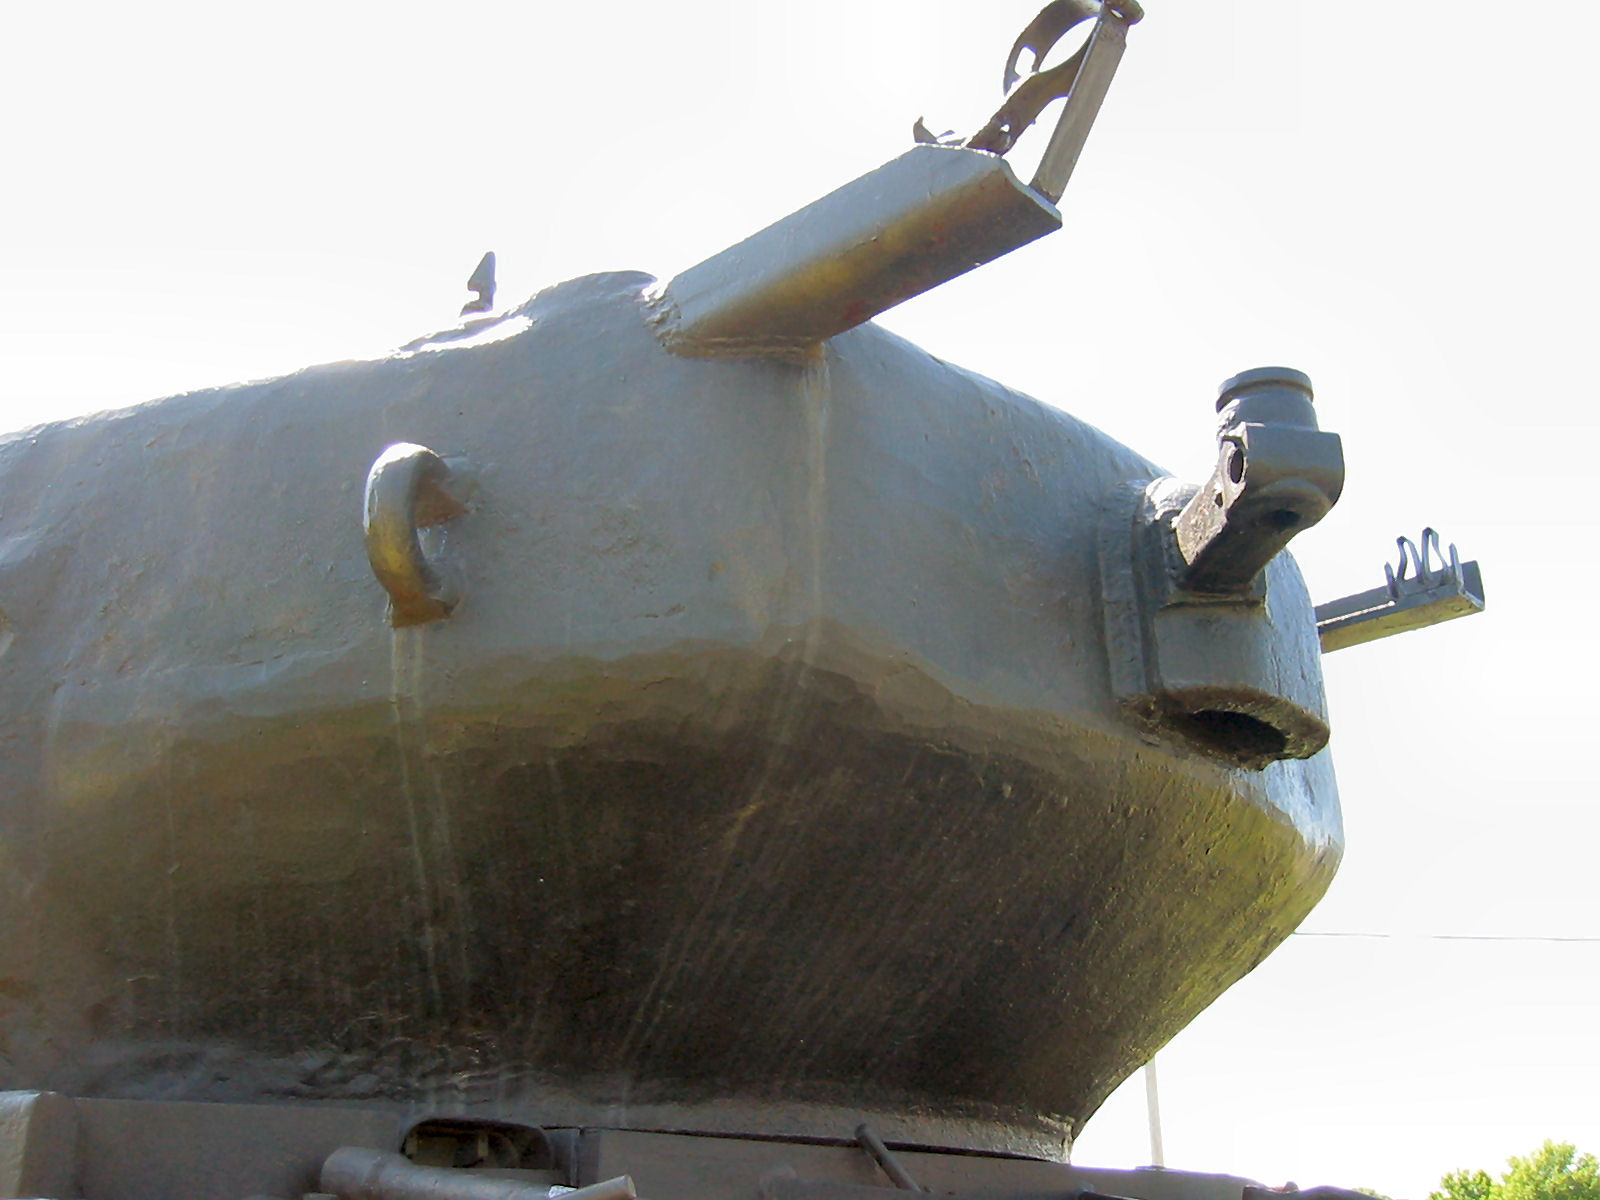


The cast texture is quite rough, so it's possible to abuse the surface quite a lot, I guess
Tommy
Re: 1/35 M4A3E8 Sherman Easy Eight
Posted: Tue Nov 08, 2016 5:25 pm
by privatepete
Hi Tommy a bit of info.
There where two foundries that made the turret casting they are the Continental Foundry & Machine at their Hubbard Foundry in Chicago and the
American Steel Foundries in their Granite City, Illinois foundry.The second had some peculiarities as to mold seam lines, sprue cutoffs, and machining style compared to turrets cast by other foundries. The foundry markings are located in the front center of the roof.
Nice build by the way well done.
Pete
Re: 1/35 M4A3E8 Sherman Easy Eight
Posted: Tue Nov 08, 2016 8:46 pm
by TommyKillander
Hey Guys!
Primer on
 20161108_193418
 by
Tommy Killander, on Flickr
 20161108_193500
 by
Tommy Killander, on Flickr
..and all the small stuff on cocktail-sticks that will be painted individually
 20161108_193358
 by
Tommy Killander, on Flickr
 20161108_193242
 by
Tommy Killander, on Flickr
I used Black Ultimate Primer on all parts except the figure, that where painted with White UP.
Tommy
Re: 1/35 M4A3E8 Sherman Easy Eight
Posted: Tue Nov 08, 2016 9:09 pm
by TommyKillander
privatepete wrote:Hi Tommy a bit of info.
There where two foundries that made the turret casting they are the Continental Foundry & Machine at their Hubbard Foundry in Chicago and the
American Steel Foundries in their Granite City, Illinois foundry.The second had some peculiarities as to mold seam lines, sprue cutoffs, and machining style compared to turrets cast by other foundries. The foundry markings are located in the front center of the roof.
Nice build by the way well done.
Pete
Hey Pete, thanks for the info, this is interesting...
I found this site
http://the.shadock.free.fr/sherman_minu ... kings.html .
The kit has a large encircled "C" marking so it should be turret from American Steel Foundries Cast Armour Plant in Chicago, I think, the second one you mention has a "G" cast marking.
Tommy
Re: 1/35 M4A3E8 Sherman Easy Eight
Posted: Wed Nov 09, 2016 6:25 am
by privatepete
Thanks Tommy very interesting site I love all the little details you find out and add, small or big there all good, have added it to my growing Sherman collection.Very nice work especially on the turret seam line

Pete
Re: 1/35 M4A3E8 Sherman Easy Eight
Posted: Wed Nov 09, 2016 9:59 am
by SergioSolo
That kit is at the top of my wish list. You're doing a great job on it!
Re: 1/35 M4A3E8 Sherman Easy Eight
Posted: Wed Nov 09, 2016 6:08 pm
by TommyKillander
Sergiotron wrote:That kit is at the top of my wish list. You're doing a great job on it!
Thanks Sergiotron
privatepete wrote:
Thanks Tommy very interesting site I love all the little details you find out and add, small or big there all good, have added it to my growing Sherman collection.Very nice work especially on the turret seam line
Pete
Thanks Pete, you're welcome
That's the good thing about build threads; if I add the pictures and links, it's easy to go back and find them. Hopefully someone else will find the information useful as well
Ok, it's time for some Olive Drab...
Today I learned that OD is a mix of Yellow and Black, not Green as I first thought.
I also found out that Tamiyas XF-62 Olive Drab is USAAF OD for aircrafts and it is too dark for land vehicles. So the correct thing to do is to mix in some yellow.
Yellow will also work fine for weathering the paint and create some variation to the colour.
So I decided to use XF-62 Olive Drab as a first dark basecoat and then mix XF-62 with XF-60 Dark Yellow (ratio 1:1) to lighten up large areas and finally make some highlights with plain XF-60 (75% thinner).
 20161109_180353
 by
Tommy Killander, on Flickr
 20161109_180419
 by
Tommy Killander, on Flickr
 20161109_180434
 by
Tommy Killander, on Flickr
 20161109_180510
 by
Tommy Killander, on Flickr
I'm having a hard time to catch the effect with my cellphone camera - but I'm happy with the result.
Oh, almost forgot the link to the OD thread on TheMiniaturesPage,
http://theminiaturespage.com/boards/msg.mv?id=205794
Tommy
Re: 1/35 M4A3E8 Sherman Easy Eight
Posted: Wed Nov 09, 2016 9:04 pm
by TommyKillander
Short update before it's time for bed.
The part of the barrel that meets the gunmantlet should be bare metal, according to Tamiyas paint callout.
I used Vallejo Duraluminium instead of Steel, because I thought it looked too dark.
 20161109_212857
 by
Tommy Killander, on Flickr
 20161109_213121
 by
Tommy Killander, on Flickr
Tommy
Re: 1/35 M4A3E8 Sherman Easy Eight
Posted: Mon Nov 14, 2016 9:56 pm
by TommyKillander
Hey Guys!
It's been a while since I posted anything, but I have been working on this kit (believe it or not)
First some detailpainting of various stuff.
Tools painted with XF-84 Dark Iron and XF-56 Metal Grey.
 20161113_135228
 by
Tommy Killander, on Flickr
Some rust and flaked off OD on the exhaust pipes
 20161113_151509
 by
Tommy Killander, on Flickr
I'm not 100% happy with that, but I will make a touchup later with pigments to get a more convincing color and texture.
 20161113_154501
 by
Tommy Killander, on Flickr
The machine guns are painted with X-10 Gun Metal and the edges have been marked with a pencil.
 20161113_155010
 by
Tommy Killander, on Flickr
The spare links might need to have some more weathering....
I'll decide that later when I see the end result.
 20161113_155136
 by
Tommy Killander, on Flickr
First round with chipping, using a sponge.
 20161113_142034
 by
Tommy Killander, on Flickr
 20161113_160226
 by
Tommy Killander, on Flickr
 20161113_160300
 by
Tommy Killander, on Flickr
Tommy
Re: 1/35 M4A3E8 Sherman Easy Eight
Posted: Tue Nov 15, 2016 11:19 am
by gaz45
nice work there mate
Re: 1/35 M4A3E8 Sherman Easy Eight
Posted: Tue Nov 15, 2016 12:45 pm
by OliveDrab
Looking fabulous, the faded OD paint work looks great
Re: 1/35 M4A3E8 Sherman Easy Eight
Posted: Tue Nov 15, 2016 1:22 pm
by Kevthemodeller
Love the finish on the tools
Re: 1/35 M4A3E8 Sherman Easy Eight
Posted: Tue Nov 15, 2016 5:21 pm
by Stokesy44
Paint job looks good. Love the chipping and the finish on the tools and greeblies.
Re: 1/35 M4A3E8 Sherman Easy Eight
Posted: Tue Nov 15, 2016 9:05 pm
by TommyKillander
gaz45 wrote:nice work there mate
Thank you very much, gaz45
OliveDrab wrote:Looking fabulous, the faded OD paint work looks great
Thanks Curt, I'm happy with it sofar.
Kevthemodeller wrote:Love the finish on the tools
Thanks Kevthemodeller
Stokesy44 wrote:Paint job looks good. Love the chipping and the finish on the tools and greeblies.
Thank you, Stokesy44
Well, the show goes on and it's time for some wheel-painting... I'm using diluted XF-85 Rubber Black for the rubber surfaces.
 20161114_203549
 by
Tommy Killander, on Flickr
And the hull and turret have been gloss-coated to prepare for decals
 20161114_212130
 by
Tommy Killander, on Flickr
 20161114_212156
 by
Tommy Killander, on Flickr
 20161114_212329
 by
Tommy Killander, on Flickr
I like the colour tone when the gloss is on, but it has lost much of it's yellow tone.
Also I'm a bit concerned about the textured surfaces and thick stiff Tamiya decals...
But using hot water normally makes the decals more manageable, so I will do that.
Tommy
Re: 1/35 M4A3E8 Sherman Easy Eight
Posted: Wed Nov 16, 2016 6:39 pm
by TommyKillander
Tamiya decals....
The best advice I've had about Tamiya decals is to use hot water, so I filled a thermos with hot water from the tap to prepare for that. Another advice was to use Gunze Mr Mark Softener, but I only have the Microscale products, so I had to use that instead...
I will choose the white decals on the hull and turret option.
 20161115_180658
 by
Tommy Killander, on Flickr
There's only 6 decals in this kit so I change water between every decal - just because I can
 20161115_193140
 by
Tommy Killander, on Flickr
And the decals went on without any drama what-so-ever... I coated them with Micro Sol 2-3 and left them to set.
After a couple of hours I cleaned the dried up Micro Sol around the decal with a cottonbud and warm water.
I have experienced that Alclad2 Aqua Gloss reacts with pooled up and dried Microsol and it gives a rough surface - I'm 99.99% sure it is because of that, so I decided to clean the surface before I put on the glosscoat again.
I think that my next step will be to finish the tracks, before I start with the weathering...
Stay tuned!
Tommy
Re: 1/35 M4A3E8 Sherman Easy Eight
Posted: Fri Nov 18, 2016 9:45 am
by TommyKillander
Hey Guys,
It's time for tracks!
Tracks are glued together with Tamiya Extra Thin and clamped up for a couple of hours
 20161117_101951
 by
Tommy Killander, on Flickr
I used XF-84 Dark Iron as a basecolor for the tracks. I made a wash using Vallejo rust colours and thinner that I applied using my airbrush. It looked awesome when it was wet, but the rust effect disappeared almost completely when it dried...
...so I might have to do some pinwash as well
 20161117_124034
 by
Tommy Killander, on Flickr
Drybrushing of the edges using X-10 Gun Metal.
 20161117_141000
 by
Tommy Killander, on Flickr
I have an idea to make a base in an urban environment, maybe a street or an industrial site. I will try to use Light Dust effects, rather than excessive amount of mud and muck all over the tank...
Keeping my fingers crossed that I can pull it off
First attempt with dust streaks... maybe too much ?
 20161117_153248
 by
Tommy Killander, on Flickr
After 3-4 hours the hull and turret where completed
 20161117_220057
 by
Tommy Killander, on Flickr
 20161117_220117
 by
Tommy Killander, on Flickr
Now I have 1000 small parts to dust too...

chop chop...
Tommy
Re: 1/35 M4A3E8 Sherman Easy Eight
Posted: Fri Nov 18, 2016 10:22 am
by Augustus
Lovely job!
Re: 1/35 M4A3E8 Sherman Easy Eight
Posted: Fri Nov 18, 2016 5:58 pm
by TommyKillander
Augustus wrote:Lovely job!
Thanks, mate!
Tommy