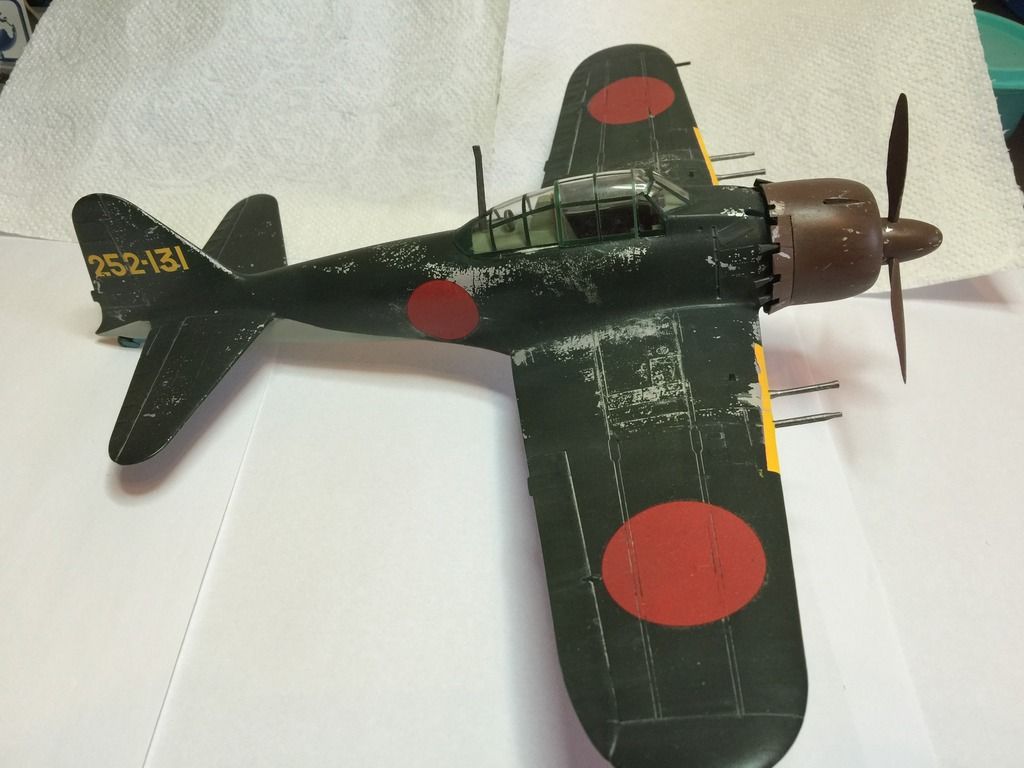
Mitsubishi A6M5c Zero Fighter Type 52 Hei '203rd Flying Group'

Post Reply
User avatar
JediBoer
Master Sergeant
Master Sergeant
Posts: 437
Joined: Thu Oct 23, 2014 6:33 am
Location: Detroit, MI
United States of America

Mitsubishi A6M5c Zero Fighter Type 52 Hei '203rd Flying Group'

Post by JediBoer »

I found this kit for an absolute bargain and decided that it was going to be my entry for the "In The Navy SiG". I have just finished my first GB/SiG on ISM and thoroughly enjoyed it.

This is not the newest of kits and this rebox edition released in 2004. Box art is great but a little faded.
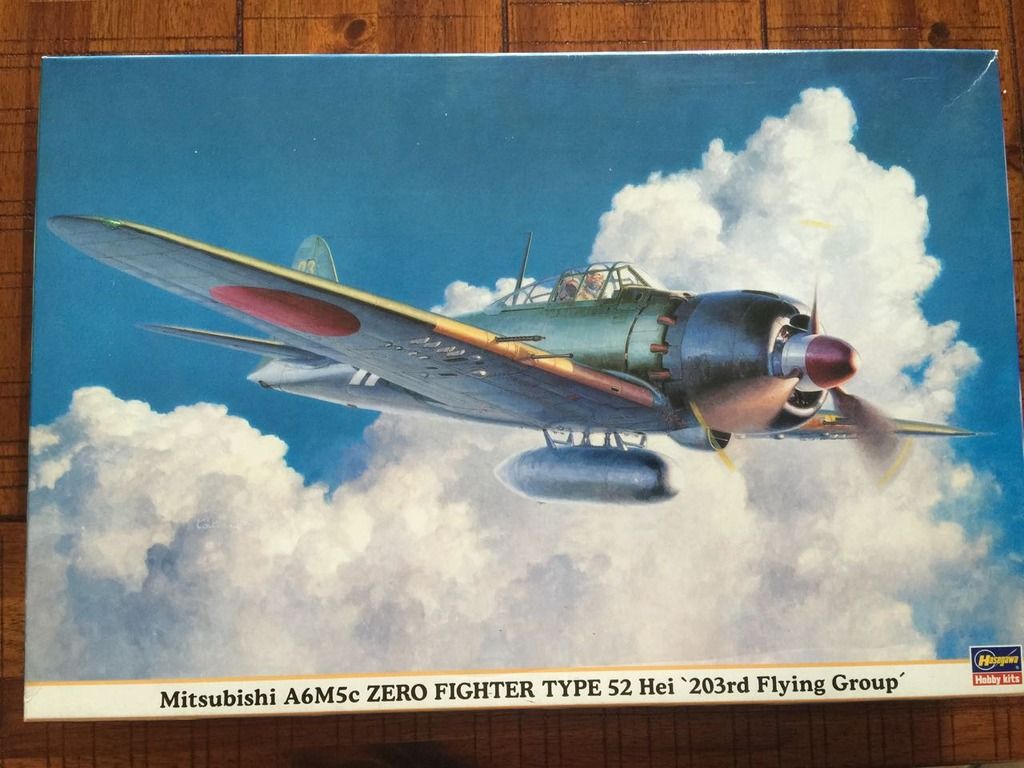
Image

Unlike the newer 1/32 kits, this one's box is not packed with plastic. It looks like a 1/48 kit that was super sized!
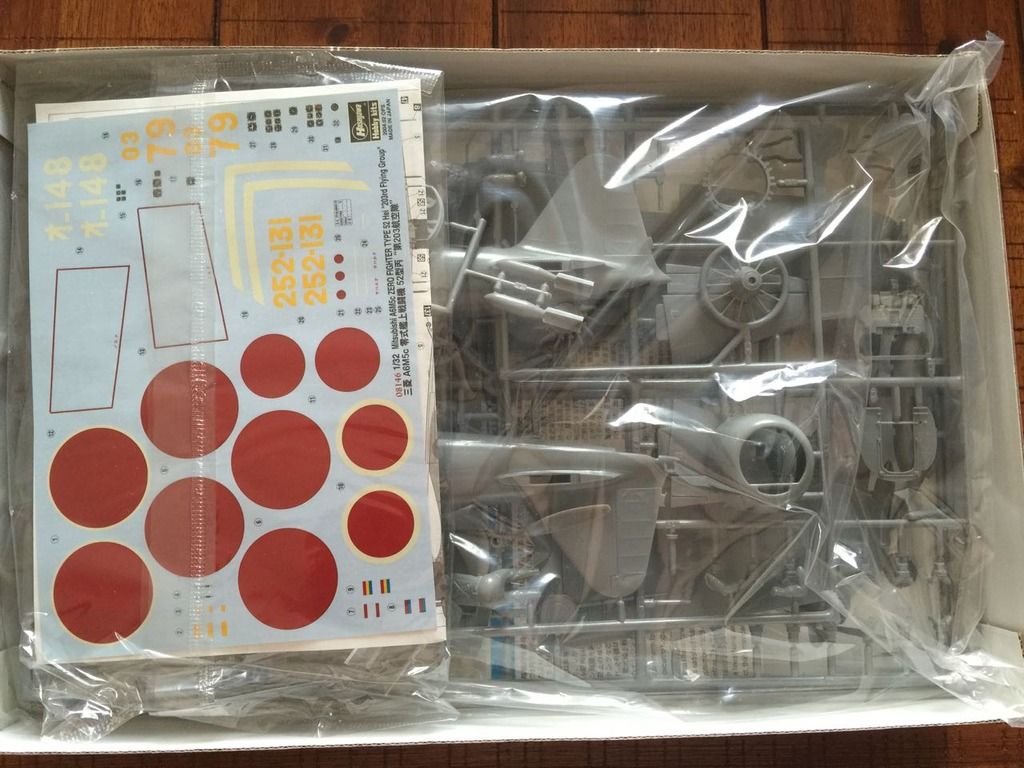
Image

The fuselage has recessed panel lines but the rivet detail is raised. The panel lines are very soft and I'll probably have to rescribe some detail. There is a little of flash here and there but it will be easy to clean up. The pilot figure sucks. Nothing more to say about that except that it won't be used.
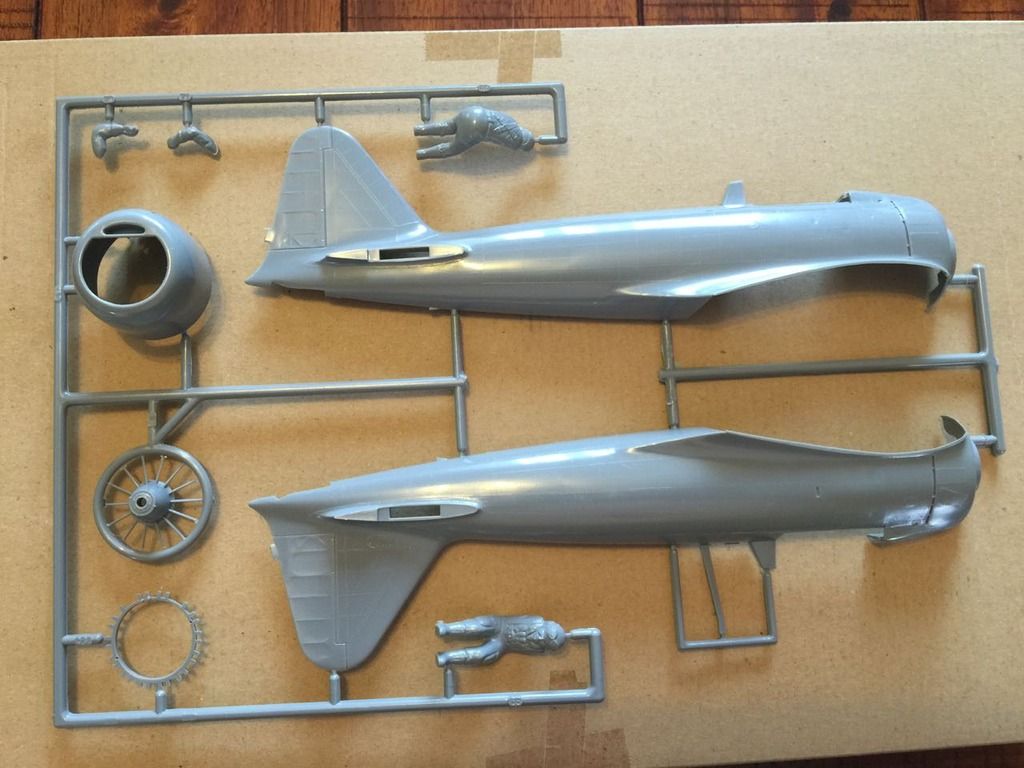
Image

Sprue with bits and bobs (Engine and cockpit detail, horizontal stabilizers) looks good. It also has some flash issues as you can see on the landing gear doors on the bottom left of the photo below.
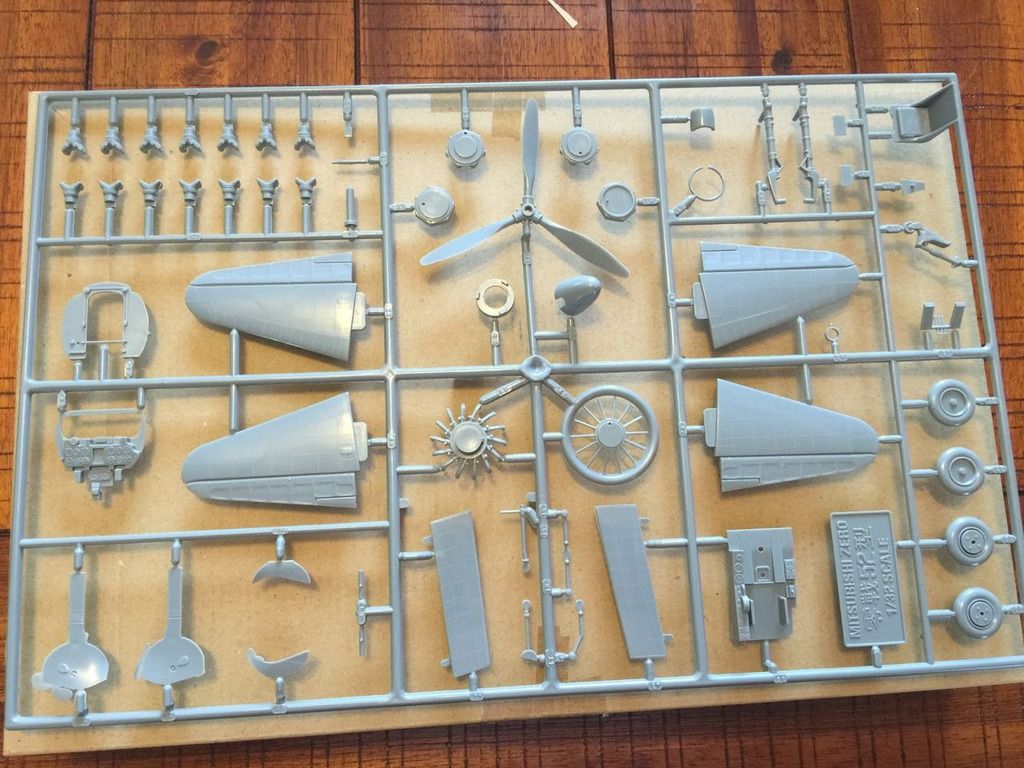
Image

The wings look pretty good with nice detail. No flash issues on this sprue.
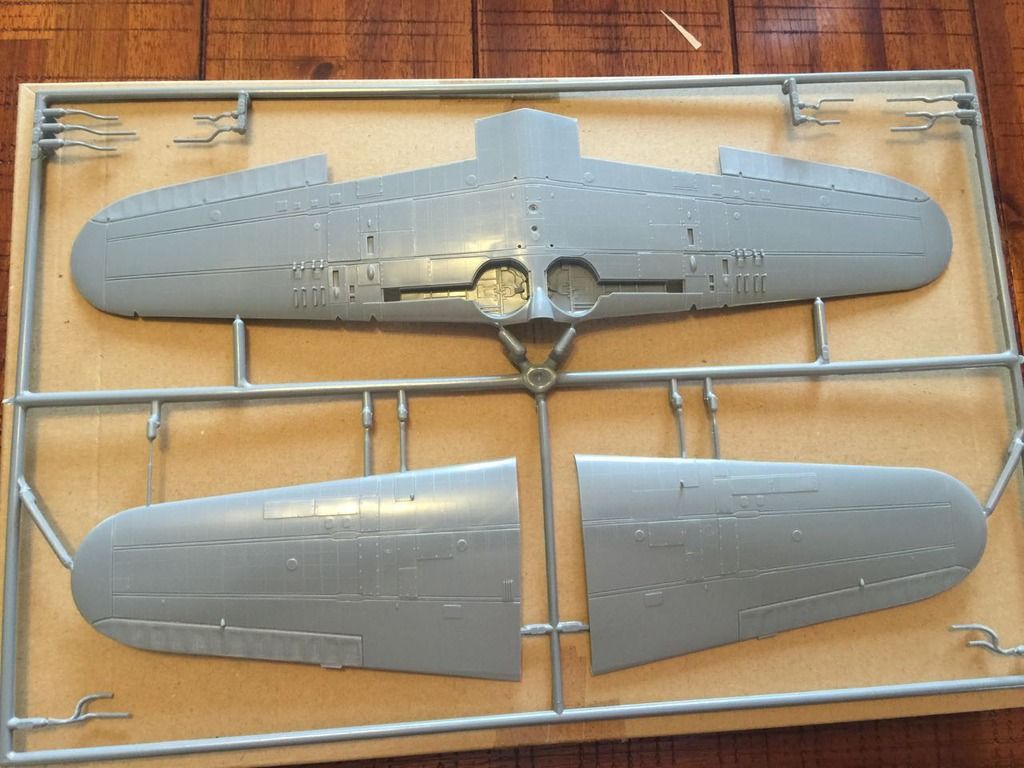
Image

Some loose sprues in the bag with engine cowlings, bombs, and fuel tank options.
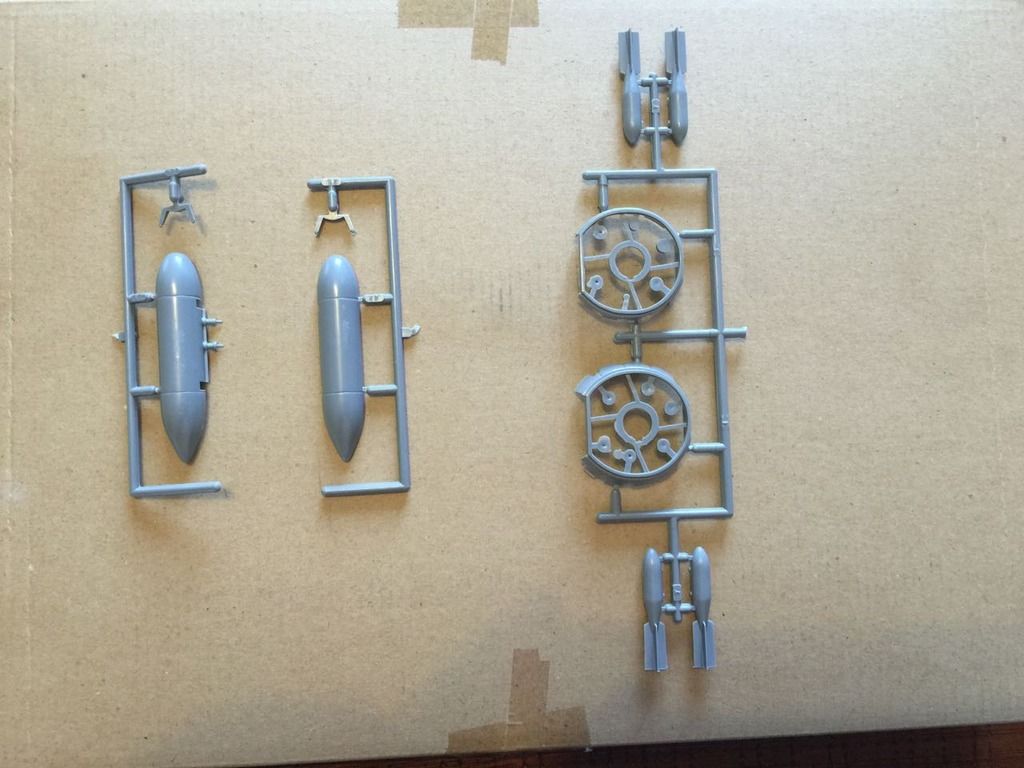
Image

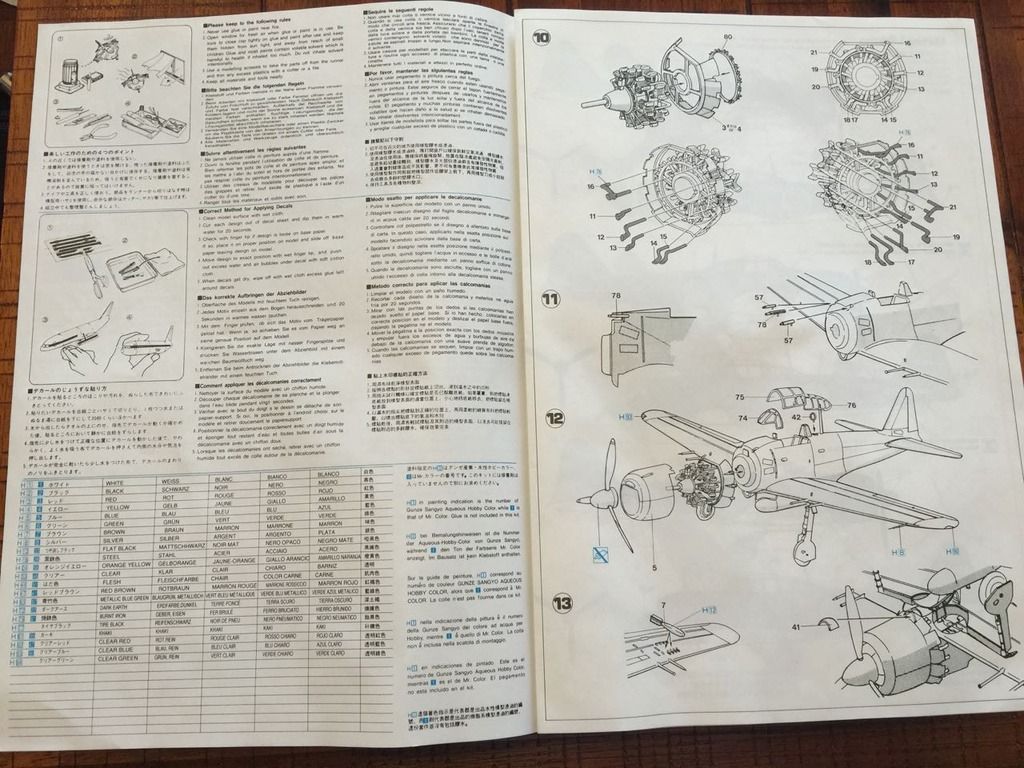
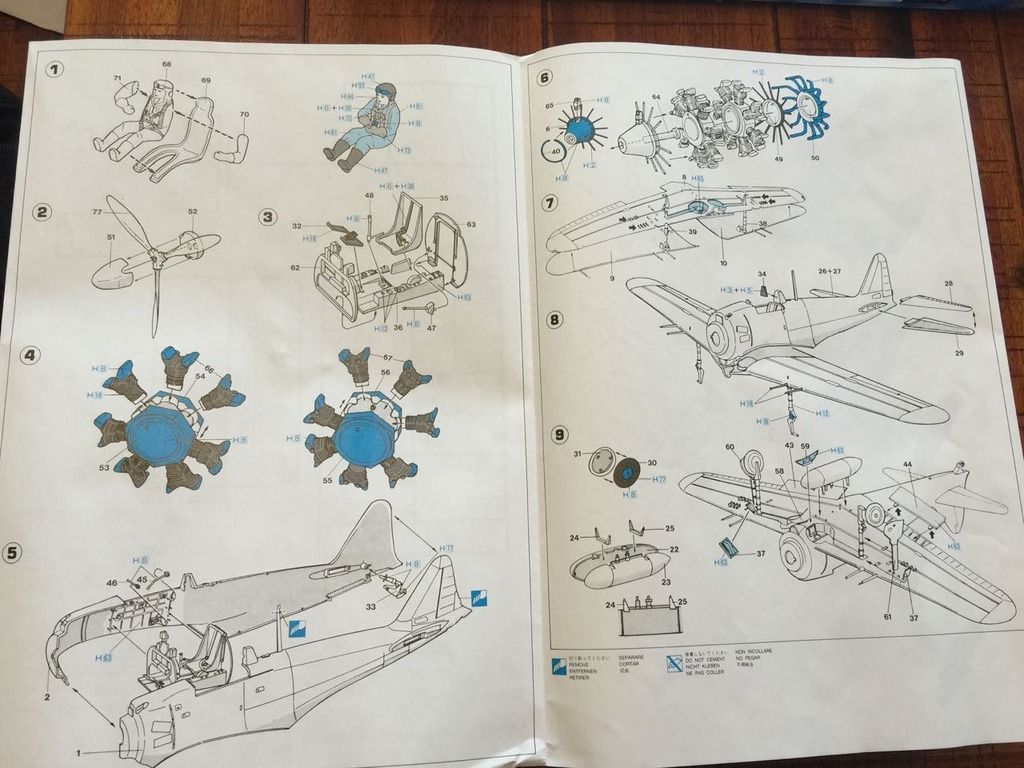
The instructions are the standard Hasegawa instructions with Gunze/Mr Color paint call-outs.
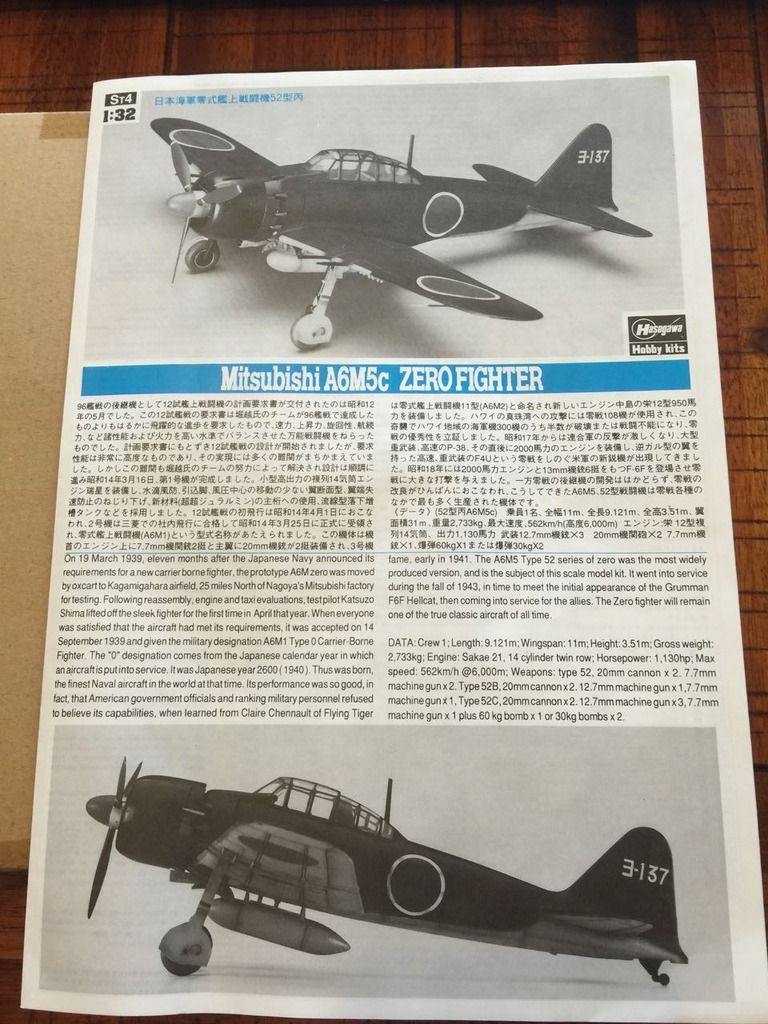
Image

Image

Image

Only 13 assembly sections for this one. Evidence of the low number of parts in the box. As usual for instructions, the paint call out and instructions are at the back. This one requires a lot of mixing but I'm thinking of getting the AK Interactive WWII IJN paint set (Here: http://ak-interactive.com/v2/?product=w ... ft-colours)
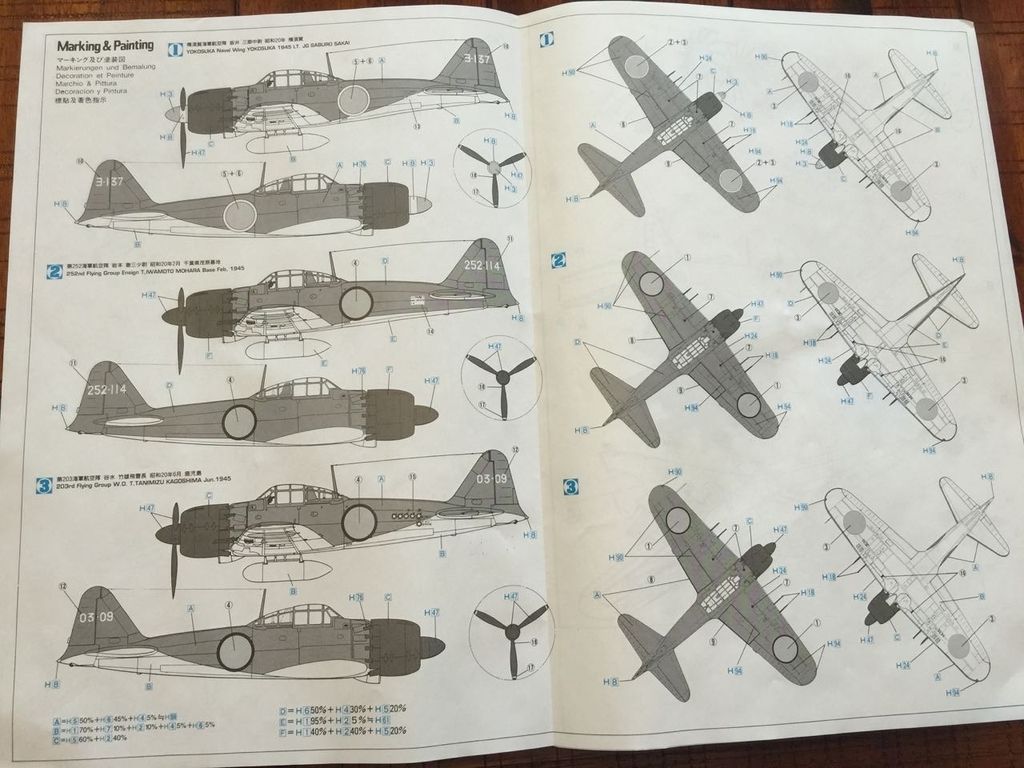
Image

Low part count is evident but it is still a nice kit!
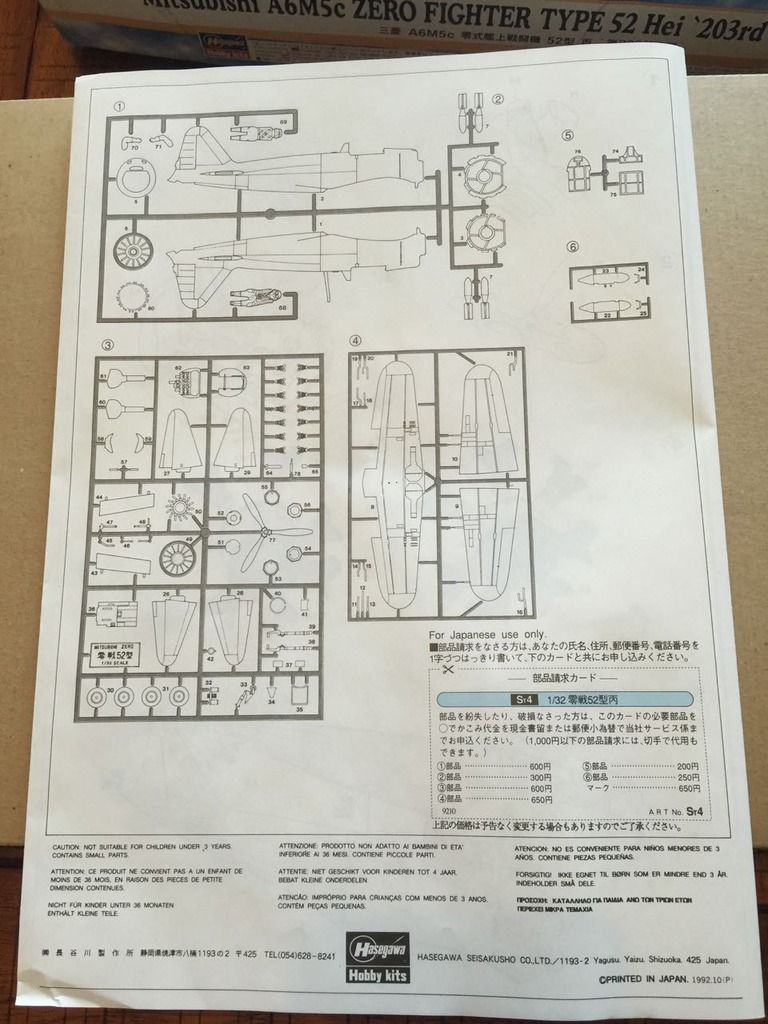
Image

Clear parts are nice with no distortion visible. It is going to be a tough masking job though.
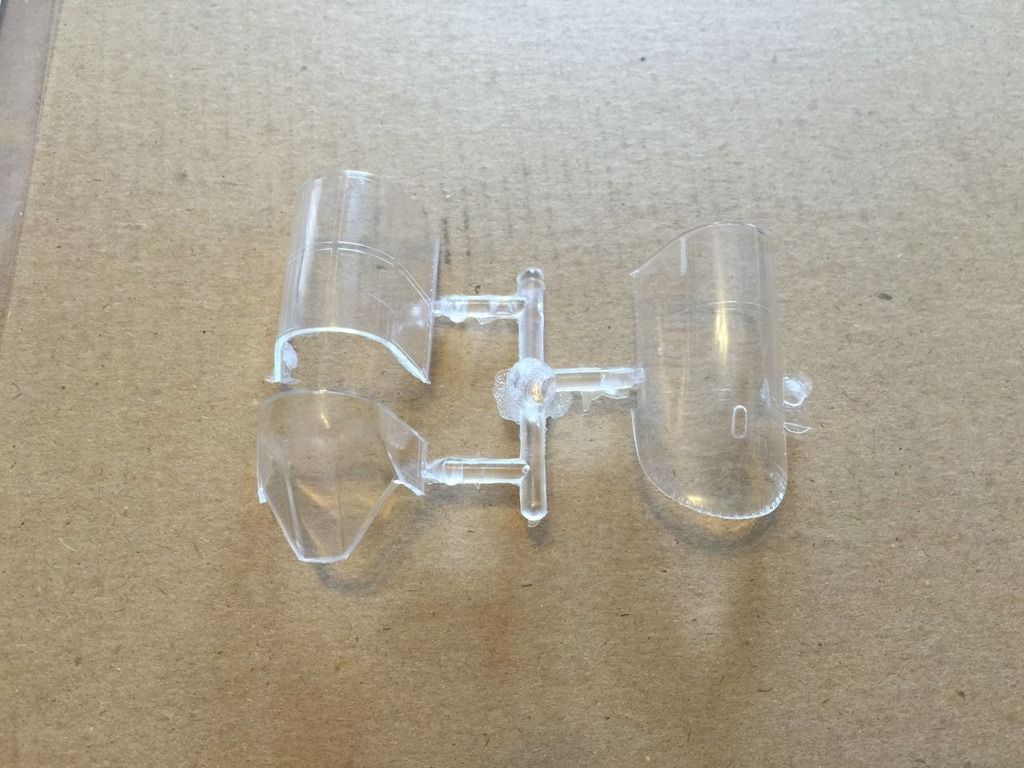
Image

There aren't too many decals. They also look a bit on the thin side but we'll see when we get there. Instructions of where the decals go is also included.
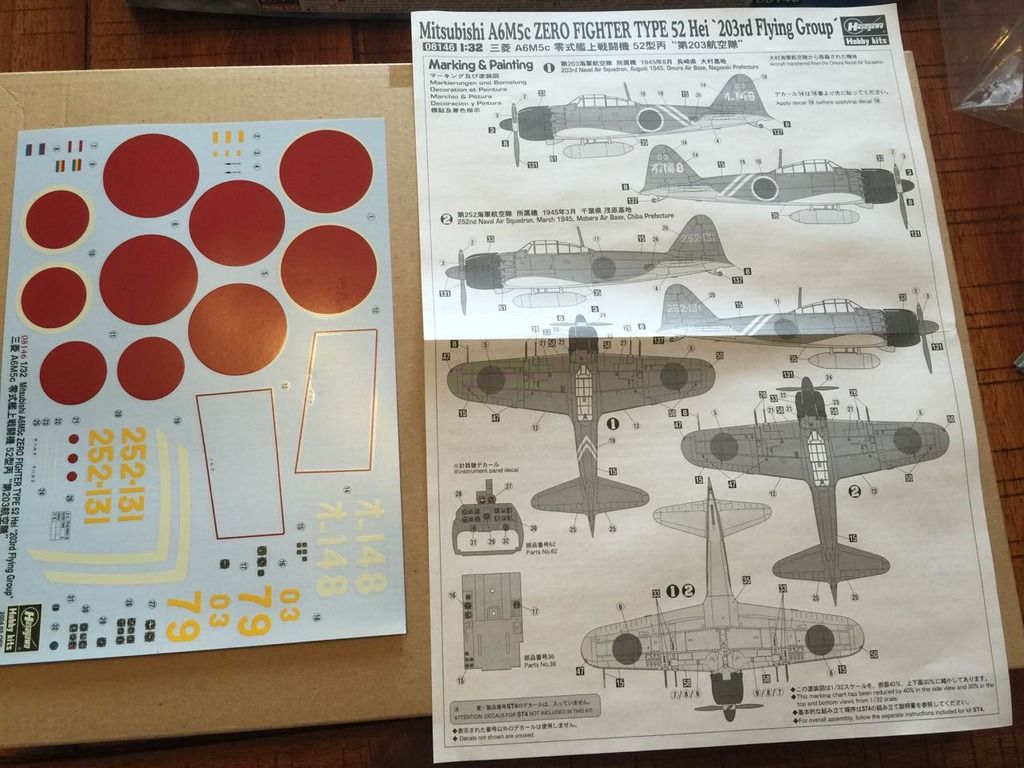
Image

So, there is my entry in the SiG! Looking forward to the build!
JediBoer

On the bench righ now: Hmm... Lots of unfinished business!
User avatar
JediBoer
Master Sergeant
Master Sergeant
Posts: 437
Joined: Thu Oct 23, 2014 6:33 am
Location: Detroit, MI
United States of America

Re: Mitsubishi A6M5c Zero Fighter Type 52 Hei '203rd Flying Group'

Post by JediBoer »

Like I said in my first post, this kit is going to be a relative simple build. That is, if there are no major fit problems!

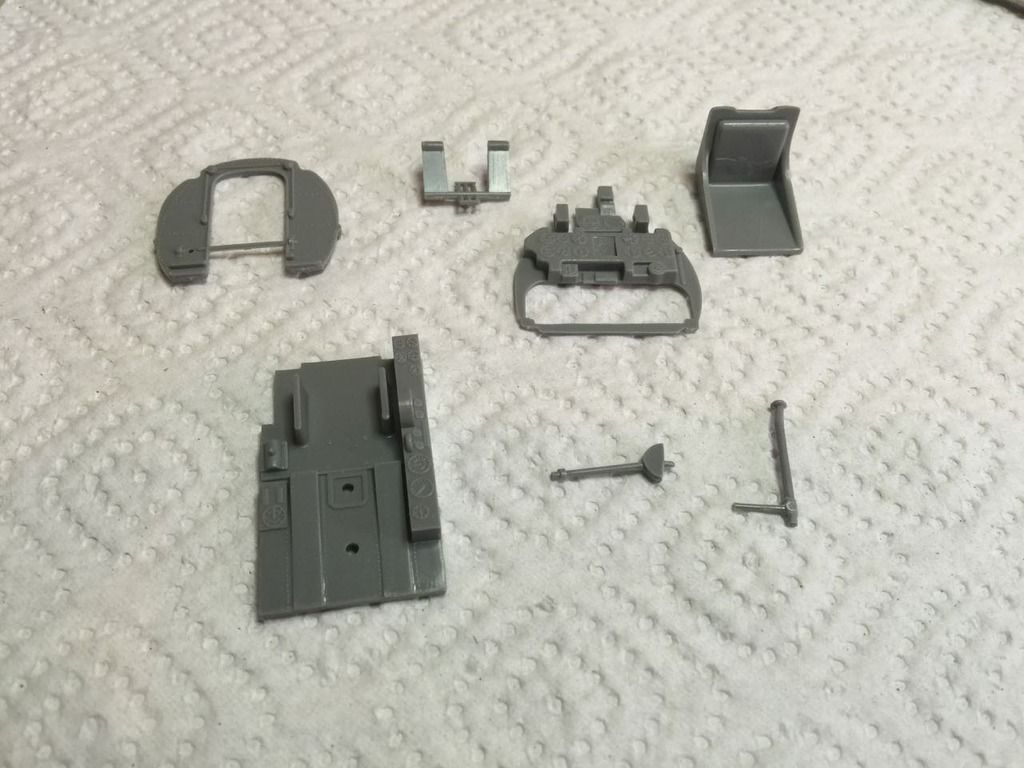
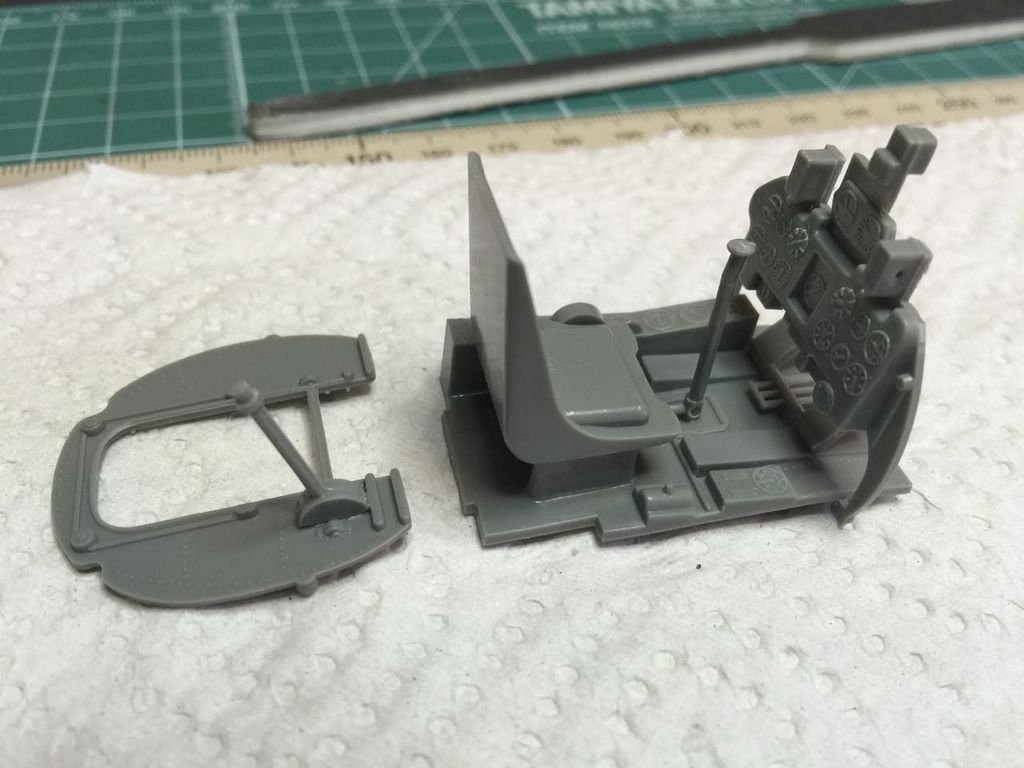
I got cracking with the cockpit and the engine this afternoon. Here you can see all the cockpit parts cleaned up and laid out. I had just washed them with some soapy water and was waiting for them to dry.

Image

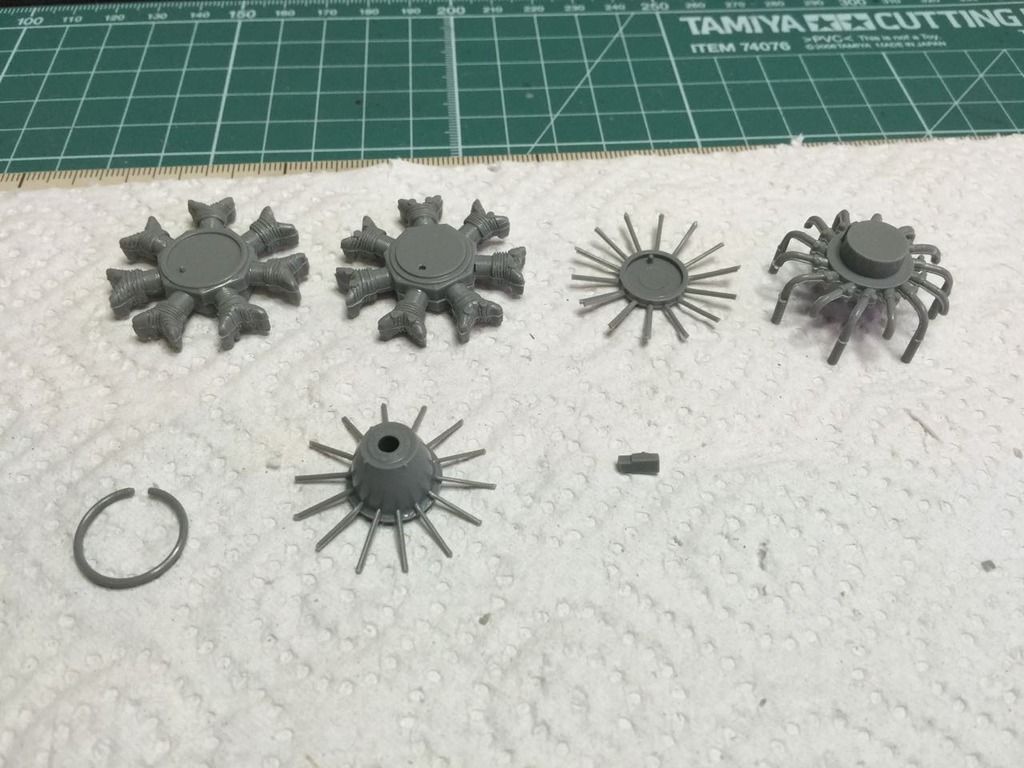
Here are the engine parts. Some of the parts had already been assembled here. Then they also had the soapy bath treatment.

Image

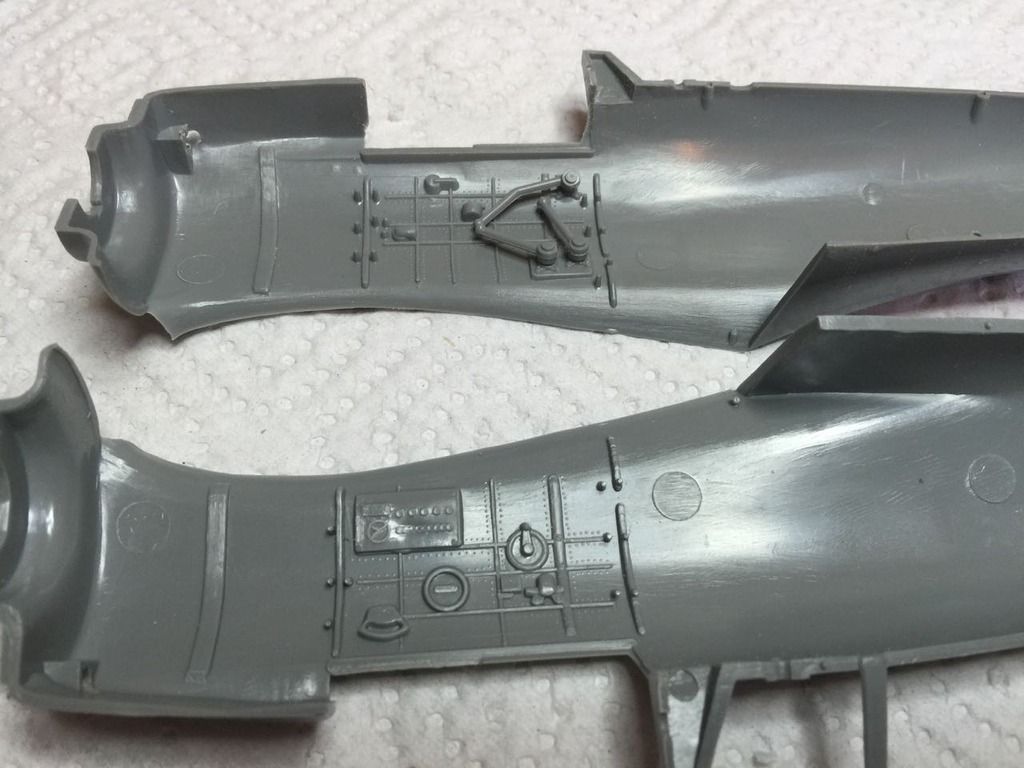
Here are the fuselage halves with the cockpit side walls ready for priming. A few bits and bobs had to be glued into place and there was no major cleaning up to do.

Image

Cockpit almost complete. The fit was very good with very little glue needed.

Image

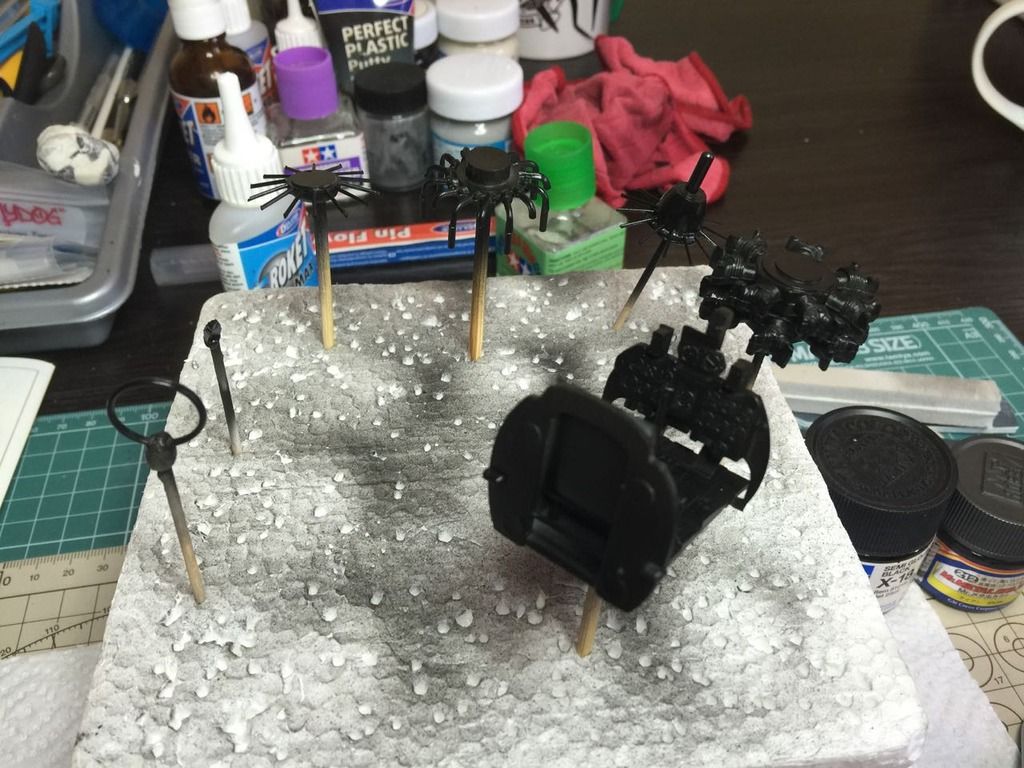
I used the Allclad Primer to prime all the parts because I planned on using metallizer paints and also because the primer dries very quickly and it has a great finish if you can keep everything dust free.

Image

Image

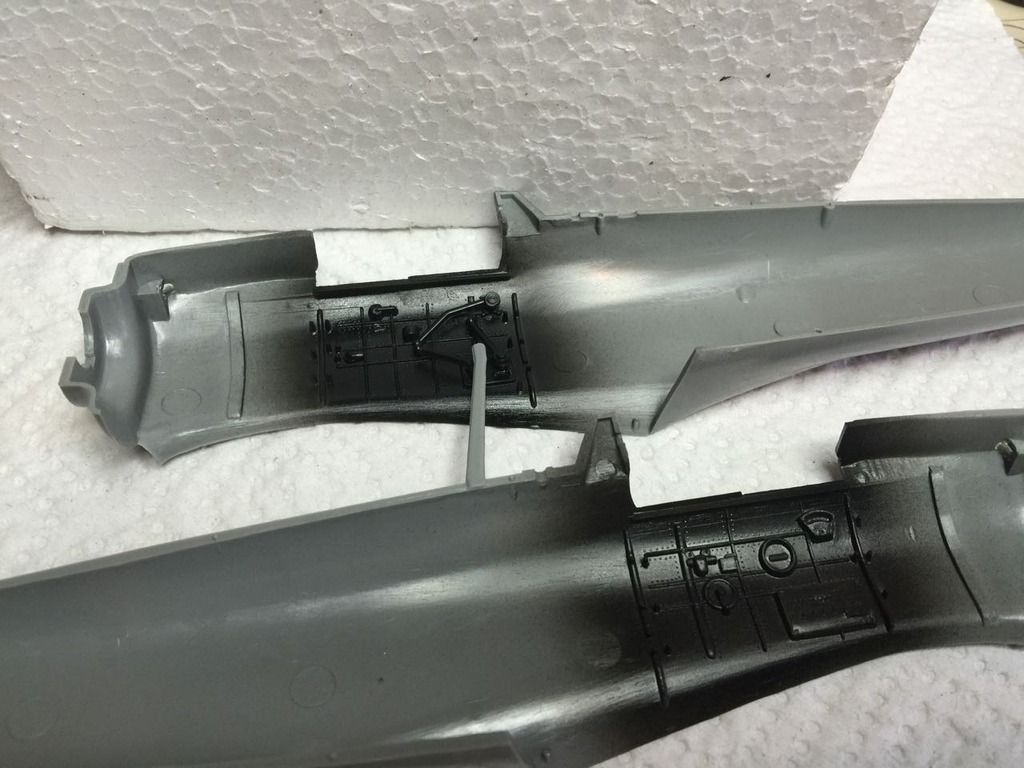
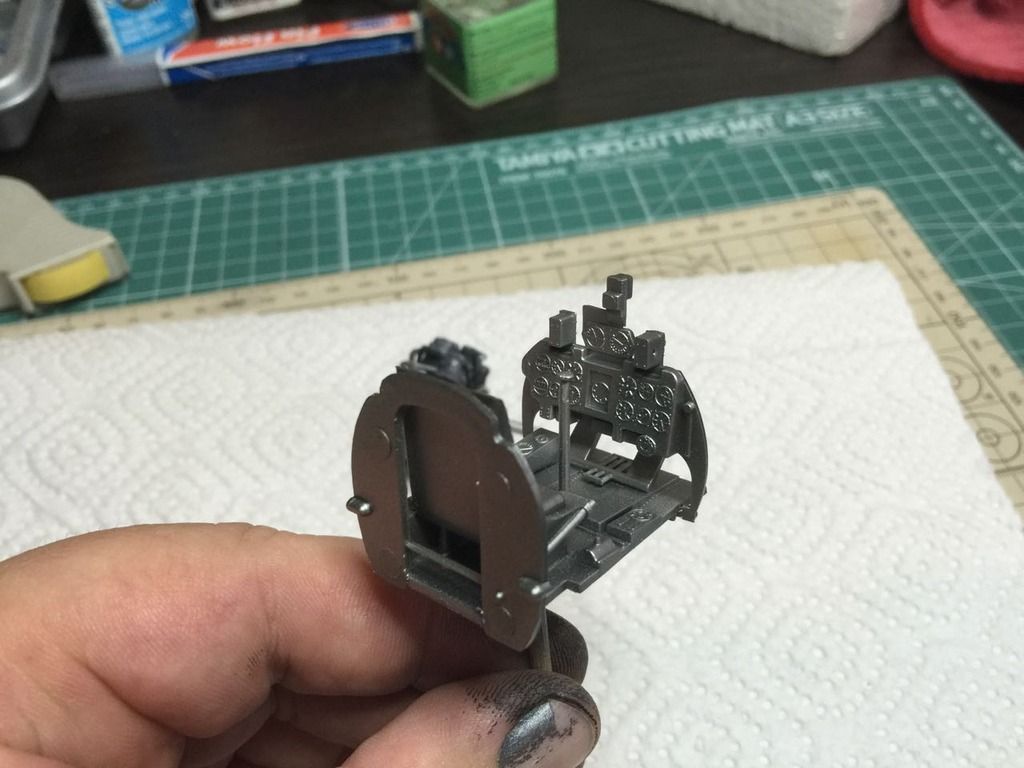
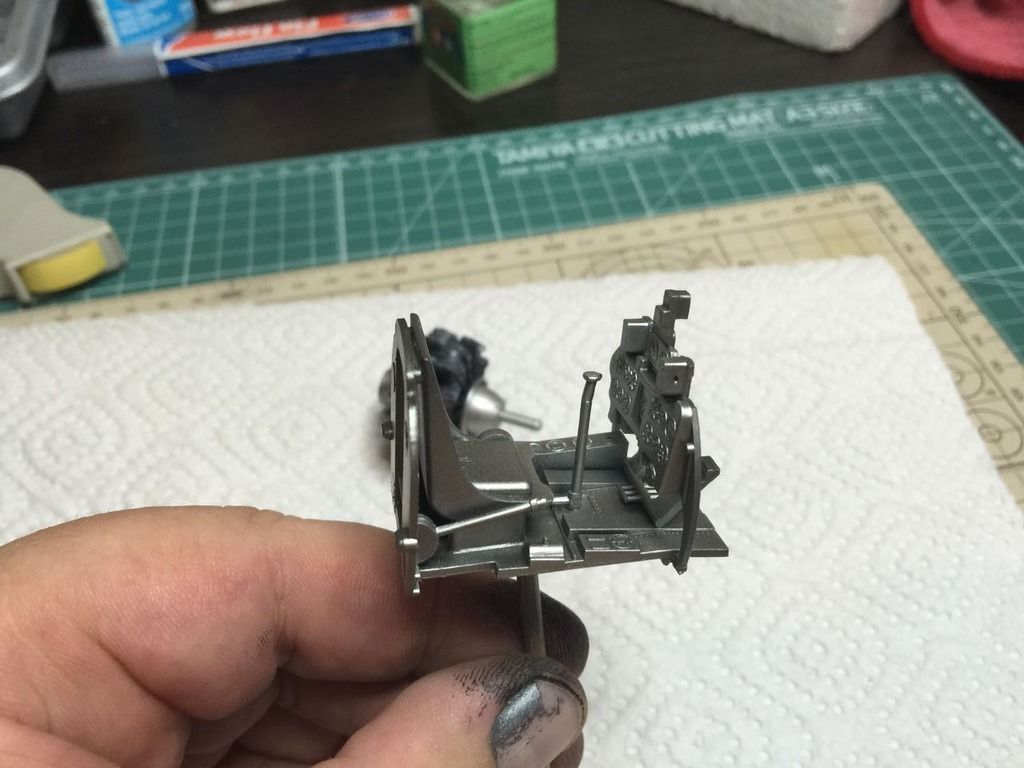
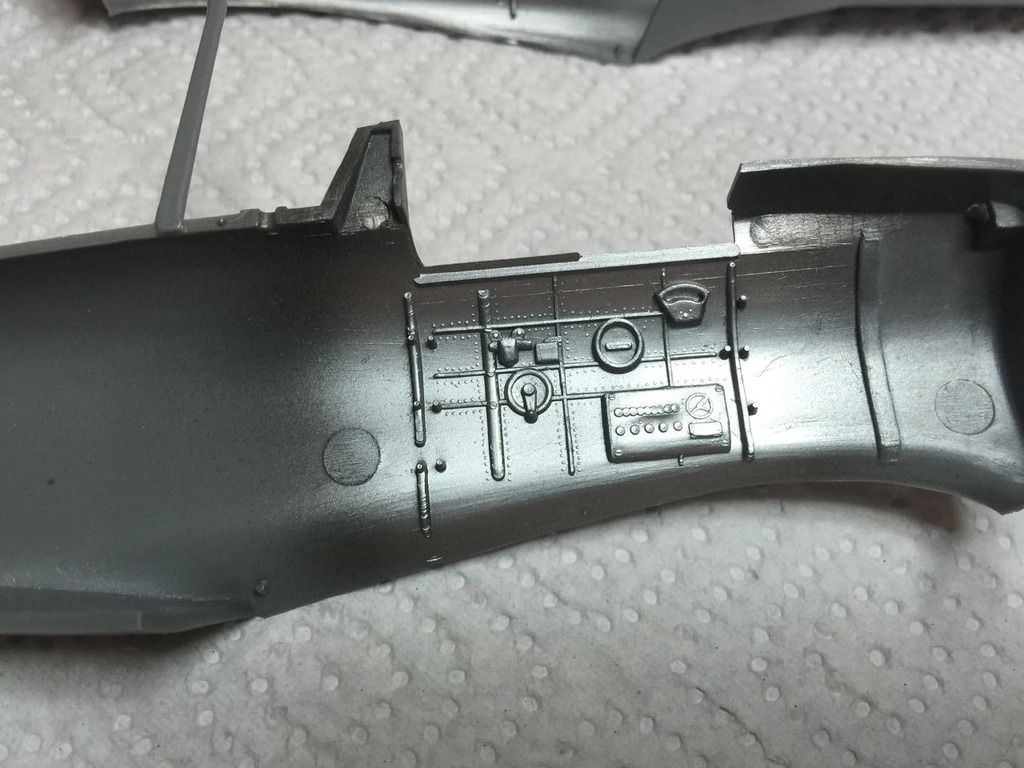
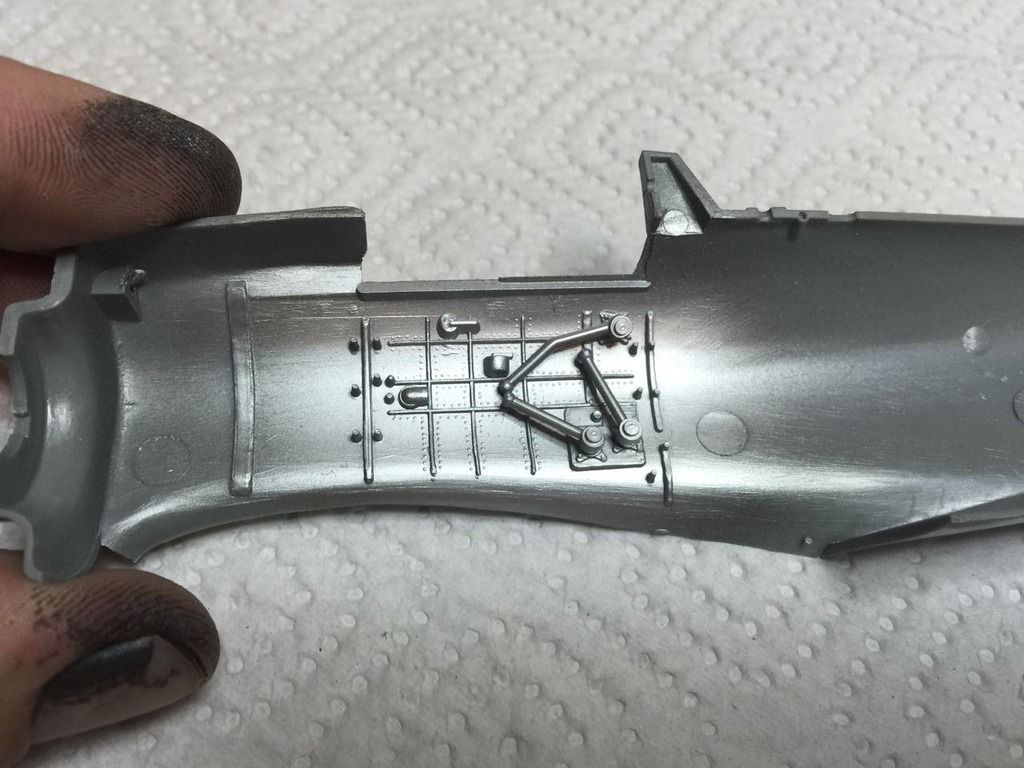
My plan with the cockpit is to spray it with Allclad Aluminum and once the paint has dried to give it a good coat of AK Worn Effects fluid. Once that hass dried I'll spray it with Tamiya XF-71 Cockpit Green (IJN). I'll then do some chipping with a coarse brush and see how it turns out. Here is the first part of the process with the cockpit and side walls sprayed in Allclad Aluminum.

Image

Image

Image

Image

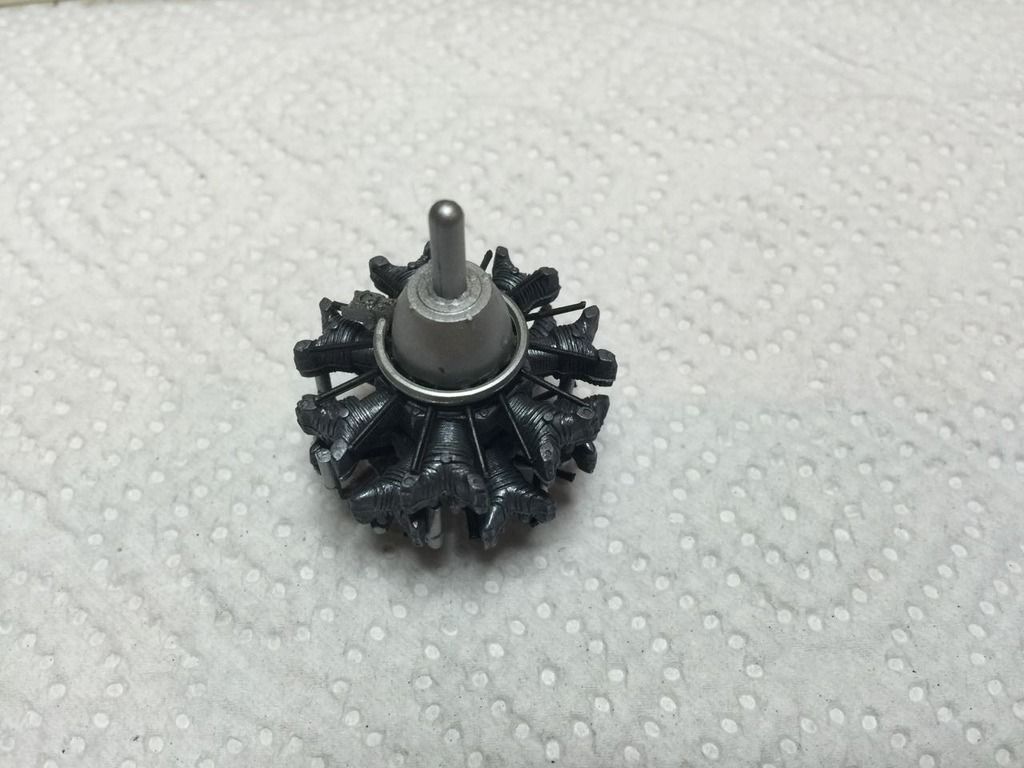
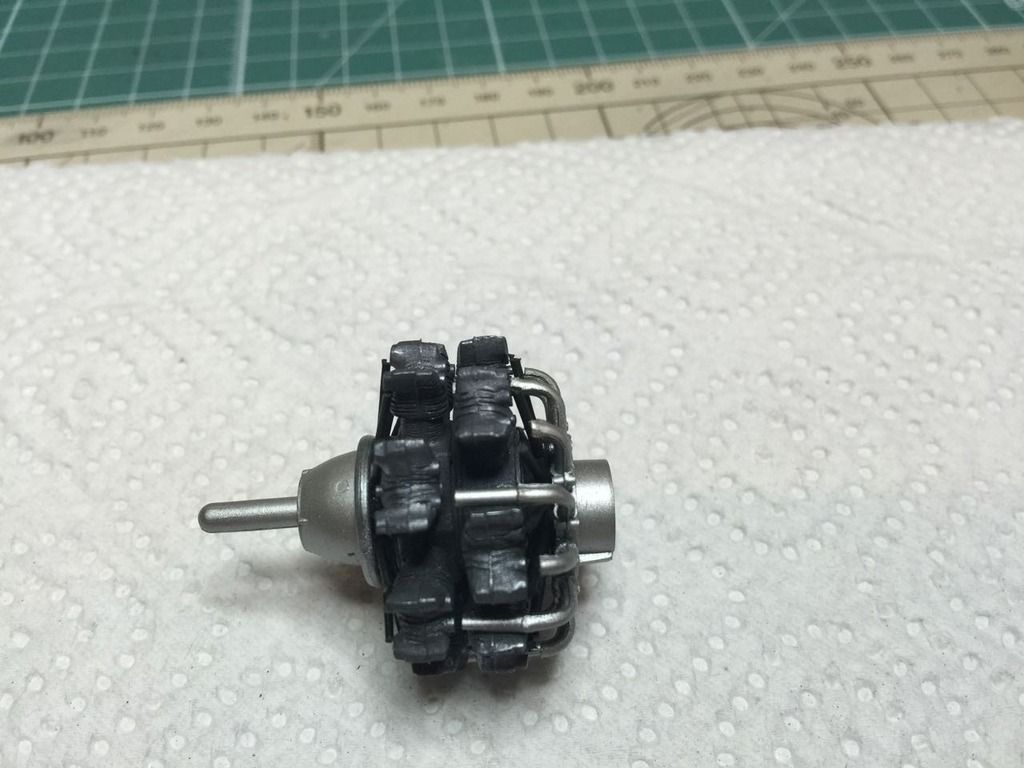
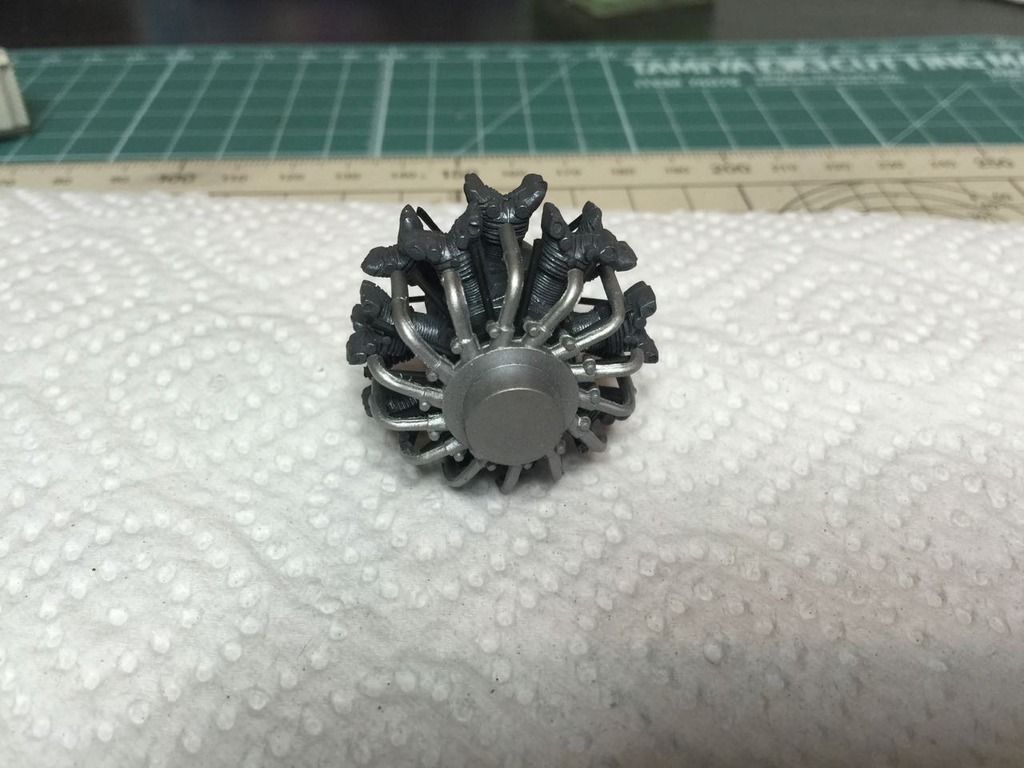
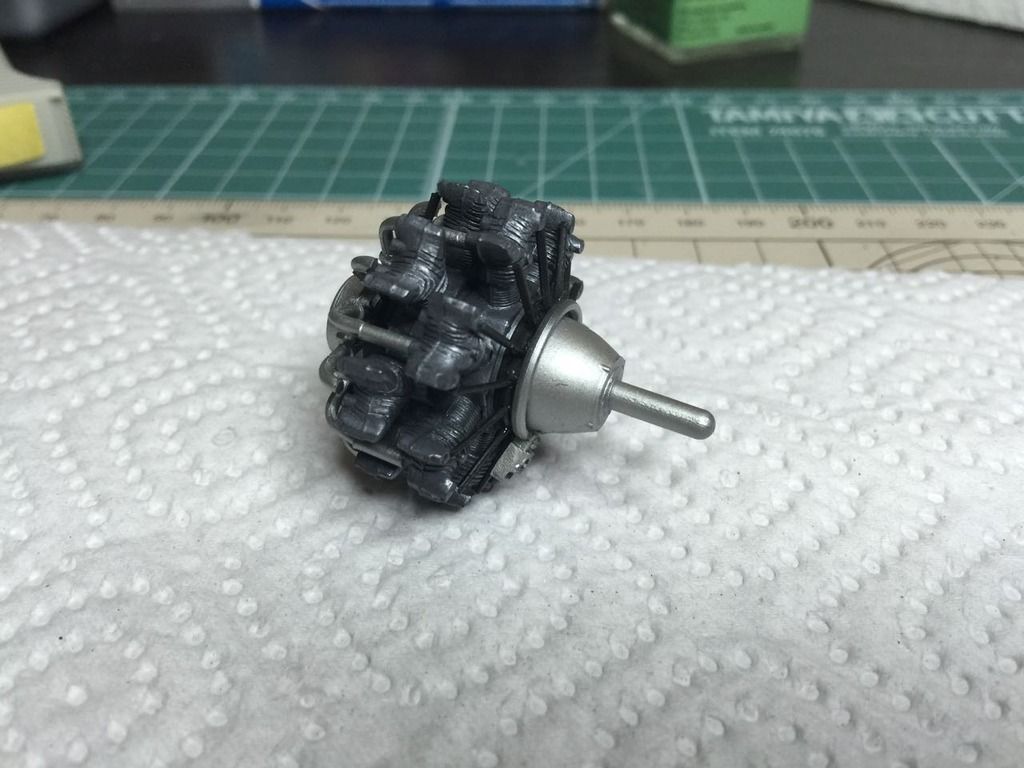
So that was it for the cockpit today. I then went on and sprayed the engine. I used some Mr Metal Iron, Tamiya X-18 Semi-gloss Black,and Tamiya X-31 Titanium Silver as the base colors.

After the Mr Metal Iron dried I gave it a good rub with a coarse brush and the effect was pretty good.

Image

Image

Image

Image

The next step with the engine is a coat of Allclad Aqua Gloss and then some weathering using AK Interactive's Aircraft Engine Wash and Engine Oil.

Let me know if you have any ideas or advice with building this kit! It will be much appreciated.

/jb
JediBoer

On the bench righ now: Hmm... Lots of unfinished business!
User avatar
JediBoer
Master Sergeant
Master Sergeant
Posts: 437
Joined: Thu Oct 23, 2014 6:33 am
Location: Detroit, MI
United States of America

Re: Mitsubishi A6M5c Zero Fighter Type 52 Hei '203rd Flying Group'

Post by JediBoer »

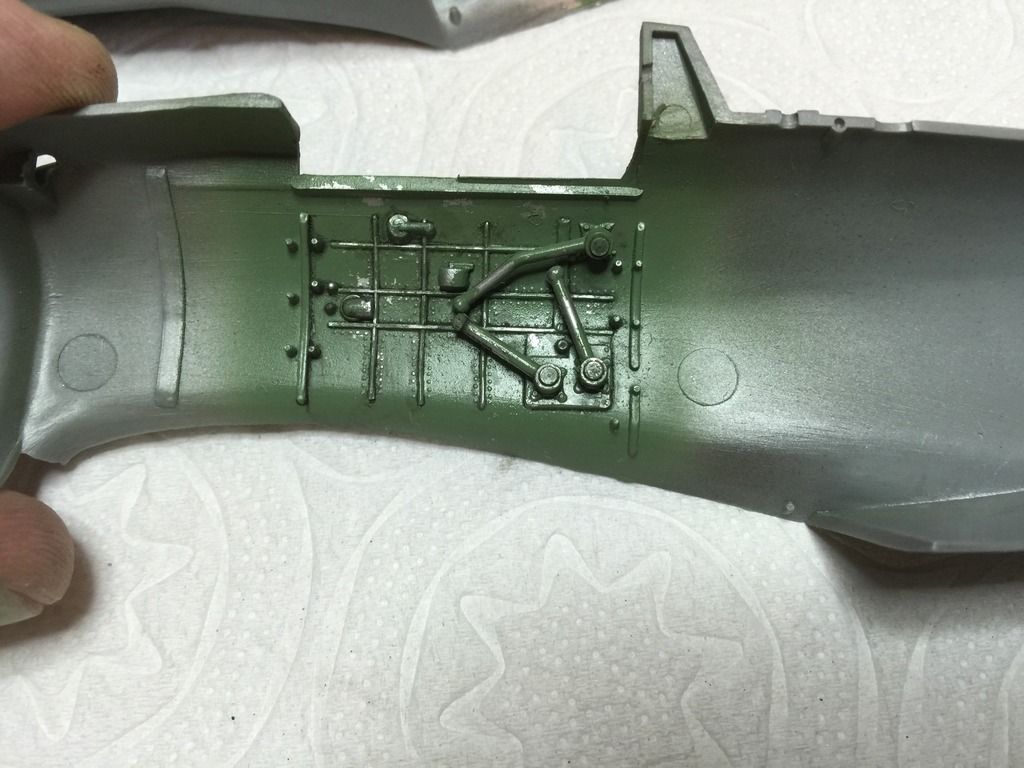
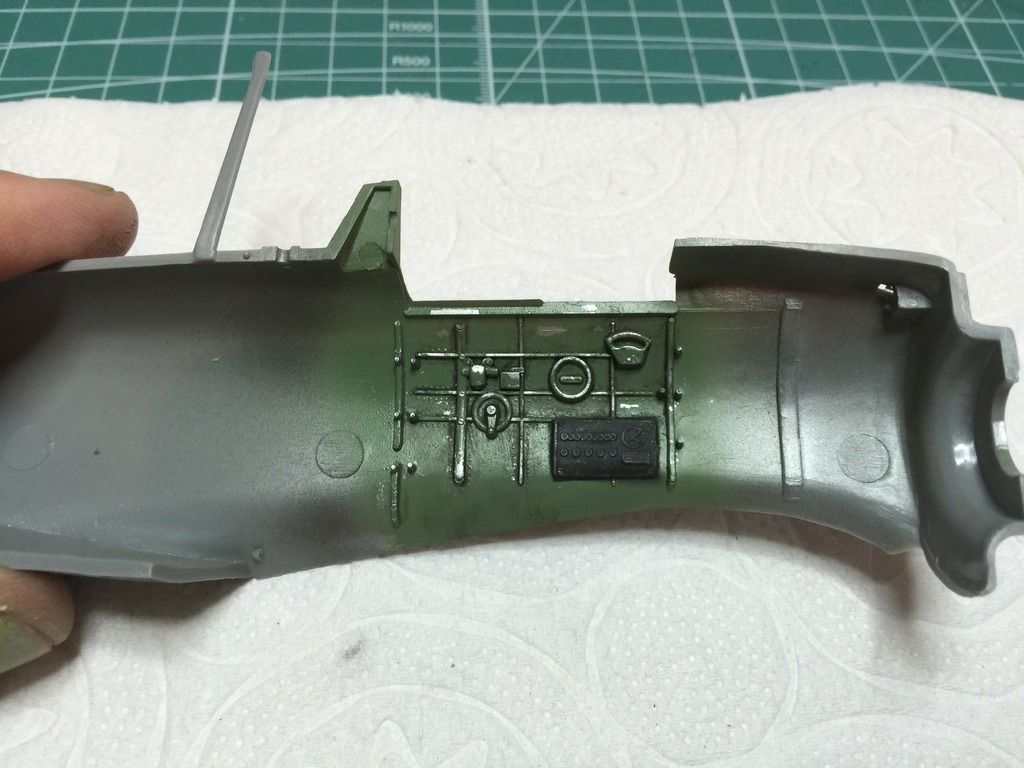
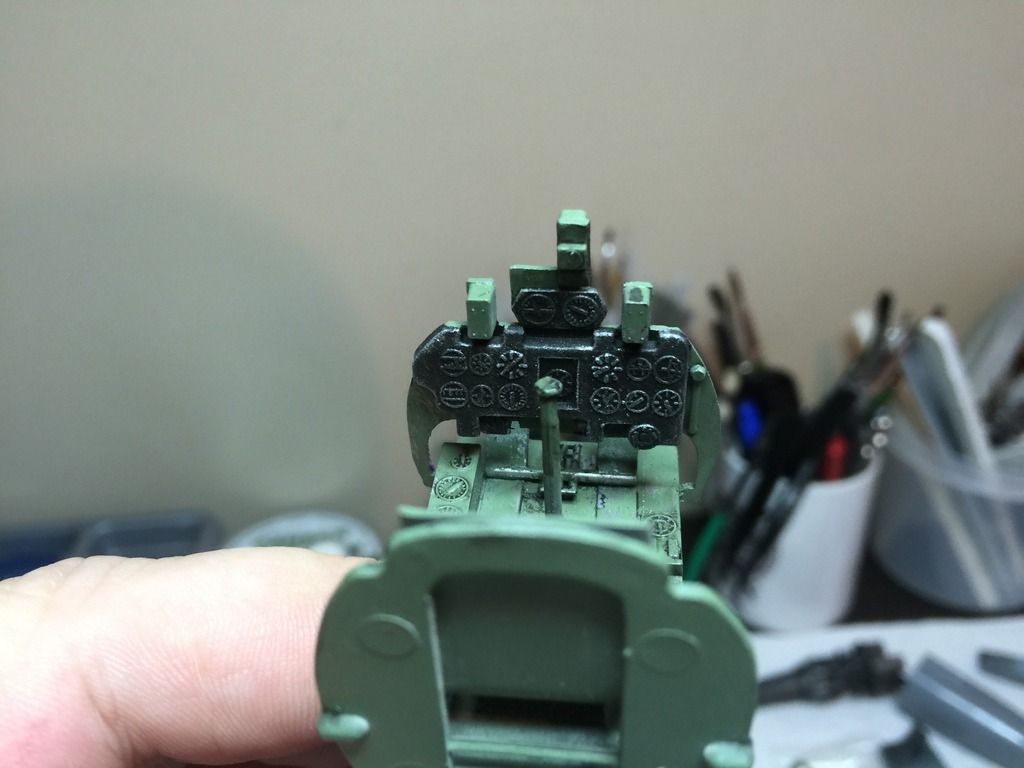
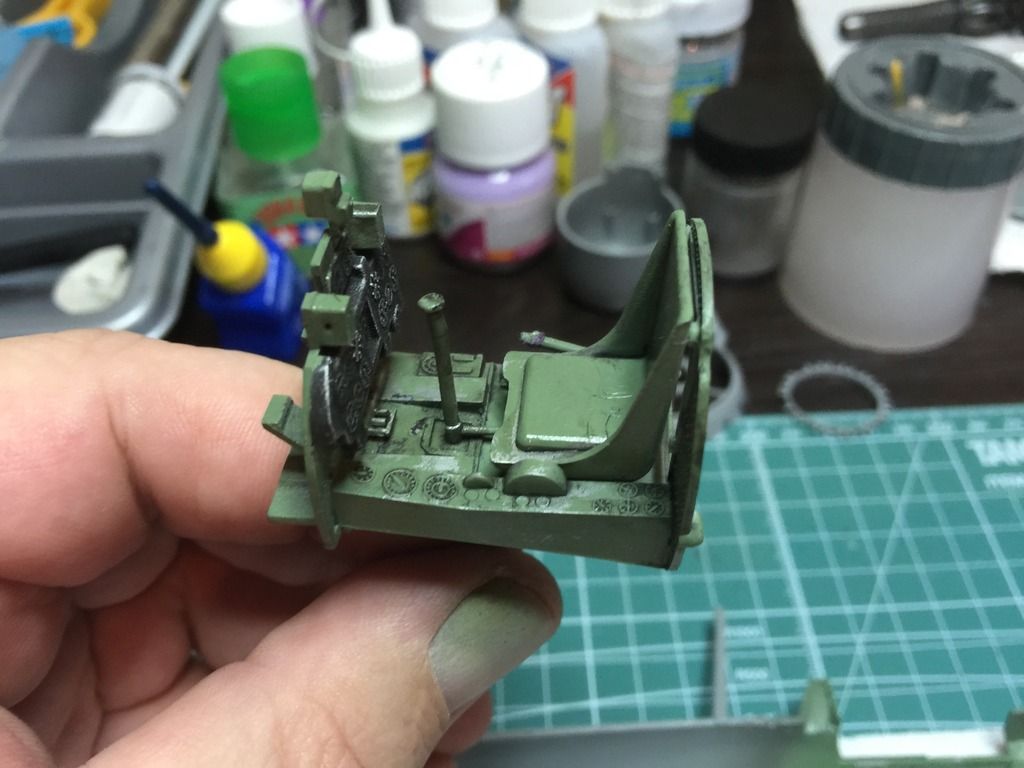
I've been away for a while but I'm back home and am spending some quality time at my work bench! I made some progress on the Zero! I manageed to finish the cockpit.

Here are the two sidewalls:

Image

Image

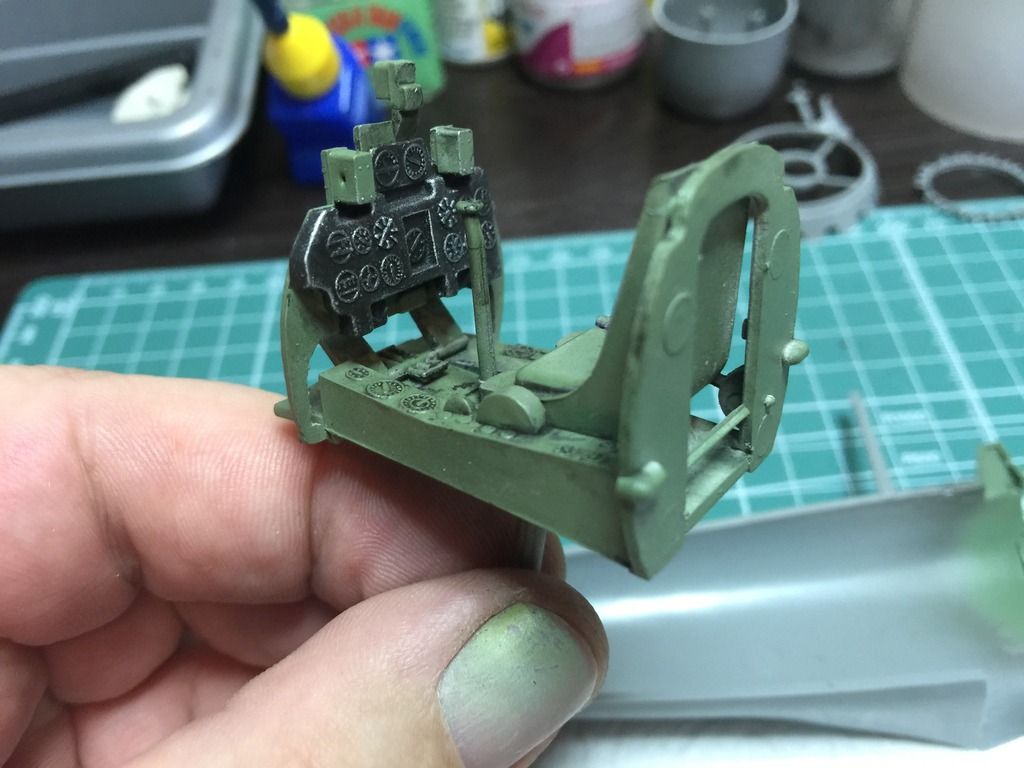
The cockpit itself. The kit comes with decals for the instrument panel but I just didn't feel like struggling with the individual small decals.

Image

Image

Image

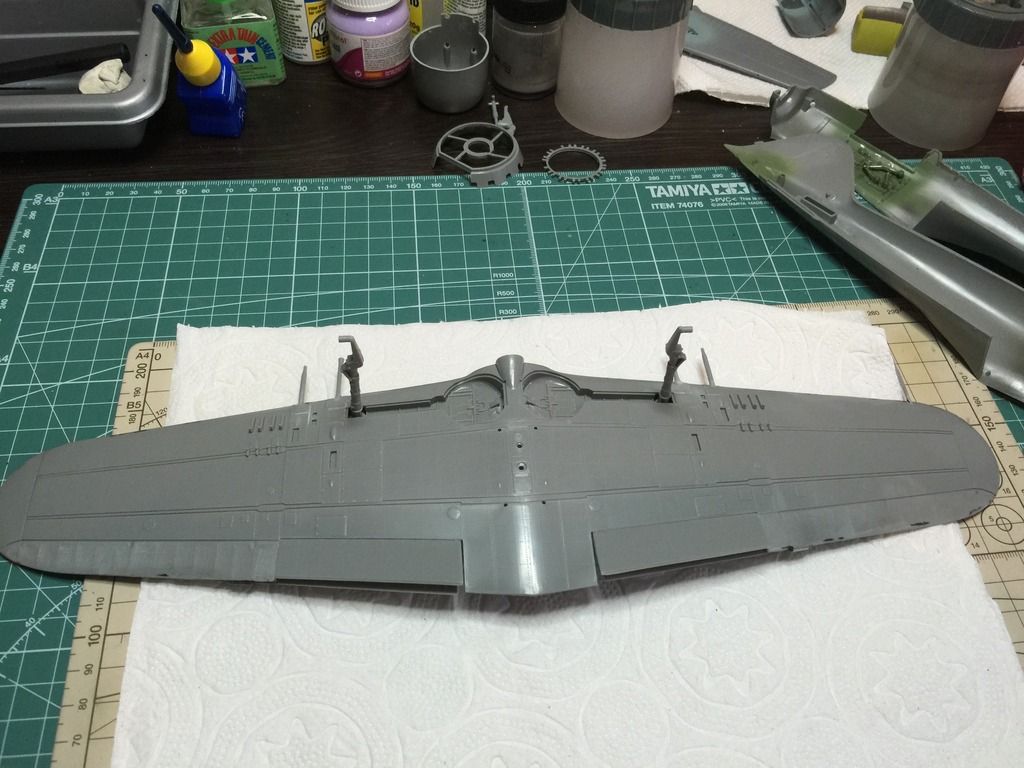
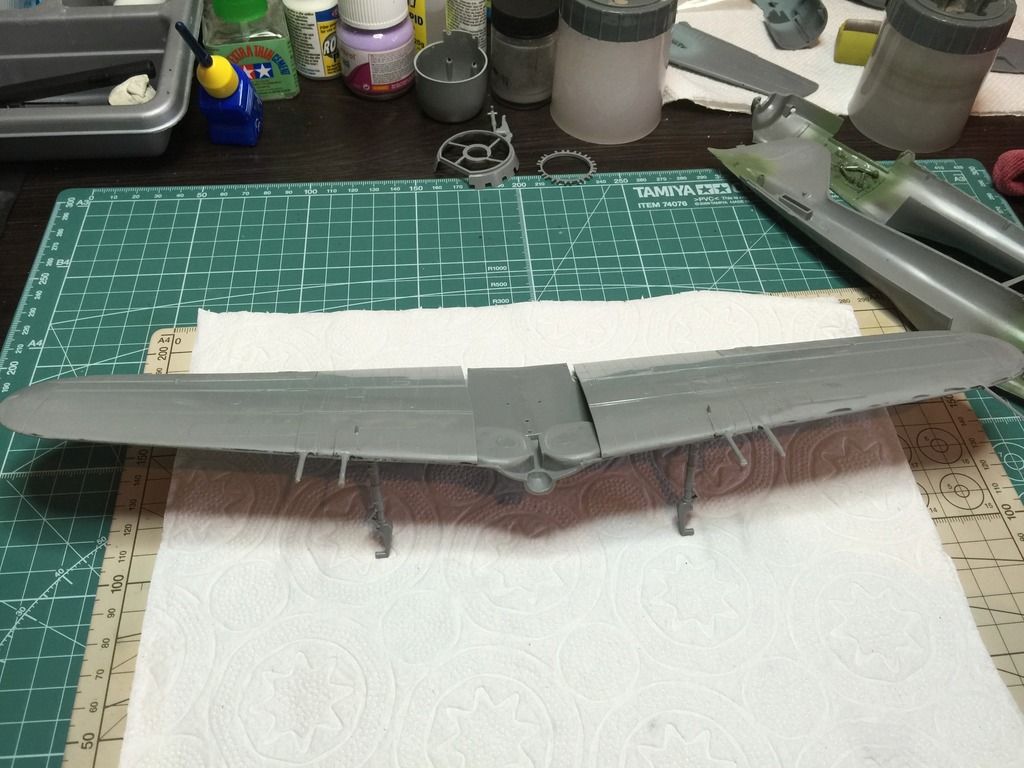
I also completed the wing section sub assembly.

Image

Image

Some more progress pics will follow soon!
JediBoer

On the bench righ now: Hmm... Lots of unfinished business!
User avatar
JediBoer
Master Sergeant
Master Sergeant
Posts: 437
Joined: Thu Oct 23, 2014 6:33 am
Location: Detroit, MI
United States of America

Re: Mitsubishi A6M5c Zero Fighter Type 52 Hei '203rd Flying Group'

Post by JediBoer »

Made some good progress! I kind of lost my mojo with this kit a couple of weeks ago and wanted to scrap it and just use it as a kit to experiment on with different paint mixes etc.

But I decided to push on with it and get it done! Seeing all the other guys' great work really got me going this morning!

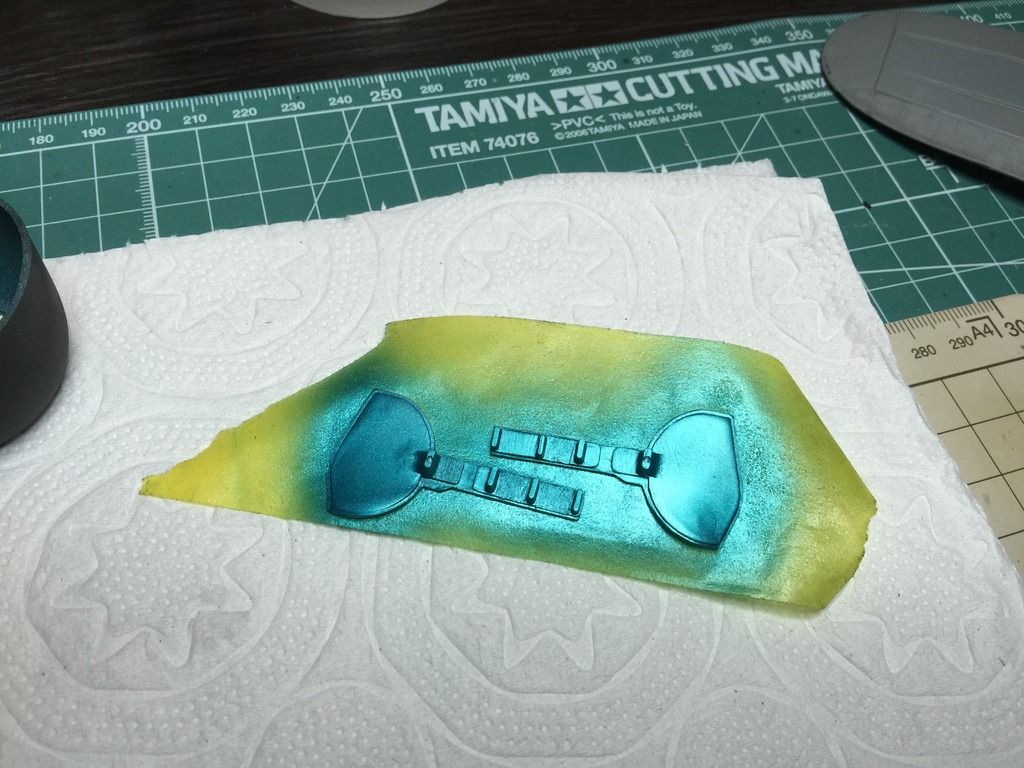
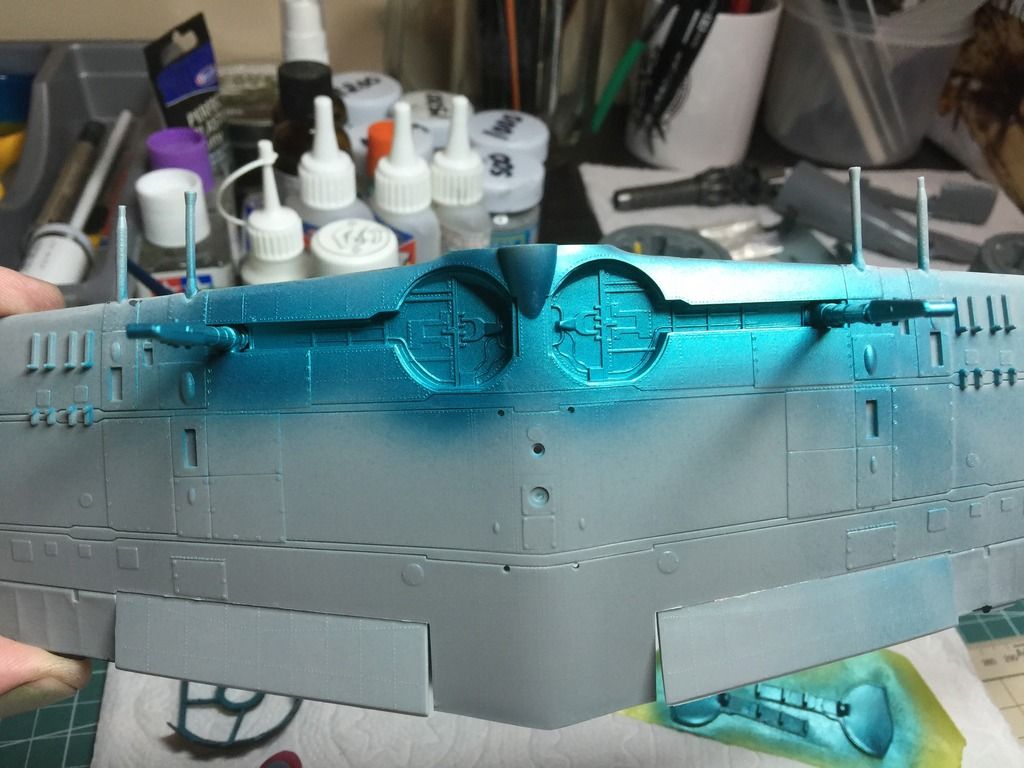
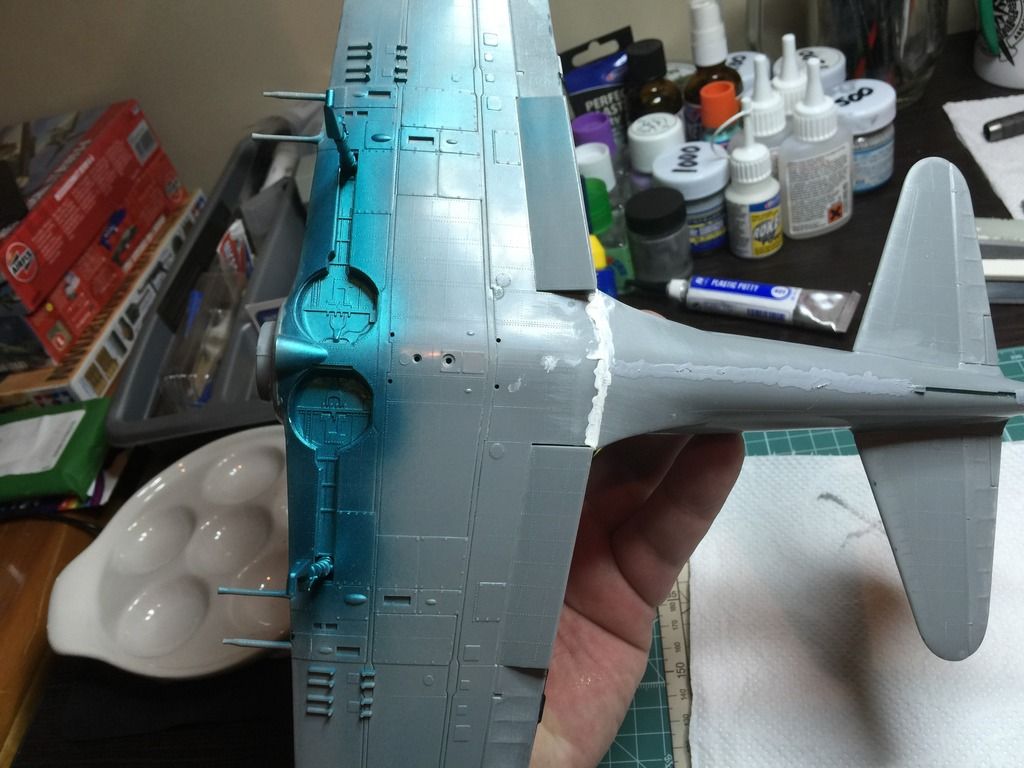
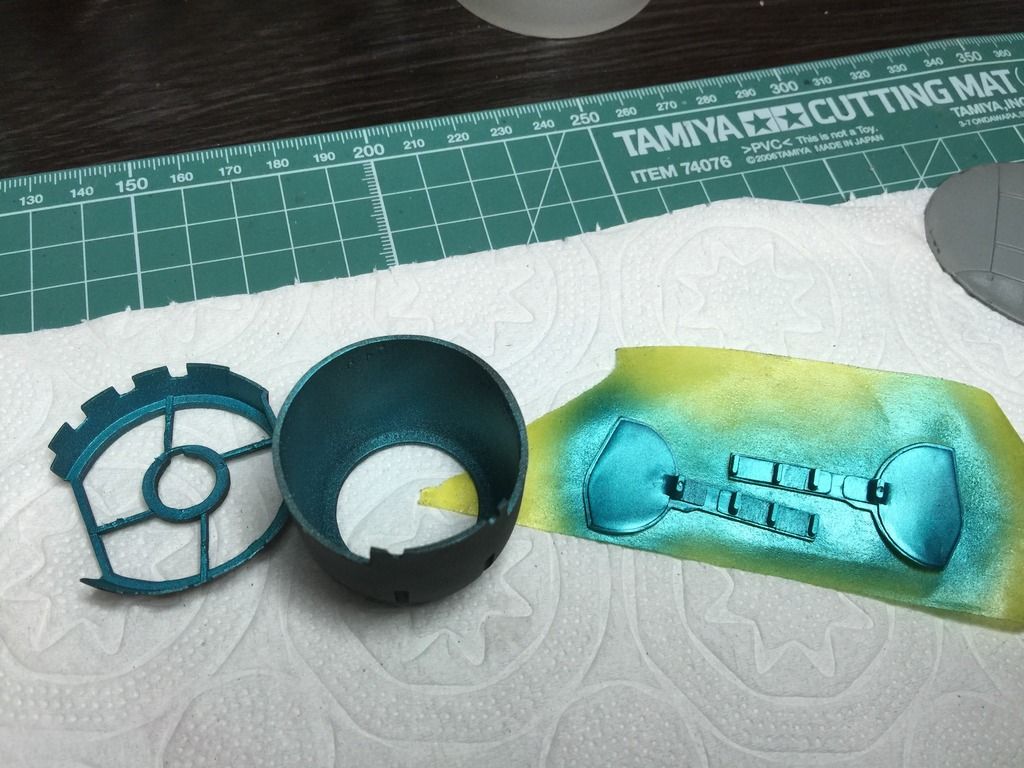
Started by spraying the landing gear with this beautiful Mr Hobby Metallic Blue-Green.

Image

Image

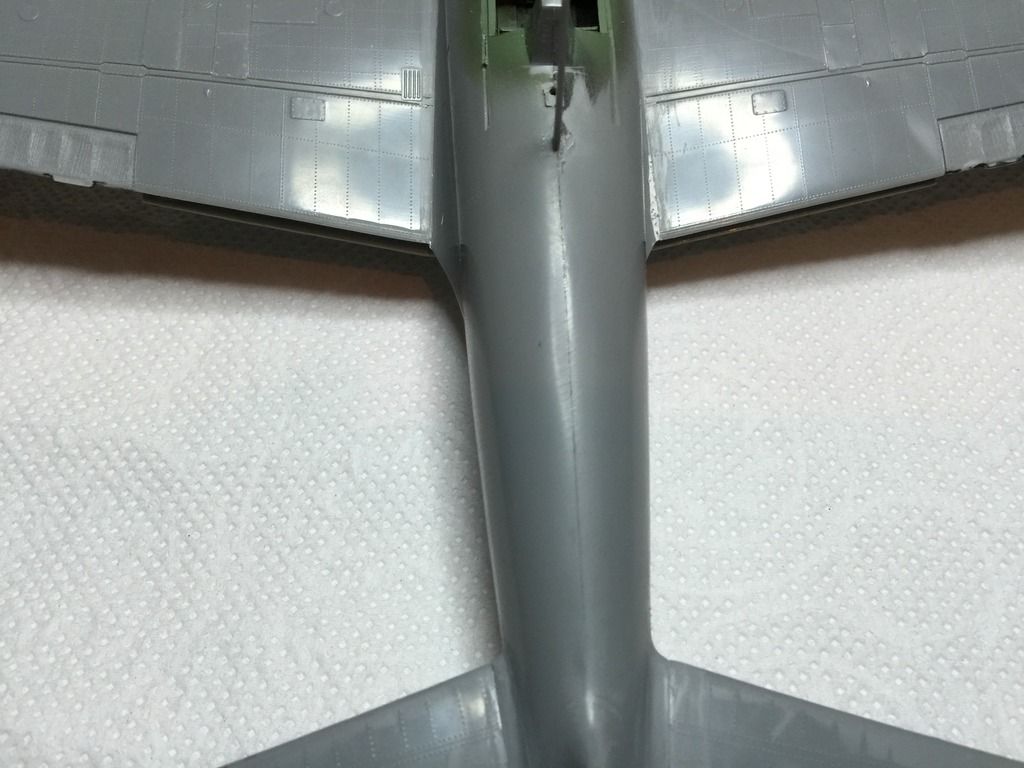
As you can see. most of the detail on this kit is raised. It is a very old kit. I probably should have done a bit more research. The fit is bad then when you fill and sand, you sand away all the detail and I'll have to do a lot of rescribing!

Image

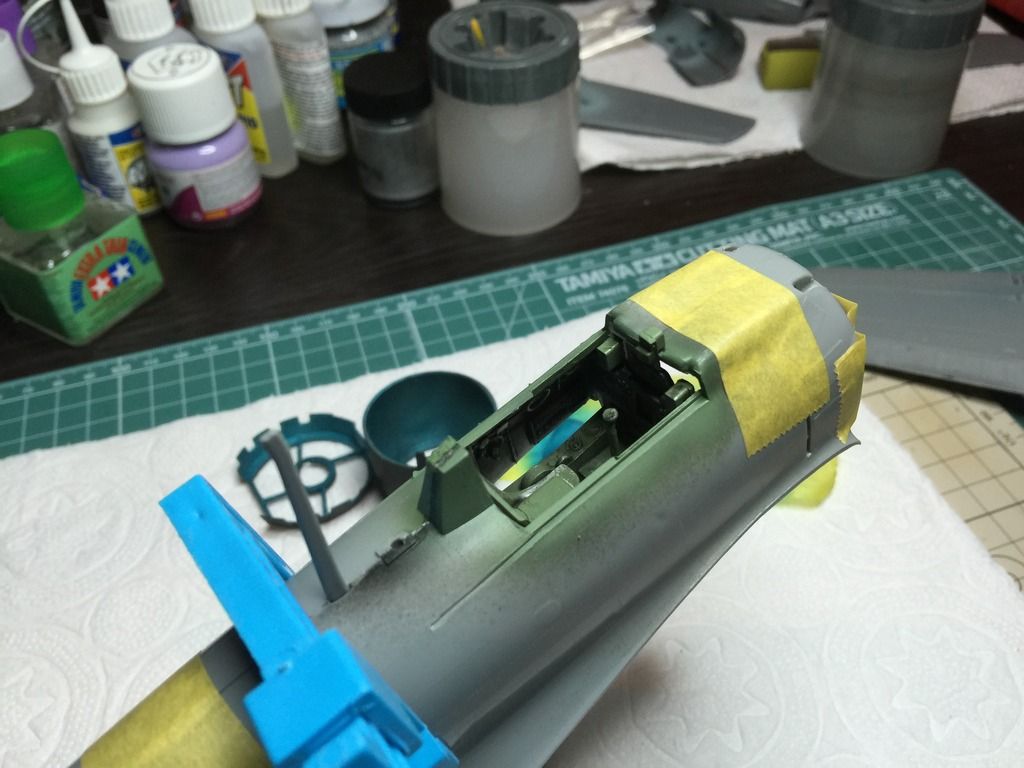
I am still experimenting though! I used several filling techniques I've seen on Youtube and read about on the forum. Above, where fuselage and wing attaches on the right, I used talcum and cyanoacrylate glue but got a very rough finish which was then covered with Valejo Plastic Putty. The seam line behind the cockpit was also filled with cyanoacrylate glue.

The cockpit glued in place. Lots of gapes everywhere.

Image

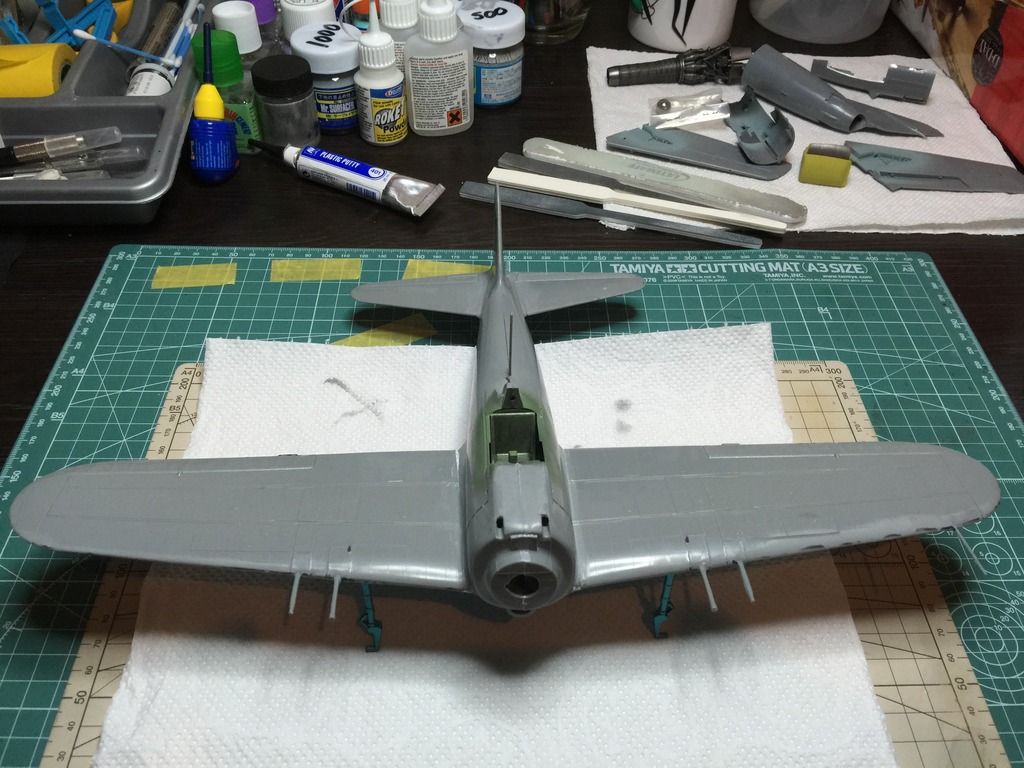
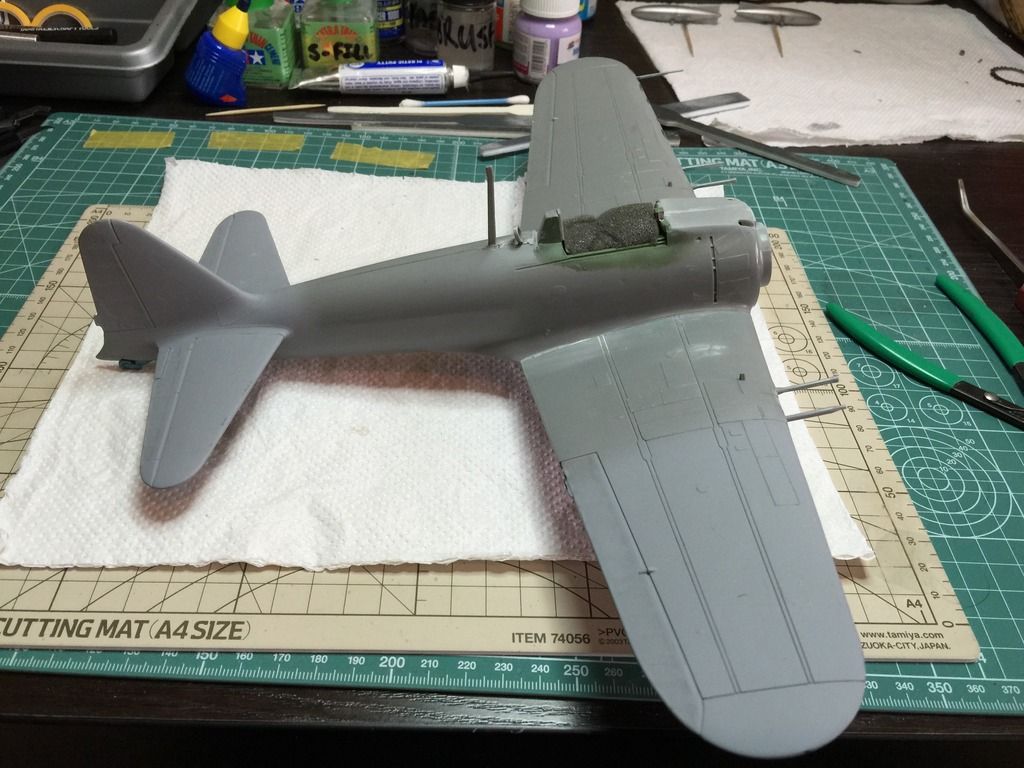
Here is the progress of the day. Almost a Zero!

Image

And of course, some more filling. This time with Valejo Plastic Putty and Mr Surfacer 1000.

Image

I also primed and started painting the engine cowling and will update you soon on the engine sub assembly.

Image

/jb
JediBoer

On the bench righ now: Hmm... Lots of unfinished business!
User avatar
JediBoer
Master Sergeant
Master Sergeant
Posts: 437
Joined: Thu Oct 23, 2014 6:33 am
Location: Detroit, MI
United States of America

Re: Mitsubishi A6M5c Zero Fighter Type 52 Hei '203rd Flying Group'

Post by JediBoer »

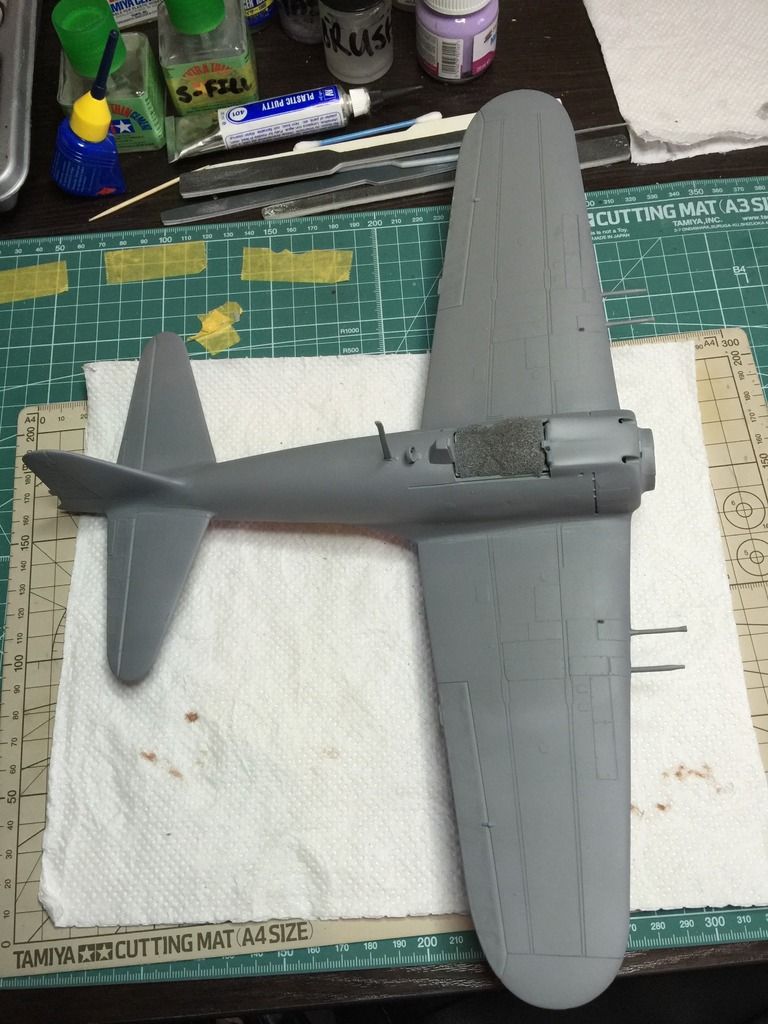
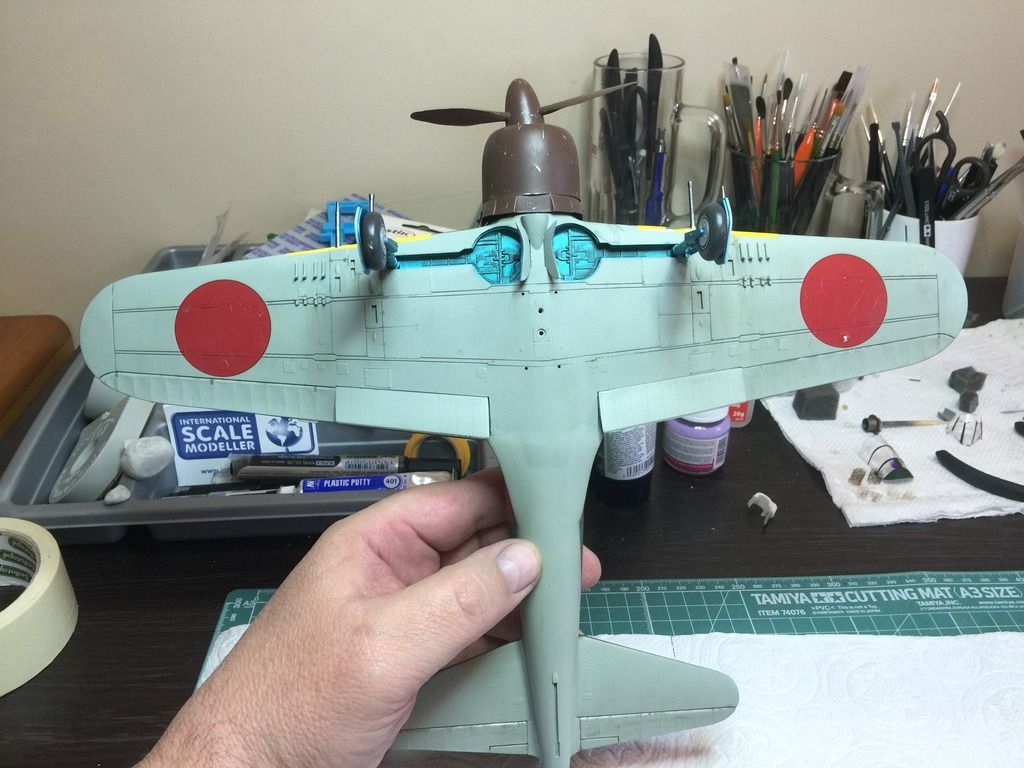
This is hardest build I have ever done! :crazy: I have wanted to give up on this kit so many times that I actually went to the local hobby shop and bought another kit for the SiG! But it keeps pulling me back in and after lots and lots of filling and sanding and rescribing, the Zero is ready for priming. I started priming with my favorite primer (AK's) but then decided to experiment with the Alclad grey primer which I bought the other day.

Here is the Zero with some bits primed with AK.

Image

And here she is after the Alclad primer!

Image

It went down super smooth and dries very quickly! I liked it a lot but the smell and fumes... :bash:

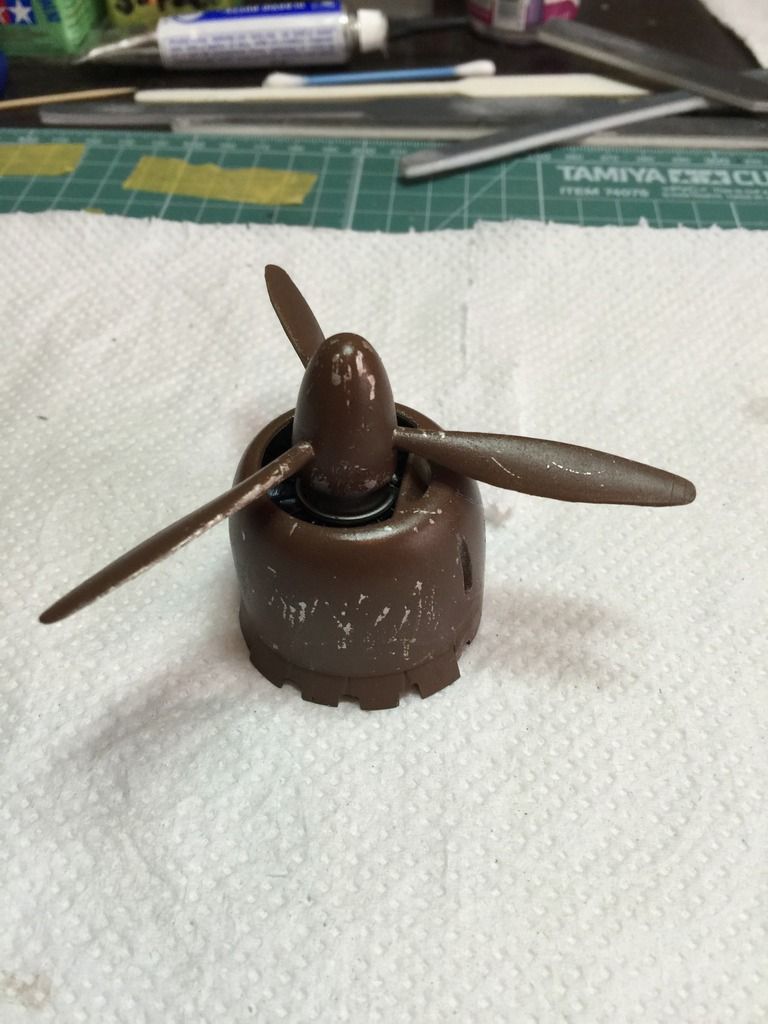
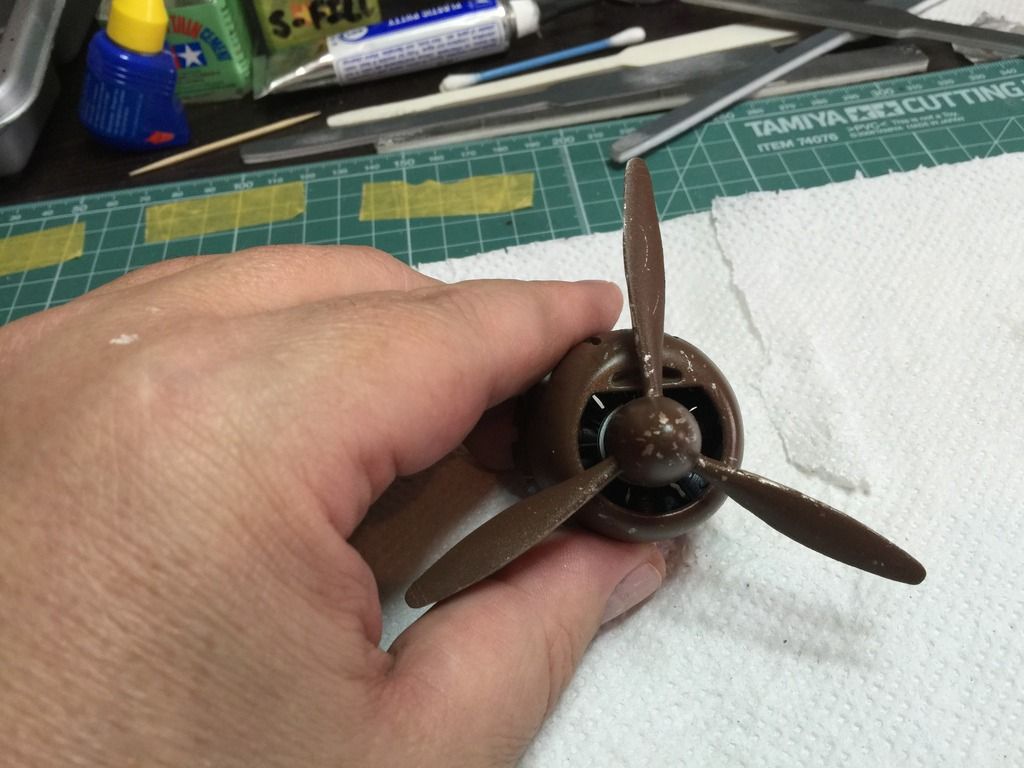
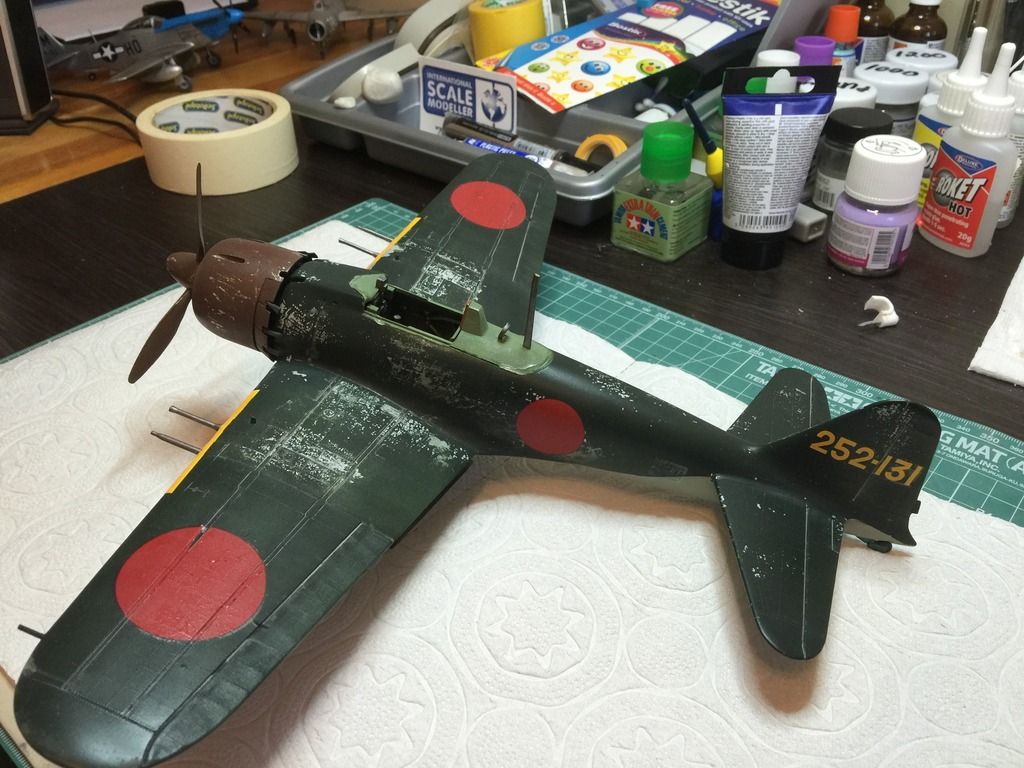
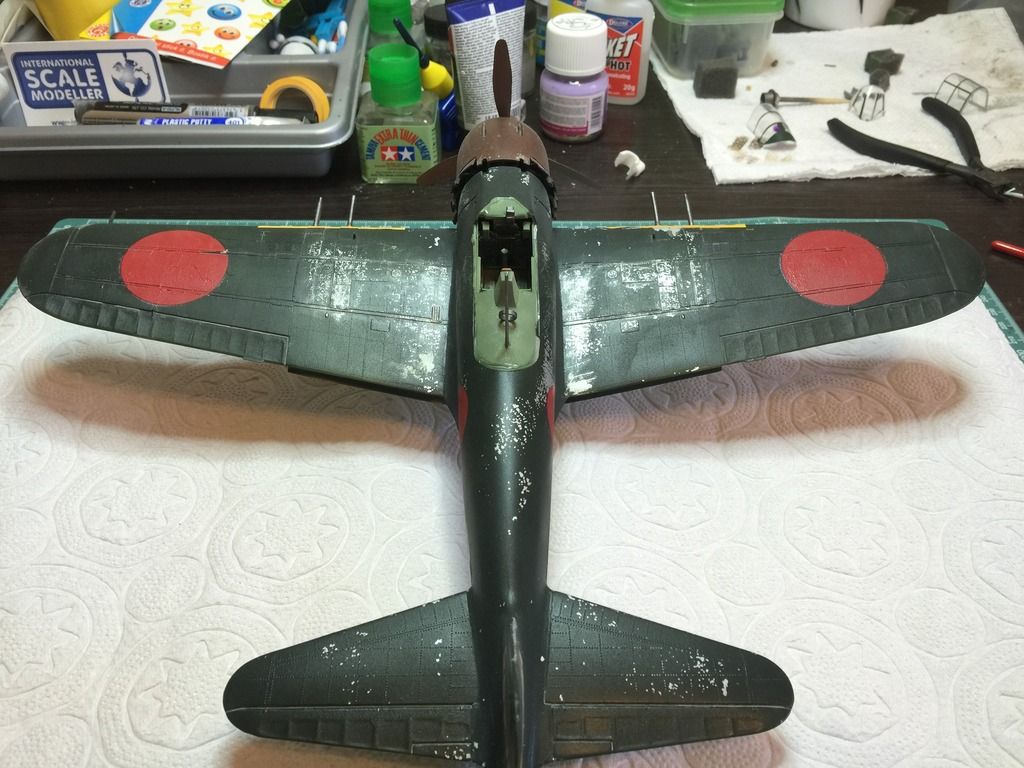
The engine section and cowling is now painted up, weathered and gloss coated. Still have to attach the exhausts.

Image

Made a slight booboo with the centering of the prop! But, it was a lesson learned and does not look too bad!
Image

Next up is the preshading and painting the underside!
/JB
JediBoer

On the bench righ now: Hmm... Lots of unfinished business!
User avatar
Thumboy
Sergeant First Class
Posts: 268
Joined: Mon Feb 17, 2014 7:05 am
Location: Wellington NZ

Re: Mitsubishi A6M5c Zero Fighter Type 52 Hei '203rd Flying Group'

Post by Thumboy »

You are doing a great job on the zero, glad you haven't given up. I always find I learn so much more from the hard builds and they are so rewarding when you finish :th:

Are you going to use the worn effects on the fuselage and wings as well?

Good luck with the rest of the build, looks like the hardest parts are behind you now :cheers2:
Andrew

On the bench
TonyCnyc
Staff Sergeant
Staff Sergeant
Posts: 195
Joined: Thu May 08, 2014 5:08 pm
Location: NYC
Contact:

Re: Mitsubishi A6M5c Zero Fighter Type 52 Hei '203rd Flying Group'

Post by TonyCnyc »

Coming along pretty good for an old kit. I find these classic kits to be great learning experiences. Looking forward to the rest of your build.
heel
Sergeant First Class
Posts: 285
Joined: Thu Nov 06, 2014 3:29 pm
Location: North Carolina, USA

Re: Mitsubishi A6M5c Zero Fighter Type 52 Hei '203rd Flying Group'

Post by heel »

Doing an awesome job on this one bud. The cowling and prop look fantastic.
User avatar
JediBoer
Master Sergeant
Master Sergeant
Posts: 437
Joined: Thu Oct 23, 2014 6:33 am
Location: Detroit, MI
United States of America

Re: Mitsubishi A6M5c Zero Fighter Type 52 Hei '203rd Flying Group'

Post by JediBoer »

Thumboy wrote:You are doing a great job on the zero, glad you haven't given up. I always find I learn so much more from the hard builds and they are so rewarding when you finish :th:

Are you going to use the worn effects on the fuselage and wings as well?

Good luck with the rest of the build, looks like the hardest parts are behind you now :cheers2:
Thanks for the encouragement Andrew! Yes, used worn effects all over. I will soon post some progress photos. Thank you again! :cheers2:
JediBoer

On the bench righ now: Hmm... Lots of unfinished business!
User avatar
JediBoer
Master Sergeant
Master Sergeant
Posts: 437
Joined: Thu Oct 23, 2014 6:33 am
Location: Detroit, MI
United States of America

Re: Mitsubishi A6M5c Zero Fighter Type 52 Hei '203rd Flying Group'

Post by JediBoer »

TonyCnyc wrote:Coming along pretty good for an old kit. I find these classic kits to be great learning experiences. Looking forward to the rest of your build.
It has been a learning experience, alright! But a good one! Thanks for the kind comments! :th:
JediBoer

On the bench righ now: Hmm... Lots of unfinished business!
User avatar
JediBoer
Master Sergeant
Master Sergeant
Posts: 437
Joined: Thu Oct 23, 2014 6:33 am
Location: Detroit, MI
United States of America

Re: Mitsubishi A6M5c Zero Fighter Type 52 Hei '203rd Flying Group'

Post by JediBoer »

heel wrote:Doing an awesome job on this one bud. The cowling and prop look fantastic.
Thanks for the comments! :cheers2:
JediBoer

On the bench righ now: Hmm... Lots of unfinished business!
User avatar
JediBoer
Master Sergeant
Master Sergeant
Posts: 437
Joined: Thu Oct 23, 2014 6:33 am
Location: Detroit, MI
United States of America

Re: Mitsubishi A6M5c Zero Fighter Type 52 Hei '203rd Flying Group'

Post by JediBoer »

Update time seeing that we are almost at the end of the SiG!

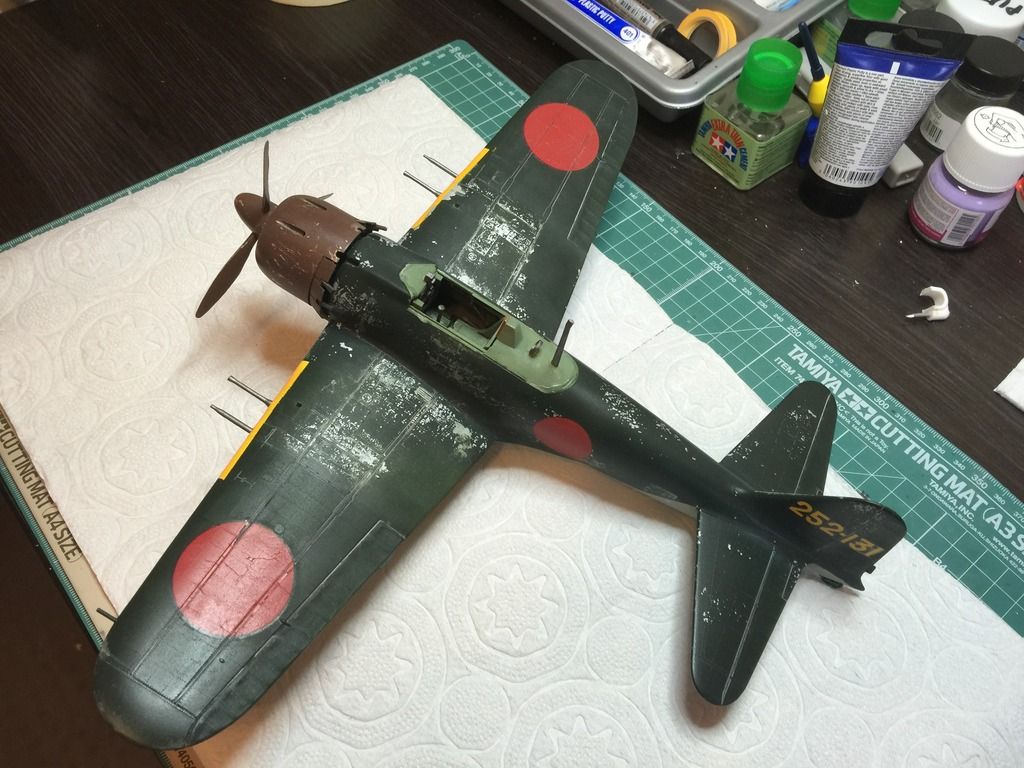
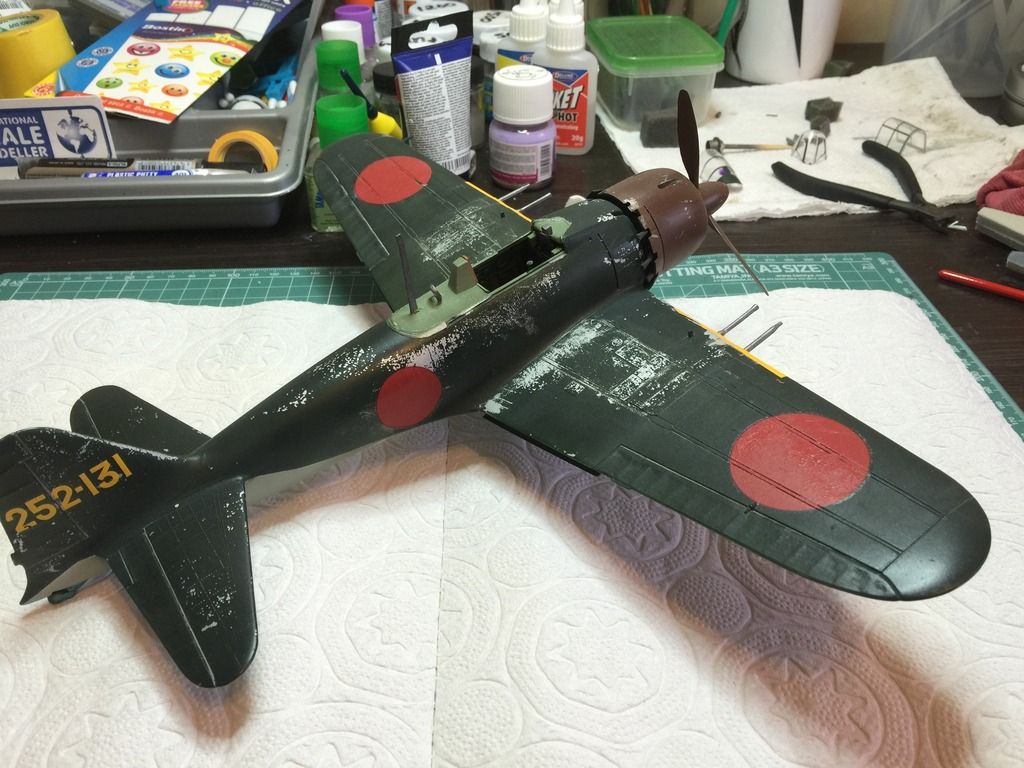
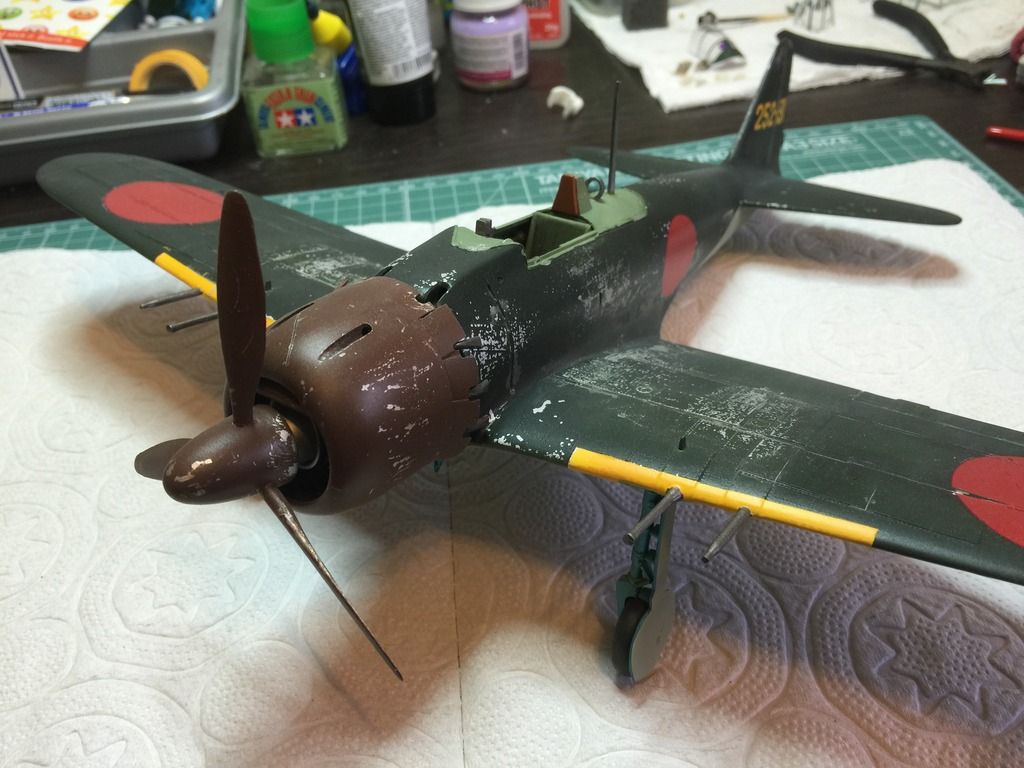
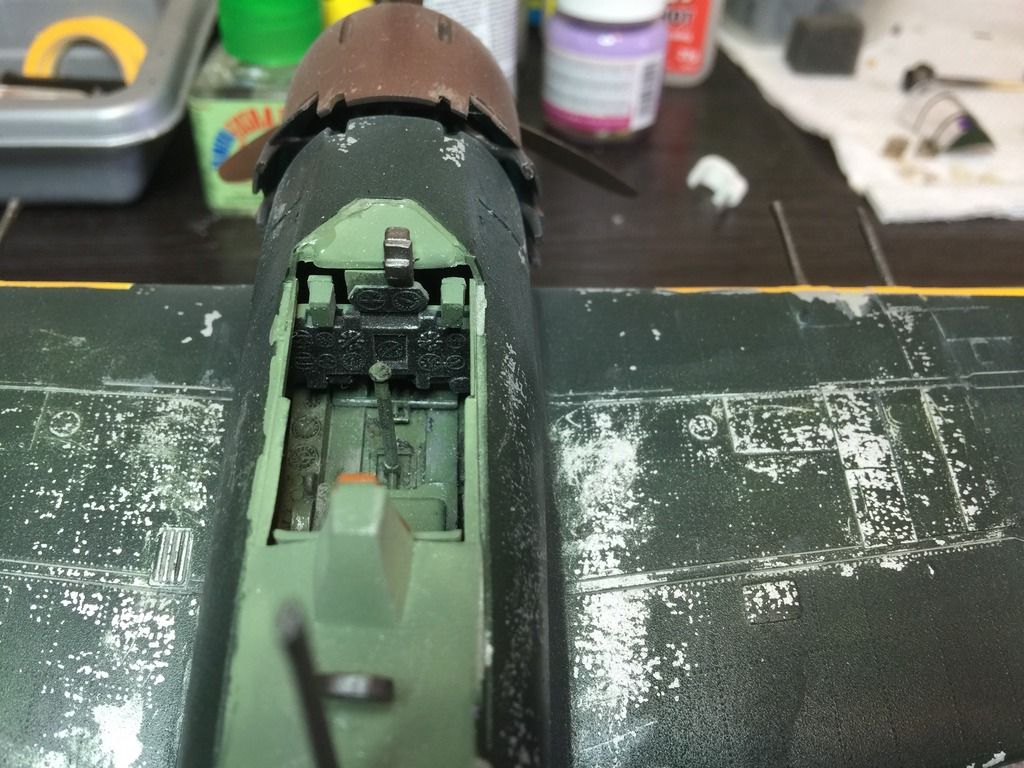
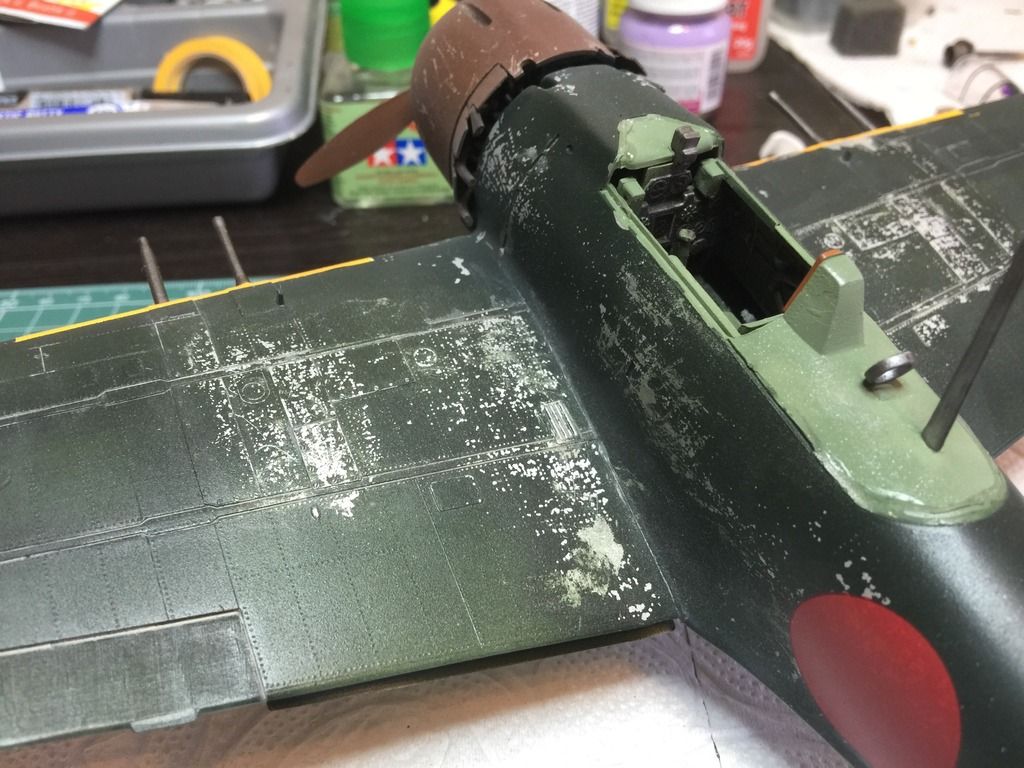
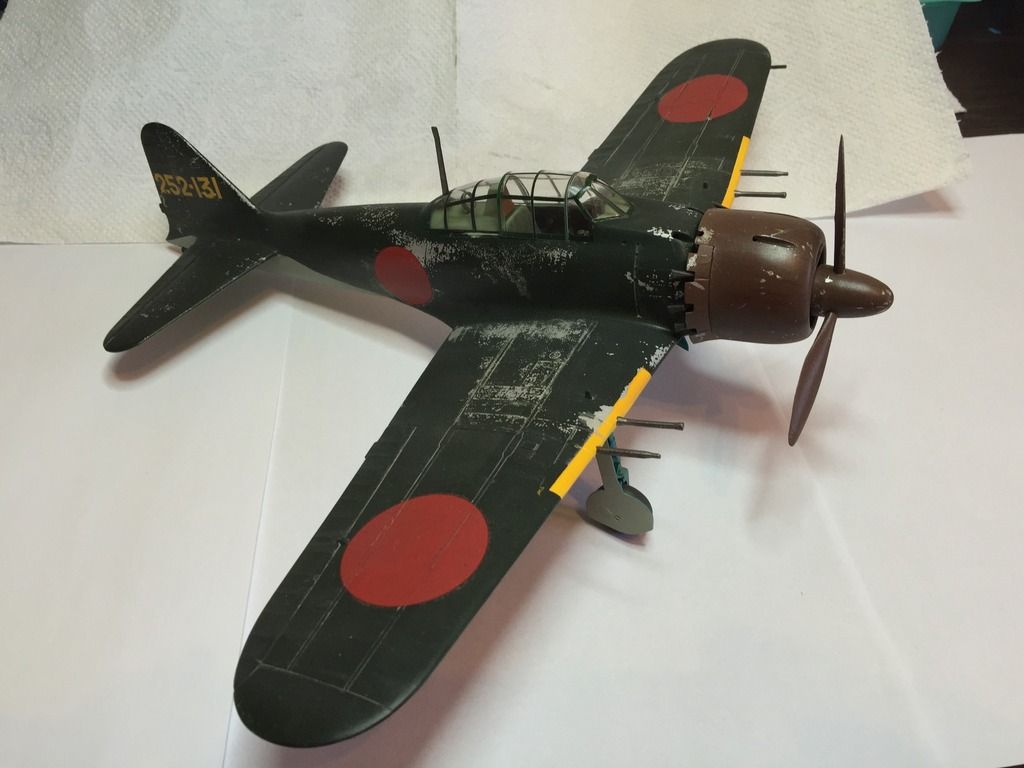
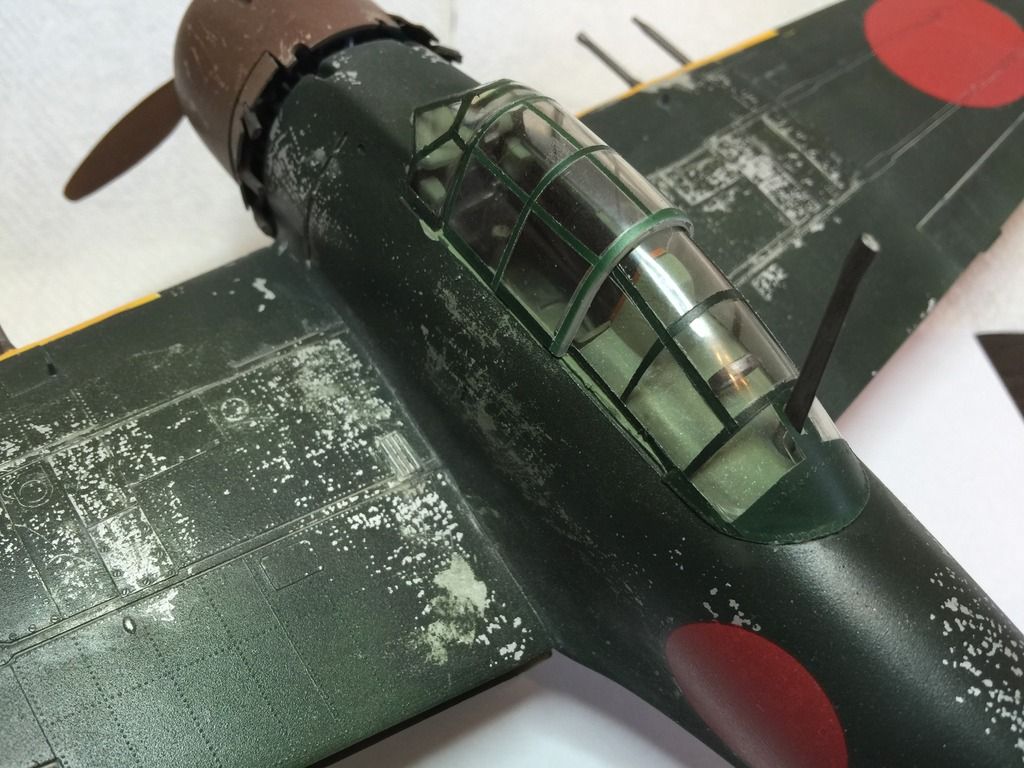
I has been a long and interesting road with this one! But she is finally coming together. After priming, she was sprayed with Tamiya XF-16 Flat Aluminum. Then AK Interactive's Worn Effects.Then the main colors was sprayed on. The upper color is Tamiya XF-11 J.N. Green and the lower color is XF-12 J.N. Grey.The paints went down well, although I think my pressure or dilution was not completely correct. The XF-12 went down very well but the XF-11 had a slightly rough texture, almost like a 1000 grit sanding paper so another coat with some retarder was sprayed over again to smooth it out.

After the paint dried, I used some sticky masking tape to chip. Not my trick, read or saw it somewhere I'm sure but it worked very well. It was then gloss coated with Alclad Aqua Gloss and decalled. Another coat of Aqua Gloss and then panel lines (the few recessed ones) were done using AMMO Mig aircraft weathering set No. 7418 for WWII Japanese Airplanes. A mix of wash was applied for a some salty streaks and dust and then it was dull coated. This is the result.

Image

Image

Image

Image

Image

Image

Image

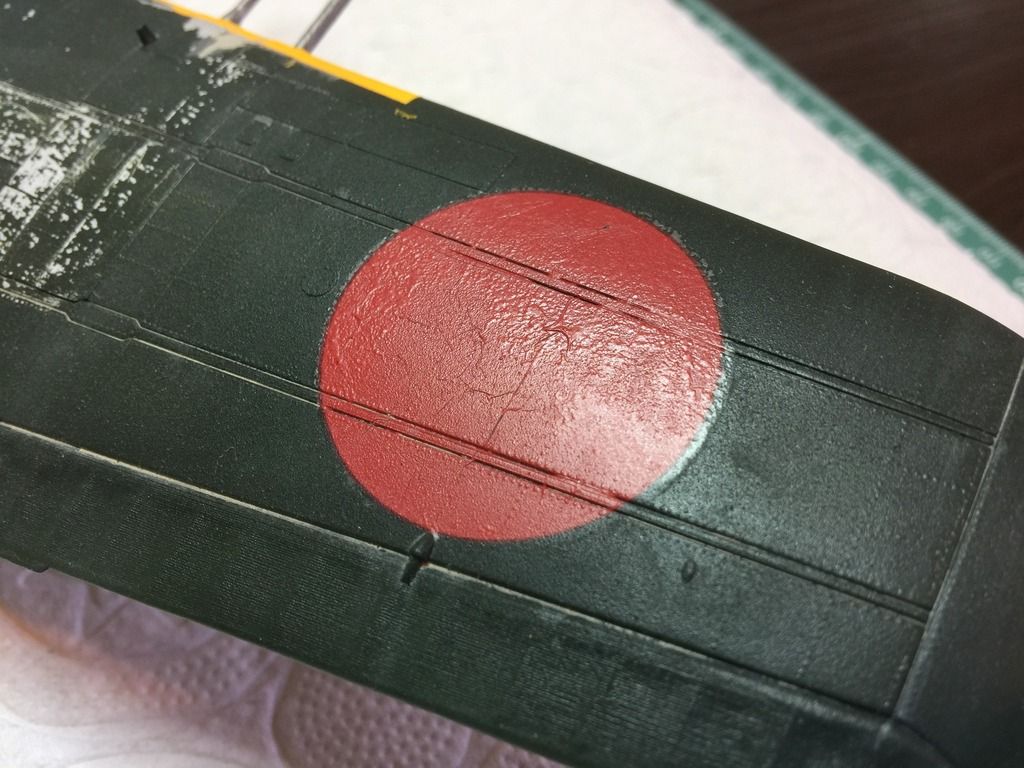
A major pain was the decals. They were thick and brittle. Some of the decals just cracked as they were drying. The decals were also very stubborn and just did not want to go down. i applied almost 10 coats of Micro Sol and it had almost no effect. I could get them down a little after a coat of Tamiya Mark Fit Strong. They still don't look great, but it was probably because the kit, and therefor the decals, is so old. At least that is what I'm telling myself! :nena:

Image

That silvering is just annnoying and even stand out more because of the black green color.

I also didn't do any chipping on the lower wings and fuselage just because I thought it would not be chipped so much and because it is "out of the eye".

Image

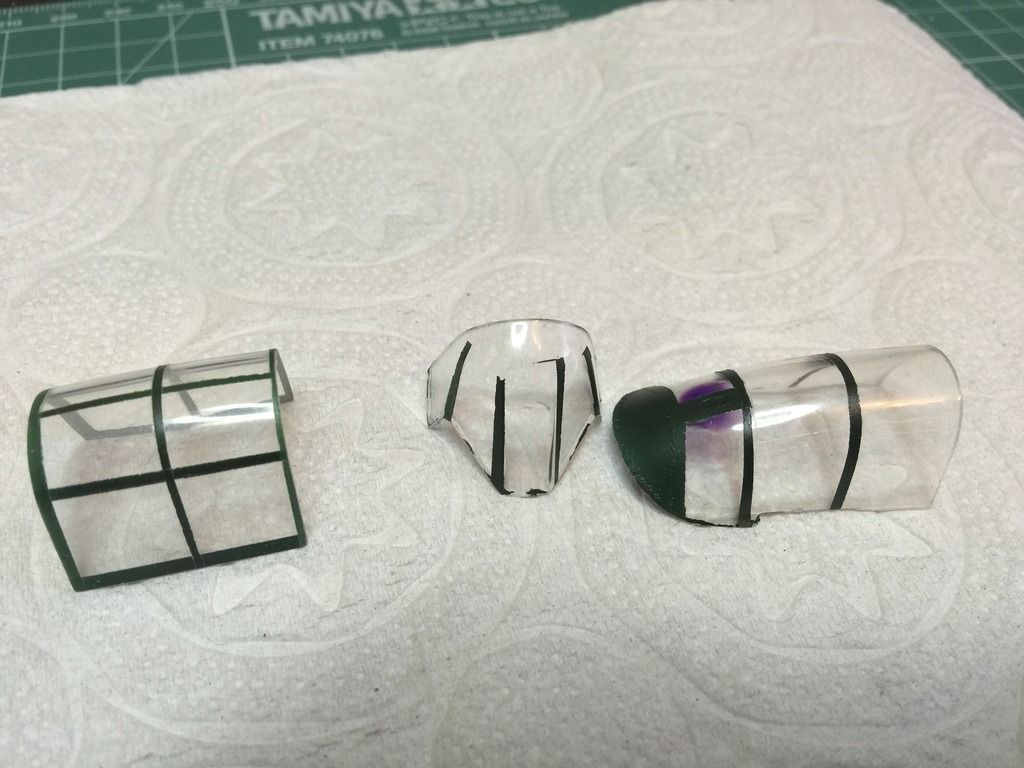
There is only one task left and that is to complete the canopy! There are no raised details on the canopy so masking is almost impossible. No, it is impossible, I also could not get a masking set anywhere. Only option is to mask of the canopy lines and paint them.

Image

But I'm almost done!

Thanks for looking and commenting!

/JB
JediBoer

On the bench righ now: Hmm... Lots of unfinished business!
cybershed
Private
Private
Posts: 21
Joined: Wed Dec 31, 2014 5:48 pm
Location: Scotland

Re: Mitsubishi A6M5c Zero Fighter Type 52 Hei '203rd Flying Group'

Post by cybershed »

I'm currently decaling my 1:48 Tamiya Zero. The decals are so thick and still look very much like decals. I've given the about 4 coats of micro sol with vety limited progress on the effect. From your comments, sounds like I'm not alone with this experience.
On the bench: Airfix MkI Hawker Hurricane
User avatar
JediBoer
Master Sergeant
Master Sergeant
Posts: 437
Joined: Thu Oct 23, 2014 6:33 am
Location: Detroit, MI
United States of America

Re: Mitsubishi A6M5c Zero Fighter Type 52 Hei '203rd Flying Group'

Post by JediBoer »

cybershed wrote:I'm currently decaling my 1:48 Tamiya Zero. The decals are so thick and still look very much like decals. I've given the about 4 coats of micro sol with vety limited progress on the effect. From your comments, sounds like I'm not alone with this experience.
I feel your pain mate! These were the absolute worst decals I've ever come across. Ever! Japanese decals seems to only work with Japanese decal solutions, so I'll be using the Tamiya Mark Fit with Japanese decals and MicroSol/Set with European/American decals. :cheers2:
JediBoer

On the bench righ now: Hmm... Lots of unfinished business!
User avatar
JediBoer
Master Sergeant
Master Sergeant
Posts: 437
Joined: Thu Oct 23, 2014 6:33 am
Location: Detroit, MI
United States of America

Re: Mitsubishi A6M5c Zero Fighter Type 52 Hei '203rd Flying Group'

Post by JediBoer »

She is done! Canopy painting took some time, but I'm calling her done! Quite happy to get to this point! This was the hardest build for me since I picked up the hobby again. :wall:

Image

Image

Image

The rest of the photos will he in the final reveal section!

Thanks for watching!

/JB
JediBoer

On the bench righ now: Hmm... Lots of unfinished business!
cybershed
Private
Private
Posts: 21
Joined: Wed Dec 31, 2014 5:48 pm
Location: Scotland

Re: Mitsubishi A6M5c Zero Fighter Type 52 Hei '203rd Flying Group'

Post by cybershed »

Check out Walthers Solvaset for getting your decals to conform. Solved my problem with the Tamiya decals.

Nice pics BTW
On the bench: Airfix MkI Hawker Hurricane
User avatar
JediBoer
Master Sergeant
Master Sergeant
Posts: 437
Joined: Thu Oct 23, 2014 6:33 am
Location: Detroit, MI
United States of America

Re: Mitsubishi A6M5c Zero Fighter Type 52 Hei '203rd Flying Group'

Post by JediBoer »

cybershed wrote:Check out Walthers Solvaset for getting your decals to conform. Solved my problem with the Tamiya decals.

Nice pics BTW
Yes, know the product. Paul advised the same but I can't get it out here in South Africa and shipping it out here is also problematic.

Thanks for the heads up!

/JB
JediBoer

On the bench righ now: Hmm... Lots of unfinished business!
cybershed
Private
Private
Posts: 21
Joined: Wed Dec 31, 2014 5:48 pm
Location: Scotland

Re: Mitsubishi A6M5c Zero Fighter Type 52 Hei '203rd Flying Group'

Post by cybershed »

Your welcome!

Love the way you've weathered the arse out of that zero BTW.

I'm very much a newbie as regards weatherin'. If I was starting my zero now I would go for the technique of metal undercoat, with maskol used to effect the chipping effect after the aircraft has been painted.

I didn't know about these methods when I started my zero, so will have to approach weathering at a later stage. I'll be making use of weathering powders, and a silver weathering pencil. Looking forward to doing this stage. ATM I'm just completing decals. Next up a few coats of klear, then I'll start the serious stuff.

Cheers for the inspiration!
On the bench: Airfix MkI Hawker Hurricane
User avatar
JediBoer
Master Sergeant
Master Sergeant
Posts: 437
Joined: Thu Oct 23, 2014 6:33 am
Location: Detroit, MI
United States of America

Re: Mitsubishi A6M5c Zero Fighter Type 52 Hei '203rd Flying Group'

Post by JediBoer »

cybershed wrote:Your welcome!

Love the way you've weathered the arse out of that zero BTW.

I'm very much a newbie as regards weatherin'. If I was starting my zero now I would go for the technique of metal undercoat, with maskol used to effect the chipping effect after the aircraft has been painted.

I didn't know about these methods when I started my zero, so will have to approach weathering at a later stage. I'll be making use of weathering powders, and a silver weathering pencil. Looking forward to doing this stage. ATM I'm just completing decals. Next up a few coats of klear, then I'll start the serious stuff.

Cheers for the inspiration!
Thanks for the undeserved compliments. :cheers2: I'm a newbie just like you! Everything I know, I learned on this forum. There is a great bunch of guys here and many of them have Youtube channels too. Just check them out and you will soon be on your way. Looking forward to seeing you Zero! :th:
JediBoer

On the bench righ now: Hmm... Lots of unfinished business!
cybershed
Private
Private
Posts: 21
Joined: Wed Dec 31, 2014 5:48 pm
Location: Scotland

Re: Mitsubishi A6M5c Zero Fighter Type 52 Hei '203rd Flying Group'

Post by cybershed »

Finally finished my Tamiya zero. You can find the videobuild on my youtube channel 'cybershed media' the video is called 'the divine wind' Enjoy!
On the bench: Airfix MkI Hawker Hurricane
Post Reply

Return to “Jet Aircraft”