Tiger 1 Initial prod. s.Pz.Abt 502 tactical number 3

Whether its tracked or wheeled, this is the place for it
Post Reply
User avatar
MarkVerploeg
Major
Major
Posts: 4837
Joined: Wed Oct 16, 2013 12:21 am
Location: Oss, Noord Braband The Netherlands
Netherlands

Tiger 1 Initial prod. s.Pz.Abt 502 tactical number 3

Post by MarkVerploeg »

hi guys
so this will be my second entry in this gb
since the Carius Tiger and the terminator are in the painting stages i decided to start 2 new builds
they both are build from Dragon's Tiger 1 initial production schwerer Panzer Abteilung 502 in the Leningrad region 1942/43
this thread will be for the number 3 vehicle wich features the Panzer III style stowage bin and will be painted with the winter camo

so lets take a look at the kit although it is being build by several others in this gb
Image
the boxart with the version for this thread

Image
first look in the box

Image
Image
Image
Image
all the sprues for this build

Image
the instructions ,Painting and markings sheet and the photo etch parts
dragon should supply these painting sheets with all their kits in my opinion
much better then the regular blue on blue instructions you normally get

Image
the version i will be building

Image
a shot of a real Tiger during that period
this is one of the other options of this kit actually but the only big difference is the number on the turret and some minor changes in the parts that you need to use

Image
what i hope to achieve with this kit
this is a guide that is published in a Dutch modelling magazine from a few years ago
although i don't use all the same techniques i do use others that give the same or a similar effect due to the progress that is made with paints and weathering products in the time since this article was made

i already made a start at this kit and i will actually be building along side a other entry
that will be the number 100 Tiger from the same unit
that is the Tiger with the side mounted stowage bins
so if you think you have seen some pictures before there is a good chance you are right as i will be using a few of them for both builds aslong as the work is the same ( and the sprue shots)

so that is all for now
i will post a update when i get a bit further ahead then i am now
thanks for watching and untill next time
cheers Mark
On the bench
GB builds
1/35 Trumpeter M1132 ESV

Personal builds
1/35 Hobby Boss M1070 tractor with M1000 semi trailer and Meng M1A2 TUSK II Abrams
1/35 Takom V2 rocket with the Meillerwagen and SS100 tractor
User avatar
Coen
General
General
Posts: 10136
Joined: Wed May 29, 2013 2:04 am
Location: Nova Scotia, Canada
Contact:
Canada

Re: Tiger 1 Initial prod. s.Pz.Abt 502 tactical number 3

Post by Coen »

HA! Awesome!!!
This is one of my favourite tiger kits. I love the look of those Leningrad tigers.
I've built the very same one myself.. though it was years ago. I really can't wait to see what you do with it Mark... It should be extremely cool.
User avatar
MarkVerploeg
Major
Major
Posts: 4837
Joined: Wed Oct 16, 2013 12:21 am
Location: Oss, Noord Braband The Netherlands
Netherlands

Re: Tiger 1 Initial prod. s.Pz.Abt 502 tactical number 3

Post by MarkVerploeg »

Haha Freezing cool
Well that is plan but we'll see how it turns out
On the bench
GB builds
1/35 Trumpeter M1132 ESV

Personal builds
1/35 Hobby Boss M1070 tractor with M1000 semi trailer and Meng M1A2 TUSK II Abrams
1/35 Takom V2 rocket with the Meillerwagen and SS100 tractor
User avatar
MarkVerploeg
Major
Major
Posts: 4837
Joined: Wed Oct 16, 2013 12:21 am
Location: Oss, Noord Braband The Netherlands
Netherlands

Re: Tiger 1 Initial prod. s.Pz.Abt 502 tactical number 3

Post by MarkVerploeg »

hi guys
so i think it is time for a update
as far as the build goes there are some minor bumps but it seems i am not the only one
the really bad thing is that i was watching Forbes Hutton's vid about the problem with the glacis plate and thought "he mde a mistake some where"
and then presto same problem not 5 minutes later
and he was right,the order of placing the hull parts in the instructions is wrong
but it was my luck that a new drop of tamiya extra thin softens the previous applied glue and i was able to remove the plate without damage

but here is the build so far
Image
i started with the wheels
mainly because i wanted to get them over with
after i sanded the spruegates i started to sand down the edge of the tyre
this gives a nice and worn look

Image
then by using my hobby knife i cut out small parts of the tyre
this effect is caused by small stones and dry rubber in real life and was a common sight back in those days

Image
after all the cleaning of the wheels i had this
i never have to put labels on stuff as i normally work on one kit at a time but i wanted to make sure i don't mix up parts

Image
then the torsion bars where installed

Image
on the sides next to the holes for the suspension are small pins sticking out of the hull
i have cut them down so the suspension has some range of movement although this kit doesn't provide you with the same kind you see in their Panther kits where it cn move pretty far

Image
the swing arms where installed and left to rest for a while to give the glue enough time to dry

Image
then the rearplate was next
here you can see the first difference between the "3" Tiger and "100"
number 3 has the normal diamond shaped block for the inertial starter
the positioning pins on number 100 have to be removed and the plate is not used
i guess it had an electric starter or was started from the inside atleast

Image
then the exhausts where assembled
i will leave them off untill the weathering stages
there won't be any shrouds covering them so they will be in full view so the rusting needs to look a bit better then normal
and if they are seperate it will be easier to paint them and then just before i use pigments i will glue them on

Image
then the jack block received some scratches to give the impression of a wood grain
i used a scribing tool but i need more practice with that tool

Image
then all the other parts where added to complete the rear of the hull

Image
then i primed the cooling units
the radiator is base coated with black
the fueltank with red brown and the core of the fans with mr metal brass
i don't know if this is accurate but i followed a guide i have and if not you won't see much of them later on

Image
the radiators where dry brushed with vallejo gunmetal and all the other parts where painted with tamiya light grey
the instructions call for a blue grey but this is kind of blue(ish) and was the closest i had in the paint supply
the fans where finished with mr metal stainless steel

Image
i hope you can see it as the quality of the photo is bad but i pulled a the white sanding sponge (corse side) from Ultimate over the edge of the hull
this is done to create the jagged effect the steel would have from the blowtorch when they cut the steel plates

Image
cooling units where installed

Image
the front plate and the engine hatch where assembled
i never had a build with the hull mg covered and thought it looks nice in the guide i use so i used it on this build aswell

Image
crew hatches and front plate where glued together

Image
the hatches for the cooling fans where assembled

Image
then everything was put together to finish the hull
so keep in mind that the upper glacis goes on last
i replaced the steel wire from the kit with copper ones as these are easier to shape
the plan is to get a Tiger that has lost the front fenders so it has the glacis without the hinges as i think that would make a nice change from the slightly or heavy damaged fenders

and that is all for now i think
i am still working on the turret and once that is done i will upload those photo's and make a new update
thanks for watching and untill next time
cheers Mark
On the bench
GB builds
1/35 Trumpeter M1132 ESV

Personal builds
1/35 Hobby Boss M1070 tractor with M1000 semi trailer and Meng M1A2 TUSK II Abrams
1/35 Takom V2 rocket with the Meillerwagen and SS100 tractor
User avatar
Coen
General
General
Posts: 10136
Joined: Wed May 29, 2013 2:04 am
Location: Nova Scotia, Canada
Contact:
Canada

Re: Tiger 1 Initial prod. s.Pz.Abt 502 tactical number 3

Post by Coen »

:crazy: :crazy:
Madness two dragons at once!!!
:jd: :eeek:
AWESOME!!!
User avatar
MarkVerploeg
Major
Major
Posts: 4837
Joined: Wed Oct 16, 2013 12:21 am
Location: Oss, Noord Braband The Netherlands
Netherlands

Re: Tiger 1 Initial prod. s.Pz.Abt 502 tactical number 3

Post by MarkVerploeg »

It is not that bad Coen
It is the same kit that is being build twice and that makes it easier
And this kit is not the hardest dragon kit out there
A couple of marders or other open top vehicle would thougher to build.
the tiger is not the thoughest tank to build unless you superdetail them then they are just as hard as any other build
On the bench
GB builds
1/35 Trumpeter M1132 ESV

Personal builds
1/35 Hobby Boss M1070 tractor with M1000 semi trailer and Meng M1A2 TUSK II Abrams
1/35 Takom V2 rocket with the Meillerwagen and SS100 tractor
User avatar
MarkVerploeg
Major
Major
Posts: 4837
Joined: Wed Oct 16, 2013 12:21 am
Location: Oss, Noord Braband The Netherlands
Netherlands

Re: Tiger 1 Initial prod. s.Pz.Abt 502 tactical number 3

Post by MarkVerploeg »

hi guys
so i have a new update
for some weird reason i thought i had done this already but it must have been the lack of building and the withdrawl caused by that
but after a healthy dose of inhaled glue and paint fumes today i noticed i forgot the update
so i will do the update up to the point of the basecolor

so here is the tiger so far
Image
the work continues with the building of the gun
with this mantlet you can add the casting numbers
they are molded on the back of a sprue (i think sprue P)
so those where added too although invisible because of the lights

Image
then the turret was constructed
there are now big issues here
there is a seam on the back wich need a bit of sanding but i noticed that the edges on the bottom where off by a bit
the corners where round so the ends don't connect but that will be out of sight

Image
the smoke launchers and loaders hatch where placed
for this build i decided to only have the cupola hatch opened
there are small inserts for the smoke grenedes i only used 3 as i think they could be used one by one and not all 6 at the same time
i could be wrong but i think it looks nice to have a few empty tubes on there

Image
the turret bin was added
i plan on having a flag sticking out from it so the lid will be added later

Image
i added some copper wire for the smoke launchers
i explained how i did this in the thread of my other build so if you want to know how i did this you can check it there

Image
i also added some wires for the headlights

Image
after that i primed the tiger with grey primer from ammo
and basecoated them with vallejo modelair german grey

Image
i then added some white to the grey to make a highlight/faded tone of the base color this was then sprayed on the panels and on the higher parts of the sides
these are the parts that i think catch more sunlight so will fade faster
i made sure to keep the faded color out of the weldseams and edges of the panels to get the panelfading effect

i then tried to paint it with washable white but again i had big problems with my ammo paints
so i will clean the white and luckily the degreaser i use seems to affect the white but it doesn't damage the grey underneath
so if all goes well i don't have to repaint the entire build

but that is all for now and i hope to have a new update soon as the mojo is there and i really want to get going on the weathering and finish some builds
so thanks for watching and untill next time
cheers Mark
On the bench
GB builds
1/35 Trumpeter M1132 ESV

Personal builds
1/35 Hobby Boss M1070 tractor with M1000 semi trailer and Meng M1A2 TUSK II Abrams
1/35 Takom V2 rocket with the Meillerwagen and SS100 tractor
User avatar
Coen
General
General
Posts: 10136
Joined: Wed May 29, 2013 2:04 am
Location: Nova Scotia, Canada
Contact:
Canada

Re: Tiger 1 Initial prod. s.Pz.Abt 502 tactical number 3

Post by Coen »

I love it when a plan comes together, it sucks about the white wash. I really hope that you can work it out Mark. They look excellent up to that point.
User avatar
MarkVerploeg
Major
Major
Posts: 4837
Joined: Wed Oct 16, 2013 12:21 am
Location: Oss, Noord Braband The Netherlands
Netherlands

Re: Tiger 1 Initial prod. s.Pz.Abt 502 tactical number 3

Post by MarkVerploeg »

Thanks Coen
I dipped the whole thing in degreaser so the white wash can be washed off
I just checked and the grey is also coming off :wall:
So i will leave it in there for a few days to soak and i will repaint the entire tank
Shouldn't be a massive problem but it will take some time though
I will order some paints tomorrow and i will get back to this build when those arrive
Untill then i can finish the Carius Tiger wich only needs pigments and some fuel and oil stains
And i can work on #100 wich is almost ready for some decals so i plan on starting the weathering on that tomorrow in the evening once the clear coat is dry and the decals are sealed in
On the bench
GB builds
1/35 Trumpeter M1132 ESV

Personal builds
1/35 Hobby Boss M1070 tractor with M1000 semi trailer and Meng M1A2 TUSK II Abrams
1/35 Takom V2 rocket with the Meillerwagen and SS100 tractor
User avatar
MarkVerploeg
Major
Major
Posts: 4837
Joined: Wed Oct 16, 2013 12:21 am
Location: Oss, Noord Braband The Netherlands
Netherlands

Re: Tiger 1 Initial prod. s.Pz.Abt 502 tactical number 3

Post by MarkVerploeg »

hi guys
well with a delay but here is the last update for this build

so where was i last time
Image
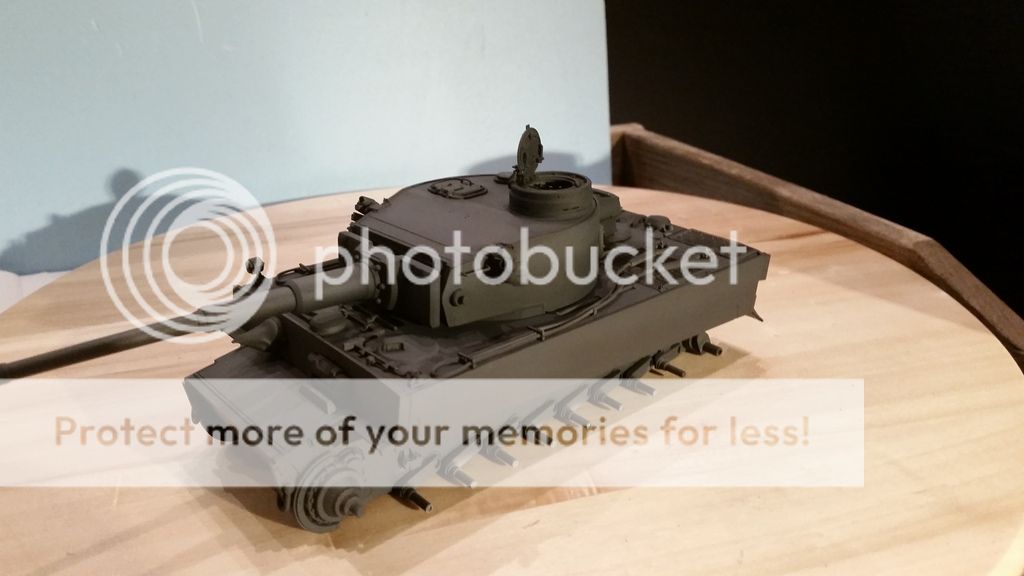
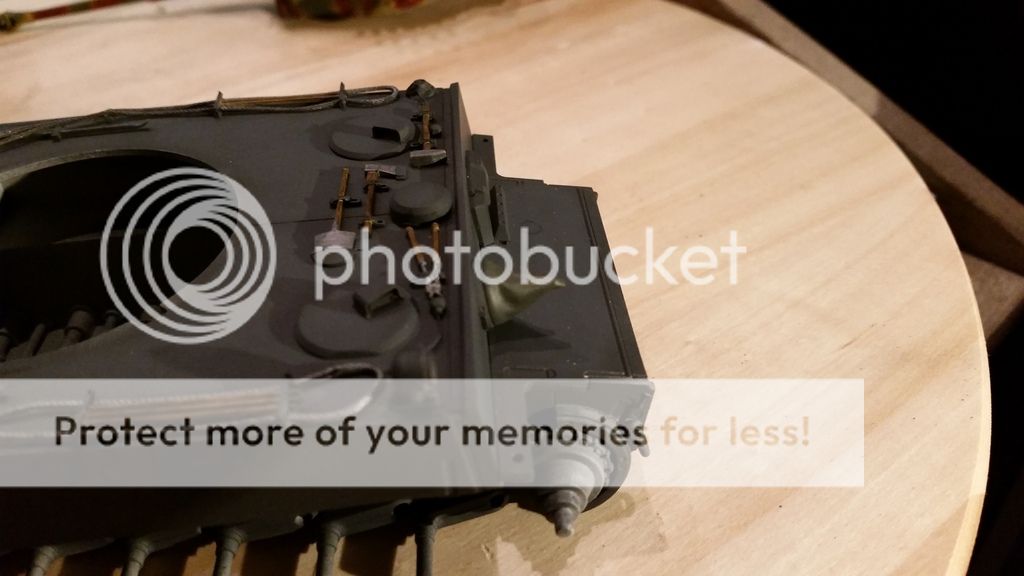
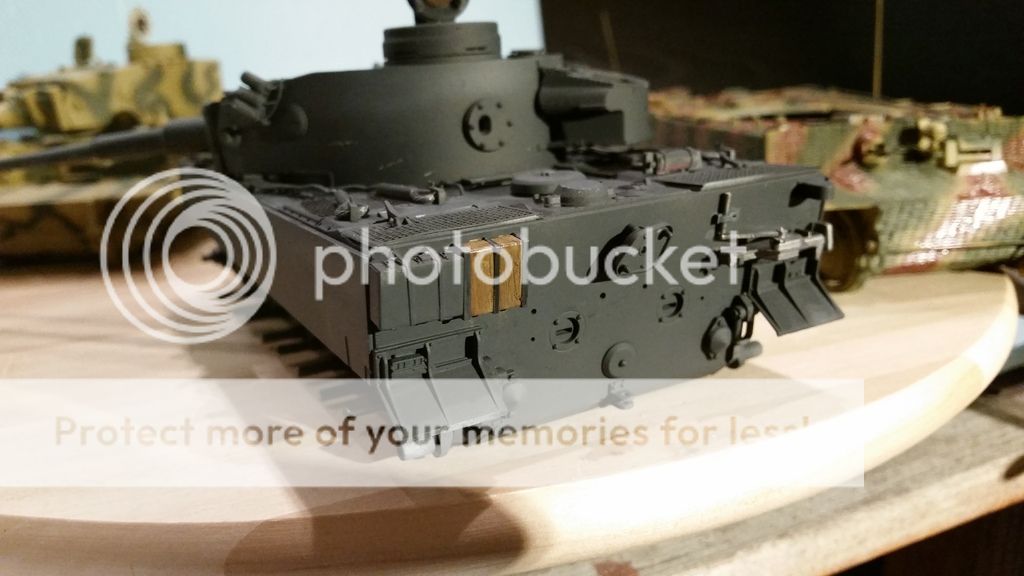
this was the last step from the previous update
the entire tank is painted with Vallejo german grey
this was then mixed with a drop of white to get a highlight color ,i think it is about 5 parts grey and 1 part white
but the best way is to just mix the color and see if you like it

Image
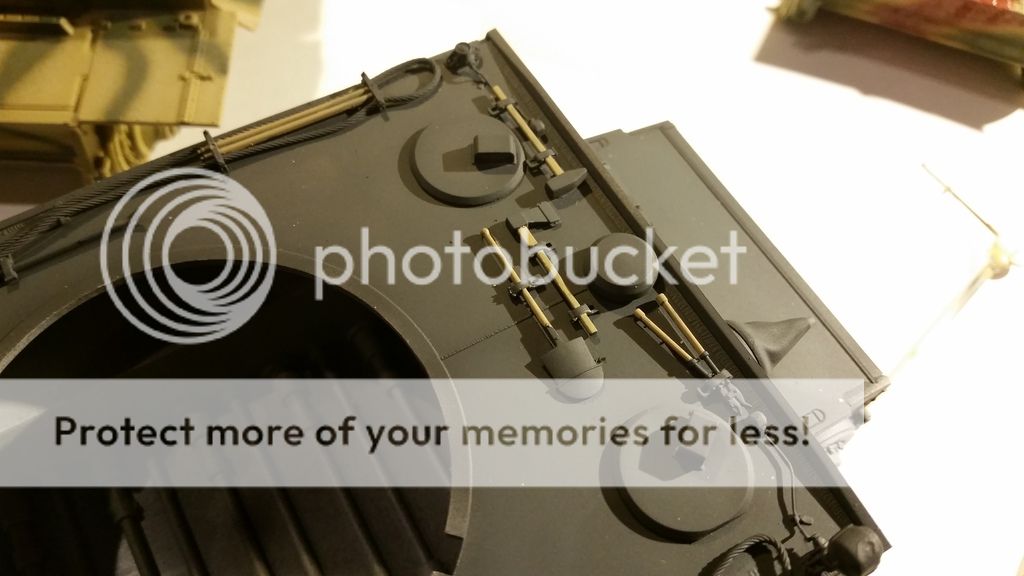
i then started on the detailing
in this case i started with the tools
the handles where the first thing on the list
they are painted with a mix of English uniform and white from Vallejo modelcolor in a 4 to 1 ratio
this will serve as the basecolor for the wood

Image
i then use Vallejo smoke
this was drybrushed onto the basecolor to get a laquered effect that looks like laquered toolhandles

Image
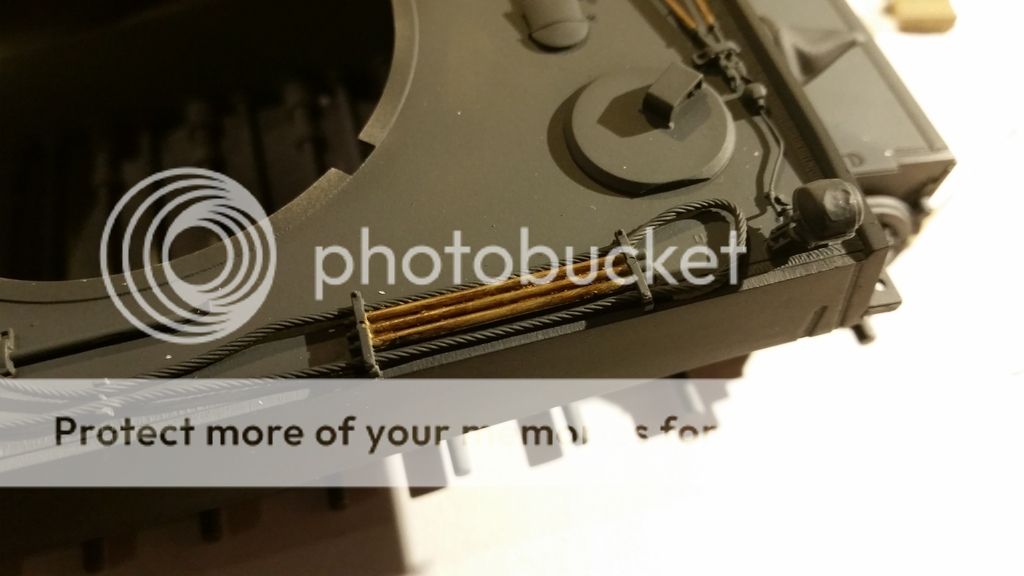
i have used mr metal stainless steel to paint the cables and toolheads
the pigments in this paint is much finer then the pigment from Vallejo gunmetal grey so it gives a more even finish
although you can buff this paint i had decided not to do so

Image
the mg cover was painted in a green grey color as a basecolor
and then i drybrushed on some field grey
this was done all over but i didn't fully cover the basecolor
i made the layer on the highlight a bit thicker so it would highlight those places

Image
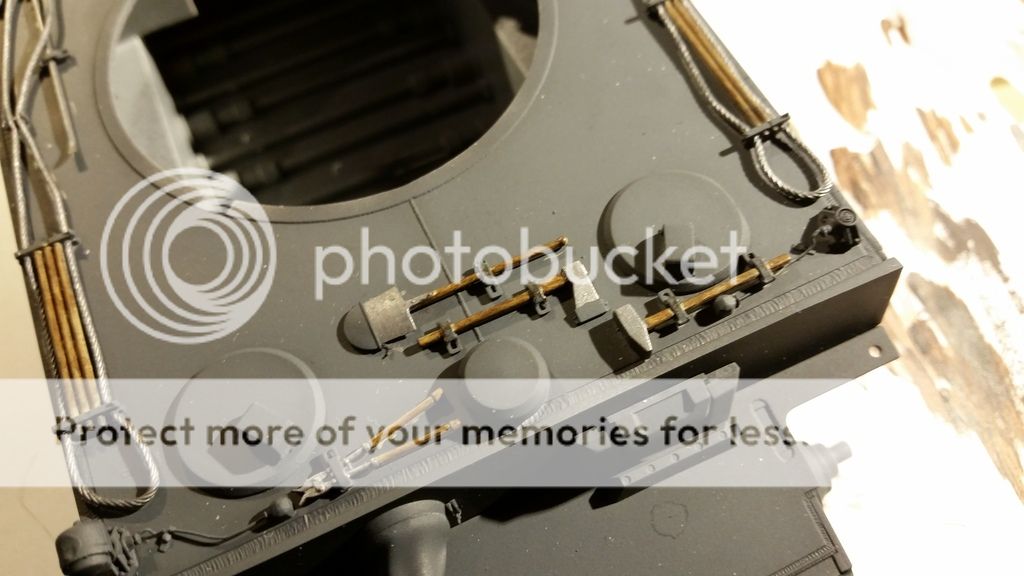
i then used ammo german grey base light
wich serves as a primary chipping color
i did this with a brush wich in hindsight wasn't the best method as a sponge would have given a more fine or smaller chipping

Image
the larger grey chipping was filled in with ammo's chipping color
this was done as a test as i normally use Vallejo german camo black brown wich is just a bit darker then this paint
the fact is that the Vallejo paint is made for brush painting and is a bit thicker
the ammo paint should be thinned to airbrush but is almost thin enough from the bottle so it makes it harder to brush paint as it is already very thin

Image
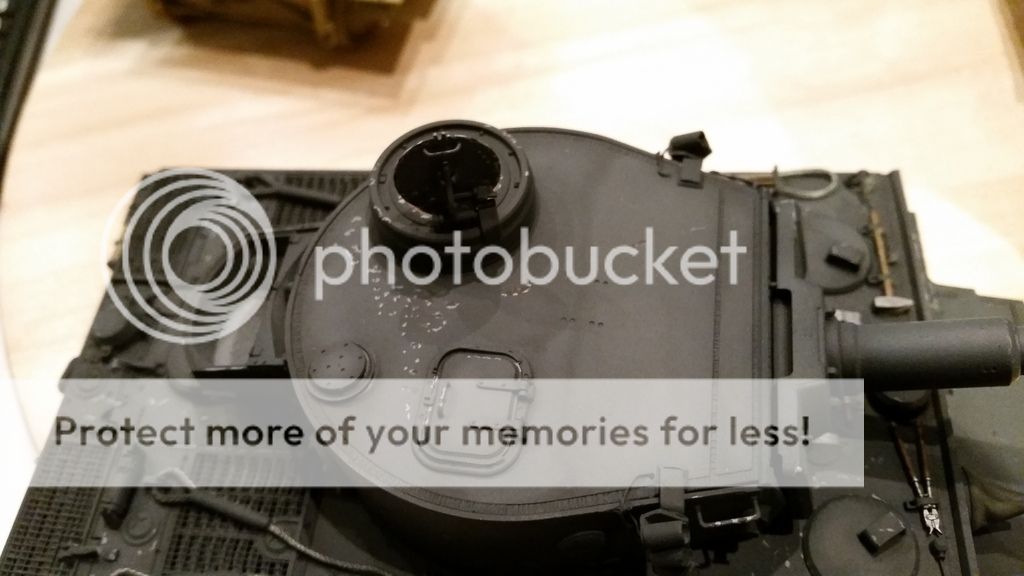
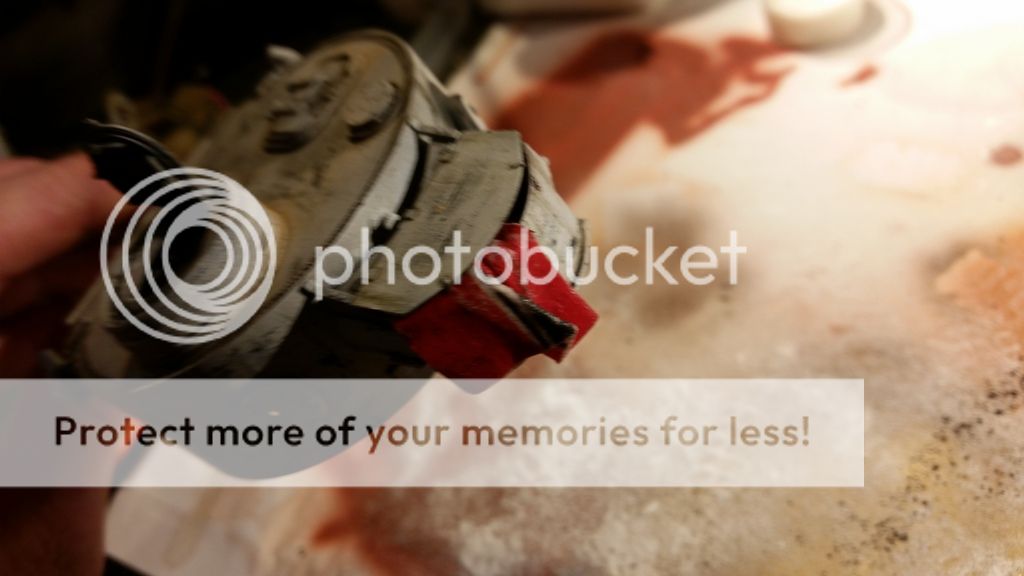
then i mixed tamiya hull red and red brown in a 1:1 ratio
this mix was used to paint the ring that gets covered by the cupola hatch
but i think that this was kept close during the painting so they couldn't spray paint inside so that ring was still in the primer color
although i am not sure that this was done but it gives a extra color in the otherwise grey and white wich helps the color variation

Image
the handles on the hatch where drybrushed with the same grey that was used for the chipping while the center part was painted with Vallejo leatherbrown
that was later drybrushed with the same paint but with a drop of white added to it

Image
the jack block was painted with the same wood color as the tools but this time i used mig productions wood ageing solution
this is basicly a brownish grey wash

Image
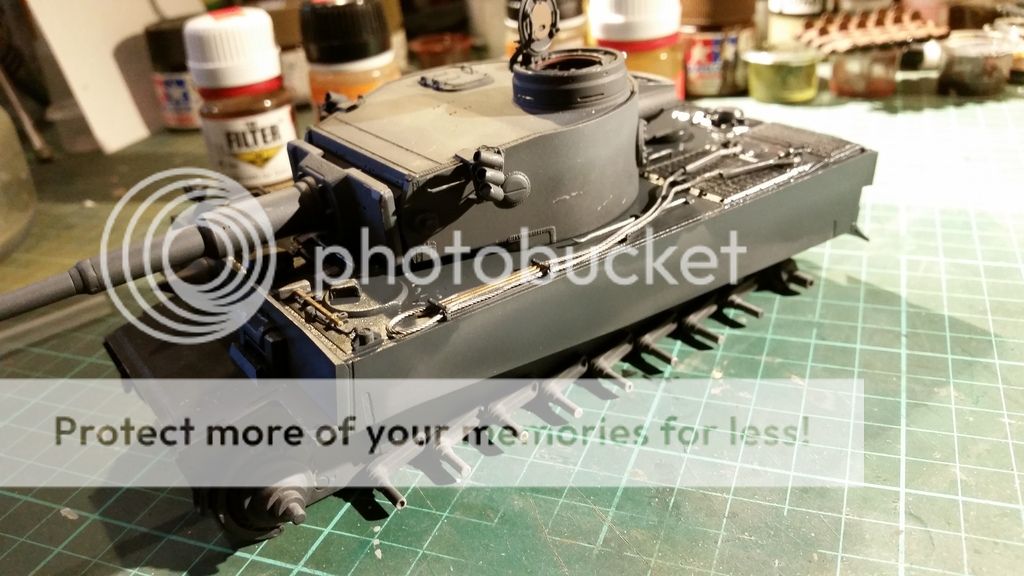
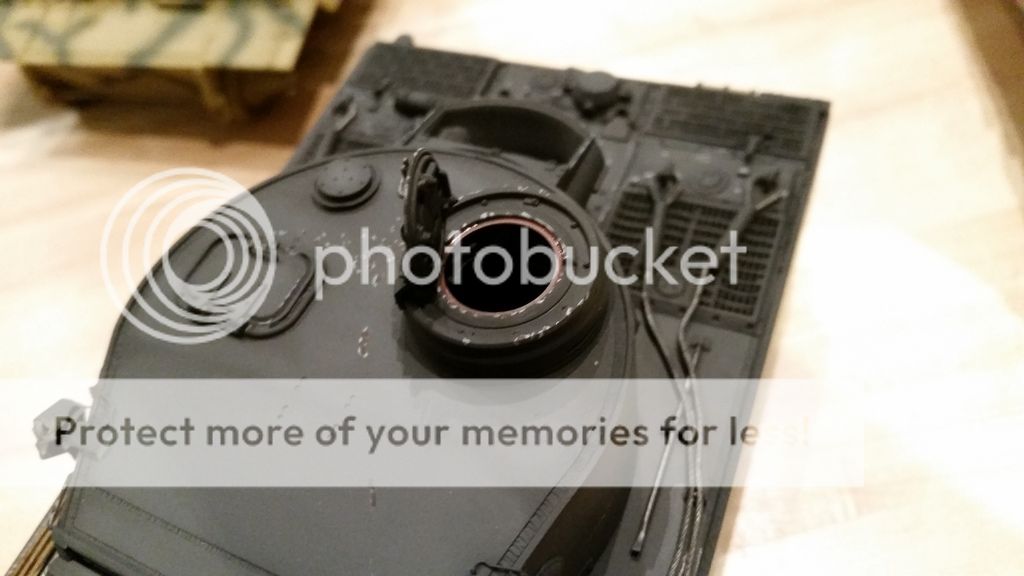
although hard to see i then used AK filter for grey vehicles wich is a blue grey filter
the turret was done in this photo and i just started the hull
while doing this i watched a video on youtube where they mentionned i need to use a coat of varnish first
but as a true filter noob i didn't but i didn't know that in time
although it only matters if you are not all to sure about the color you will use
in this case i tested that filter and was happy with the blue sheen it gives

Image
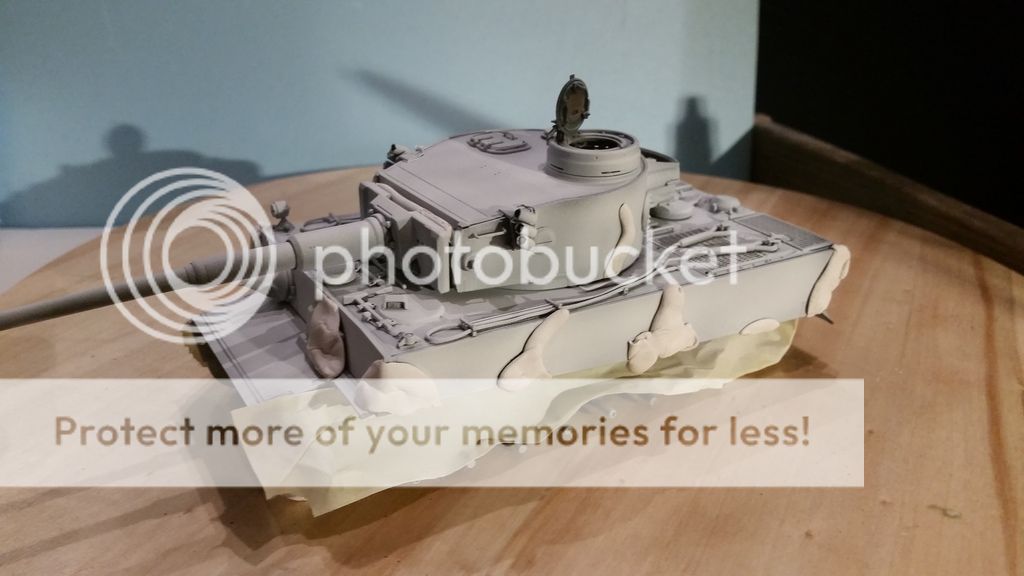
once the filter had enough time to dry the entire tank was coated with a layer of satin varnish
i then used pieces of white tac or poster buddies as they are known here to mask the grey parts and brushed ak worn effects on it
i prefer the somewhat milder worn effects over the chipping effects as i didn't want large chips in the white
and i had trouble with the chipping effects before so i didn't want to take that risk
this chipping effects fluid was used on the tols as this enables you to completly remove the new layer of paint
although it didn't work on the cables because of the gaps inbetween the strands
the white i used is my all time favorite white namely tamiya flat white
as far as i know this is about the best covering white paint on the market and although i am switching to aqueous paints this will stay in my paint collection

Image
the masking was then removed
the grey looks very dark at this point

Image
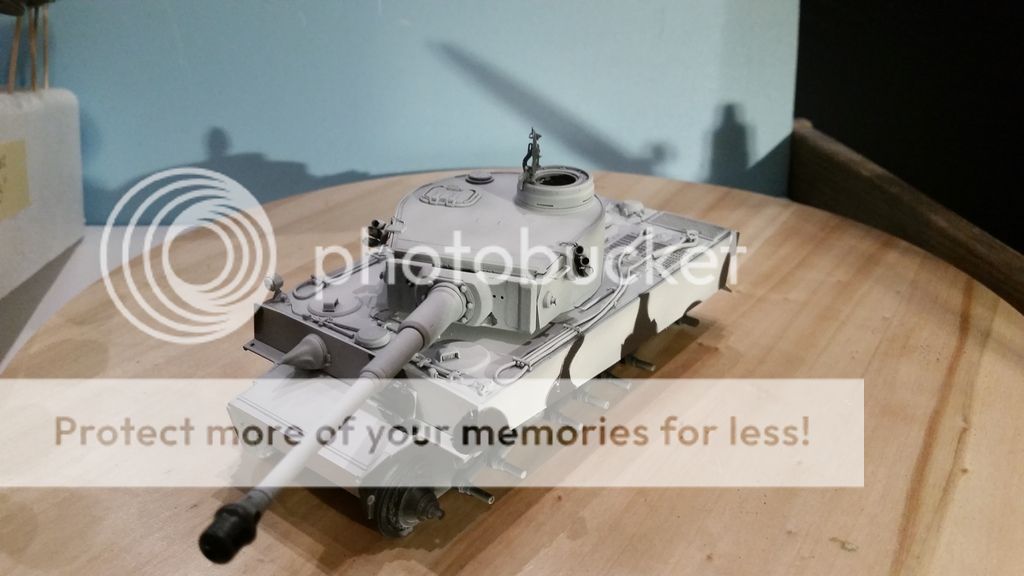
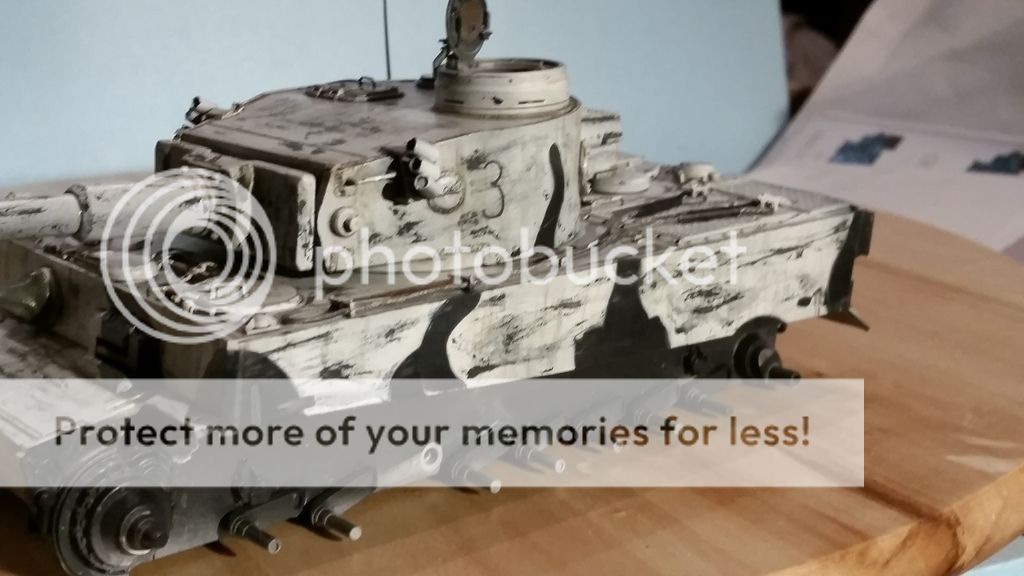
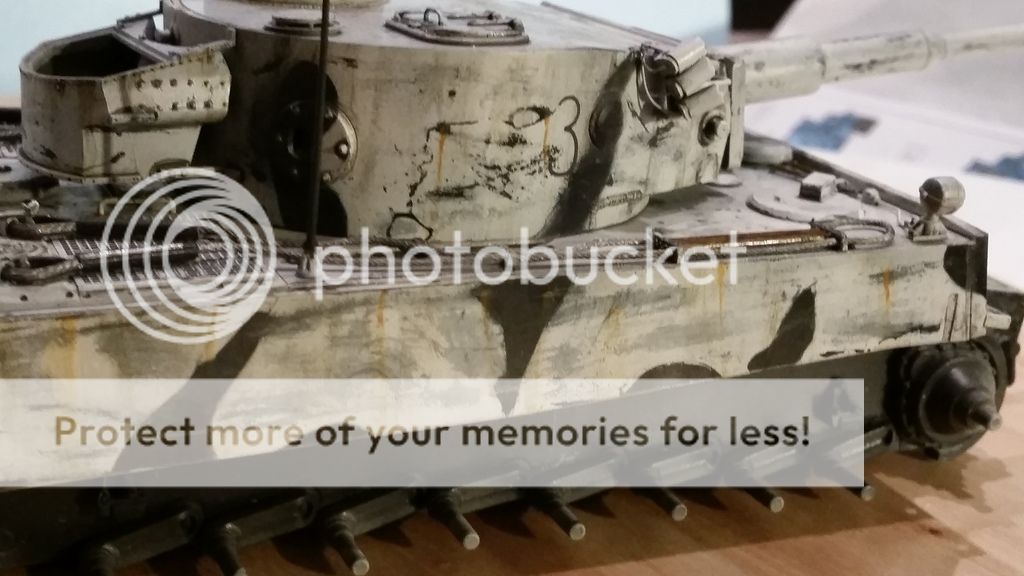
i then started all the chipping
the nice thing about worn effects is that you can remove the paint partially so there will be a thin layer left in some places
and there are some full scratches ofcourse where branches from trees and other things scratched through the white

Image
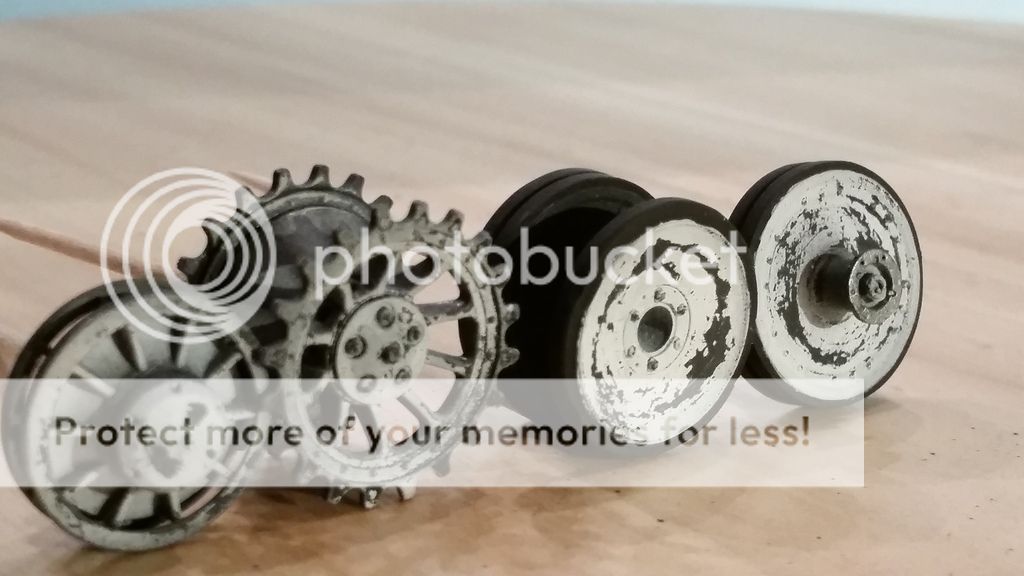
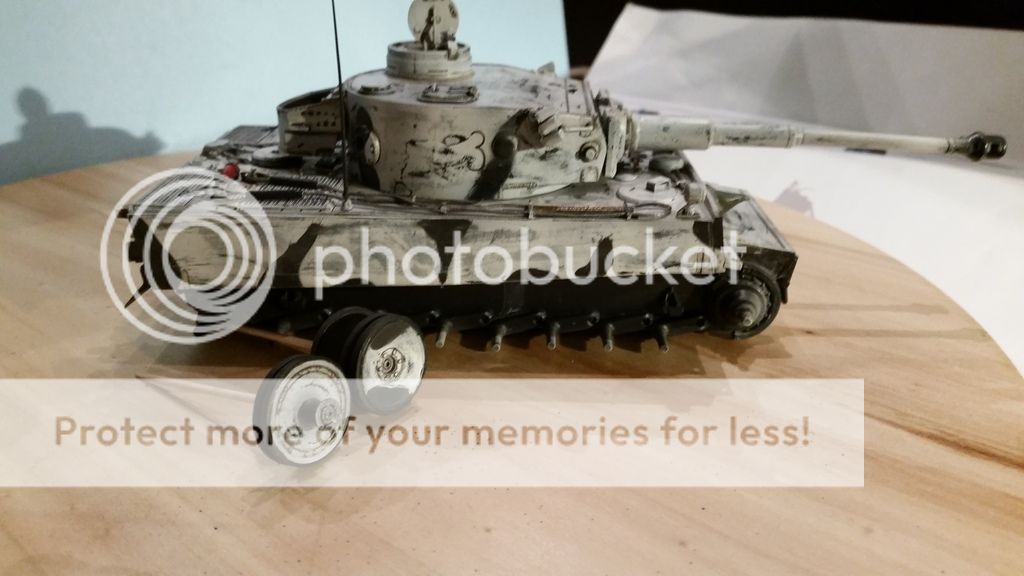
the wheels where also chipped
i think i forgot about this but the bare metal is painted with mr metal stainless steel and the rubber tyres are painted with a mix of black and german grey in a 3 to 1 ratio

Image
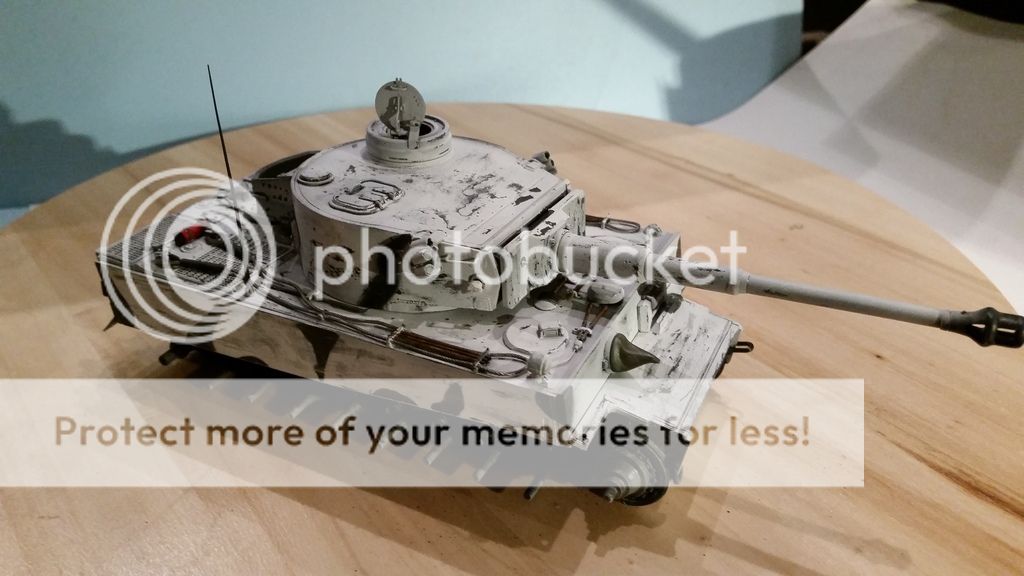
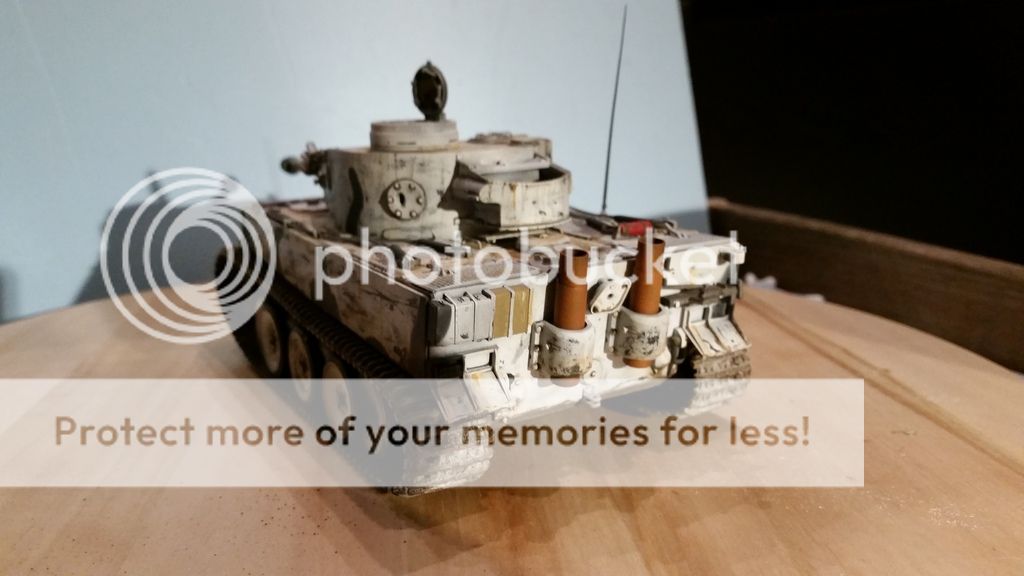
then the tools where cleaned and the tow cables where repainted
and in the back you can see the fire extiguisher is red , this was done with mr hobby aqueous flat red
this looks a bit bright at first but dries darker and actually comes pretty close to the actual color

Image
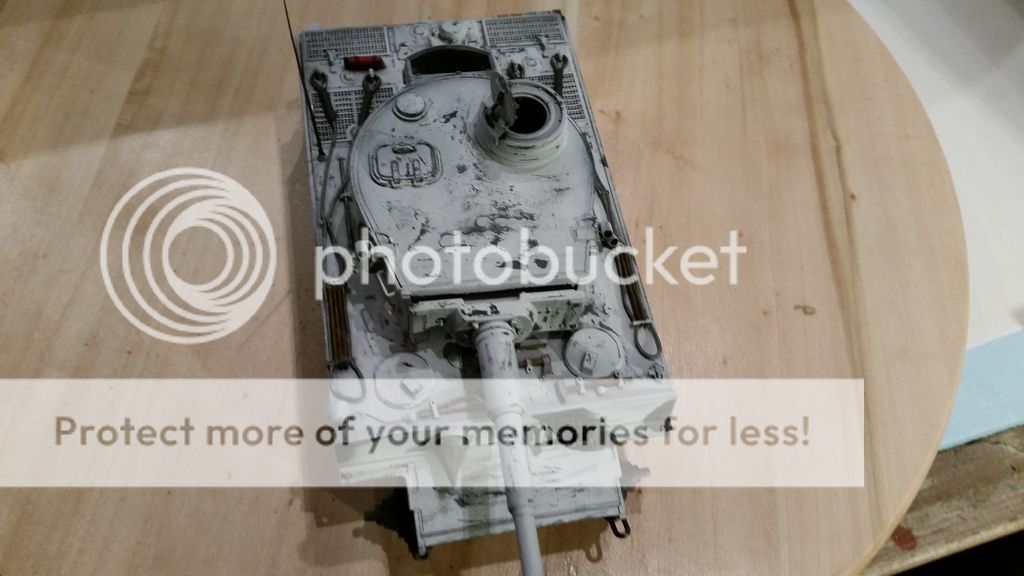
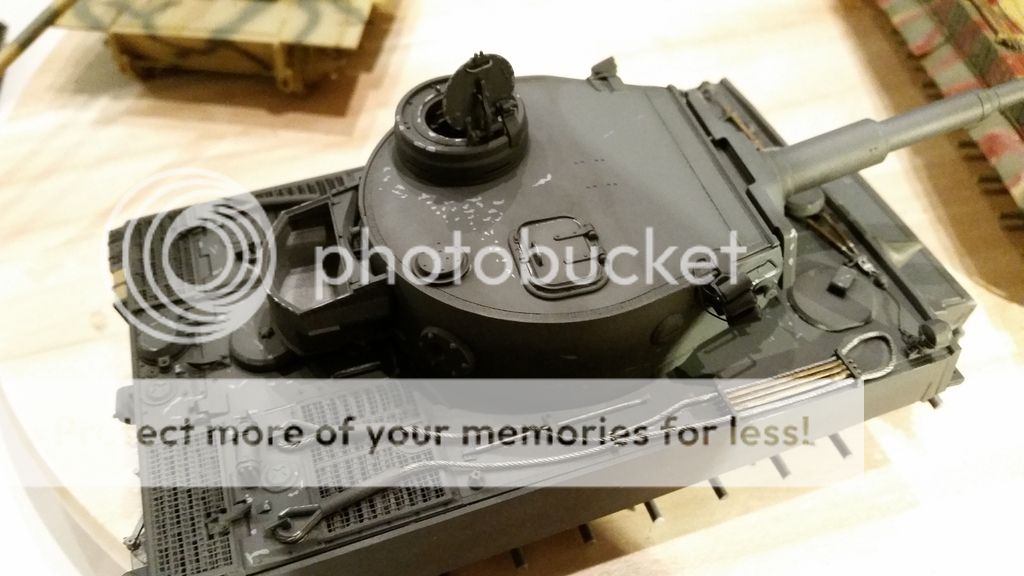
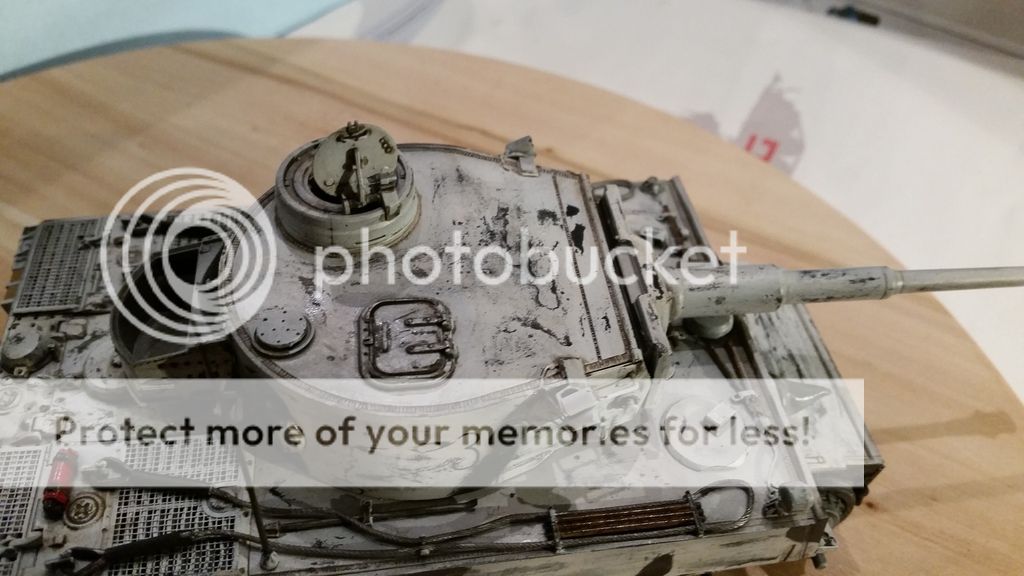
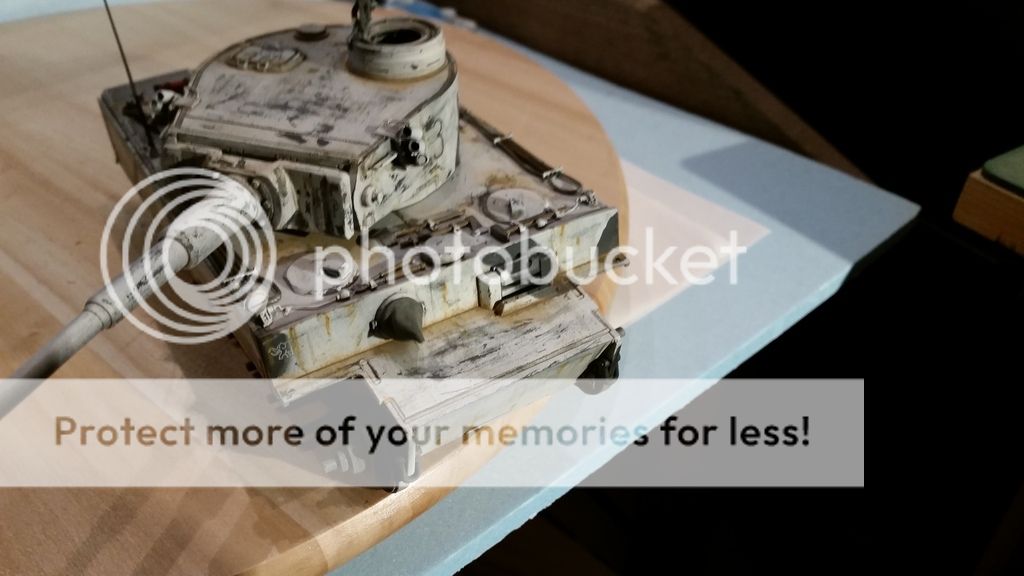
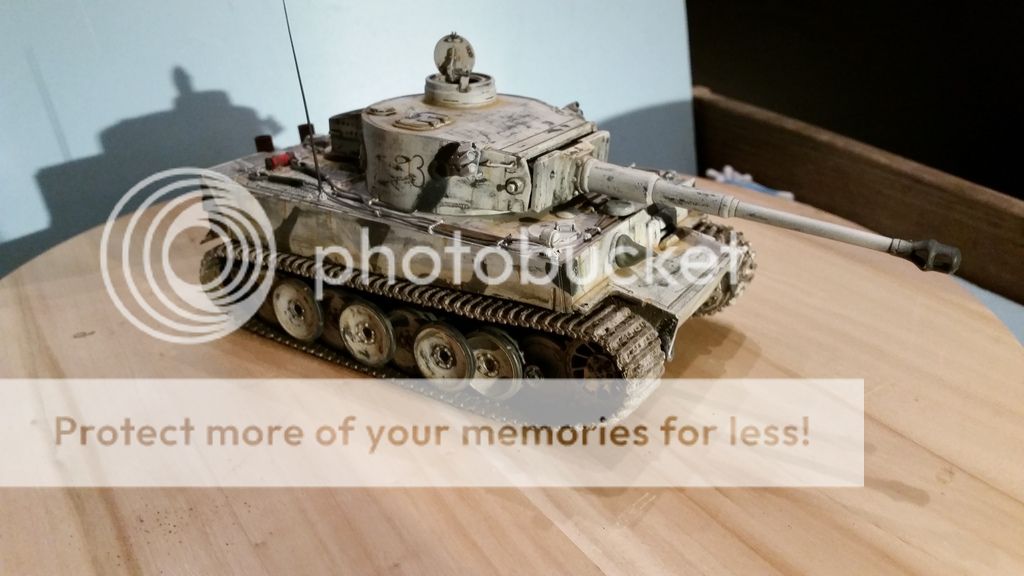
top view of the chipping and scratching
i tried to concentrate this around places where i think the crew would be most and where there are hatches that they could slam shut

Image
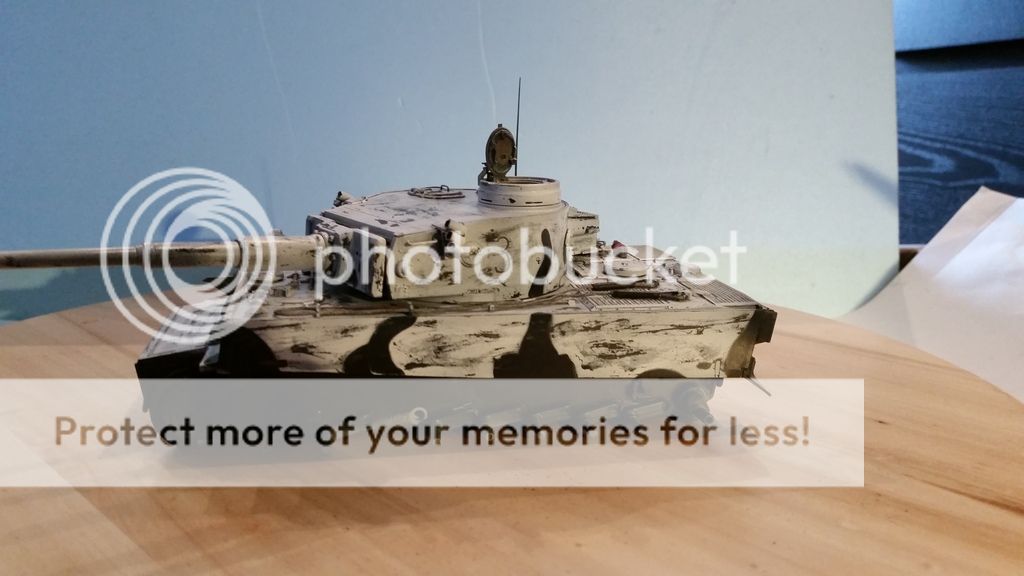
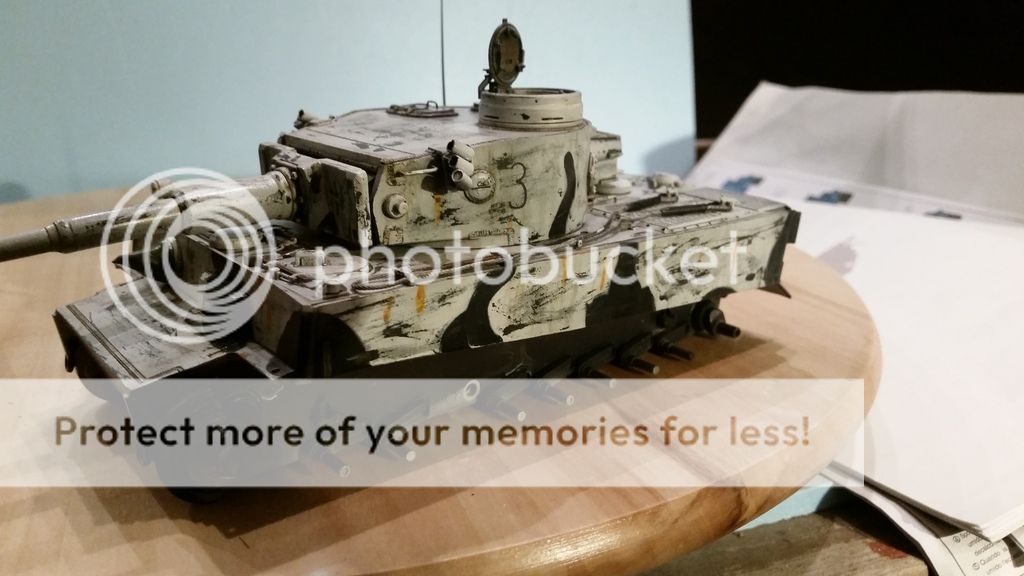
after a new coat of satin varnish i applied the 3 decals
there are the 2 number 3 decals for the sides and a elephant for the front plate

Image
Image
i then applied yet another coat of varnish
once that was dry i applied the wash
only a pinwash this time as dirt and such will be done with pigments
the wash i used was mig productions neutral wash wich is a grey colored but the thinner is more sand colored and i can't get it mixed that well as the paint particals are clumpped in the corners but the 2 tone thinghy works for me and it allows me to play with the wash a bit more

Image
you can see the greyish wash in the weldseams here
the nice thing is that this color works for both the grey and white

Image
some mig productions rust effects was used to make crude streaking

Image
with a flat brush and a little bit of thinner the streaking was refined a bit

Image
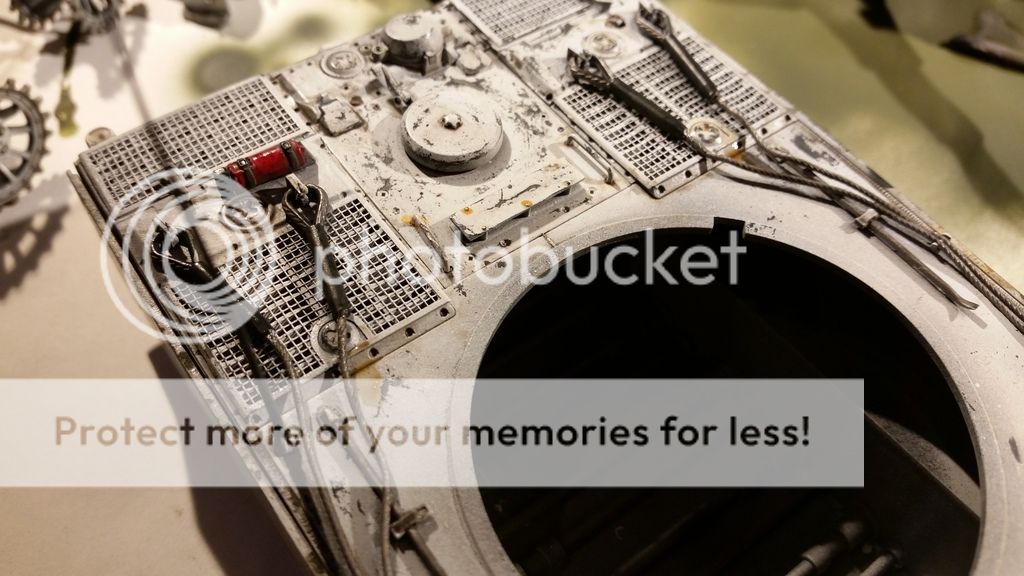
i then used ak fuel stains to make small fuel spills around the fuelcaps

Image
i then added some oil stains with ak engine oil stains

Image
i then varnished the tiger again but this time with matt/flat varnish
once that was dry i use mig productions europe dust for the dust effects and concentrated that around the large raised parts like the cupola and where the glasic and drivers plates meet

Image
still the same step

Image
the tracks where painted in gunmetal from tamiya first
then the outside was covered with a mix of ak fresh mud effects (thick wash that dries to look like pigments) and some plaster
this was applied with a brush and then as a final step i added a cleaning salt
i need to look for the name but it is used to calm the stomach when that feels to be burning
this was done when the mud mix was almost dry because moisture desolves the stuff

Image
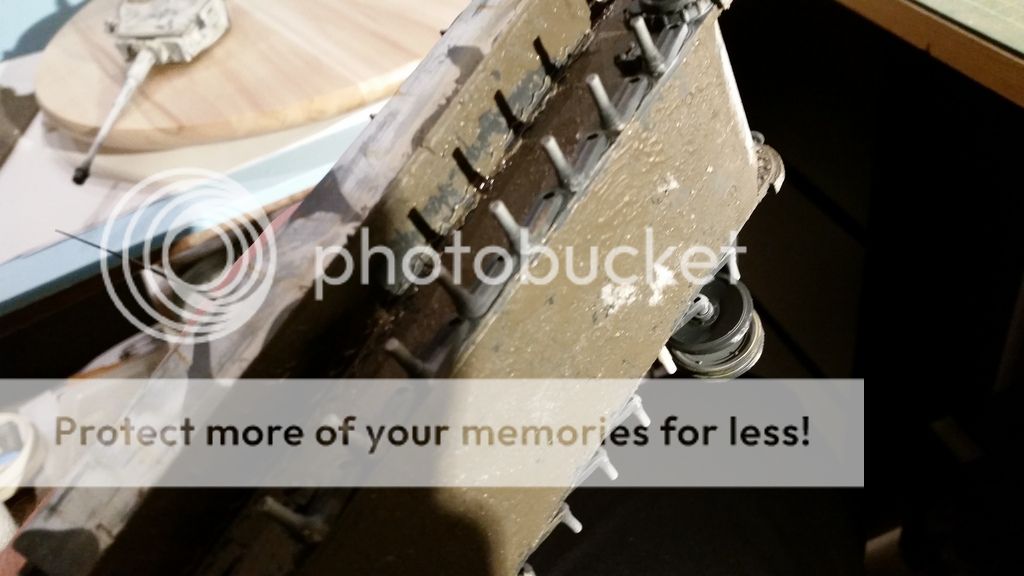
the bottom and sides (behind the wheels) where covered with the same mud mix

Image
then the wheels and tracks where installed

Image
then the exhaust where added
they are painted with several colors of the ammo rust set and these where sprayed on
and covered with a thin layer of old rust pigments from mig productions

Image
i added a german flag wich was folded a bit to get the right lenght

Image
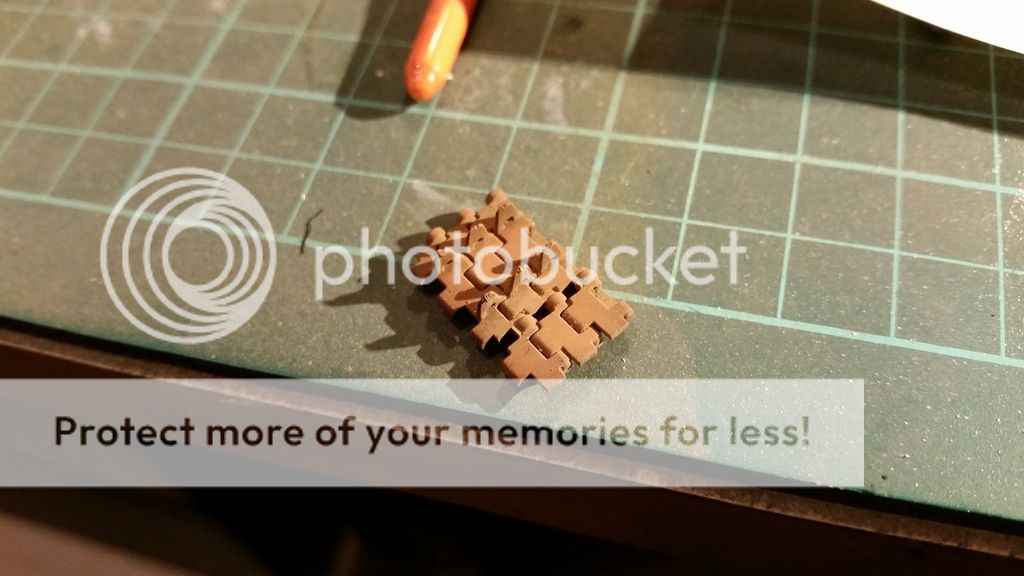
the same rust paints where used on a small lenght of spare track and then i used the rust pigments again

Image
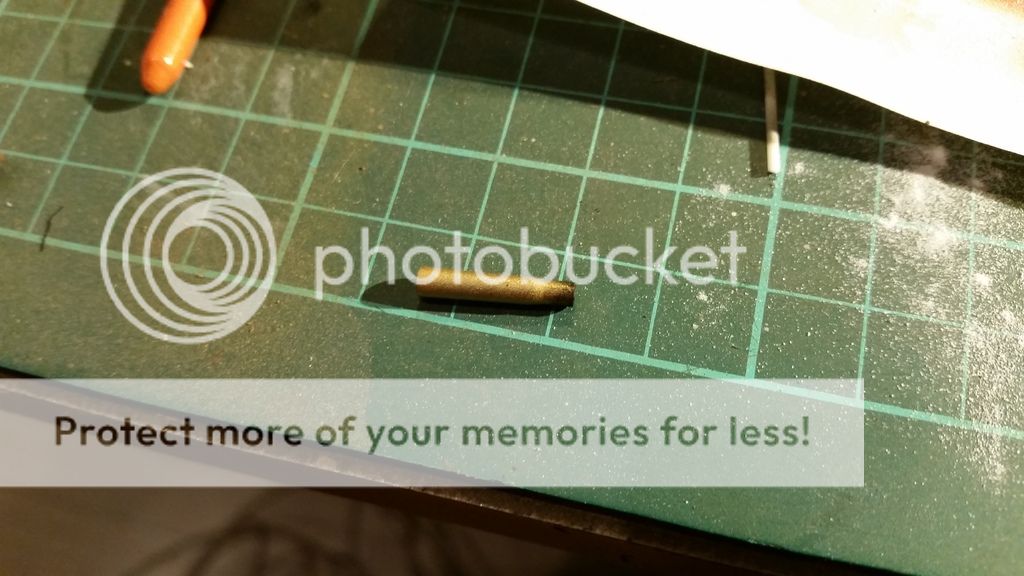
i found a few 88mm or 8,8cm shells in my stash of ammo and painted them with mr metal brass
the ends where dusted with black smoke pigments to get the look of spend powder

Image
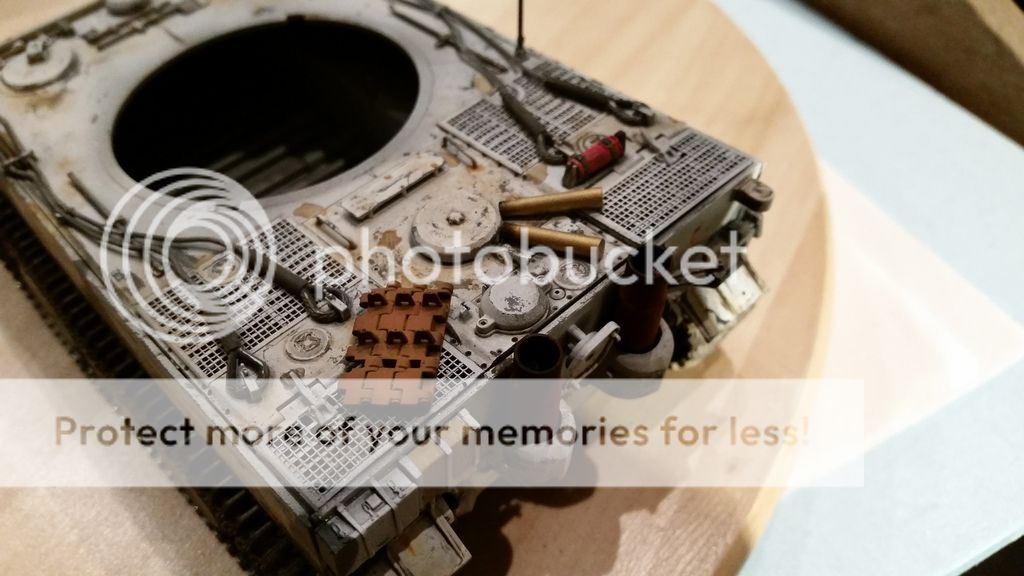
this stowage was then added to the rear of the tank

Image
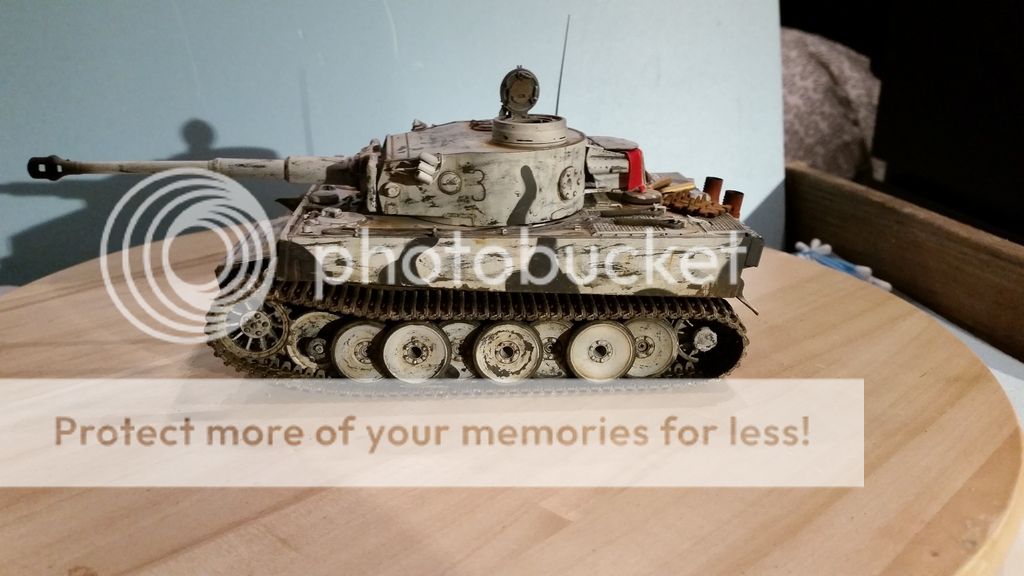
then the turret was put in place and the entire tank was finished

so that is all for this build
i hope you like it and thanks for stopping by
untill next time
cheers Mark
On the bench
GB builds
1/35 Trumpeter M1132 ESV

Personal builds
1/35 Hobby Boss M1070 tractor with M1000 semi trailer and Meng M1A2 TUSK II Abrams
1/35 Takom V2 rocket with the Meillerwagen and SS100 tractor
User avatar
Coen
General
General
Posts: 10136
Joined: Wed May 29, 2013 2:04 am
Location: Nova Scotia, Canada
Contact:
Canada

Re: Tiger 1 Initial prod. s.Pz.Abt 502 tactical number 3

Post by Coen »

Beautiful Work Mark!!!
Again... I'm loving those flags buddy... those look really cool!
User avatar
MarkVerploeg
Major
Major
Posts: 4837
Joined: Wed Oct 16, 2013 12:21 am
Location: Oss, Noord Braband The Netherlands
Netherlands

Re: Tiger 1 Initial prod. s.Pz.Abt 502 tactical number 3

Post by MarkVerploeg »

Thank you Coen
They are stuburn little things as the paper is very stiff so i soak them in water for a minute
On the bench
GB builds
1/35 Trumpeter M1132 ESV

Personal builds
1/35 Hobby Boss M1070 tractor with M1000 semi trailer and Meng M1A2 TUSK II Abrams
1/35 Takom V2 rocket with the Meillerwagen and SS100 tractor
Post Reply

Return to “Armour & Military Vehicles”