Ok guys, some of you are familiar with doing led wiring in your kits, if this is the case then this next video I made will be of no interest to you whatsoever, however if you havent or are thinking about trying it, I go into quite a lot of detail in this video about the planning behind lighting up your kit to designing the circuit, how the circuit works, what components are used and testing it all out. The video is a good hour and ten minutes of me waffling on but I hope it helps people.
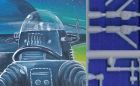
in this example I use Hasegawa's Egg Plane Space Shuttle that I am currently working on but not doing a build series on.
Smoo's 1:112 Revell X-Wing Fighter *COMPLETED*
Moderator: T3hGuppy
-
TheSmoo

- Sergeant First Class

- Posts: 270
- Joined: Mon Dec 07, 2015 11:01 pm
- Location: Bonnie Scotland
- Contact:
Re: Smoo's 1:112 Revell X-Wing Fighter
I just realised that this ends at the end of september so will try and get my mojo back up and on with the x-wing build, sorry guys real life has gotten in the way a bit of late


Re: Smoo's 1:112 Revell X-Wing Fighter
Hope things get sorted and you're back at your bench soon mate. 
Cheers, Neil
On the Bench:
Revell 1/72 Millennium Falcon
Tamiya 1/48 P-38F/G
On the Bench:
Revell 1/72 Millennium Falcon
Tamiya 1/48 P-38F/G


Re: Smoo's 1:112 Revell X-Wing Fighter
Hi there, hope all is well.
Good news! The deadline has been extended to midnight GMT October 31! Get building!
Good news! The deadline has been extended to midnight GMT October 31! Get building!
Backlog Progress: |||||||||||||||-------|----------|----------| 26/80
On the bench: Hasegawa 1/72 Tatiana's Vanship
Last Completed: Bandai HGUC Geara Zulu // Hasegawa 1/48 J2M3Raiden Prisoner of War
On the bench: Hasegawa 1/72 Tatiana's Vanship
Last Completed: Bandai HGUC Geara Zulu // Hasegawa 1/48 J2M3Raiden Prisoner of War
-
TheSmoo
- Sergeant First Class
- Posts: 270
- Joined: Mon Dec 07, 2015 11:01 pm
- Location: Bonnie Scotland
- Contact:
Re: Smoo's 1:112 Revell X-Wing Fighter
yay good news about the extension to the end date, managed to get back to the bench and have hopefully figured out how to use flickr
Got the bench set up to replace the two leds I blew due to me soldering them with my portasol butane soldering iron of which, I have no control over the soldering temperature but all cured now with a temp controlled soldering station.

Replaced the two blown leds, tested and double tested all was still working before glueing the engine covers in place, left them clamped up overnight and might have a tiny wee bit of filling to do along the seam lines.

hopefully I got this Flickr thing right so a bit of filling and sanding and on to paint next
Got the bench set up to replace the two leds I blew due to me soldering them with my portasol butane soldering iron of which, I have no control over the soldering temperature but all cured now with a temp controlled soldering station.
Replaced the two blown leds, tested and double tested all was still working before glueing the engine covers in place, left them clamped up overnight and might have a tiny wee bit of filling to do along the seam lines.
hopefully I got this Flickr thing right so a bit of filling and sanding and on to paint next
-
TheSmoo
- Sergeant First Class
- Posts: 270
- Joined: Mon Dec 07, 2015 11:01 pm
- Location: Bonnie Scotland
- Contact:
Re: Smoo's 1:112 Revell X-Wing Fighter
ok I got a wee bit more done to the X-wing, got the engine covers glued on and re-checked all the leds were working and glued the weapon pylons on ready for priming -

Got the wings primed and did a light leakage test, found the seams between the engine covers were needing filled slightly and were leaking light due to me trying to shoehorn 3mm leds into them. there is very little wiggle room to get in and fill or sand the seams due to the scale so I used Perfect plastic puty as it is water soluble to fill the seams and then dressed them up with a damp cotton bud so hopefully no further sanding required.

Left wings filler to dry then it will be back to priming again with Ultimate black primer, also got a wee bit of detail painting done on the pilot

That's it for now
Got the wings primed and did a light leakage test, found the seams between the engine covers were needing filled slightly and were leaking light due to me trying to shoehorn 3mm leds into them. there is very little wiggle room to get in and fill or sand the seams due to the scale so I used Perfect plastic puty as it is water soluble to fill the seams and then dressed them up with a damp cotton bud so hopefully no further sanding required.
Left wings filler to dry then it will be back to priming again with Ultimate black primer, also got a wee bit of detail painting done on the pilot
That's it for now
Re: Smoo's 1:112 Revell X-Wing Fighter
Great to see you back at the bench on this one mate!
Cheers, Neil
On the Bench:
Revell 1/72 Millennium Falcon
Tamiya 1/48 P-38F/G
On the Bench:
Revell 1/72 Millennium Falcon
Tamiya 1/48 P-38F/G
-
TheSmoo
- Sergeant First Class
- Posts: 270
- Joined: Mon Dec 07, 2015 11:01 pm
- Location: Bonnie Scotland
- Contact:
Re: Smoo's 1:112 Revell X-Wing Fighter
just another quick video update of where I have got to with the build all the lights in the wings are working and light blockage sorted with some filing and re-priming, hope to get onto paint later today -

Re: Smoo's 1:112 Revell X-Wing Fighter
Looks great again Terry! Will look at the video this weekend.
-Doc
On the bench:
On the bench:
Re: Smoo's 1:112 Revell X-Wing Fighter
Just caught up with videos 4 & 5 - liking the 20 minute format very much.
Nice progress too - it's coming together well
Nice progress too - it's coming together well
Cheers, Neil
On the Bench:
Revell 1/72 Millennium Falcon
Tamiya 1/48 P-38F/G
On the Bench:
Revell 1/72 Millennium Falcon
Tamiya 1/48 P-38F/G
-
TheSmoo
- Sergeant First Class
- Posts: 270
- Joined: Mon Dec 07, 2015 11:01 pm
- Location: Bonnie Scotland
- Contact:
Re: Smoo's 1:112 Revell X-Wing Fighter
thanks for all the kind comments guys, some more progress on the build -
got the base coat down on the wings using Tamiya xf-2 white ready for the next lot of detail painting now

gloss coated the pilot figure and stuck the teeny wee helmet decal on, lol 112 scale, I'm not that good at figure painting but it's good enough as you hardly see any of him anyways.

hand brushed some AK ultra matte on him to tone down the shiny and glossed his helmet and visor

decided to try out the blue led for effect now the pilot and cockpit were done, found it a bit too subtle and hard to see in daylight

another pic of the blue led, not happy with it, as the led shines up from his feet i opened up the aperture where his feet go to allow more light up and will go for a brighter white led later on in the build.

painted up the dash and masked off the canopy no idea why it's upside down

before fixing it into place with microscale crystal clear canopy glue

last build video was #5 so got 6 and 7 done in one weekend trying too keep them to 20 mins but I fail on a couple...lol too much waffling -
build video #6 -
build video #7 -
more pics to come but saving this now in case I muck it up lol
got the base coat down on the wings using Tamiya xf-2 white ready for the next lot of detail painting now
gloss coated the pilot figure and stuck the teeny wee helmet decal on, lol 112 scale, I'm not that good at figure painting but it's good enough as you hardly see any of him anyways.
hand brushed some AK ultra matte on him to tone down the shiny and glossed his helmet and visor
decided to try out the blue led for effect now the pilot and cockpit were done, found it a bit too subtle and hard to see in daylight
another pic of the blue led, not happy with it, as the led shines up from his feet i opened up the aperture where his feet go to allow more light up and will go for a brighter white led later on in the build.
painted up the dash and masked off the canopy no idea why it's upside down
before fixing it into place with microscale crystal clear canopy glue
last build video was #5 so got 6 and 7 done in one weekend trying too keep them to 20 mins but I fail on a couple...lol too much waffling -
build video #6 -
build video #7 -
more pics to come but saving this now in case I muck it up lol
-
TheSmoo
- Sergeant First Class
- Posts: 270
- Joined: Mon Dec 07, 2015 11:01 pm
- Location: Bonnie Scotland
- Contact:
Re: Smoo's 1:112 Revell X-Wing Fighter
more progress -
masked up the wings for the panels that would go in a greenish grey (going by what the kit says to do not going for film accurate realism here).

the kits revell paint colour for the panels crosses over to Tamiya xf-12 which I didn't have, J.N.Grey which turns out to be a stone grey with a grren tinge, i did have some lifecolor stone grey/green so a friend who had xf-12 took a photo and i matched it up with a photo of a swatch I did, close enough me thinks

with the colour matching done I went about spraying in the panels, looks a bit green hmm

doesn't look to bad a colour though with the masking off, it's going to get an oil pin wash anyways

I needed to make a custom light grey mix for a few of the other panels as the revell paint code didn't cross reference to anything else so did some swatches using tamiya xf-66 light grey as the base and just kept adding drops of tamiya xf-2 white to it until i got a colour i was happy with

I then set about masking off the parts that were going to get sprayed with my custom light grey

quite happy with the results maybe some chipping and a pin wash once the final bit of masking on the canopy and decals are on

the colour the back end is is the same colour I will use around the canopy, the revell colour code cross matxhes to tamiya xf-54 dark sea grey which is a blueish grey, just got the canopy to mask off and put this colour on it

another video update #8, apologies ran well over 20 mins (48 actually mostly waffle lol ), reminder not to film after a few vodkas over the weekend ha ha
build video #8 -
so that's where i'm up to, canopy to mask and paint, engines to paint but will use a hairy stick for that, gloss coat then onto decals, getting there.
masked up the wings for the panels that would go in a greenish grey (going by what the kit says to do not going for film accurate realism here).
the kits revell paint colour for the panels crosses over to Tamiya xf-12 which I didn't have, J.N.Grey which turns out to be a stone grey with a grren tinge, i did have some lifecolor stone grey/green so a friend who had xf-12 took a photo and i matched it up with a photo of a swatch I did, close enough me thinks
with the colour matching done I went about spraying in the panels, looks a bit green hmm
doesn't look to bad a colour though with the masking off, it's going to get an oil pin wash anyways
I needed to make a custom light grey mix for a few of the other panels as the revell paint code didn't cross reference to anything else so did some swatches using tamiya xf-66 light grey as the base and just kept adding drops of tamiya xf-2 white to it until i got a colour i was happy with
I then set about masking off the parts that were going to get sprayed with my custom light grey
quite happy with the results maybe some chipping and a pin wash once the final bit of masking on the canopy and decals are on
the colour the back end is is the same colour I will use around the canopy, the revell colour code cross matxhes to tamiya xf-54 dark sea grey which is a blueish grey, just got the canopy to mask off and put this colour on it
another video update #8, apologies ran well over 20 mins (48 actually mostly waffle lol ), reminder not to film after a few vodkas over the weekend ha ha
build video #8 -
so that's where i'm up to, canopy to mask and paint, engines to paint but will use a hairy stick for that, gloss coat then onto decals, getting there.
Re: Smoo's 1:112 Revell X-Wing Fighter
Looks really cool Terry. that small fighter is almost ready for flight! 
-Doc
On the bench:
On the bench:
-
TheSmoo
- Sergeant First Class
- Posts: 270
- Joined: Mon Dec 07, 2015 11:01 pm
- Location: Bonnie Scotland
- Contact:
Re: Smoo's 1:112 Revell X-Wing Fighter
onto the last bits of masking and painting now before decals and weathering
top of fuselage all masked up to do the canopy colour, i use parafilm to mask the ends

all that masking for one tiny area

grey bands on the engine next, just going to use a hairy stick on these

masked just to avoid any potential slip ups with the brush

so thats the upper canopy and both wings masked again

so that's me all ready for painting tomorrow

almost there, I can see the end in sight, more so when the decals go on and I can start the weathering and final wiring
top of fuselage all masked up to do the canopy colour, i use parafilm to mask the ends
all that masking for one tiny area
grey bands on the engine next, just going to use a hairy stick on these
masked just to avoid any potential slip ups with the brush
so thats the upper canopy and both wings masked again
so that's me all ready for painting tomorrow
almost there, I can see the end in sight, more so when the decals go on and I can start the weathering and final wiring
Re: Smoo's 1:112 Revell X-Wing Fighter
Very nice work mate - all that masking is really paying off!
Cheers, Neil
On the Bench:
Revell 1/72 Millennium Falcon
Tamiya 1/48 P-38F/G
On the Bench:
Revell 1/72 Millennium Falcon
Tamiya 1/48 P-38F/G
Re: Smoo's 1:112 Revell X-Wing Fighter
Awesome work so far Terry! I can imagine the test firing of the engines soon! 
-Doc
On the bench:
On the bench:
-
TheSmoo
- Sergeant First Class
- Posts: 270
- Joined: Mon Dec 07, 2015 11:01 pm
- Location: Bonnie Scotland
- Contact:
Re: Smoo's 1:112 Revell X-Wing Fighter
Pushing to get this done before it closes, got 3 builds ongoing at same time and not sleeping well but nearing the finishing stages so should make it so here is where I am up to -
Sprayed the Canopy so hopefully it unmasks ok

came out good after unmasking, i think masking stuff for me is the scariest bit of painting a model

detail painted the wee thing at the back and masked the engines for their grey stripes

engine stripes came out well

a bit of dry brushing on the engines and rear exhaust posts looking good to me that's me done with painting yay (apart from weathering it)

Gloss coated now so just waiting for it to dry to get the decals on

hopefully I'll get this done in time, 5 days to go, decals, chipping and some light weathering then finalising the led wiring and should all be done
Couple more build videos -
Bulid video #9
Build video #10
getting there, thats all for now
Sprayed the Canopy so hopefully it unmasks ok
came out good after unmasking, i think masking stuff for me is the scariest bit of painting a model
detail painted the wee thing at the back and masked the engines for their grey stripes
engine stripes came out well
a bit of dry brushing on the engines and rear exhaust posts looking good to me that's me done with painting yay (apart from weathering it)
Gloss coated now so just waiting for it to dry to get the decals on
hopefully I'll get this done in time, 5 days to go, decals, chipping and some light weathering then finalising the led wiring and should all be done
Couple more build videos -
Bulid video #9
Build video #10
getting there, thats all for now
Re: Smoo's 1:112 Revell X-Wing Fighter
Amen to that - unmasking is always a bum-clenching moment for me!
It's looking absolutely fantastic mate - especially given how small it is. The details are really popping out - great job
Cheers, Neil
On the Bench:
Revell 1/72 Millennium Falcon
Tamiya 1/48 P-38F/G
On the Bench:
Revell 1/72 Millennium Falcon
Tamiya 1/48 P-38F/G
-
TheSmoo
- Sergeant First Class
- Posts: 270
- Joined: Mon Dec 07, 2015 11:01 pm
- Location: Bonnie Scotland
- Contact:
Re: Smoo's 1:112 Revell X-Wing Fighter
Thanks for the encouragement Neil
OK more progress I can see the finish line in sight -
All set up for applying the decals now

Turns out the Revell kit uses cartograf decals and they are settling down well

All the decals are on now, the spiral blue ones on the pylons were challenging though

just got to wait on the decals fully drying then i will do a bit of paint chipping on them before a clear coat and some light weathering

So whilst I am waiting on them drying it's time to do the chrome dome on the R2 droid unit before clear coating him and applying minuscule decals to him

Another video to go with this, it covers applying the decals from a beginners aspect
Build video #11 -
that's all for now
OK more progress I can see the finish line in sight -
All set up for applying the decals now
Turns out the Revell kit uses cartograf decals and they are settling down well
All the decals are on now, the spiral blue ones on the pylons were challenging though
just got to wait on the decals fully drying then i will do a bit of paint chipping on them before a clear coat and some light weathering
So whilst I am waiting on them drying it's time to do the chrome dome on the R2 droid unit before clear coating him and applying minuscule decals to him
Another video to go with this, it covers applying the decals from a beginners aspect
Build video #11 -
that's all for now
Re: Smoo's 1:112 Revell X-Wing Fighter
Oh man that is looking real nice Terry! I got two of those ships near my bench (pre-painted by Estes) and they dont look half that good as yours and there bigger too!
-Doc
On the bench:
On the bench:
-
Twokidsnosleep

- General

- Posts: 18136
- Joined: Thu Aug 07, 2014 4:07 pm
- Location: BC,Canada

Re: Smoo's 1:112 Revell X-Wing Fighter
I had to do a double take at the scale of this...it is really small for so much detail and lighting.
A real challenge for you indeed, but is finishing up great
A real challenge for you indeed, but is finishing up great
Scott
On, Under or Near the Bench:
American Graffiti Ford Coupe
Headless Horseman...figure sig
1/72 Black Pearl Pirate Ship
On, Under or Near the Bench:
American Graffiti Ford Coupe
Headless Horseman...figure sig
1/72 Black Pearl Pirate Ship
Re: Smoo's 1:112 Revell X-Wing Fighter
Wait...the spirals are decals? 
How are you still sane? Also, how do you even put those on?!
How are you still sane? Also, how do you even put those on?!
Backlog Progress: |||||||||||||||-------|----------|----------| 26/80
On the bench: Hasegawa 1/72 Tatiana's Vanship
Last Completed: Bandai HGUC Geara Zulu // Hasegawa 1/48 J2M3Raiden Prisoner of War
On the bench: Hasegawa 1/72 Tatiana's Vanship
Last Completed: Bandai HGUC Geara Zulu // Hasegawa 1/48 J2M3Raiden Prisoner of War
-
TheSmoo
- Sergeant First Class
- Posts: 270
- Joined: Mon Dec 07, 2015 11:01 pm
- Location: Bonnie Scotland
- Contact:
Re: Smoo's 1:112 Revell X-Wing Fighter
thanks for all the kind comments, and yes the spirals were decals lol.
The kit is finished so will update that section shortly, just uploading the final reveal video now
There is a video that covers most of what I did here and it is Build video #12 -
ok into weathering now and some chipping on the decals using the base colour before clear coating it all with alclad II aqua gloss

then some shading and panel line washes with citadel agrax earthshade and nuln oil

then some test fitting of the wings

then unmasking the canopy after all the weathering was done and matt coated with A/k ultra Matte and installing the pilot and cockpit

then i set about soldering the white led for the cockpit

I then turned my attention to further light blocking using kitchen foil and pva glue

i then applied light block on the actual led itself using tulip slick black

then i checked the final position and operation of the led

before hot glueing it into place

then a test for light leakage

there was still some slight leakage from the sides so i made an overlapping foil shield

glued the body together and left it clamped up for ages

then i soldered in the resistors

checked all the lights were working


finally stuck the decals on the teeny r2 droid and jobs a goodun

so that's it done now to post up my reveal picks in the other thread
The kit is finished so will update that section shortly, just uploading the final reveal video now
There is a video that covers most of what I did here and it is Build video #12 -
ok into weathering now and some chipping on the decals using the base colour before clear coating it all with alclad II aqua gloss
then some shading and panel line washes with citadel agrax earthshade and nuln oil
then some test fitting of the wings
then unmasking the canopy after all the weathering was done and matt coated with A/k ultra Matte and installing the pilot and cockpit
then i set about soldering the white led for the cockpit
I then turned my attention to further light blocking using kitchen foil and pva glue
i then applied light block on the actual led itself using tulip slick black
then i checked the final position and operation of the led
before hot glueing it into place
then a test for light leakage
there was still some slight leakage from the sides so i made an overlapping foil shield
glued the body together and left it clamped up for ages
then i soldered in the resistors
checked all the lights were working
finally stuck the decals on the teeny r2 droid and jobs a goodun
so that's it done now to post up my reveal picks in the other thread
