Another Tamiya Mossie

Post Reply
das84
Sergeant
Sergeant
Posts: 114
Joined: Thu Mar 13, 2014 6:04 pm
Location: Northampton, UK
Great Britain

Another Tamiya Mossie

Post by das84 »

Quite by coincidence this Mosquito was going to be my next build, and then I saw this SIG appear and decided I'd join in, this is my first time doing a build thread I'll try my best to keep it updated and interesting.

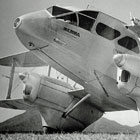
So I'm going to be building Tamiya's 1/48 Mosquito FB Mk VI

Image

I'm planing on doing option B which is the Coastal Command varient.

Let the fun begin
Last edited by das84 on Tue Jun 16, 2015 8:06 pm, edited 1 time in total.
Insanity: doing the same thing over and over again and expecting different results. - Albert Einstein
das84
Sergeant
Sergeant
Posts: 114
Joined: Thu Mar 13, 2014 6:04 pm
Location: Northampton, UK
Great Britain

Re: Another Tamiya Mossie

Post by das84 »

Ok, so I've made a start by deciding to ignore the instructions which would have you start by building the wheel wells and instead skipped ahead to start on the cockpit and bomb bay.

The cockpit is fairly well detailed out of the box plus dry fitting the fuselage has given me the impression that you wont be able to see a great deal of it anyway once its all built certainly around the instrument panel anyway, one area that you can see quite clearly is the seats so decided to jazz these up a bit, the seatbelt decals provided look awful and my last attempt at using PE seatbelts resulted in language that would put a sailor to shame and gave me a headache for the rest of the day. Being fairly new at this modelling malarkey I try and incorporate at least one new technique or material in to each of my builds so this time I decided to replace the kit seats using resin seats from quickboost.

Image

Here they are still attached to there casting blocks

Image

And here they are cleaned up along with the cockpit section with the original seats removed.

Image

And finally attached to the kit parts, they look great now I wonder if they will look as good when I've been let loose at them with a paintbrush.
Insanity: doing the same thing over and over again and expecting different results. - Albert Einstein
Hawkins6685
Sergeant
Sergeant
Posts: 114
Joined: Wed Apr 01, 2015 1:24 am

Re: Another Tamiya Mossie

Post by Hawkins6685 »

Looking good will follow your progress. Can't wait till mine arrives in about 2 months lol
On the bench
Airfix 1/78 messerschmitt bf109e-4/n trop, eduard neumann North Africa 1941
Revell 1/78 Lockheed f22 raptor
User avatar
Nige201980
Captain
Captain
Posts: 4095
Joined: Wed Jun 05, 2013 9:30 am
Location: Doncaster South Yorkshire UK
Contact:

Re: Another Tamiya Mossie

Post by Nige201980 »

Of to a great start mate.
http://www.youtube.com/channel/UCy-TGcs5u_ZXSZ9kObNfsPg


On the go at the Mo

Quite a few :banana:
das84
Sergeant
Sergeant
Posts: 114
Joined: Thu Mar 13, 2014 6:04 pm
Location: Northampton, UK
Great Britain

Re: Another Tamiya Mossie

Post by das84 »

Parts have been primed and then sprayed interior green using XF71

Image

Detail painting and drybrushing on some of the cockpit parts

Image

And on the wheel wells

Image

Just the seats and the bomb bay left to paint now.
Insanity: doing the same thing over and over again and expecting different results. - Albert Einstein
User avatar
shortCummins
Chief Warrant Officer 2
Posts: 1640
Joined: Mon Aug 04, 2014 4:30 pm
Location: Cotgrave, Nottingham
Great Britain

Re: Another Tamiya Mossie

Post by shortCummins »

nice detail painting :th:

rgds
John(shortCummins)
"I'm tall for my height" - "it looks like it was painted by a blind chimpanzee"
das84
Sergeant
Sergeant
Posts: 114
Joined: Thu Mar 13, 2014 6:04 pm
Location: Northampton, UK
Great Britain

Re: Another Tamiya Mossie

Post by das84 »

Thanks, those were the easy bits I think painting the seats and belts has sent me cross eyed :crazy:
Insanity: doing the same thing over and over again and expecting different results. - Albert Einstein
das84
Sergeant
Sergeant
Posts: 114
Joined: Thu Mar 13, 2014 6:04 pm
Location: Northampton, UK
Great Britain

Re: Another Tamiya Mossie

Post by das84 »

Ok, have finished painting and weathering the cockpit, bomb bay and wheel wells. Another new technique tried here in the form of oil washes, yellowy brown around the aluminium parts and a dark dirty brown everywhere else. Just need to matte coat everything in the morning and hopefully can make a start on getting the fuselage joined up

Cockpit parts
Image

Close up of the seats, don't think I made too much of a hash at painting them
Image

Bomb Bay
Image
Insanity: doing the same thing over and over again and expecting different results. - Albert Einstein
User avatar
shortCummins
Chief Warrant Officer 2
Posts: 1640
Joined: Mon Aug 04, 2014 4:30 pm
Location: Cotgrave, Nottingham
Great Britain

Re: Another Tamiya Mossie

Post by shortCummins »

you've done a first rate job on those seats :clap:

how did you find working with resin for the first? time

rgds
John(shortCummins)
"I'm tall for my height" - "it looks like it was painted by a blind chimpanzee"
peppie
Sergeant Major
Sergeant Major
Posts: 629
Joined: Mon Feb 17, 2014 6:10 pm
Location: Boskoop Holland
Netherlands

Re: Another Tamiya Mossie

Post by peppie »

Some great painting Sir. :th:
Joined this forum to become a better modell builder. Now, if I can just put away my laptop and start building..

On the Bench:

Piper PA-18-150
Ford GPA
GMC cckw 1947
Ford V3000 "Bello"
das84
Sergeant
Sergeant
Posts: 114
Joined: Thu Mar 13, 2014 6:04 pm
Location: Northampton, UK
Great Britain

Re: Another Tamiya Mossie

Post by das84 »

how did you find working with resin for the first? time
Much easier than I thought it would be, certainly much easier than fiddling with tiny pieces of PE. Its a bit daunting though when you start chopping off the original kits parts.
Insanity: doing the same thing over and over again and expecting different results. - Albert Einstein
das84
Sergeant
Sergeant
Posts: 114
Joined: Thu Mar 13, 2014 6:04 pm
Location: Northampton, UK
Great Britain

Re: Another Tamiya Mossie

Post by das84 »

Have had a chance to get a bit more done in the last few days, firstly both propellers painted and assembled.

Image

And the canopy masked up, normally I don't mind masking these with tape myself but decided to get the eduard mask set at the same time I was getting the resin seats and I'm certainly glad as trying to cut 23 individual masks would have sent me crazy.

Image

Also found a fairly handy way of getting the masks into the right place without sticking to the first piece of plastic they come across, first lift the mask off of the backing paper and then roll it around a cocktail stick leaving only a small part of the mask unstuck.

Image

Get this stuck in the correct place and then slowly unroll the rest of the mask in to place. It should hopefully be nicely lined up.

Image

Lastly I've managed to get the fuselage together, filled, sanded and polished.

Image
Image
Last edited by das84 on Tue Jun 16, 2015 8:09 pm, edited 1 time in total.
Insanity: doing the same thing over and over again and expecting different results. - Albert Einstein
User avatar
martin57
Command Sergeant Major
Posts: 897
Joined: Tue Apr 01, 2014 8:44 pm
Location: oundle, east northants.

Re: Another Tamiya Mossie

Post by martin57 »

nice work on the canopy good tip with the stick i will be giving that a try :th:
User avatar
wally
Staff Sergeant
Staff Sergeant
Posts: 234
Joined: Thu Oct 24, 2013 2:50 pm
Location: Warsaw [Poland]
Poland

Re: Another Tamiya Mossie

Post by wally »

Very nice work on the cockpit. I like the propeller to. Looking forward to see the next steps of your build. I have plan to add in my Mosie the resin seats so your paint work on them will help me to work on it. Keep up good work.
Wally
My Protfolio:
http://intscalemodeller.com/viewtopic.php?f=69&t=4138
On the Bench:
1/48 Mig-21PFM
1/48 PV-1 Ventura
das84
Sergeant
Sergeant
Posts: 114
Joined: Thu Mar 13, 2014 6:04 pm
Location: Northampton, UK
Great Britain

Re: Another Tamiya Mossie

Post by das84 »

Thanks for all the positive comments so far.

Have had my first problems with the build, managed to snap off the gunsight whilst dry fitting the canopy, unfortunately once the fuselage halves are together its impossible to see where its supposed to sit on the instrument panel so ended up super gluing it into roughly the right place, its probably sticking out of an instrument dial or something. And then I managed to loose what I assume is a pitot tube which should fit into the tail section, not a huge problem as it was replaced by a short length of thick fuse wire.
Insanity: doing the same thing over and over again and expecting different results. - Albert Einstein
User avatar
Nige201980
Captain
Captain
Posts: 4095
Joined: Wed Jun 05, 2013 9:30 am
Location: Doncaster South Yorkshire UK
Contact:

Re: Another Tamiya Mossie

Post by Nige201980 »

Great work so far mate.
http://www.youtube.com/channel/UCy-TGcs5u_ZXSZ9kObNfsPg


On the go at the Mo

Quite a few :banana:
User avatar
Coen
General
General
Posts: 10136
Joined: Wed May 29, 2013 2:04 am
Location: Nova Scotia, Canada
Contact:
Canada

Re: Another Tamiya Mossie

Post by Coen »

She looks excellent!
Nice trick with the masking tape. That's one I'll be using next time for sure.
Thanks for that.
das84
Sergeant
Sergeant
Posts: 114
Joined: Thu Mar 13, 2014 6:04 pm
Location: Northampton, UK
Great Britain

Re: Another Tamiya Mossie

Post by das84 »

Nice trick with the masking tape. That's one I'll be using next time for sure.
Was just and idea that popped into my head whilst trying to line up the tiny pieces of masking tape into the correct place, much easier than struggling with two pairs of tweezers.
Insanity: doing the same thing over and over again and expecting different results. - Albert Einstein
das84
Sergeant
Sergeant
Posts: 114
Joined: Thu Mar 13, 2014 6:04 pm
Location: Northampton, UK
Great Britain

Re: Another Tamiya Mossie

Post by das84 »

Didn't have a chance to do any more over the weekend as I was working nights, but now I'm fully recovered the wings have been built and added to the fuselage, the undercarriage and wheels are done as well. All that is left to do is build the rocket rails and probably put a smear of filler along the wing roots and then the assembly is all done.

Image

Also whilst looking around the internet found a picture of the aircraft represented in the kit

Image

And also this colour picture of a Coastal Command Mosquito being loaded with rockets, cant tell which aircraft it is though as the loaders are standing infront of the serial number.

Image
Insanity: doing the same thing over and over again and expecting different results. - Albert Einstein
User avatar
Nige201980
Captain
Captain
Posts: 4095
Joined: Wed Jun 05, 2013 9:30 am
Location: Doncaster South Yorkshire UK
Contact:

Re: Another Tamiya Mossie

Post by Nige201980 »

Looking great mate. So fab photos too
http://www.youtube.com/channel/UCy-TGcs5u_ZXSZ9kObNfsPg


On the go at the Mo

Quite a few :banana:
User avatar
shortCummins
Chief Warrant Officer 2
Posts: 1640
Joined: Mon Aug 04, 2014 4:30 pm
Location: Cotgrave, Nottingham
Great Britain

Re: Another Tamiya Mossie

Post by shortCummins »

das84 wrote:
Image
that would make a nice 'simple' dio'

rgds
John(shortCummins)
"I'm tall for my height" - "it looks like it was painted by a blind chimpanzee"
das84
Sergeant
Sergeant
Posts: 114
Joined: Thu Mar 13, 2014 6:04 pm
Location: Northampton, UK
Great Britain

Re: Another Tamiya Mossie

Post by das84 »

Over the weekend I've managed to prime, preshade and paint the lower surfaces. The colour callout in the instructions is for xf55 which is deck tan something about this didn't seem right, so after a quick search around on the internet I discover that coastal mosquito's undersides were actually painted sky, not sure where tamyias suggestion of light brown came from.

Sprayed XF21 sky
Image

Have also got the wheels and the undercarriage painted, used mr metal for the aluminium, first time using this does it always rub off onto everything quite so easily, had to apply the gloss coat rather quickly to prevent the metal colour ending up everywhere.
Insanity: doing the same thing over and over again and expecting different results. - Albert Einstein
User avatar
Coen
General
General
Posts: 10136
Joined: Wed May 29, 2013 2:04 am
Location: Nova Scotia, Canada
Contact:
Canada

Re: Another Tamiya Mossie

Post by Coen »

They did the same I'm my kit bud.
Not so much on the exterior colours, but they fuel tanks and some of the interior call outs were off.
I love the look of that underbelly though. Nicely done.
das84
Sergeant
Sergeant
Posts: 114
Joined: Thu Mar 13, 2014 6:04 pm
Location: Northampton, UK
Great Britain

Re: Another Tamiya Mossie

Post by das84 »

And today the top has been masked up and sprayed extra dark sea grey. Have just noticed a couple of spots that need a little touching up so will hopefully get that done over the weekend and then am trying to decide whether to try some post shading. Its a technique I've always skipped as I am always worried that I will completely wreck my paintwork in the process, so I've sprayed a spare wing in grey to practice on first.

Image
Image

Have also got all eight rockets painted, they just need a wash once I've finished painting and glossing eveything.

Image
Insanity: doing the same thing over and over again and expecting different results. - Albert Einstein
User avatar
Nige201980
Captain
Captain
Posts: 4095
Joined: Wed Jun 05, 2013 9:30 am
Location: Doncaster South Yorkshire UK
Contact:

Re: Another Tamiya Mossie

Post by Nige201980 »

Great work mate
http://www.youtube.com/channel/UCy-TGcs5u_ZXSZ9kObNfsPg


On the go at the Mo

Quite a few :banana:
das84
Sergeant
Sergeant
Posts: 114
Joined: Thu Mar 13, 2014 6:04 pm
Location: Northampton, UK
Great Britain

Re: Another Tamiya Mossie

Post by das84 »

Not much progress with this recently, my attempts at post shading with the airbrush have been less than successful so will need to find some other way to break up the vast expanse of grey.

The first gloss coat has gone horribly wrong though and I now have a surface rougher than what I started with, as I understand it this is down to the gloss drying before it reaches the surface (serves me right for trying to spray in a conservatory i guess). Whats the best way to correct this is it a case of spraying more gloss to even out the surface or does the rough surface meed to be polished out?

The only real progress is on the undercarriage which has had all of its washes applied. Think I may have gone a bit heavy with the rusty colours but oh well live and learn.

Image
Insanity: doing the same thing over and over again and expecting different results. - Albert Einstein
das84
Sergeant
Sergeant
Posts: 114
Joined: Thu Mar 13, 2014 6:04 pm
Location: Northampton, UK
Great Britain

Re: Another Tamiya Mossie

Post by das84 »

Yesterday turned into a bit of a decaling disaster, having smoothed out the rather rough gloss coat I set about putting down the decals. I've decided that tamyia decals and me don't mix, on my spitfire build they wouldn't snug down to the surface no matter how much setting solution i used and these ones just decided to tear whenever I went near them, the yellow N split into three parts but i managed to move all the bits into place without too much trouble. Unfortunately one of the serial numbers and one of the red boxes for over the air intakes tore and curled up so badly that I couldn't salvage them, I don't suppose anyone who is building the tamyia kit would be able to send me there unused serial number decals would they?

Anyway here is how everything looks at the minute.

Image
Image
Insanity: doing the same thing over and over again and expecting different results. - Albert Einstein
User avatar
Nige201980
Captain
Captain
Posts: 4095
Joined: Wed Jun 05, 2013 9:30 am
Location: Doncaster South Yorkshire UK
Contact:

Re: Another Tamiya Mossie

Post by Nige201980 »

She is looking great mate. PM me your address and the decals you need and I'll send you some out. I've got a few different sets of mossie decals so should be able to sort something for you.
http://www.youtube.com/channel/UCy-TGcs5u_ZXSZ9kObNfsPg


On the go at the Mo

Quite a few :banana:
User avatar
Coen
General
General
Posts: 10136
Joined: Wed May 29, 2013 2:04 am
Location: Nova Scotia, Canada
Contact:
Canada

Re: Another Tamiya Mossie

Post by Coen »

It's the nature of tamiya's decals I've found. They make great kits but man! Their decals stink!

Love the paint job bud!mshe looks awesome :th: :thumb2: :thumb1:
das84
Sergeant
Sergeant
Posts: 114
Joined: Thu Mar 13, 2014 6:04 pm
Location: Northampton, UK
Great Britain

Re: Another Tamiya Mossie

Post by das84 »

First off, thanks to Nige for supplying replacements for the various decals that I managed to screw up the first time round.

With all the markings on where they should be another gloss coat was added ready for the washes. Ultimate dark dirt was liberally applied all over and left to dry.

Image
Image

Come to wipe it off and my rough gloss coat starts causing problems again, I had polished the areas the decals were going smooth but not the whole model, resulting a a very patchy finish to the varnish, super smooth in some places but almost matt in others. The wash was stuck fast in the matt areas and trying to wipe it off had left fibres from the paper towel stuck everywhere, ended up scrubbing majority of the wash off with a tooth brush and then touching up the underside by pin washing the dark dirt in, the wash thats stuck in the matt areas has actually left quite a nice discoloration to the paint work so its not all bad.

Image

I also decided to use an oil wash on the upper surfaces, once dry the dark dirt just didn't look right to me against the EDSG so Paynes grey was pin washed in and left to dry, unfortunately once dry paynes grey is basically the same colour as EDSG so the wash was basically non existant. Will have to darken it up a bit with some black and then try again.
Insanity: doing the same thing over and over again and expecting different results. - Albert Einstein
User avatar
Avgas
Chief Warrant Officer 5
Posts: 2819
Joined: Mon May 18, 2015 8:45 pm
Location: Englandshire
Equatorial Guinea

Re: Another Tamiya Mossie

Post by Avgas »

Looking good to me. Love the cocktail stick tip, will certainly try that on my next build.
Regards, Dave.
User avatar
Nige201980
Captain
Captain
Posts: 4095
Joined: Wed Jun 05, 2013 9:30 am
Location: Doncaster South Yorkshire UK
Contact:

Re: Another Tamiya Mossie

Post by Nige201980 »

Glad I could help mate.

The mossie is looking sweet mate think I'll have to get another to do this scheme I really like it.
http://www.youtube.com/channel/UCy-TGcs5u_ZXSZ9kObNfsPg


On the go at the Mo

Quite a few :banana:
User avatar
Coen
General
General
Posts: 10136
Joined: Wed May 29, 2013 2:04 am
Location: Nova Scotia, Canada
Contact:
Canada

Re: Another Tamiya Mossie

Post by Coen »

I've had the exact same thing happen to me on more than one build.
I feel your pain bud.
Still... It looks pretty good dude.
User avatar
jackielinz
Private First Class
Private First Class
Posts: 29
Joined: Tue May 19, 2015 12:44 pm

Re: Another Tamiya Mossie

Post by jackielinz »

Nice work, cant wait to see the finished product :) :banana:
:shock: Going Cross Eye
das84
Sergeant
Sergeant
Posts: 114
Joined: Thu Mar 13, 2014 6:04 pm
Location: Northampton, UK
Great Britain

Re: Another Tamiya Mossie

Post by das84 »

Once again thanks for all the positive comments, hopefully I'm on the home straight now.

The panel lines were washed again this time with a slightly darker grey so that they would actually show up

Image

And once the oil had been give a few days to dry all the odd and ends where added and then everything has been coated in winsor and newton professional matt varnish.

Image

Except for the wheel bay doors which I have just realised I completely forgot to paint.

I really liked the look of the dot filter that Coen used on his mossie so I think that will be the next thing to try, then it should just be a case of weathering the exhausts and adding exhaust stains.
Insanity: doing the same thing over and over again and expecting different results. - Albert Einstein
User avatar
Coen
General
General
Posts: 10136
Joined: Wed May 29, 2013 2:04 am
Location: Nova Scotia, Canada
Contact:
Canada

Re: Another Tamiya Mossie

Post by Coen »

Dot filters are one of my favourite weathering effects. It's that little bit of magic that adds so much.
If done right it can make all the difference
That's a super looking build bud. The dot filter will certainly knock the hell out of it :thumb1: :thumb1: :thumb1:
User avatar
Nige201980
Captain
Captain
Posts: 4095
Joined: Wed Jun 05, 2013 9:30 am
Location: Doncaster South Yorkshire UK
Contact:

Re: Another Tamiya Mossie

Post by Nige201980 »

That's cracking work with the dot filter mate really brings her to life.
http://www.youtube.com/channel/UCy-TGcs5u_ZXSZ9kObNfsPg


On the go at the Mo

Quite a few :banana:
das84
Sergeant
Sergeant
Posts: 114
Joined: Thu Mar 13, 2014 6:04 pm
Location: Northampton, UK
Great Britain

Re: Another Tamiya Mossie

Post by das84 »

Coen wrote:Dot filters are one of my favourite weathering effects. It's that little bit of magic that adds so much.
If done right it can make all the difference
That's a super looking build bud. The dot filter will certainly knock the hell out of it :thumb1: :thumb1: :thumb1:

I hope so, have just been looking at the pics of the dot filtering on your mosquito and was just wondering do you only filter the top surfaces or do you do the whole aircraft (in the photos it only looks like the upper parts)
Insanity: doing the same thing over and over again and expecting different results. - Albert Einstein
User avatar
Coen
General
General
Posts: 10136
Joined: Wed May 29, 2013 2:04 am
Location: Nova Scotia, Canada
Contact:
Canada

Re: Another Tamiya Mossie

Post by Coen »

I do the entire thing. :thumb1:
das84
Sergeant
Sergeant
Posts: 114
Joined: Thu Mar 13, 2014 6:04 pm
Location: Northampton, UK
Great Britain

Re: Another Tamiya Mossie

Post by das84 »

Hopefully this will be the last build update for this mosquito and the next time you see her will be in the reveals section.

First off the dot filter was applied
Image

And here is the wing after it was wiped off, not sure if you can actually see the results in the photo
Image

Exhaust stacks painted and weathered
Image

Exhaust staining added
Image
Image
Insanity: doing the same thing over and over again and expecting different results. - Albert Einstein
User avatar
Coen
General
General
Posts: 10136
Joined: Wed May 29, 2013 2:04 am
Location: Nova Scotia, Canada
Contact:
Canada

Re: Another Tamiya Mossie

Post by Coen »

Wow!! That worked! :thumb1: :thumb1: :thumb1:
Well done!
User avatar
Nige201980
Captain
Captain
Posts: 4095
Joined: Wed Jun 05, 2013 9:30 am
Location: Doncaster South Yorkshire UK
Contact:

Re: Another Tamiya Mossie

Post by Nige201980 »

Brilliant work with the dot filter mate really gives her a used look.
http://www.youtube.com/channel/UCy-TGcs5u_ZXSZ9kObNfsPg


On the go at the Mo

Quite a few :banana:
User avatar
shortCummins
Chief Warrant Officer 2
Posts: 1640
Joined: Mon Aug 04, 2014 4:30 pm
Location: Cotgrave, Nottingham
Great Britain

Re: Another Tamiya Mossie

Post by shortCummins »

das84 wrote:
First off the dot filter was applied
Image
is that roundel a decal? either way awesome job :bow::

rgds
John(shortCummins)
"I'm tall for my height" - "it looks like it was painted by a blind chimpanzee"
das84
Sergeant
Sergeant
Posts: 114
Joined: Thu Mar 13, 2014 6:04 pm
Location: Northampton, UK
Great Britain

Re: Another Tamiya Mossie

Post by das84 »

Yes the roundel is a decal, even more impressive is its a tamyia decal which has actually done what its supposed to do.

Its been faded a little by drybrushing it with oil paint so that it hopefully matches up with the rest of the worn, sea battered look.
Insanity: doing the same thing over and over again and expecting different results. - Albert Einstein
User avatar
shortCummins
Chief Warrant Officer 2
Posts: 1640
Joined: Mon Aug 04, 2014 4:30 pm
Location: Cotgrave, Nottingham
Great Britain

Re: Another Tamiya Mossie

Post by shortCummins »

das84 wrote:Yes the roundel is a decal, even more impressive is its a tamyia decal which has actually done what its supposed to do.

Its been faded a little by drybrushing it with oil paint so that it hopefully matches up with the rest of the worn, sea battered look.
that's a fantastic effect, I'm going to try that myself :th:
"I'm tall for my height" - "it looks like it was painted by a blind chimpanzee"
Post Reply

Return to “Builds”