Foxx's and ClaytonDJ's DeAgostini Millennium Falcon Builds WIP

If it doesn't exist..........yet
User avatar
modelmakingguru
Corporal
Corporal
Posts: 76
Joined: Mon Jan 26, 2015 12:58 pm
Contact:

Foxx's and ClaytonDJ's DeAgostini Millennium Falcon Builds WIP

Post by modelmakingguru »

So the first issue of DeAgostini's "Build This Massive Thing That is Bigger Than Your Workspace and Where The Heck Will You Put It When It Is Finished Anyway?" (also known as "Build The Millennium Falcon" has arrived. MUCH EXCITE!

Image

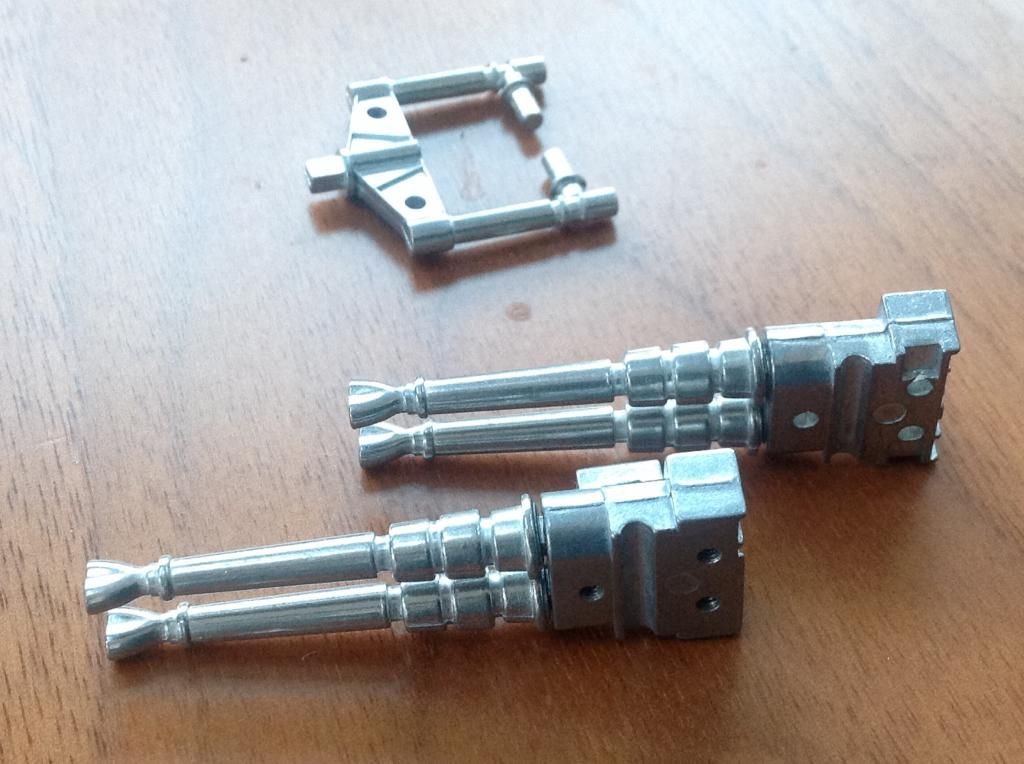
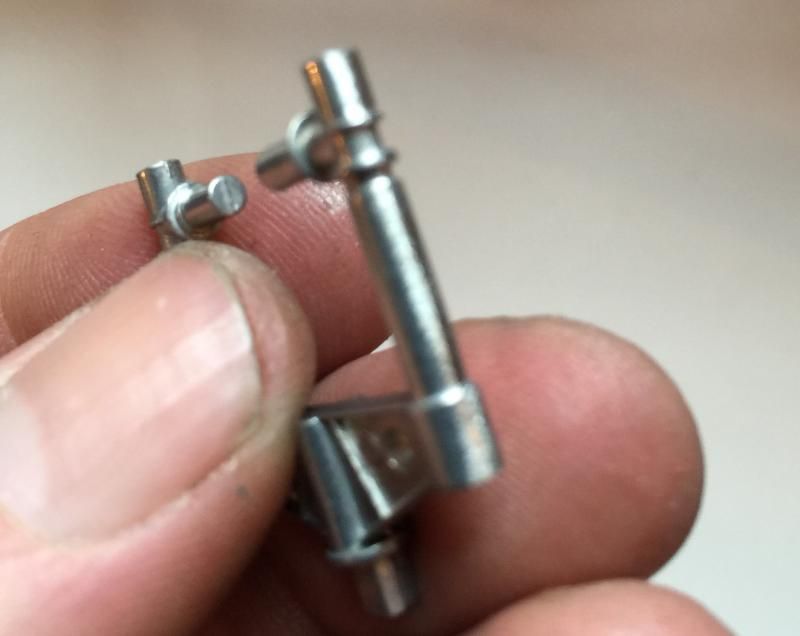
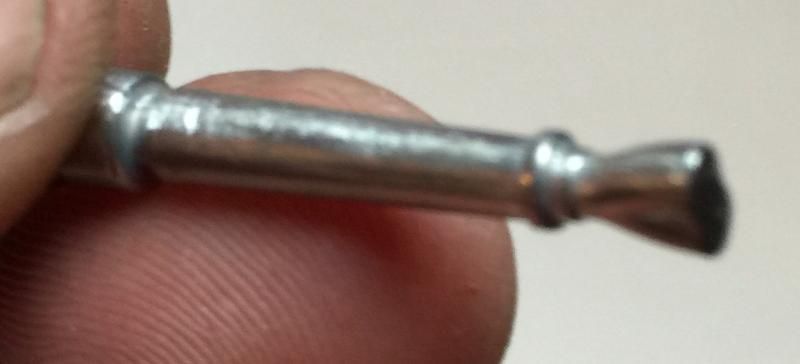
There's not a great deal to do in the first issue other than the quad laser cannon build, and panic about size. The cannon is cast in metal and fits together perfectly. I will need to go over it with a file and sand off the visible seam lines, and it will be painted at a later stage. Included are the cockpit back wall, floor and back wall sticker, two bits of metal hull frame and the first piece of hull plating. The plating piece is beautifully cast and although the publicity suggests an intense paint job, it's actually cast in the hull colour and a black wash has been applied. This is fine for the younger or less-experienced builder who will not paint the model, but I, of course, will be doing a full repaint and weathering. Still, the detail is exquisite and hopefully this will be the case for the rest of the ship.

To give you an idea of size, here's the plate in comparison with the same part on the Fine Molds 1/72 Falcon:

Image

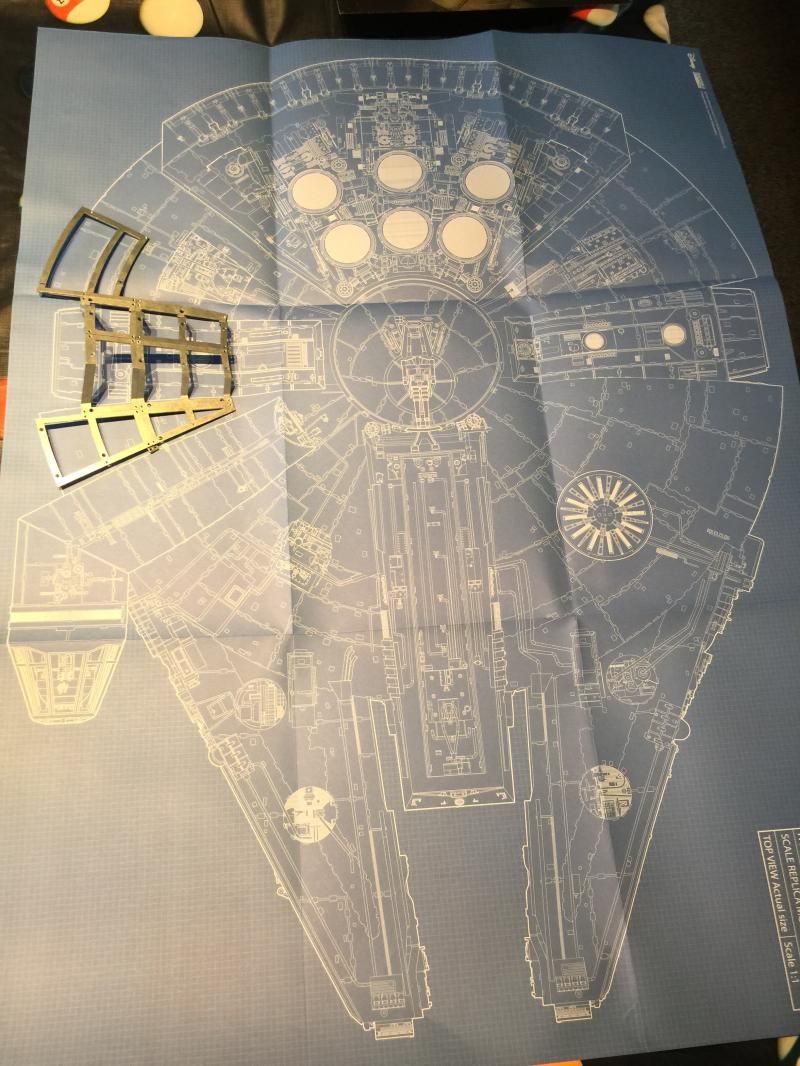
Also provided is the first issue magazine, full of interesting background info (FINALLY an explanation of exactly how the turret areas worked, being all upside-down an' that) and this blueprint which is full size and makes me realise the model is actually bigger than my workspace. This is going to get...interesting.

Image

I'll do a video a little later, stay tuned.
Last edited by modelmakingguru on Wed Feb 04, 2015 5:41 pm, edited 1 time in total.
Image
Der Fuchs ist schlau und spielt dumm, aber Foxx ist einfach dumm.
ClaytonDJ
Corporal
Corporal
Posts: 86
Joined: Fri Jan 16, 2015 2:47 pm

Re: Foxx's DeAgostini Millennium Falcon Build WIP

Post by ClaytonDJ »

You need to catch up matey - I've picked up issue 4 today - and seen what's coming in issue 5!
When do we start putting this thing together - and more importantly when do we start painting some of the interior?

Dave
ClaytonDJ
Corporal
Corporal
Posts: 86
Joined: Fri Jan 16, 2015 2:47 pm

Re: Foxx's DeAgostini Millennium Falcon Build WIP

Post by ClaytonDJ »

Here's the challenge to make it more interesting!
You're an expert guru modeller - I've never used an airbrush before in my life.
We both have the same kit to put together - you want to lead and demonstrate - I'm happy to learn and emulate. You go first and share what you've done and how - then I'll have a go! And we'll compare builds as we go - if you're a good tutor and I'm a quick learner - then by the end we should have 2 awesome Millennnium Falcons worth a few quid. Are you up for this challenge? Dave
User avatar
mincemeat
Sergeant Major
Sergeant Major
Posts: 702
Joined: Sat Jun 14, 2014 9:14 pm
Location: MN, USA
United States of America

Re: Foxx's DeAgostini Millennium Falcon Build WIP

Post by mincemeat »

What an interesting concept! I'll be following this thread!
Current Builds
Mk. A Whippet: http://www.intscalemodeller.com/viewtop ... 29&t=21073
Panzer IV Ausf D Buddy Build with SteveAFV: http://www.intscalemodeller.com/viewtop ... 29&t=19653
User avatar
modelmakingguru
Corporal
Corporal
Posts: 76
Joined: Mon Jan 26, 2015 12:58 pm
Contact:

Re: Foxx's DeAgostini Millennium Falcon Build WIP

Post by modelmakingguru »

ClaytonDJ wrote:Here's the challenge to make it more interesting!
You're an expert guru modeller - I've never used an airbrush before in my life.
We both have the same kit to put together - you want to lead and demonstrate - I'm happy to learn and emulate. You go first and share what you've done and how - then I'll have a go! And we'll compare builds as we go - if you're a good tutor and I'm a quick learner - then by the end we should have 2 awesome Millennnium Falcons worth a few quid. Are you up for this challenge? Dave
Image

I wouldn't say I was an expert, I just took that name when I realised the URL was available. Too good to miss! :lol: :lol:

I suspect it will be a while before any actual painting etc takes place - I'll only really paint stuff once I know that part is complete. I'll probably not paint the exterior till I have all the panels collected, just so I can make sure the paint and weathering is consistent. Unlike a model kit I can scan ahead through the instructions to plan sub-assemblies that can be built and painted up in advance, so this is a bit of a fly-by-wire :)

But, I will post pics and the videos up on here as I go along and keep this thread updated, so you are more than welcome to add yours to the thread too so we can see how you get on. I'm expecting issues 2 & 3 in a day or two, the DeAg site says they were shipped today (of all days) so I am lagging behind a bit. Then again, I am not feeling the bigest sense of urgency with this project :)

Anyhoo, here's the first part. I don't know why you can't full-screen a Youtube video from here, it's quite annoying TBH.
[youtube]yN5AUo0xfCU[/youtube]
Image
Der Fuchs ist schlau und spielt dumm, aber Foxx ist einfach dumm.
ClaytonDJ
Corporal
Corporal
Posts: 86
Joined: Fri Jan 16, 2015 2:47 pm

Re: Foxx's DeAgostini Millennium Falcon Build WIP

Post by ClaytonDJ »

Foxy (new name - do you like it?)

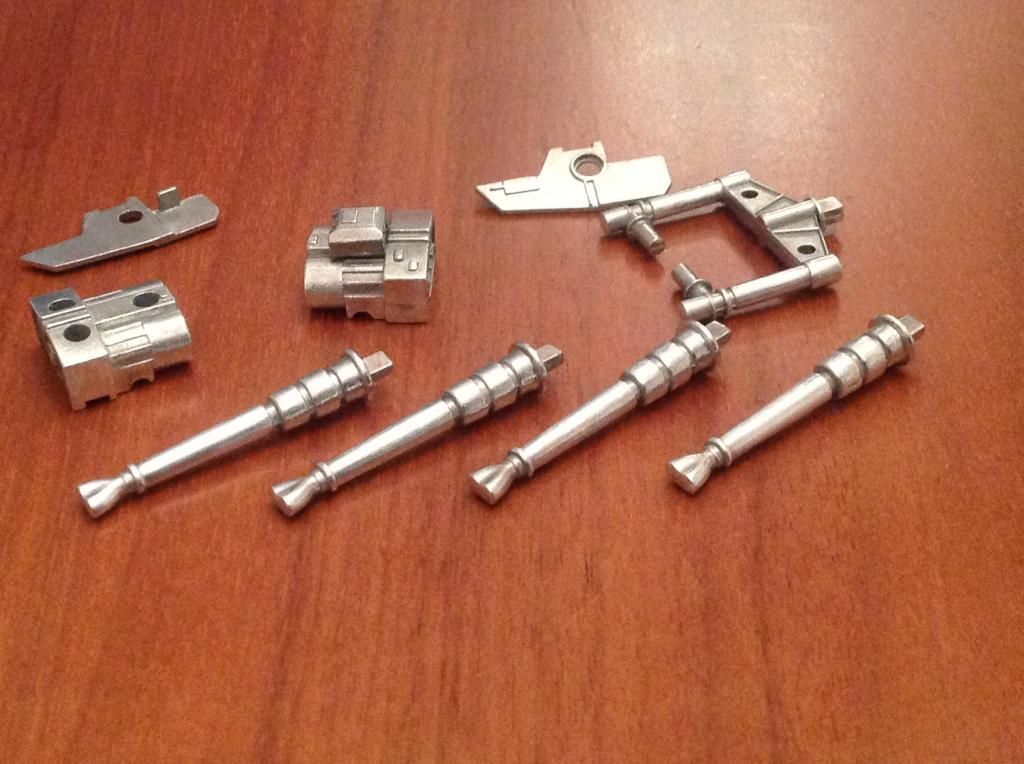
After watching your first Youtube clip (Issue 1), I nipped to B&Q and grabbed a few needle files. Have tried to carefully remove the seam lines from the cannons and assembly (where they would be visible) whilst retaining the curves and lines of the pieces. Appreciate comments and feedback on my first foray into such things...

First pic are the pieces as removed from the package - before washing in soapy water

Image


Second pic are the pieces after filing to remove visible cast seams - and cleaned up with some fine grade wire wool ( haven't got the Ultimate sanding sticks yet!)

Image
User avatar
modelmakingguru
Corporal
Corporal
Posts: 76
Joined: Mon Jan 26, 2015 12:58 pm
Contact:

Re: Foxx's DeAgostini Millennium Falcon Build WIP

Post by modelmakingguru »

Hey, looking good amigo! I see no seams so looks like the wire wool did the trick :)

The wire wool should have keyed up the metal nicely ready to receive the primer.

For those following, I suggested DJ get cheapy B&Q files as filing metal can be hard on the tools, so no point wasting your finest file set :)

Just waiting on issue 2 & 3 now. Are they here yet? Are they here yet? Are they here yet?


Are they here yet?
Image
Der Fuchs ist schlau und spielt dumm, aber Foxx ist einfach dumm.
ClaytonDJ
Corporal
Corporal
Posts: 86
Joined: Fri Jan 16, 2015 2:47 pm

DeAgostini Millennium Falcon Build WIP

Post by ClaytonDJ »

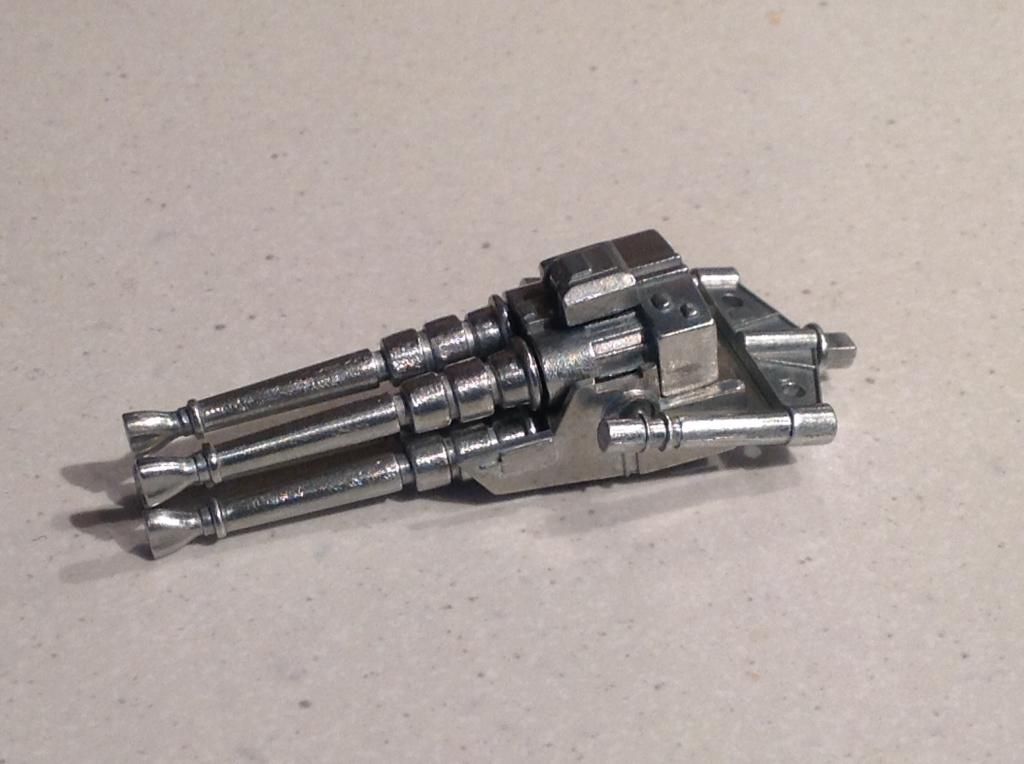
Foxy's given the thumbs up to my removal of the cast seams on the MF's quad cannons - so I've loosely assembled them to keep the pieces together in one place and stop me loosing the teenie weenie screws!

Image
ClaytonDJ
Corporal
Corporal
Posts: 86
Joined: Fri Jan 16, 2015 2:47 pm

DeAgostini Millennium Falcon Build WIP

Post by ClaytonDJ »

Being an early subscriber I've already received issues 1, 2, 3 and 4 (and had a sneak preview of what's in issue 5). I'll share in a mo...

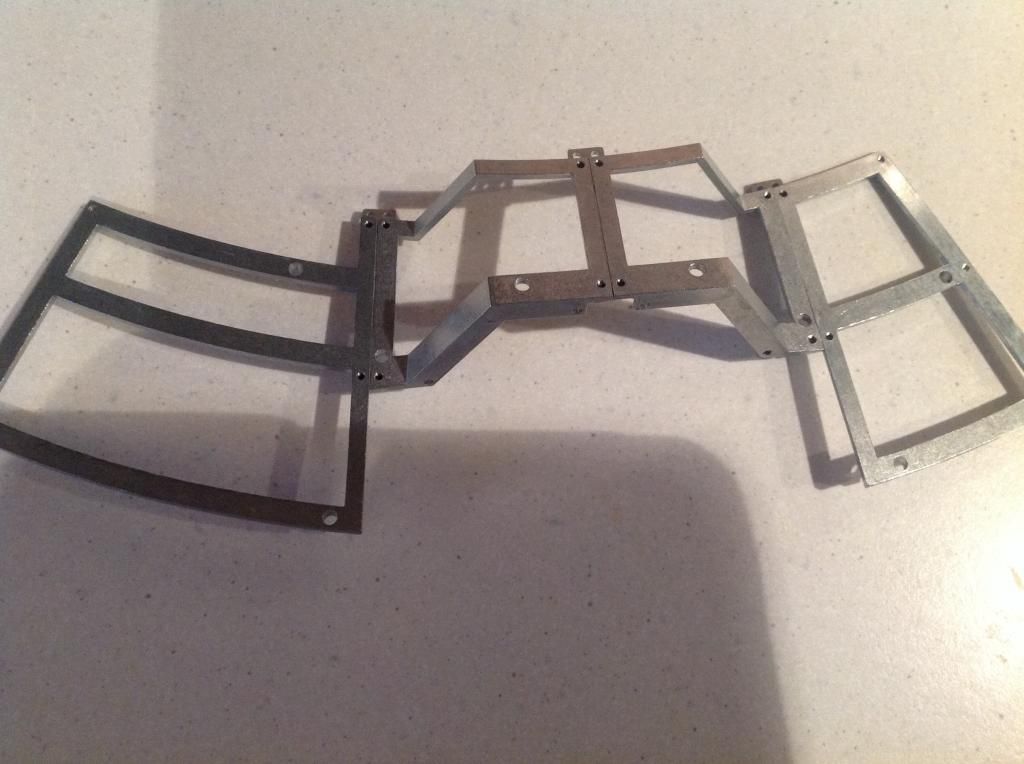
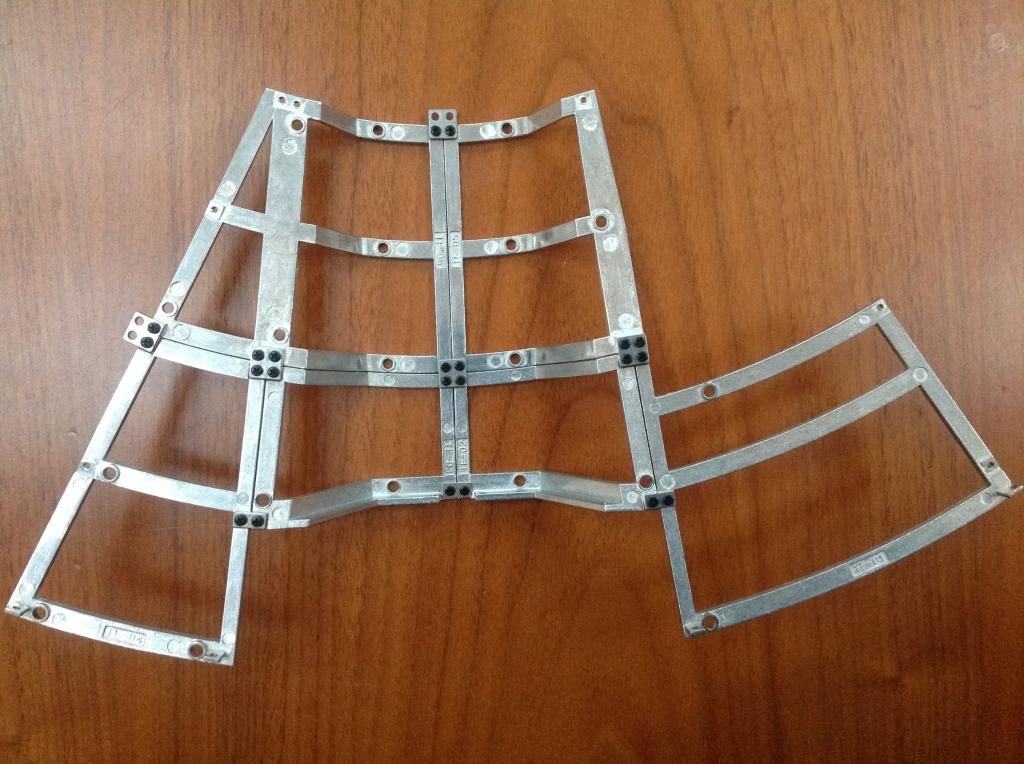
Meantime, unable to resist breaking into issue 2, I've loosely put together the first 4 pieces of the sub-frame that were in issue 1 and issue 2.

Image

...and tried the first piece of hull plating on for size!

Image

Nice!
ClaytonDJ
Corporal
Corporal
Posts: 86
Joined: Fri Jan 16, 2015 2:47 pm

DeAgostini Millennium Falcon Build WIP

Post by ClaytonDJ »

Now then - to put you out of your suspense...

Issue 2
Image

Issue 3
Image

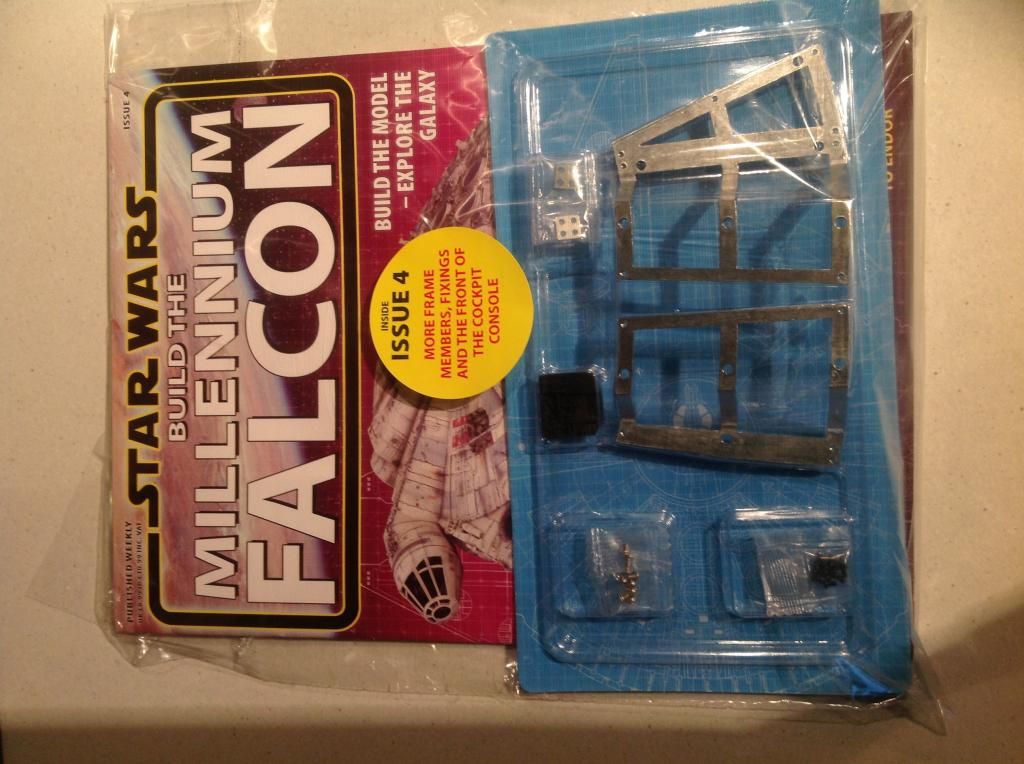
Issue 4
Image

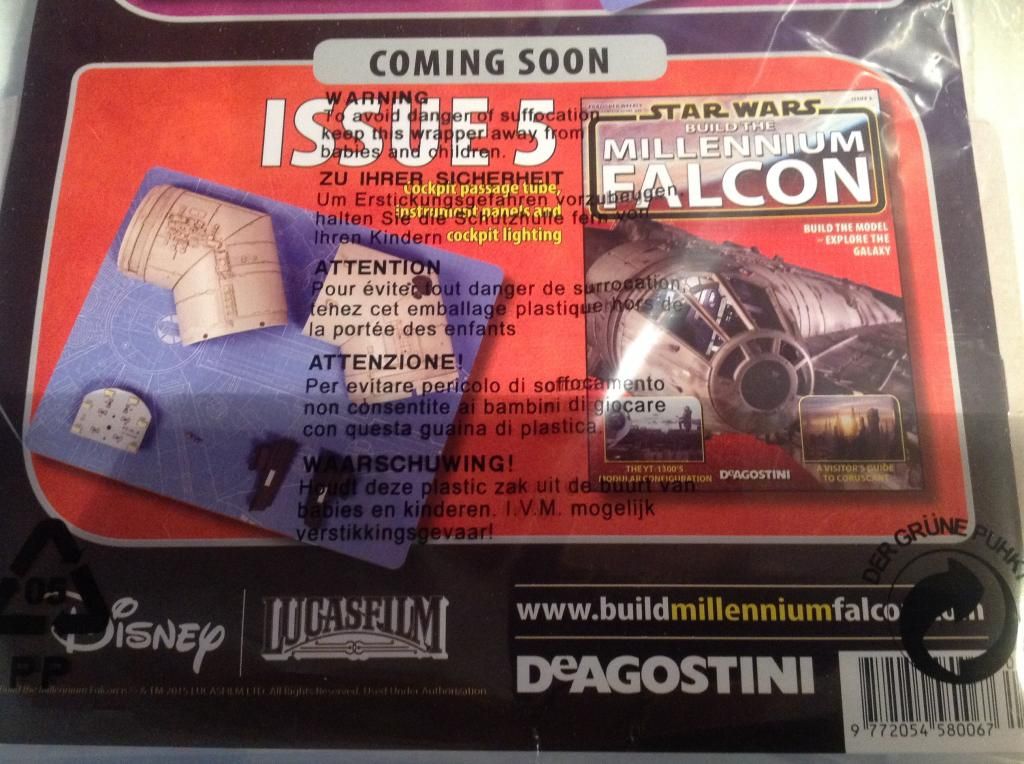
And look what's coming in Issue 5!
Image
User avatar
modelmakingguru
Corporal
Corporal
Posts: 76
Joined: Mon Jan 26, 2015 12:58 pm
Contact:

Re: Foxx's and ClaytonDJ's DeAgostini Millennium Falcon Builds WIP

Post by modelmakingguru »

You are steaming ahead! I think I'll be following you on this build, it seems!

The gun looks epic. Is yours a little loose (as in, it won't stay pointed up if you point it up)? I seem to have a lot of play between the cannon and the wishbone thing it locks into and it just flaps about. That's going to suck on the lower turret.

Still waiting for issues 2 & 3 but I can't wait for issue 5. EPIC TUBE ACTION! TUBE! TUBE!

Image
Image
Der Fuchs ist schlau und spielt dumm, aber Foxx ist einfach dumm.
ClaytonDJ
Corporal
Corporal
Posts: 86
Joined: Fri Jan 16, 2015 2:47 pm

Re: Foxx's and ClaytonDJ's DeAgostini Millennium Falcon Builds WIP

Post by ClaytonDJ »

I don't think so Mr Foxx - hare and turtle spring to mind - it's just that I'm getting the parts ahead of you.

My cannon is a little firmer (oo 'eerrr) - maybe I've over-tightened the assembly screws!

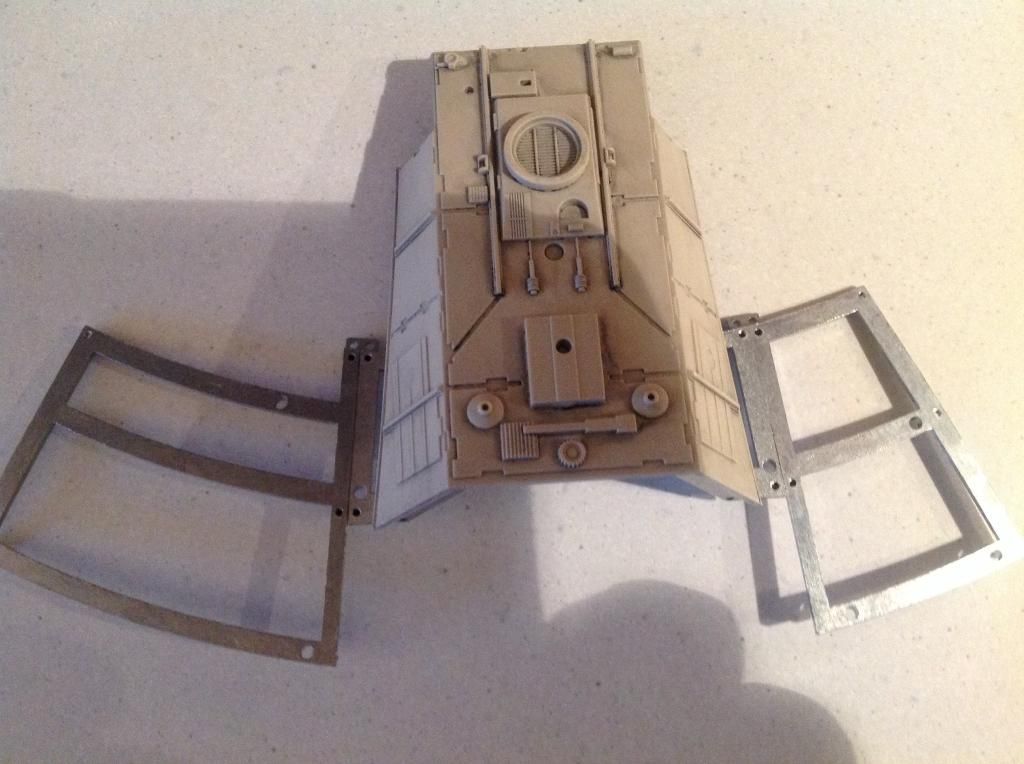
Unable to resists, I've added the sub-frame pieces contained in Issue 4 to the parts assembled from Issue 1 and 2....

Image

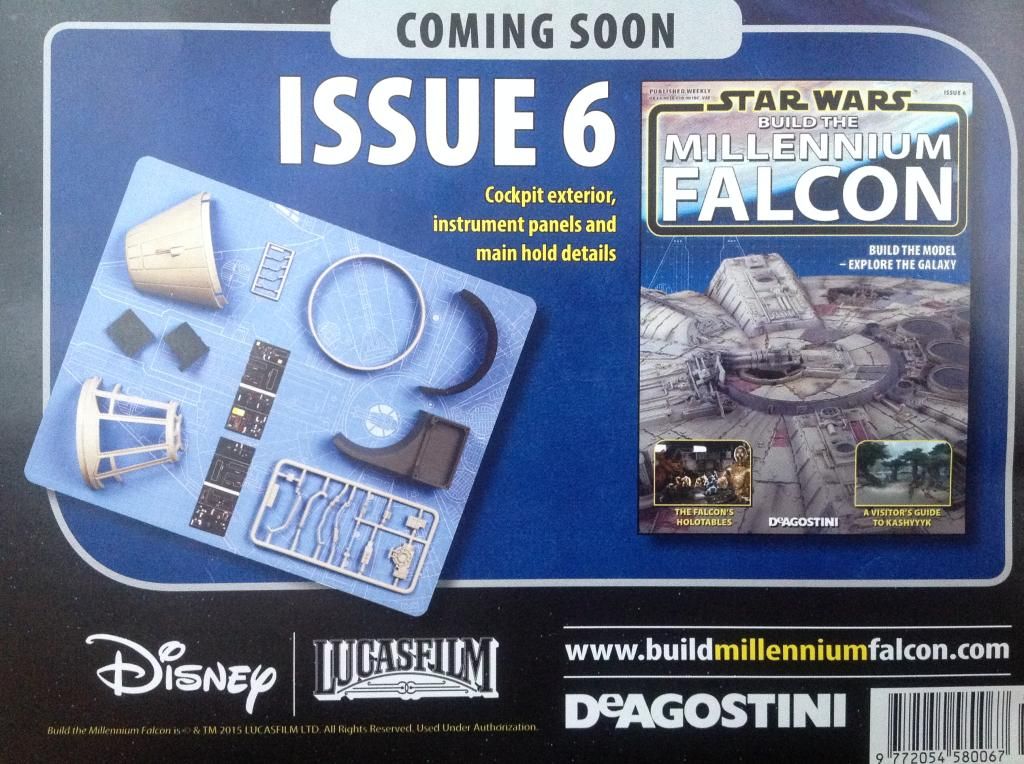
And if you like the tubes in Issue 5 - just wait till you see what's in Issue 6!

Image
ClaytonDJ
Corporal
Corporal
Posts: 86
Joined: Fri Jan 16, 2015 2:47 pm

Re: Foxx's and ClaytonDJ's DeAgostini Millennium Falcon Builds WIP

Post by ClaytonDJ »

Mr Foxx,

Been catching up on some of the other YouTube vids of folks building this model.

One fellow has drilled holes into the ends of the quad cannons (as well as painting them). Have you seen this - and should we emulate?
I've also seen a few eagle-eyed folks have picked up on the incorrect positioning of the inner gun turret (and removal/re-positioning if said piece). I'm sure you'll be onto this too - so keen to know how we go about fixing this without damaging the original parts. Others have cut the inner piece out with a sharp blade - with one suggesting putting it in the freezer first to trash the glue then pop the inner piece out!
User avatar
modelmakingguru
Corporal
Corporal
Posts: 76
Joined: Mon Jan 26, 2015 12:58 pm
Contact:

Re: Foxx's and ClaytonDJ's DeAgostini Millennium Falcon Builds WIP

Post by modelmakingguru »

OMG GREEBLIES!

I need issue 6 RIGHT NOW.

Well, issues 2&3 have arrived:

Image

First thing I notice is THE FREAKIN' SIZE. Here's the turret next to the Fine Molds 1/72 turret.

Image

Holy cow. Also, not that I am saying my paint job is good or anything, but it is closer to the studio model than DeAg's paint job. I understand that unlike the Master Replicas model it is not hand painted but rather painted all in one go with a rubber press plate thing. However, allegedly Doody McPersonchap formerly of Master Replicas whose name I forget said he spent 2 years getting the details and paint and weathering just right for the printing process. Hrm. Looks pretty crap to me. Not even any paint chips on the panels. And that orange panel is terrible - it is supposed to be ever so slightly discoloured, like on my little one, not BRIGHT ORANGE with a BIG HOLE IN THE MIDDLE. And don't even get me started on the inaccuracy of the blaster marks. Repainting and some dremel work will be required methinks.

I tell you., looking at the BIG FAT blaster mark on the cockpit tube in issue 5 - which is terrible - makes me worry how they will do the big gouges on the underside hull. I foresee bad things.

Then, as you have spotted, the massive error with the frame on the turret. It's not accidental; there is a little tab inside so it can only go in one way.

Image

So much for it being the most accurate Falcon ever. Easily fixed, and I'll go into detail when I film the next build film. Basically I scored around the inside between the frame and the turret to loosen it. then gently pushed it until it popped out. Some folks have had little beads of glue, but mine was glued all the way around. Not hard, but a bit scary. Apparently if it is not giving up, putting it in the freezer makes the glue brittle ( I didn't do that so no idea how accurate that is).

Image

I also removed the little locating tab, and I'll glue that in.

As I received the seats and stuff, I *may* do some painting on this next vid. We'll see.

I've considered drilling out the cannons - I did that on the Fine Molds Falcon but that was TERRIFYING. However these are bigger and not breakable plastic, so we'll see. I might leave that till much later. I need to get a little vice first!

I'm starting to wonder whether I should start priming panels now and giving them a basecoat. I don't know whether panels will be removable once they are in place on the hull, and I don't think I have enough room to spray the ship all in one go. I'm really not sure. Working without a forward plan of what goes where is really weird!
Image
Der Fuchs ist schlau und spielt dumm, aber Foxx ist einfach dumm.
ClaytonDJ
Corporal
Corporal
Posts: 86
Joined: Fri Jan 16, 2015 2:47 pm

Re: Foxx's and ClaytonDJ's DeAgostini Millennium Falcon Builds WIP

Post by ClaytonDJ »

You are truly informed - "the force is strong with this one"...

I understand that the screws that attach the sub-frame to the hull plating are like self-tappers - so cut their thread once (and best left in rather then removed). I'm considering applying the primer to the hull plating pieces off the model......not sure whether to leave applying the base coat until the whole thing is assembled (but that's light years away!).

Once I pluck up enough courage I'll have a go at removing and re-positioning the inner turret - and as mentioned to you I quite like the idea of drilling out the holes in the cannon's having seen the difference it makes....but like you need to invest in a desk vice first. This is becoming quite expensive!
ClaytonDJ
Corporal
Corporal
Posts: 86
Joined: Fri Jan 16, 2015 2:47 pm

Foxx's and ClaytonDJ's DeAgostini Millennium Falcon Builds WIP

Post by ClaytonDJ »

I've taken Paul's advice and invested in some Badger primer - should I apply white primer to lighten the base coat or grey primer to cool it down?
I intend using Tamiya acrylics for my base coat - I believe these will take well on top of the Badger primer.

After watching Foxx's video on weathering I am quite drawn to using oils to weather....but need some advice on what else I need to apply in terms of washes, clear coats, varnish and the like - and the order (and rationale) for each laid down?

For the metal parts such as the exposed engine bays - I'm considering Alclad lacquers over Alclad primer - but happy to take any views on this and how it will work (or not) with the Badger/Tamiya combination on the rest of the model.

As for the interior - cockpit and the like - is the Badger/Tamiya team suitable for this as well?
User avatar
modelmakingguru
Corporal
Corporal
Posts: 76
Joined: Mon Jan 26, 2015 12:58 pm
Contact:

Re: Foxx's and ClaytonDJ's DeAgostini Millennium Falcon Builds WIP

Post by modelmakingguru »

This thing will barely fit on my work desk, never mind in the spray booth, so I think I'll have to start painting panels, just primer and basecoat.

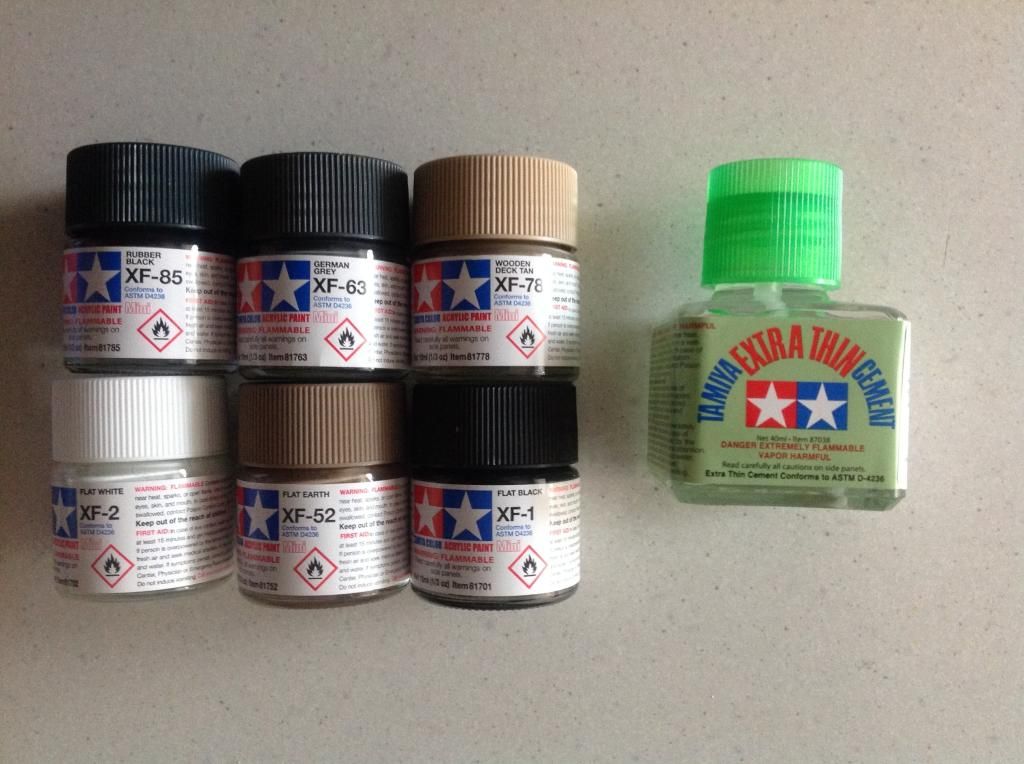
I'm only familiar with Tamiya Primer so I can't advise on the Bagder, but I would guess a lighter primer coat wil be best, to avoid changing the tine of the main base colour that's going on top of it too much. My roster of paints will be Tamiya acrylics (pre-shading, base coat, cockpit, interior areas), then 502 Abteilung oils (weathering, some shading, panel discolouration and filtering) and maybe a little Tamiya weathering pastel. That's about it. The beauty of the Falcon is that there are actually very few colours used, and in all honesty you can paint the whole damn thing with only a handful of oils and acrylics, mixing colours as you go.

I'll go into detail on the video in the next day or two, but basically for part two I'll do a coat of primer, then some pre-shading airbrushed on with Tamiya Rubber Black (I find regular black is TOO dark and contrasty) and then the base coat of my custom mix which is 4 parts Tamiya Flat White to 1 part Tamiya Deck Tan. I THINK. I actually can't recall if it was 3:1 or 4:1. I think 4:1 - I'll know when I mix it :)

MY only hope is that the pre-shading matches up and makes sense when the hull is put together!

I guess the only other parts I'll need to paint are the cockpit, for which I'll (I think) go Tamiya German Grey, and then darken it subtly with Starship Filth oil paint, so that it is not quite black, and I can work in dark and light areas. Oh, and the interior areas, but I have no idea what colours are involved there. We shall see. For highlights and edges most likely I'll use a lightened oil paint equivalent of German Grey, just a shade lighter, and some pastels. It may not be a perfect blend with the black stickers, but it will look more interesting than just boring old black. Not fully sure on the seats yet, I'll figure that out as I go along, stay tuned.

Oh, obvs the other place I'll need paint is the coloured hull panels, but that'll be a ways off yet. That I can do once the ship is built, I think.

When it comes to the weathering (which I won't do until I have the whole ship built and painted), unless I decide otherwise, I'll probably limit it to a wash, maybe two, of thinned Tamiya Smoke all over the hull, then oil paints all the way. Now that I've weathered a few Falcons, I'm looking forward to a month or two doing that part. This thing is so big that I will really be able to go crazy with streaking and such. The kind of streaks I get on a section of hull on the 1/72 will be even more in scale on this big puppy. I'll be able to have lots of streaks on individual panels, and work in small and delicate streaks that are just not possible on smaller kits.

So, overall, my plan is: paint hull plates as I go along, just the primer, pre-shade and basecoat. Spend two years doing this! Then, when the full hull is assembled, I will heft the whole damn thing onto my large garden table (hopefully it will be spring or summer) and spend a month or more of pleasant afternoons in the garden, carefully applying oil paint weathering. There really is nothing nicer than sitting out in the sun, birds chirping away, wood pigeons falling off the bird feeder, and oil paints in hand. Bliss :)

I have also had a cunning idea what to do with the model once it is complete, but that's a secret for now :)
Image
Der Fuchs ist schlau und spielt dumm, aber Foxx ist einfach dumm.
User avatar
modelmakingguru
Corporal
Corporal
Posts: 76
Joined: Mon Jan 26, 2015 12:58 pm
Contact:

Re: Foxx's and ClaytonDJ's DeAgostini Millennium Falcon Builds WIP

Post by modelmakingguru »

Oh, I didn't really break down the weathering as you asked. Well. here you go - you asked for it :)

You know, weathering a Millennium Falcon is very much like making love to a beautiful...no. Wait. It's totally not.

Once built, I will mask off the coloured hull panels. Then I will use Maskol and a cocktail stick and a pin to mask off the paint chips in those panels (I will use that and not the hairspray method because I will want to try and match the chipping on the studio model). Paint panels (Tamiya paints), remove maskol. Paint chips!

Some of the base colour hull has paint chipping too, little grey specks and patches. I will add this as post-chipping - I will apply Tamiya colour with a bit off ripped off scouring pad to get that random, flakey chip effect. Once done, in some areas I may then add tiny rust coloured specks inside the grey flecks.

Ship is matt varnished, then a Smoke wash. Maybe two, as the size of the model might allow this without it looking too naff. After drying, again with trhe matt varnish.

Then the oil paints come in: Filter 1: General oil paint hull discolouration, general. varied dots of colour applied to the surface, and blended in with a brush dipped in thinner (i.e. odourless oil paint thinners), to break up the uniform hull colour. I MIGHT NOT DO THIS BIT, not sure yet. My 4:1 mix hull colour is exactly as I want it, so this might not be needed.I decided against this filter on my latest Falcon build and everything was fine. Dry for 24hours minimum.

Filter 2: OI Paint Panel discolouration. 1 tiny dot of colour added to one panel, then mixed across the single panel with a thinner-dipped brush, just to make that panel a slightly different tone to it's neighbours. Only carried out here and there. Dry for 24hours minimum.

Filter 3: streaks. Panel is coated in thinner and splotches and lines of Starship Filth/Engine Grease/Light Rust/Dark Rust oil paints painted on the panel. These are then softened, flattened and stretched out with a dry flat bush to create streaks. Dry for 24hours minimum.

FIlter 4: Drybrush Engine Grease in maintenance pits and mechanical areas (minimal). Light streaks from Engine vents down the rear hull. Dry for 48/72 hours minimum.

Filter 5: Drybrush Starship Filth in maintenance pits and various greeblies around the hull, also corners and edges to suggest dirt, filth and also slight shadowing.Also used to create the dark patches around blaster damage and the big dorsal scars, suggesting scorching. NOT BLACK but a darkish brown/grey tone. FInally streaks down the full from the engine vents, "inside" the engine grease streaks, to give a darker centre to those streaks, suggesting heat. Dry for 48/72 hours minimum.

FIlter 6: Light Rust drybrush to create soft patches of rust, where rust has leached. Dry for 24hours minimum.

|Filter 7: Dark Rust drybush inside the light rust patches to suggest a darker centre, then just neat dark rust paint patches added to actually suggest the rust from which all the rest has leached. Then leave the entire model for 2 weeks so that ALL the oils I have added can dry thoroughly. Matt varnish.

Filter 8: mix a colour of oil paint that is a tiny bit lighter than the base hull colour. drybrush entire hull to catch the edges and highlight. Will also be used to lighten the centres of some panels, and to fade some of the red and blue-gray hull panels. Leave for 1 week.

Matt Varnish.

DONE

Then spend weeks fussing and fiddling with streaks and dirty patches because I CAN'T HELP MYSELF.

Stand back, light pipe, admire handiwork.
Image
Der Fuchs ist schlau und spielt dumm, aber Foxx ist einfach dumm.
User avatar
SteveLow
Corporal
Corporal
Posts: 71
Joined: Fri Oct 11, 2013 3:40 pm
Location: St. James, NY USA

Re: Foxx's and ClaytonDJ's DeAgostini Millennium Falcon Builds WIP

Post by SteveLow »

One advantage I see right off the bat is the larger size will make all of the detail visible in the gun turrets. On the Fine Molds kit I am working on, all of the extra detail I added is mostly covered up or hidden by shadows. :-( I too am going with an Abteilung oils discoloration/weathering scheme. Hope you get to it first so I can pick your brain a bit on it. lol

BTW, who in your family gets to drive and who gets to sit in the turrets blasting tie fighters?
Steve
User avatar
modelmakingguru
Corporal
Corporal
Posts: 76
Joined: Mon Jan 26, 2015 12:58 pm
Contact:

Re: Foxx's and ClaytonDJ's DeAgostini Millennium Falcon Builds WIP

Post by modelmakingguru »

SteveLow wrote:One advantage I see right off the bat is the larger size will make all of the detail visible in the gun turrets. On the Fine Molds kit I am working on, all of the extra detail I added is mostly covered up or hidden by shadows. :-( I too am going with an Abteilung oils discoloration/weathering scheme. Hope you get to it first so I can pick your brain a bit on it. lol

BTW, who in your family gets to drive and who gets to sit in the turrets blasting tie fighters?
My brain is eminently pickable :)

Oh, I drive, but it's an X-WIng so I get to do it all :)
Image
Der Fuchs ist schlau und spielt dumm, aber Foxx ist einfach dumm.
User avatar
modelmakingguru
Corporal
Corporal
Posts: 76
Joined: Mon Jan 26, 2015 12:58 pm
Contact:

Re: Foxx's and ClaytonDJ's DeAgostini Millennium Falcon Builds WIP

Post by modelmakingguru »

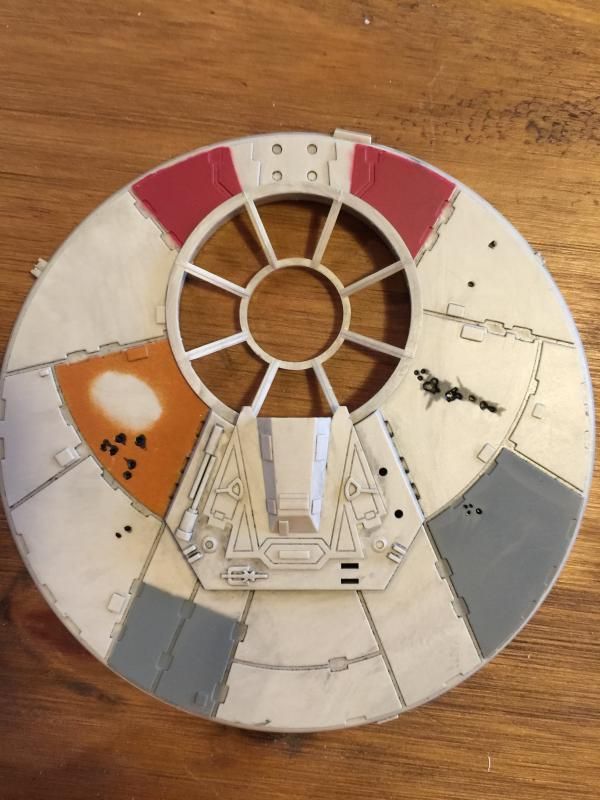
I'm just editing the video now, but here's a sneak peek. I decided to prime, pre-shade and paint (basecoat) the panels as I go along.

Image
Image
Der Fuchs ist schlau und spielt dumm, aber Foxx ist einfach dumm.
ClaytonDJ
Corporal
Corporal
Posts: 86
Joined: Fri Jan 16, 2015 2:47 pm

Foxx's and ClaytonDJ's DeAgostini Millennium Falcon Builds WIP

Post by ClaytonDJ »

Mr Fox,
Now it is you who are steaming ahead!

To try and maintain screen accuracy I too have decided to fix the frame inside the turret...which is poorly aligned

Image

So I've plucked up the courage, grabbed the nearest and pointiest craft knife and teased the frame out by scoring the glue line (couldn't wait for the video - you'll have the whole thing finished and sold before long!). It came away with only minor scuff marks on it and the turret - so I'll need to get some of those Ultimate sanding sticks to clean them up before re-gluing it back in.

Image

On the subject of gluing the bits of the Falcon that need it - I've got one of these in the drawer..

Image

Is it OK for use or should I get something more in the modellers line ?
ClaytonDJ
Corporal
Corporal
Posts: 86
Joined: Fri Jan 16, 2015 2:47 pm

Re: Foxx's and ClaytonDJ's DeAgostini Millennium Falcon Builds WIP

Post by ClaytonDJ »

So much for "It'll be 2 years before I get round to painting!"...

As per our 'challenge' I'll try and follow suit. My badger primer should arrive this week and I'll give this airbrushing thing a go (managed to get it plugged into the compressor and blowing air out anyway!). You've advised light primer rather than dark - I've ordered white and grey - which would you recommend I go with?

I'll probably try to spray the primer on first then post the results for you to look at and comment on before going any further just in case I need to redo the prime coat. If that goes OK then I'll move to the pre-shade bit - but will need to watch your video to understand what this entails (assume it's putting something darker along the panel lines like I've seen folks do on aircraft panels?) What to I need to get in for that bit?

Again I'll post my results for your scrutiny and advice (and please don't be gentle because I'm a novice - rather redo early on than end up with a poor finished product).

If that goes well (and miracles do happen!) then I'll muster up some courage and try to spray the base-coat. You mentioned using 2 Tamiya colours (flat white and another). How much of this base coat mix are you preparing given that we'll probably have a few hull panels every month or so to paint up?

Sorry - lots of questions Master - but I must learn quickly!
User avatar
modelmakingguru
Corporal
Corporal
Posts: 76
Joined: Mon Jan 26, 2015 12:58 pm
Contact:

Re: Foxx's and ClaytonDJ's DeAgostini Millennium Falcon Builds WIP

Post by modelmakingguru »

Ooh, nice work!

I'm sure superglue will be fine, but I tend to reserve that for metal parts or already painted parts. I'm always cautious with it as Superglue is super-strong but does not fare well against sudden shocks. I have heard tell of amusing incidents at boating ponds where remote-controlled ships bump into the wall of the pond suddenly, only for all the steam stacks to fall off because the glue shattered. It also breaks down at very low temperatures.

I glued mine on with Tamiya Thin. As the parts are plastic the glue can melt the plastic and weld them together (which is how liquid model glues work) giving a much stronger bond. There will be superglue needed in the kit though, especially for gluing metal things to plastic things (where Tamiya Thin can't melt the metal so there will be no bond).

I'd say stick to some of the model superglues available rather than B&Q type stuff you have there. The CA glue (cyanoacrylate) glue you can get for models often comes in thick, medium and thin, with the thick having a slower drying time than the thin, allowing adjustment. Off the shelf stuff like Loctite is fine but can get messy and sometimes stringy and can often dry straight away, leaving a mis-positioned piece stuck for all time :)

As for the primer, whichever you prefer will be best. I only go for a light grey one rather than white because it makes it easier to see where I have primed on the light coloured hull. Occasionally I will forget and spray a model with a primer of similar colour to the plastic and punch myself in the face.

Don't worry too much about how to do stuff, I decided in the videos to try and explain everything as much as I can (especially about airbrushing) as I know you have not tried it before, so there are a few text blocks to explain what I am talking about. The only thing I forgot to mention is thinner - I typically fill my airbrush cup half-full with Tamiya paint and add 7-10 drops of Tamiya thinner with a pipette (Tamiya paint is best thinned just a little to go through the airbrush easily).

On that note, here is episode 2, which includes pieces, frame-building and priming/pre-shading/painting of hull panels. As always you'll have to watch it on YOutube if you want to go full-screen. Enjoy!
[youtube]uLk57U2vRKw[/youtube]
Image
Der Fuchs ist schlau und spielt dumm, aber Foxx ist einfach dumm.
ClaytonDJ
Corporal
Corporal
Posts: 86
Joined: Fri Jan 16, 2015 2:47 pm

Foxx's and ClaytonDJ's DeAgostini Millennium Falcon Builds WIP

Post by ClaytonDJ »

Mr Foxx,
You must have posted you're Pt 2 video just as I was posting the above questions - and the video has answered most of my questions so than you.
Thanks also for the steer on priming - I'm torn between giving it a go with my airbrush or the rattle can approach you've gone with. The caution regarding overspray/paint drying before it hits the model id a concern - so being a novice I might go the rattle can route for the larger panels and use the airbrush fore the smaller bits.

Take your point about Superglue - so will get some Tamiya Thin (and CA thick glue) glue when I nip to the local model shop to but the Tamiya paints (flat white, deck tan, german grey and rubber black) that I need.

My next post will be crucial - my first go at spraying primer!
ClaytonDJ
Corporal
Corporal
Posts: 86
Joined: Fri Jan 16, 2015 2:47 pm

Re: Foxx's and ClaytonDJ's DeAgostini Millennium Falcon Builds WIP

Post by ClaytonDJ »

Mr Foxx,

On quickie - I've bought Tamiya X20-A to thin my Tamiya paints.....I understood I to be a 50/50 mix of paint to thinners but not knowing how large your airbrush cup is I can't work out whether 7-10 drops of thinners is the same measure of paint that half fills your cup? My sense is that your mix is not 50/50
User avatar
mincemeat
Sergeant Major
Sergeant Major
Posts: 702
Joined: Sat Jun 14, 2014 9:14 pm
Location: MN, USA
United States of America

Re: Foxx's and ClaytonDJ's DeAgostini Millennium Falcon Builds WIP

Post by mincemeat »

I thought you would have puttied the blaster marks since they were "inaccurate". I'm curious as to why you didn't?
Current Builds
Mk. A Whippet: http://www.intscalemodeller.com/viewtop ... 29&t=21073
Panzer IV Ausf D Buddy Build with SteveAFV: http://www.intscalemodeller.com/viewtop ... 29&t=19653
User avatar
modelmakingguru
Corporal
Corporal
Posts: 76
Joined: Mon Jan 26, 2015 12:58 pm
Contact:

Re: Foxx's and ClaytonDJ's DeAgostini Millennium Falcon Builds WIP

Post by modelmakingguru »

Good questions :)

I really don't have an accurate answer about the thinner mix, I kind of wing it when it comes to thinner. As it also depends on the airbrush, it might be wise to experiment a little. Maybe start wioth a 50/50 mix, see how that works. It's kind of an instinctivbe thing for me. If it's just too thin and your paint is prone to wateriness or runs, dial the thinner back a little on the next mix and see how that goes. Rule of thumb is if you are struggling to get paint out of the airbrush or it comes out in blobs and sputters, most likley there's either a blockage or your paint is too thick :)

Note also that the ideal ratio of thinner to paint can vary depending on the thinner or the paint. I would say before you paint the Falcon parts have a big long play with the airbrush, get familiar with it, get used to it, get used to painting thin lines and thick, adjusting the paint flow regulator (what I call the choke) and varying the trigger (what I call the throttle). If you have an old kit you can sacrifice as a test model, or really anything that you can paint on to practice. then go for it. I don't suggest this because airbrushing is hard; I say it because it is very easy to get disheartened fast. I have seen many people try airbrushing and give up immediately because they weren't able to just pick it up and do it well right out of the box. It's not hard but just takes a little practice to get comfortable and to understand what you can do with it. Moat airbrushes come with no real helpful documentation at all, so make sure to max out on youtube guides, especially ones for your airbrush.

But to start you out and take away the confusing and scary strangeness of it, think of it as a simple two-piece machine. If it is a dual action brush, the trigger pushes down to feed air out of the nozzle and pulls back to feed paint out of the nozzle. You can vary the paint flow as you go by adjusting how far back you pull the trigger. No pull = just air, useful for drying paint and moving washes around. The dial on the butt-end is the paint flow regulator and controls how far back you can pull the trigger (it sets the maximum amount of paint you can feed through). To paint very fine lines, you lock the trigger with the dial to the right so it can't move very far back (low paint flow) and use the airbrush close to the painting surface. To cover large areas fast, like a basecoat, you would adjust the paint flow dial over to the left, allowing the trigger to be pulled further and allowing more paint through. However, you would hold the airbrush further away from the model to build up layers of colour - otherwise you get a blast of paint that downs the surface and runs everywhere. The trick is that when you paint a colour, expect to do it in several thin coats or passes, not all at once in one go. If |I'm painting something bright red, it will probably take two or three light coats, building up the colour from a faint pink to the red I want. Better to go slowly and build up, rather than blast the model and put too much paint down. I can't wait to see how you get on!

As to the blaster damage...well. I'l be honest, I got carried away with the painting and forgot all about that. BUT, I have an update on that issue. After I had finished filming I started double-checking images of the studio models and found some images I had not seen before, and it turns out the little chips might not actually be that inaccurate. I have found some shots that actually match quite well the dings on the DeAg model, once you take the terrible black wash off. I noticed that the DeAg dings actually match quite well the Falcon made for A New Hope, which was less weathered that the Empire Falcon and where the dings are clearer. So It may just be a case of DeAg using multiple studio models as reference, or simply seeing things on the studio model that we cannot on pictures from the interwebs, which is fair enough. I will ad an update and add a mea culpa on the next film.

However, on that topic I feel it is important that I set some expectations for the future instalments of the build, to be fair to viewers. Although I like to be as accurate as possible and bitch about kit errors - which I feel is reasonable when this kit costs £900 - , the one thing that will stop me correcting every little flaw that I point out is time. My day job is six days a week, evenings are taken up with three active commission builds and a build for eModels and pretty much the only day I get to myself is Sunday, and an occasional half day Saturday. In that I also have to fit daily life stuff - shopping, family, friends etc. Filming this can take up to a day and a half - building, filming, editing and processing the video. Also, any process that requires a 24-hour drying time such as fillers and oil paints then increase production time by as long as a week as filming has to stop and then we are back in to time allotted for the job and paid work.
I haven't actually done a build for myself in months simply because paying commissions take precedent always and the last thing I can do is fit my own builds in (trust me, I have a whole mess of ideas waiting to happen - I have had a wonderfully silly Hello Kitty armoured personnel carrier planned for months now. I've not even opened the box yet). As this kit only demands a little of my time each month I can just about fit it in around everything else where I could not fit a normal personal build in, but some compromises will have to be made. It's not ideal, and if someone was paying me to build this I would correct every single flaw, but sadly no-one is so some things will get left behind. Might be a little hypocritical perhaps, given that I bitch about inaccuracies, but there is only so much I can do in the time I have without stretching this build out to five years or something :lol: :lol:

HOWEVER I still believe it's valid to call out the errors on the kit so that people who do have the time to make the corrections but perhaps do not have a great awareness of the studio model can see them and be encouraged to make theirs look the best :)
Image
Der Fuchs ist schlau und spielt dumm, aber Foxx ist einfach dumm.
User avatar
modelmakingguru
Corporal
Corporal
Posts: 76
Joined: Mon Jan 26, 2015 12:58 pm
Contact:

Re: Foxx's and ClaytonDJ's DeAgostini Millennium Falcon Builds WIP

Post by modelmakingguru »

Wow, killed the thread there :lol: :lol:

Anyhoo, I found something interesting today. I was organising my greeblies earlier today, you know, like you do, and in amongst all the boxes of bits, kit parts, doodads and such I found a Tamiya 1/35 Panzer IV hull. And something caught my eye.

Image

I guess that confirms the scale of the Falcon is studio scale, for any doubters (ILM is known to have kitbashed using approximately ALL the Tamiya kits in the world. All of them, and this part would have been one, so is reproduced in perfect size, and pretty darn accurately it has to be said). Just thought it was nice to show a comparison between DeAg's copy greebie and the original source piece :)
Image
Image
Der Fuchs ist schlau und spielt dumm, aber Foxx ist einfach dumm.
User avatar
mincemeat
Sergeant Major
Sergeant Major
Posts: 702
Joined: Sat Jun 14, 2014 9:14 pm
Location: MN, USA
United States of America

Re: Foxx's and ClaytonDJ's DeAgostini Millennium Falcon Builds WIP

Post by mincemeat »

That's an interesting find there! If you subscribe to Tested on the Tubes of You, you get to hear Adam Savage talk about building new concept models from scratch and how they were a lot easier than building a replica of an existing model. Two videos that are relevant here. At least I find them interesting anyway.

[youtube]vKRG6amACEE[/youtube]

[youtube]4sCReGjfZ_A[/youtube]
Current Builds
Mk. A Whippet: http://www.intscalemodeller.com/viewtop ... 29&t=21073
Panzer IV Ausf D Buddy Build with SteveAFV: http://www.intscalemodeller.com/viewtop ... 29&t=19653
User avatar
modelmakingguru
Corporal
Corporal
Posts: 76
Joined: Mon Jan 26, 2015 12:58 pm
Contact:

Re: Foxx's and ClaytonDJ's DeAgostini Millennium Falcon Builds WIP

Post by modelmakingguru »

mincemeat wrote:That's an interesting find there! If you subscribe to Tested on the Tubes of You, you get to hear Adam Savage talk about building new concept models from scratch and how they were a lot easier than building a replica of an existing model. Two videos that are relevant here. At least I find them interesting anyway.
LOL here is the t-shirt I am wearing RIGHT NOW:

Image


I've been a member since they were with the Giant Bomb guys at Whiskey Media, before the Adam & Jamie days. When I am building models my background music is either the Giant Bombcast or Tested's This Is Only A Test. You can't imagine my absolute joy when I heard Gary Whiita is on this week's podcastr. Absolute happiness!

Seriously though, I wish they would do more about modelmaking with Adam. I mailed them to ask the story behind the Millennium Falcoon in Adam's workshop, peeeking out of a box high up on top of a cupboard, but never got a reply. We shall never know! (check any one-day build vid, you'll see a mandible peeping out. I think it appeared last on the Barbarella rifle video).
Image
Der Fuchs ist schlau und spielt dumm, aber Foxx ist einfach dumm.
User avatar
mincemeat
Sergeant Major
Sergeant Major
Posts: 702
Joined: Sat Jun 14, 2014 9:14 pm
Location: MN, USA
United States of America

Re: Foxx's and ClaytonDJ's DeAgostini Millennium Falcon Builds WIP

Post by mincemeat »

What a co-inky-dink!

Maybe I'll start spamming them too, I would love to hear more model making stories. I've got a few accounts I can use! Rock on Beirdo! :cheers2:
Current Builds
Mk. A Whippet: http://www.intscalemodeller.com/viewtop ... 29&t=21073
Panzer IV Ausf D Buddy Build with SteveAFV: http://www.intscalemodeller.com/viewtop ... 29&t=19653
ClaytonDJ
Corporal
Corporal
Posts: 86
Joined: Fri Jan 16, 2015 2:47 pm

Foxx's and ClaytonDJ's DeAgostini Millennium Falcon Builds WIP

Post by ClaytonDJ »

Mr Foxx,

Your post about available time is music to my ears - might give me a chance to catch up!
What takes you 5 minutes will probably take me 5 hours - so on that basis I'm probably looking at a completion period of 20 years!

Thanks for the steers on practicing with the airbrush - dying to spray some of the Falcon bits - but appreciate the need to get familiar with the airbrush for unleashing it on a £900 model! I promise to practice a bit
before becoming a crazy fatherless person on the Falcon!

Postie didn't bring new issues today - but did deliver my Badger primer - so only need to know what best to clean it out of the airbrush then I can start my training practice (sound like a young Jedi - with you as Master Yoda!). I've emailed Paul at ISM since it was he who raved about the Badger primer (so assume he will steer on how to clean the airbrush out).

Dave
User avatar
modelmakingguru
Corporal
Corporal
Posts: 76
Joined: Mon Jan 26, 2015 12:58 pm
Contact:

Re: Foxx's and ClaytonDJ's DeAgostini Millennium Falcon Builds WIP

Post by modelmakingguru »

No worries :)

I'll let Paul answer you about the primer - I have never used airbrush primer so I have no idea, but I would guess normal airbrush cleaner and whatever thinners are compatible with the primer (I bet you five pence Paul suggests Ultimate thinners and cleaners, lol)

For practice, if you have one dig out an old kit that has never been made, or one you made years ago that you think totally suucks now and can sacrifice. Or, if you don't have one, get a crappy Airfix cheapy kit from the model shop (this is pretty much the only time I recommend such a course of action). They habitually release their old 60's and 70-s kits in new boxes and they are usually less than as tenner now. It's all my local Hobbycraft seem to stock. Anyway, they will be good practice as the kits are so crappy they are not worth buying to build and can be painted and re-painted for testing. I have a Junkers Ju52 kit that was so abysmal I didn't even start to build it. I just use the fuselage halves as test-beds. Ideally get a big aircraft or something if you can, that will allow you to practice on small fiddly stuff (the cockpit, engines etc, if you build them) and nice flat surfaces (the wing halves). You can also use your junk kit as a good place to test other techniques such as weathering, chipping, washes and the like.

As the Falcon is a £900 model, I would probably suggest working on some cheapy kits first to get practice in. To slightly mis-quote Dr. Faust's Painting Clinic, whern you first start out it is guaranteed you will screw up your first few kits. That's just the way it is, because you don't know how to do stuff and have certain expectations. But, if you go in with the mindset that you will suck at the first few kits, that will allow you to not lose heart and be put off, and you'll be able to say "well, I expected that to suck, let's see what I learned and move on to the next one". We have two years, so if you are not at all feeling confident about something, hold off a bit and practice on something else. Besides, once you get into iot you'll realise that modelling is an addiction anyway and you'll be down the model shop every week buying kits! Within a few weeks you'll be all like "Can't wait for the next issue! Need to build! Give me that Spitfire and that Tank and that Space Shuttle and that 14th century halberd carrying soldier and that working scale Victorian Beam Engine and and and..."

Trust me ;)

The comic below is not about modelling, but this is exactly what happens when I have free time and am near a model shop window.

Image

I'm getting excited to see how you get on. It's always nice to watch someone take their first steps.
Image
Der Fuchs ist schlau und spielt dumm, aber Foxx ist einfach dumm.
ClaytonDJ
Corporal
Corporal
Posts: 86
Joined: Fri Jan 16, 2015 2:47 pm

Re: Foxx's and ClaytonDJ's DeAgostini Millennium Falcon Builds WIP

Post by ClaytonDJ »

Mr Foxx,

Thanks for the sound advice - I'll invest in a large crappy Airfix plane and screw up on that.

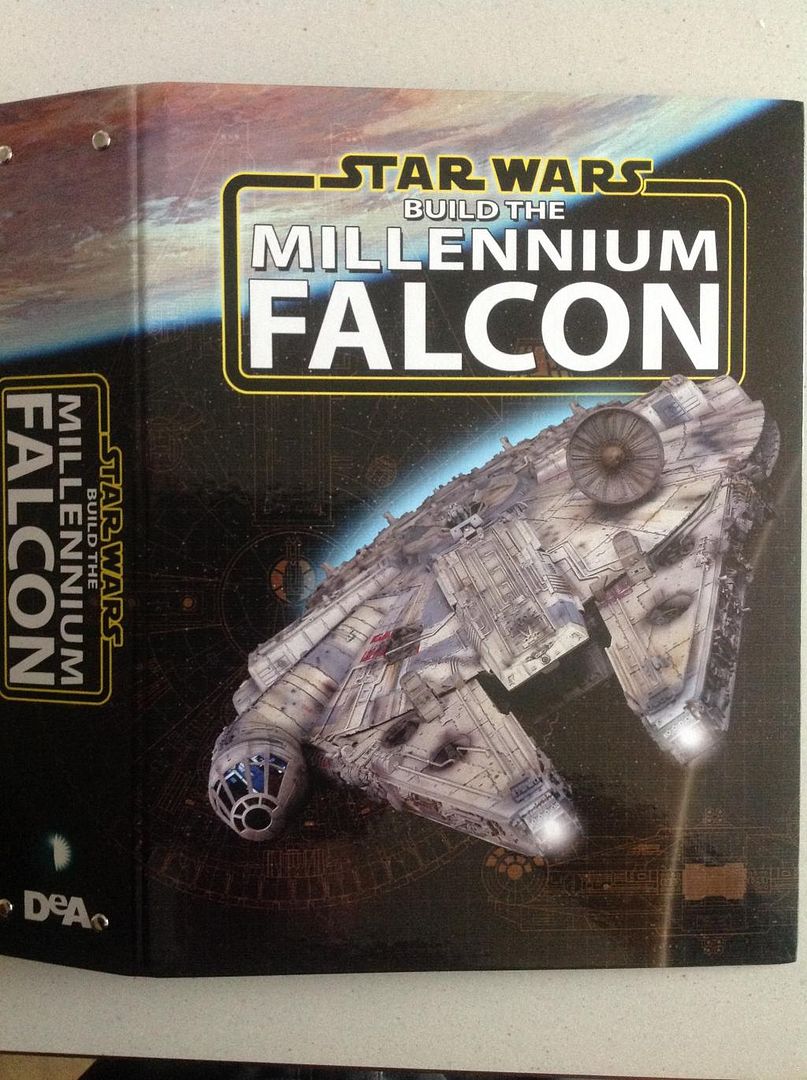
This morning the postman delivered Issue 4 and 5 - and a binder!

Image

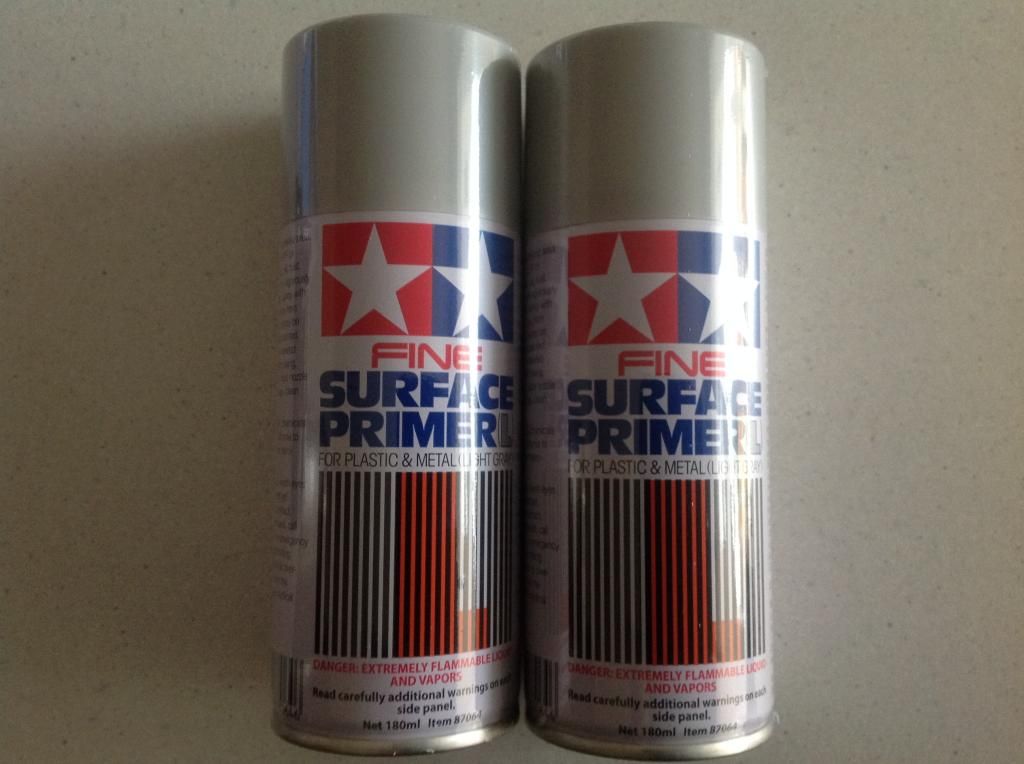
Then a couple of courier drops landed these bad boys...

Image

...and the first of many of these I'm sure...

Image

...off to buy an old plane!
User avatar
modelmakingguru
Corporal
Corporal
Posts: 76
Joined: Mon Jan 26, 2015 12:58 pm
Contact:

Re: Foxx's and ClaytonDJ's DeAgostini Millennium Falcon Builds WIP

Post by modelmakingguru »

Yay! Exciting package scenario! Things are afoot now!

I've done a little bit of painting in the cockpit, I'm hoping to get a little bit of filming done this weekend, if I get time :)
Image
Der Fuchs ist schlau und spielt dumm, aber Foxx ist einfach dumm.
ClaytonDJ
Corporal
Corporal
Posts: 86
Joined: Fri Jan 16, 2015 2:47 pm

Re: Foxx's and ClaytonDJ's DeAgostini Millennium Falcon Builds WIP

Post by ClaytonDJ »

Take your time - no rush really!

DJC
User avatar
modelmakingguru
Corporal
Corporal
Posts: 76
Joined: Mon Jan 26, 2015 12:58 pm
Contact:

Re: Foxx's and ClaytonDJ's DeAgostini Millennium Falcon Builds WIP

Post by modelmakingguru »

LOL, yeah, we can afford a more pedestrian pace on this puppy ;)
Image
Der Fuchs ist schlau und spielt dumm, aber Foxx ist einfach dumm.
ClaytonDJ
Corporal
Corporal
Posts: 86
Joined: Fri Jan 16, 2015 2:47 pm

Re: Foxx's and ClaytonDJ's DeAgostini Millennium Falcon Builds WIP

Post by ClaytonDJ »

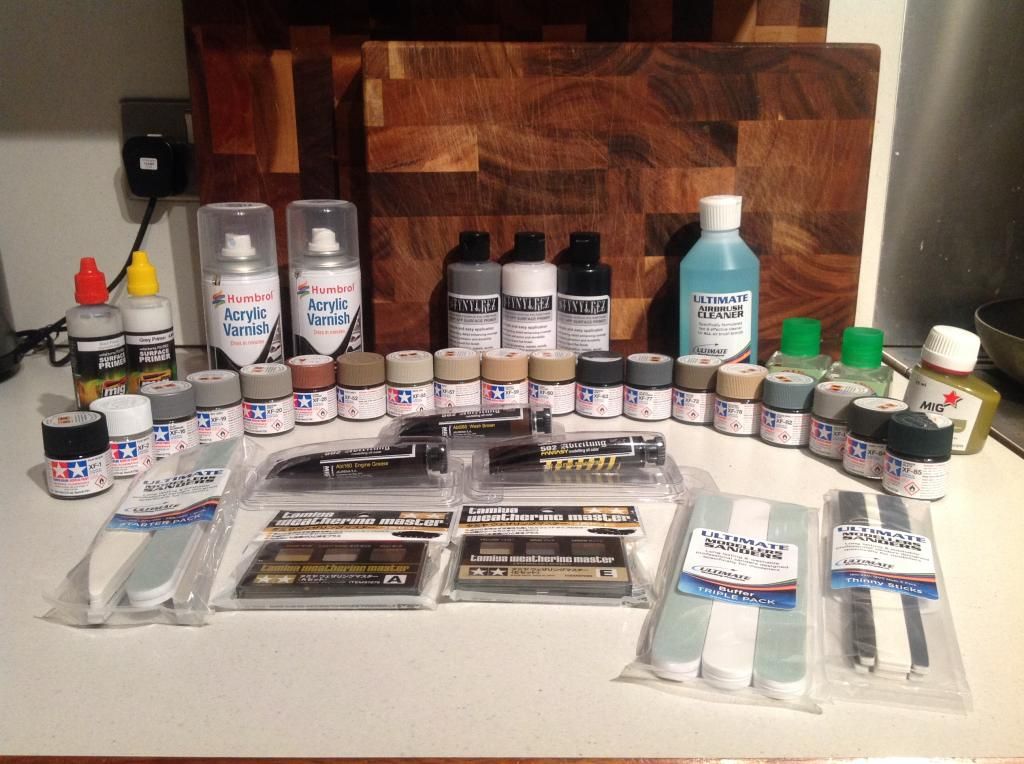
More deliveries today....more Tamiya paints (I count 25 in my box now!), Ultimate sanding things, Starship Filth and Engine Grease 502 oils, airbrush cleaner and plastic bottles for mixed paints...getting close! Also bought a modellers vice and 1.5mm drill bit - still considering drilling holes in the quad cannons. No luck today finding a crappy ol' Airfix to practice my airvbrushing on - but there's a Falcon on ebay ending tonight that might serve the purpose!
User avatar
modelmakingguru
Corporal
Corporal
Posts: 76
Joined: Mon Jan 26, 2015 12:58 pm
Contact:

Re: Foxx's and ClaytonDJ's DeAgostini Millennium Falcon Builds WIP

Post by modelmakingguru »

Oo packages! Yeah, an old Falcon kit might bne good. Or even the Revell Easykit Falcon - it's horrendously inaccurate but widely available in shops and will be a good painting test bed :)
Image
Der Fuchs ist schlau und spielt dumm, aber Foxx ist einfach dumm.
Stefan8271
Private
Private
Posts: 16
Joined: Sat Feb 14, 2015 12:35 pm

Re: Foxx's and ClaytonDJ's DeAgostini Millennium Falcon Builds WIP

Post by Stefan8271 »

Hi
Contacted Foxx on Facebook yesterday and asked about paints. Paints all ordered. I am excited about this build or should I say LONG build
HunkOfJunk
New Recruit
Posts: 1
Joined: Thu Feb 12, 2015 6:57 am

Re: Foxx's and ClaytonDJ's DeAgostini Millennium Falcon Builds WIP

Post by HunkOfJunk »

Hey, loving the posts and I'm paying great attention to your youtube vids re this epic Falcon adventure that we're all embarking on. To a newbie like myself I'm finding these sources of reference invaluable.

Just a question on your Falcon basecoat, is 4:1 or 3:1? Cheers and keep up the solid work.
ClaytonDJ
Corporal
Corporal
Posts: 86
Joined: Fri Jan 16, 2015 2:47 pm

Re: Foxx's and ClaytonDJ's DeAgostini Millennium Falcon Builds WIP

Post by ClaytonDJ »

Bugger - missed the Falcon which went for £7.00 last night at 23:30!
ClaytonDJ
Corporal
Corporal
Posts: 86
Joined: Fri Jan 16, 2015 2:47 pm

Foxx's and ClaytonDJ's DeAgostini Millennium Falcon Builds WIP

Post by ClaytonDJ »

Postman brought more goodies today...almost there in terms of the paints and weathering oils/powders

Image
Stefan8271
Private
Private
Posts: 16
Joined: Sat Feb 14, 2015 12:35 pm

Re: Foxx's and ClaytonDJ's DeAgostini Millennium Falcon Builds WIP

Post by Stefan8271 »

Great set of paints Clayton , i have ordered my paint list today and i am following Foxx's work also.
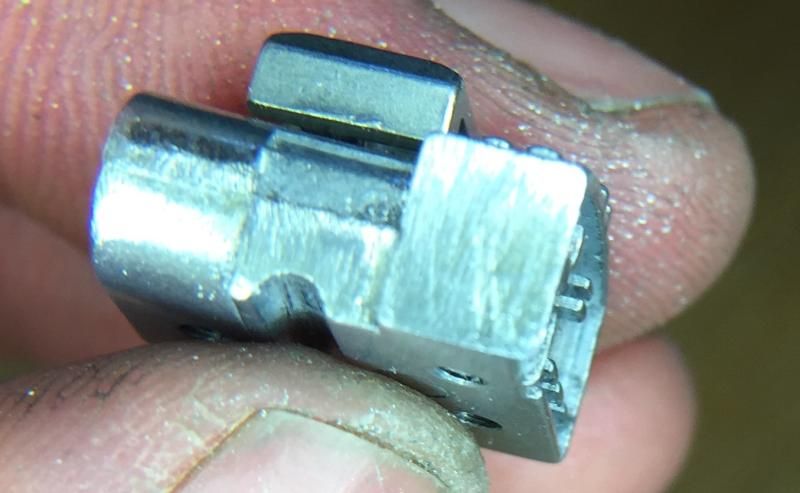
today i played catch up and put the frame together , sorted turret and filed down quad cannons. once the paint arrives , that's next

Image

Image

Image

still have a bit of buffing to do once the sanding buffers arrive.

Image

Image

cant wait for the paint to arrive , so i can then catch up and follow step by step
ClaytonDJ
Corporal
Corporal
Posts: 86
Joined: Fri Jan 16, 2015 2:47 pm

Re: Foxx's and ClaytonDJ's DeAgostini Millennium Falcon Builds WIP

Post by ClaytonDJ »

Welcome Stefan - like you I'm endeavouring to follow the Foxx on this one - but unlike you I've never used an airbrush in my life - thus far only gathering paints and weathering stuff together. I've removed the cast lines from the quad cannons - and am thinking of drilling holes in the ends for a touch of realism - but not plucked up the courage just yet!

Following Foxx's advice and looking to pick up some old airfix models to practice my airbrushing on - and the Foxx will decide when my technique is good enough to let loose on a real piece of Falcon kit.

Foxx is already away painting - so I'm going to be lagging behind in the painting stakes - that said you go boy and catch that Foxx :)

Dave
ClaytonDJ
Corporal
Corporal
Posts: 86
Joined: Fri Jan 16, 2015 2:47 pm

Re: Foxx's and ClaytonDJ's DeAgostini Millennium Falcon Builds WIP

Post by ClaytonDJ »

The search is over - bought 3 old Star Wars vehicles (including an old Falcon) on ebay today for £5.10 (so you can guess the quality of the pieces).
That said I'm only after them to practice using my airbrush...I'll post up some pics when they arrive for assessment and guidance.

Dave
ClaytonDJ
Corporal
Corporal
Posts: 86
Joined: Fri Jan 16, 2015 2:47 pm

Foxx, ClaytonDJ & Stefan's DeAgostini Millennium Falcon Builds WIP

Post by ClaytonDJ »

New title?
User avatar
modelmakingguru
Corporal
Corporal
Posts: 76
Joined: Mon Jan 26, 2015 12:58 pm
Contact:

Re: Foxx's and ClaytonDJ's DeAgostini Millennium Falcon Builds WIP

Post by modelmakingguru »

Ha haar, I'm back!

Now to reply to a WHILE mess of posts!

WELCOME to our new friends Stefan and HunkOfJunk who join in this madness! Nice sanding work on the cannon, Stefan!

Nice collection of paints there Clayton, they all look so clean and tidy and organised and that won't last ;) BTW I think it only right and proper that you decide when you are ready to airbrush the Falcon - it's more about confidence with the tools than anything else. I'm no expert, I just slap stuff about in the laziest way possible and hope that good results ensure. And if they don't , I just weather the crap out of them to hide any grievous errors :lol: :lol:

Anyhoo, latest vid is done. In the absence of any new issues being delivered I sorted out the cockpit furniture and hatchway. I'n not touching the actual cockpit structure yet until I have all the parts, so that is to come. Here's some "after" pics, and the vid is below, which takes you through the processes involved in getting to those pictures. As always, follow the youtube link to watch it full-screen. Also apologies that the colour balance is all over the shop, my iPhone freaks out every time something enters the shot. But on the upside, SPANKY NEW LIGHTING SETUP w00t!

As a say in the video, this kit is aimed at modellers and non-modellers with no experience, so with that in mind and after feedback from folks like yourselves I have decided to make them more instructional, for beginners almost, so that they are useful to everyone and not just fellow sprue-heads. If you already know a load of stuff in them, but be patient, not everyone has painted a model before and these videos will be tailored for the beginner (but hopefully contain something for everyone).

Image

Image

Image

And the video guide:
[youtube]PvCQnKrv14E[/youtube]
Image
Der Fuchs ist schlau und spielt dumm, aber Foxx ist einfach dumm.
User avatar
modelmakingguru
Corporal
Corporal
Posts: 76
Joined: Mon Jan 26, 2015 12:58 pm
Contact:

Re: Foxx's and ClaytonDJ's DeAgostini Millennium Falcon Builds WIP

Post by modelmakingguru »

ClaytonDJ wrote:The search is over - bought 3 old Star Wars vehicles (including an old Falcon) on ebay today for £5.10 (so you can guess the quality of the pieces).
That said I'm only after them to practice using my airbrush...I'll post up some pics when they arrive for assessment and guidance.

Dave
Kick ass! Make sure to give them a good wash to get the thirty years of cigarette schmutz, finger jam and spider parts off!

BTW I posted this on my Facebook page and should really include it here too, I have been asked a few times what paints and stuff I'll be using throughout the build. Here's a list - I've probably missed something out, and no doubt there will be new products I add to the list over the next two years that I haven't used yet. I hope this is useful for you all :)

I may add some extras but from previous experience I know I will use the following:

Hull base colour: 4 pots Tamiya Flat White to 1 pot Tamiya Deck Tan. I THINK. Truth is, I wrote it down in two different places and on one I wrote 3:1 and the other I wrote 4:1. I am an idiot. But I am pretty sure it's 4:1. For safety, try 3:1 first. It should be a similar colour to the bare plastic colour (maybe a tiny bit lighter). I'll confirm this when I need to mix some more :)

Tamiya acrylics and kit:
Flat White
Deck Tan
German Grey
Rubber Black
Neutral Grey
Flat Black
Flat Red
Flat Yellow
Red Brown
Flat ALimunium
Smoke
Khaki

Tamiya Thinner X-20A
Tamiya Extra Thin plastic cement

Mig 502 Abteilung oil paints:
Starship Filth
Engine Grease
Light Rust
Dark Rust
German Grey Highlight

Bog standard artist's oil paints:
Mixing White

Tamiya Weathering Pastels:
(these come in boxes of three colours but I will use)
Sand
Yellow
Gray
Deck Tan
Light Sand

Other stuff:
Any modelling CA (cyanoacrlate glue)
Humbrol Maskol masking fluid
Tamiya Masking tape (various sizes)
Humbrol 49 Matt Varnish
not decided on a gloss varnish yet...
I may use some Ultimate Modelling Products Dark Dirt wash
Tamiya Surface Primer L spray can - the one with the grey lid
Image
Der Fuchs ist schlau und spielt dumm, aber Foxx ist einfach dumm.
Post Reply

Return to “Sci-Fi”